


SpringBoot系列文章目录
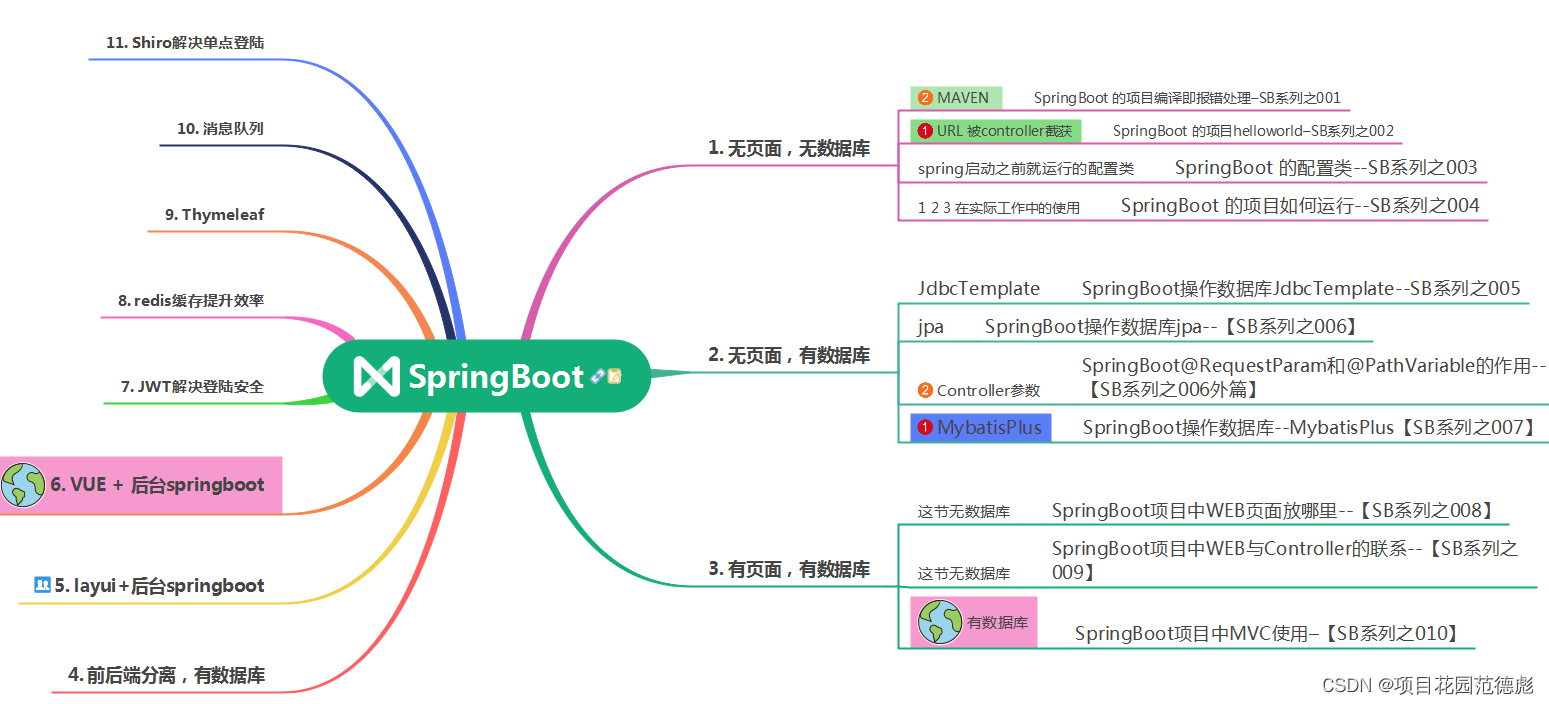
SpringBoot知识范围-学习步骤–【思维导图知识范围】
文章目录
本系列校训
用免费公开视频,卷飞培训班哈人!打死不报班,赚钱靠狠干!
只要自己有电脑,前后项目都能搞!N年苦学无人问,一朝成名天下知!
SpringBoot技术很多很多
本文专门讨论 CommandLineRunner的使用,必须要依赖于org.springframework.boot,所以项目必须要是springBoot 的项目
韩顺平说:学习JAVA的人有两大难
第一困惑,JAVA能百度到的知识太多太多,完全不知道学啥
第二困惑,就是不知道以什么样的顺序去学,有的时候乱看一堆视频有遗漏,有的时候,两边的视频还有重复。
建议,学习完右侧的技术之后,就应该投入到项目的学习当中,在项目里去学习左侧的技术会好很多。
Spring的外围技术就更多了。本例也是springBoot的外围技术,不过并不在下面的图表之中。
所以,学习东西要系统一些,如果基本功不够,那后面的技术就会学的很浮。
环境及工具:
本系列环境
| 环境 | win11 |
|---|---|
| 工具 | idea 2018 |
| jdk | 1.8 |
| 数据库 | 本例不需要 |
| maven | 3.2.1 |
| 项目导入方式 | maven 导入 |
| 数据库前端工具 | 本例不需要 |
数据库前端工具:mysql-front (navicat 也可以)
主要是这些跟PHPStudy 2018 整合了,所以有的时候懒的打开navicat
关于环境的重要性,直接看上面的《SpringBoot 的项目编译即报错处理–JSB系列之001》
必要的知识
配置类
这里深入的讨论一下配置类。
项目启动时需要加载多个配置类,且需要控制某些配置类的加载顺序。使用@Configuration标注配置类,使用@AutoConfigureAfter、@AutoConfigureBefore设置配置类加载顺序。
结果:能够正常加载配置类,但无法控制配置类的加载顺序。
几个注解 @ComponentScan:自动扫描组件。value
指定扫描的包路径,将包路径下标识了需要装配的类(@Controller,@Service,@Repository,@Configuration等)自动装配到Spring的bean容器中。
启动SpringBoot时,如果配置了@ComponentScan,则扫描包路径为配置的包路径;如果没配置@ComponentScan,扫描包路径默认为SpringBootApplication启动类所在的包路径。@Configuration:修饰类,表明当前类是一个配置类,如果该类在@ComponentScan指定的包路径下,那么在启动SpringBoot时,就会自动将该类装配到Spring的Bean容器中。
@AutoConfigurationAfter:表明当前配置类在某一个配置类加载后加载。
@AutoConfigurationBefore:表明当前配置类在某一个配置类加载前加载。
常见的配置类
1: 跨域请求后端解决方案
package com.config;

import org.springframework.context.annotation.Configuration;
import org.springframework.web.servlet.config.annotation.CorsRegistry;
import org.springframework.web.servlet.config.annotation.WebMvcConfigurer;

//解决跨域问题
@Configuration
public class CrosConfig implements WebMvcConfigurer {

    @Override
    public void addCorsMappings(CorsRegistry registry) {
        registry.addMapping("/**")
                .allowedOrigins("*")
                .allowedMethods("GET","POST","HEAD","PUT","DELETE")
                .allowCredentials(true)
                .maxAge(3600)
                .allowedHeaders("*");
    }

	// 如果同时配置了拦截器,上面的方法就会失效,可以使用下面的方式解决跨域问题
	    /**
     * 问题:配置 JWT ,使用拦截器出现跨域问题
     * 跨越配置
     * 改用过滤器CorsFilter 来配置跨域,由于Filter的位置是在Interceptor之前的,问题得到解决:
     */

    @Autowired
    JWTInterceptor jwtInterceptor;

    @Bean
    public CorsFilter corsFilter() {
        CorsConfiguration config = new CorsConfiguration();
        // 设置允许跨域请求的域名
        config.addAllowedOrigin("*");
        // 是否允许证书 不再默认开启
         config.setAllowCredentials(true);
        // 设置允许的方法
        config.addAllowedMethod("*");
        // 允许任何头
        config.addAllowedHeader("*");
        config.addExposedHeader("token");
        UrlBasedCorsConfigurationSource configSource = new UrlBasedCorsConfigurationSource();
        configSource.registerCorsConfiguration("/**", config);
        return new CorsFilter(configSource);
    }
}
2: 编码解决静态文件不加载
package com.config;

import org.springframework.context.annotation.Bean;
import org.springframework.context.annotation.Configuration;
import org.springframework.web.servlet.config.annotation.InterceptorRegistry;
import org.springframework.web.servlet.config.annotation.ResourceHandlerRegistry;
import org.springframework.web.servlet.config.annotation.WebMvcConfigurationSupport;

import com.interceptor.AuthorizationInterceptor;

@Configuration
public class InterceptorConfig extends WebMvcConfigurationSupport{

	/**
	 * springboot 2.0配置WebMvcConfigurationSupport之后,会导致默认配置被覆盖,要访问静态资源需要重写addResourceHandlers方法
	 */
	@Override
    public void addResourceHandlers(ResourceHandlerRegistry registry) {
		registry.addResourceHandler("/**")
        .addResourceLocations("classpath:/resources/")
        .addResourceLocations("classpath:/static/")
        .addResourceLocations("classpath:/admin/")
        .addResourceLocations("classpath:/front/")
        .addResourceLocations("classpath:/public/");
		super.addResourceHandlers(registry);
    }
}
3:MVC 拦截器配置
主要是防用户不登陆 穿透后面的URL(就是直接输入URL访问后面权限控制的页面)
package com.config;

import org.springframework.context.annotation.Bean;
import org.springframework.context.annotation.Configuration;
import org.springframework.web.servlet.config.annotation.InterceptorRegistry;
import org.springframework.web.servlet.config.annotation.ResourceHandlerRegistry;
import org.springframework.web.servlet.config.annotation.WebMvcConfigurationSupport;

import com.interceptor.AuthorizationInterceptor;

@Configuration
public class InterceptorConfig extends WebMvcConfigurationSupport{

	@Bean
    public AuthorizationInterceptor getAuthorizationInterceptor() {
        return new AuthorizationInterceptor();
    }

	@Override
    public void addInterceptors(InterceptorRegistry registry) {
        registry.addInterceptor(getAuthorizationInterceptor()).addPathPatterns("/**").excludePathPatterns("/static/**");
        super.addInterceptors(registry);
	}

	/**
	 * springboot 2.0配置WebMvcConfigurationSupport之后,会导致默认配置被覆盖,要访问静态资源需要重写addResourceHandlers方法
	 */
	@Override
    public void addResourceHandlers(ResourceHandlerRegistry registry) {
		registry.addResourceHandler("/**")
        .addResourceLocations("classpath:/resources/")
        .addResourceLocations("classpath:/static/")
        .addResourceLocations("classpath:/admin/")
        .addResourceLocations("classpath:/front/")
        .addResourceLocations("classpath:/public/");
		super.addResourceHandlers(registry);
    }
}
4:上传路径存储位置
package com.spring.config;

import org.springframework.context.annotation.Configuration;
import org.springframework.web.servlet.config.annotation.EnableWebMvc;
import org.springframework.web.servlet.config.annotation.ResourceHandlerRegistry;
import org.springframework.web.servlet.config.annotation.WebMvcConfigurationSupport;
import org.springframework.web.servlet.config.annotation.WebMvcConfigurer;

@Configuration
public class WebConfigure implements WebMvcConfigurer {

    /**
     * 设置上传路径存储位置,默认放在运行目录下的 upload
     * @param registry
     */
    @Override
    public void addResourceHandlers(ResourceHandlerRegistry registry) {
        // 设置方位地址
        System.out.println(Configure.UPLOAD_DIR);
        registry
            .addResourceHandler("/upload/**")
            .addResourceLocations("file:" + Configure.UPLOAD_DIR)
            .addResourceLocations("file:" + System.getProperty("user.dir") + "/src/webapp/upload/");
    }
}
5:防SQL注入
package com.spring.config;

import com.jntoo.db.Configuration;
import com.jntoo.db.QueryConfig;
import javax.annotation.Resource;
import org.springframework.boot.ApplicationArguments;
import org.springframework.boot.ApplicationRunner;
import org.springframework.stereotype.Component;

/**
 * 配置数据库访问源
 */
@Component
public class QueryConfigRuntime implements ApplicationRunner {

    @Resource
    private QueryConfigConnect config;

    /**
     * Callback used to run the bean.
     *
     * @param args incoming application arguments
     * @throws Exception on error
     */
    @Override
    public void run(ApplicationArguments args) throws Exception {
        QueryConfig queryConfig = new QueryConfig();
        queryConfig.setPrefix("");
        queryConfig.setConnectionConfig(config);
        queryConfig.setDebug(true);
        Configuration.setQueryConfig(queryConfig);
    }
}
6: 数据库的里自动日期(创建日期,修改日期等)
在后台这里生成,比前台的准,比数据库里的移植性强。
不过,要求这些字段取一致的字段名
package com.config;

import java.util.Date;

import org.apache.ibatis.reflection.MetaObject;

import com.baomidou.mybatisplus.mapper.MetaObjectHandler;

/**
 * 自定义填充处理器
 */
public class MyMetaObjectHandler extends MetaObjectHandler {

    @Override
    public void insertFill(MetaObject metaObject) {
        this.setFieldValByName("ctime", new Date(), metaObject);
    }

    @Override
    public boolean openUpdateFill() {
        return false;
    }

    @Override
    public void updateFill(MetaObject metaObject) {
        // 关闭更新填充、这里不执行
    }
}
另外:封装统一返回结果集时,解决返回 null 值显示
import com.fasterxml.jackson.core.JsonGenerator;
import com.fasterxml.jackson.databind.JsonSerializer;
import com.fasterxml.jackson.databind.ObjectMapper;
import com.fasterxml.jackson.databind.SerializerProvider;
import org.springframework.boot.autoconfigure.condition.ConditionalOnMissingBean;
import org.springframework.context.annotation.Bean;
import org.springframework.context.annotation.Configuration;
import org.springframework.context.annotation.Primary;
import org.springframework.http.converter.json.Jackson2ObjectMapperBuilder;

import java.io.IOException;

/**
 * 使用 SpringBoot 默认的 jackjson 解决 统一结果集为空的情况
 * */


@Configuration
public class NullValueConfiguration {

    @Bean
    @Primary
    @ConditionalOnMissingBean(ObjectMapper.class)
    public ObjectMapper jacksonObjectMapper(Jackson2ObjectMapperBuilder builder) {
        ObjectMapper objectMapper = builder.createXmlMapper(false).build();
        objectMapper.getSerializerProvider().setNullValueSerializer(new JsonSerializer<Object>() {
            @Override
            public void serialize(Object o, JsonGenerator jsonGenerator, SerializerProvider serializerProvider) throws IOException, IOException {
                jsonGenerator.writeString("");
            }
        });
        return objectMapper;
    }
}
本文也是一种配置类。实用性很强。学起来容易。
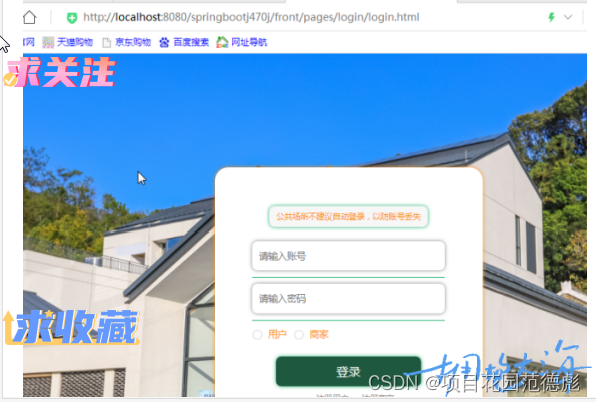
就是一个项目,经过了一段时间之后,经常是找不到开始的首页了。有一些项目不太方便在index.html里跳转。
那么,本文的这个配置类就可以登场了。
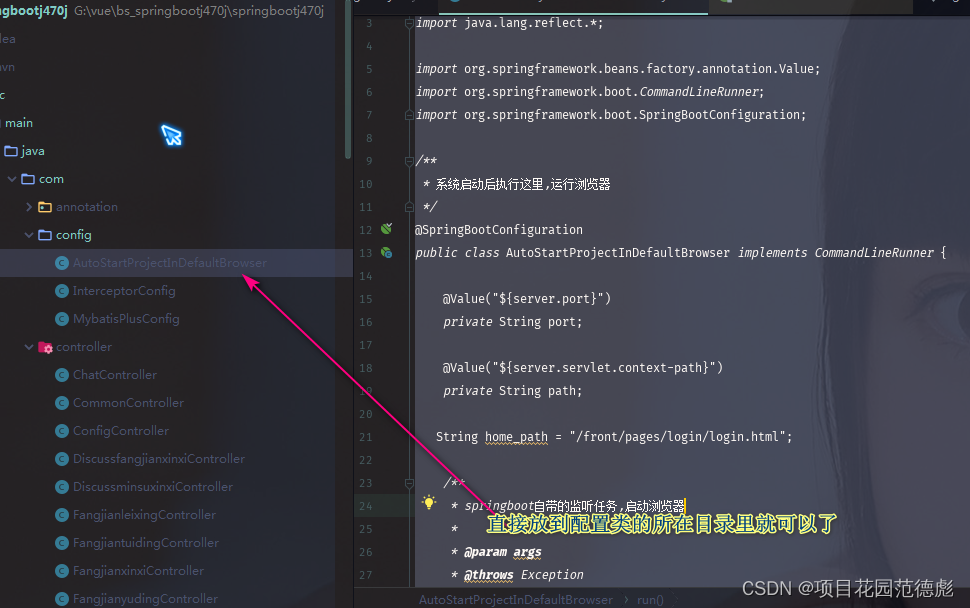
public class AutoStartProjectInDefaultBrowser implements CommandLineRunner
也是取SpringBoot 里的类。
整体代码如下:
package com.config;

import java.lang.reflect.*;

import org.springframework.beans.factory.annotation.Value;
import org.springframework.boot.CommandLineRunner;
import org.springframework.boot.SpringBootConfiguration;

/**
 * 系统启动后执行这里,运行浏览器
 */
@SpringBootConfiguration
public class AutoStartProjectInDefaultBrowser implements CommandLineRunner {

    @Value("${server.port}")
    private String port;

    @Value("${server.servlet.context-path}")
    private String path;

   String home_path = "/front/pages/login/login.html";

    /**
     * springboot自带的监听任务,启动浏览器
     *
     * @param args
     * @throws Exception
     */
    @Override
    public void run(String... args) throws Exception {
        try {
            String url = "http://localhost:" + port + path + home_path;
            browse(url);
            //Runtime.getRuntime().exec("cmd /c start http://localhost:" + port + ""+path);
        } catch (Exception ex) {
            ex.printStackTrace();
        }
    }

    private static void browse(String url) {
        try {
            String osName = System.getProperty("os.name", "");
            if (osName.startsWith("Mac OS")) {
                Class fileMgr = Class.forName("com.apple.eio.FileManager");
                Method openURL = fileMgr.getDeclaredMethod("openURL", String.class);
                openURL.invoke(null, url);
            } else if (osName.startsWith("Windows")) {
                Runtime.getRuntime().exec("rundll32 url.dll,FileProtocolHandler " + url);
            } else {
                // Unix or Linux
                String[] browsers = {"firefox", "opera", "konqueror", "epiphany", "mozilla", "netscape"};
                String browser = null;
                for (int count = 0; count < browsers.length && browser == null; count++) // 执行代码,在brower有值后跳出,
                    // 这里是如果进程创建成功了,==0是表示正常结束。
                    if (Runtime.getRuntime().exec(new String[]{"which", browsers[count]}).waitFor() == 0)
                        browser = browsers[count];
                if (browser == null) throw new Exception("Could not find web browser");
                else // 这个值在上面已经成功的得到了一个进程。
                    Runtime.getRuntime().exec(new String[]{browser, url});
            }
        } catch (Exception e) {
            e.printStackTrace();
        }
    }
}
就是本文啦。
代码位置。
Spring Boot启动类
把启动的用户,密码也记在启动类里
package com;
import org.mybatis.spring.annotation.MapperScan;
import org.springframework.boot.SpringApplication;
import org.springframework.boot.autoconfigure.SpringBootApplication;
import org.springframework.boot.builder.SpringApplicationBuilder;
import org.springframework.boot.web.servlet.support.SpringBootServletInitializer;
@SpringBootApplication
@MapperScan(basePackages = {"com.dao"})
public class SpringbootSchemaApplication extends SpringBootServletInitializer{
public static void main(String[] args) {
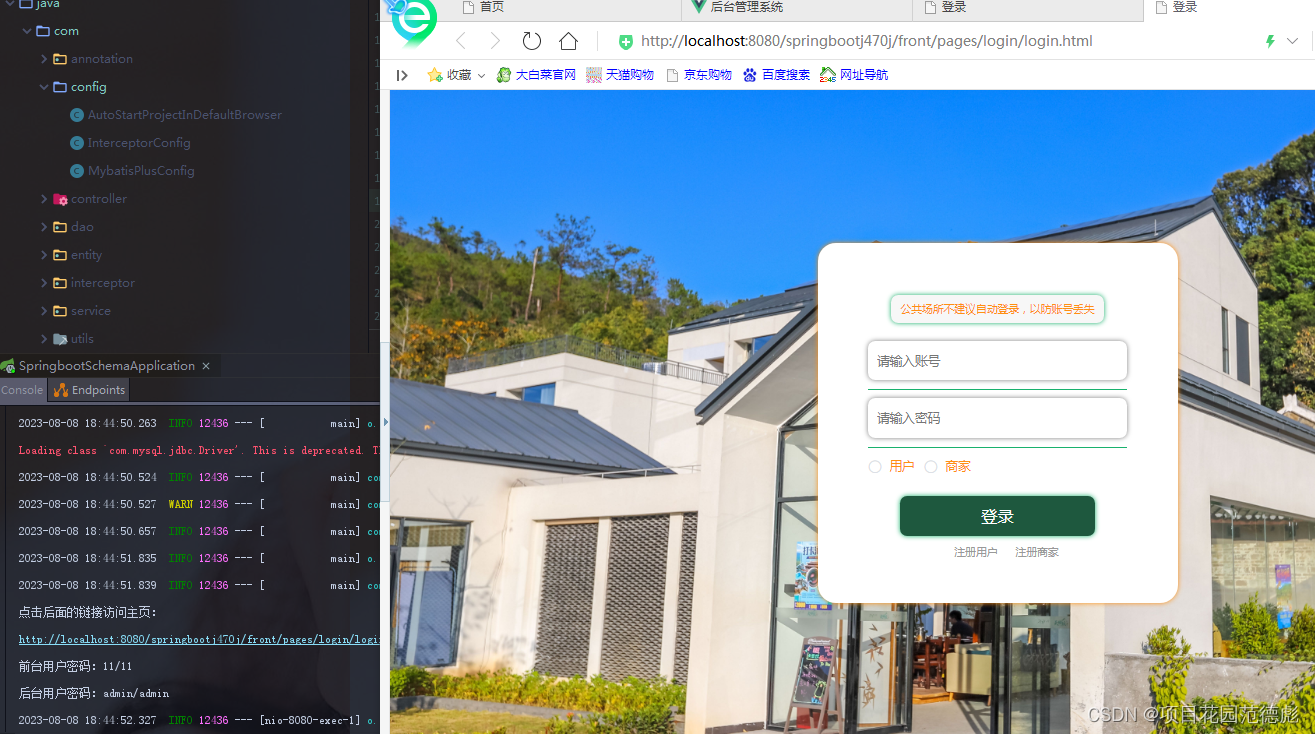
SpringApplication.run(SpringbootSchemaApplication.class, args);
System.out.println("点击后面的链接访问主页:");
System.out.println("http://localhost:8080/springbootj470j/front/pages/login/login.html");
System.out.println("前台用户密码:11/11");
System.out.println("后台用户密码:admin/admin");
}
@Override
protected SpringApplicationBuilder configure(SpringApplicationBuilder applicationBuilder) {
return applicationBuilder.sources(SpringbootSchemaApplication.class);
//http://localhost:8080/springbootj470j/front/pages/login/login.html
}
}
最后的成果。
另外:
还可以在启动类里记录下项目的其它的配置要求:
数据源里的datasource 的名字。用户名,密码。还有就是mysql 的驱动是com.mysql.jdbc.Driver
总的来说,
com.mysql.jdbc.Driver 是 mysql-connector-java 5.5之前的,
com.mysql.cj.jdbc.Driver 是 mysql-connector-java 6及6之后的的,
初学者容易陷入一个误区,就是什么东西最新版是最好的,事实上很有可能他写的东西,明明JDK6.0就完全足够。一边喊着自己的机器内存不足,一边让内存运行着他自己用不到的东西。就比如说idea应该算是这些开发者工具里最卡的。有人可能明明只是打开几个网页,那为什么不使用webstorm? 甚至不是写很多代码的时候,为什么不选择更轻量级的VSCode?
配套资源
配套资源
无
作业:
无,看懂即是神
学SpringBoot,里面的东西很多,没有人可以在工作之前都能碰得到,经验的积累才是工作中顺利晋升的关键


 6353
6353


 被折叠的 条评论
为什么被折叠?
被折叠的 条评论
为什么被折叠?
 到【灌水乐园】发言


