


Vue-app
1.项目的开始首先我们创建项目
配置跟着一步一步来中间的流程图如下
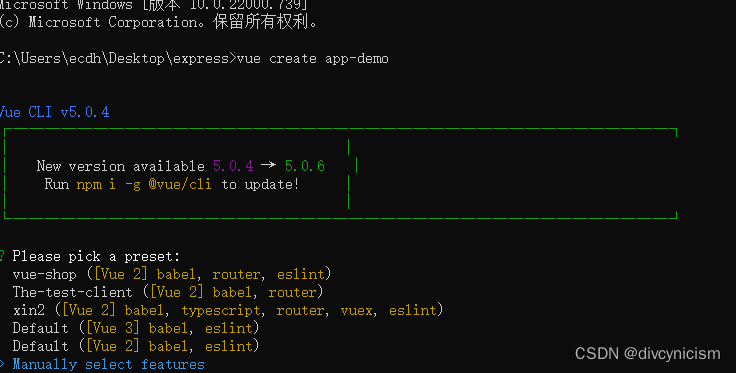
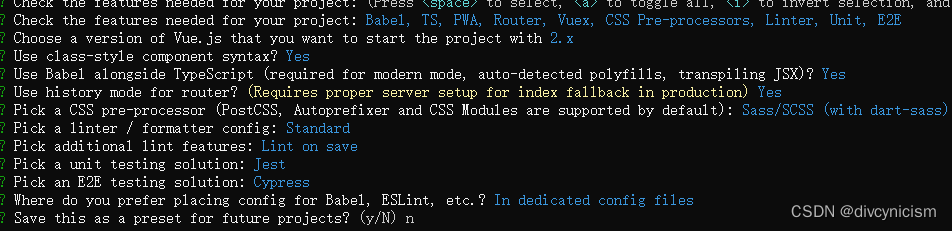

以上就是第一步的完成
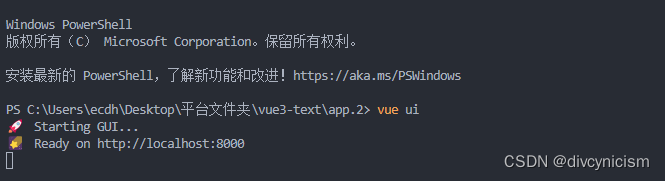
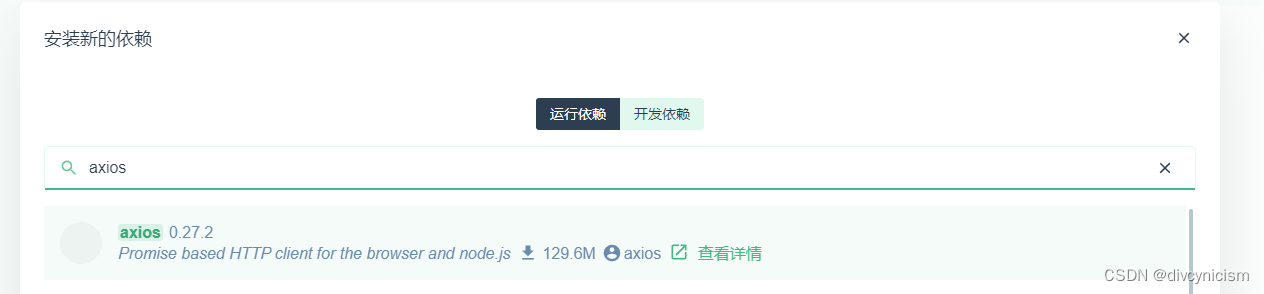
2.紧接着我们在终端里输入vue ui 打开可视化面板安装插件Vant 这一步顺便加上axios依赖后面我们配置Ajax.ts
流程图如下
搜索点击安装

这里我们选择按需导入!!!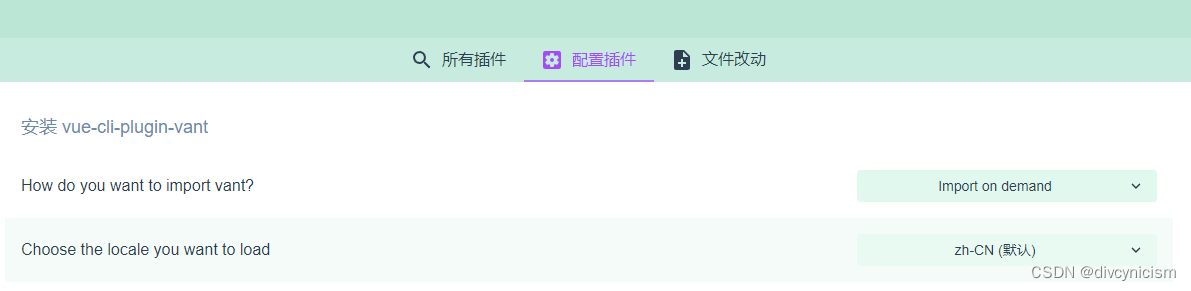
之后稍等..........
完事之后在安装依赖axios
以上完成后查看你的目录
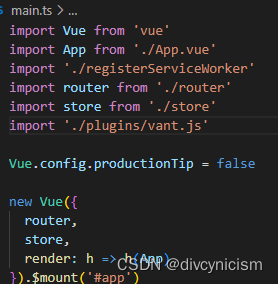
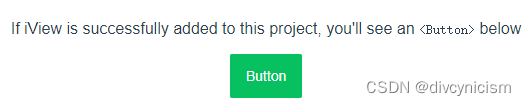
在你的src目录下会多一个Plugins然后在main.js中引入顺便测试一下

以上就是第二步的完成
3.我们在安装自适应配置移动端 这里我选择的是PX转VM 你也可以PX转REM 顺便再加上路由规范
1.终端打开输入:npm install postcss-px-to-viewport --save--dev
2.安装完成后,在项目的根目录的postcss.config.js文件中配置如下代码: 如果项目中没有postcss.config.js文件,需要手动创建该文件,然后配置相关代码:
module.exports = {
  plugins: {
    autoprefixer: {},
    "postcss-px-to-viewport": {
      unitToConvert: "px", // 默认值`px`,需要转换的单位
      viewportWidth: 375,//视窗的宽度,对应的是我们设计稿的宽度 750*1334是iphone6的宽高
      // viewportHeight: 1334, // 视窗的高度,根据750设备的宽度来指定,一般指定1334,也可以不配置
      unitPrecision: 3,//指定`px`转换为视窗单位值的小数位数,默认是5(很多时候无法整除)
      viewportUnit: 'vw',//指定需要转换成的视窗单位,建议使用vw
      fontViewportUnit: 'vw', //指定字体需要转换成的视窗单位,默认vw;
      selectorBlackList: ['.ignore','tab-bar','tab-bar-item','navbar','tabControl'],//指定不转换为视窗单位的类
      minPixelValue: 1,// 小于或等于`1px`不转换为视窗单位
      mediaQuery: false,// 允许在媒体查询中转换`px`,默认false
      exclude:[/node_modules/], //如果是regexp, 忽略全部匹配文件;如果是数组array, 忽略指定文件
      exclude:[/TabControl/,/Tabbar/,/DetailBottomBar/], // 正则表达式,匹配的内容是不想被转换单位的文件名,添加了这种匹配后凡是文件名中带有这些字符的全部排除
    }
  }
}
配置路由规范
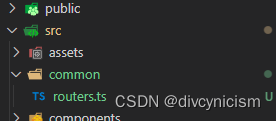
1.首先在src下新建文件夹common 在该文件夹下建routers.ts
这是代码......
import { RouteConfig } from 'vue-router';

export interface IRouterMeta {
  title: string;
  keepAlive?: boolean;
  index?: number;
  useCache?: boolean;
}

export type IRouter = RouteConfig & { children?: IRouter }

export type IRouteConfig = RouteConfig & {
  meta?: IRouterMeta;

  children?: IRouteConfig[];
}

export type IPermissionRouteConfig = IRouteConfig & {
  permission?: string;

  icon?: string;

  notRequiredNav?: boolean;

  children?: IPermissionRouteConfig[];
}

export type IAuthRouteConfig = IRouteConfig & {
  authorized?: boolean;

  children?: IAuthRouteConfig[];
}
之后我们在router文件夹下新建登录页(account.ts)首页页(home.ts)(这里只是做演示)在新建routerName.ts 随后在index.ts中修改引入
如下图所示
页面内容附上一个其他页面根据自己需求
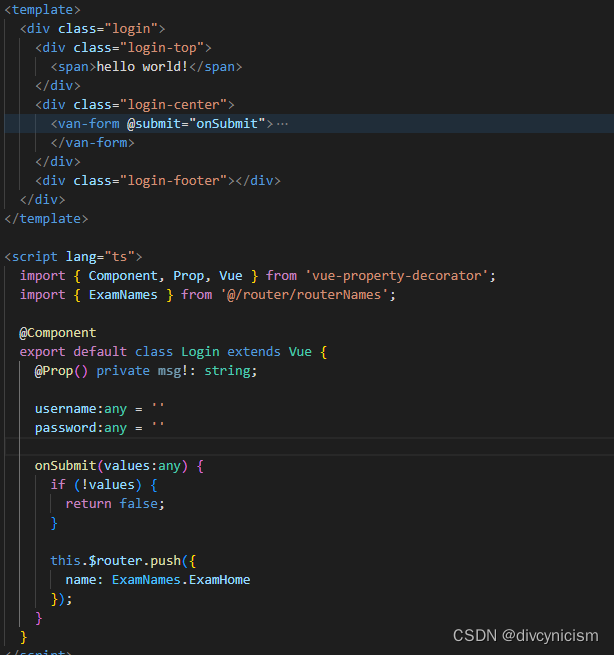
home.ts
import { IPermissionRouteConfig } from '@/common/routers';
import { ExamNames } from '@/router/routerNames';

export const homeRouters: Array<IPermissionRouteConfig> = [
  {
    path: '/home',
    name: ExamNames.ExamHome,
    meta: { title: '首页' },
    component: () => import('@/views/home.vue')
  }
];
account.ts
import { IRouteConfig } from '@/common/routers';
import { ExamNames } from '@/router/routerNames';

export const accountRouters: IRouteConfig = {
  path: '/account',
  name: ExamNames.ExamAccount,
  component: () => import('@/views/login.vue')
};
路由文件夹
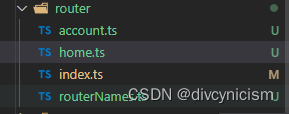
index.ts
import Vue from 'vue';
import VueRouter from 'vue-router';
import { accountRouters } from '@/router/account';
import { homeRouters } from '@/router/home';


Vue.use(VueRouter);

const router = new VueRouter({
  mode: 'history',
  base: process.env.BASE_URL,
  routes: [
    accountRouters,
    ...homeRouters
  ]
});

export default router;
routerName.ts
export const ErrorCodeNames = {
  Err: 'error',
  Err403: 'error.403',
  Err404: 'error.404',
  Err500: 'error.500'
};

export const ExamNames = {
  ExamAccount: 'exam.accont',
  ExamHome: 'exam.home'
};

export function install(Vue: any) {
  Vue.prototype.ErrorNames = ErrorCodeNames;
  Vue.prototype.ExamNames = ExamNames;
}
以上就是路由的配置和自适应配置
4.我们紧接着封装一个ajax后续方便写代码 在src下新建一个libs文件夹在文件夹下建ajax.ts
import axios from 'axios';
import Vue from 'vue';
import { Toast } from 'vant';

Vue.use(Toast);

export const ajax = axios.create({
  baseURL: process.env.VUE_APP_BASE_API,
  timeout: 6e4
});

ajax.interceptors.request.use(
  config => {
    const token = sessionStorage.getItem('Authorization');

    if (token) {
      (config.headers as any).common.Authorization = token;
    }

    const language = localStorage.getItem('language');

    if ((config.headers as any).common.lang !== '') {
      if (language) {
        (config.headers as any).common.lang = language;
      }
    }

    return config;
  },
  error => {
    return Promise.reject(error);
  }
);

const vm = new Vue();

ajax.interceptors.response.use(
  response => {
    if (response.data.code === '1') {
      vm.$toast.fail(response.data.msg);
      console.log(vm);

      return Promise.reject(response);
    }

    return response;
  },
  error => {
    if (error.response &&
      error.response.data.error &&
      error.response.data.error.message &&
      error.response.data.error.details) {
      vm.$toast.clear();
      vm.$toast.fail(error.response.data.error.message);
    }
    else if (error.response &&
      error.response.data &&
      error.response.data.error &&
      error.response.data.error.message) {
      vm.$toast.clear();
      vm.$toast.fail(error.response.data.error.message);
    }
    else if (!error.response) {
      vm.$toast.clear();
      vm.$toast.fail('请求失败');
    }

    return Promise.reject(error);
  }
);
以上代码就是第四步了
后续的还会加入mock.js的引用,包括打包的选型......欢迎大家来指正 我也会努力的学习的哦~


 7226
7226


 被折叠的 条评论
为什么被折叠?
被折叠的 条评论
为什么被折叠?
 到【灌水乐园】发言


