


从零开始建github.io博客
前言
🈲为节约时间请直接跳转到版本三
从新创建一个库开始
谨记git五条命令
‘’ does not have a commit checked out fatal: adding files failed when inputting “git add .” in command prompt
git clone http://xxx
git add .
git commit -m"introduction for this commit"
git push -u origin master
了解到git init就是已经是初始化了一个repo库,再使用git clone xxxx会在该目录下,克隆一个远程的github库,作为subrepository,而此时,返回主目录,执行git add .会报错
'<filename>' does not have a commit checked out fatal: adding files failed when inputting “git add .” in command prompt(点击访问该错误)
adding files failed when inputting “git add .” in command prompt报错解决
根据下面提到的解法:
为了扩展Mario Zigliotto和Albert’s answer的已接受答案,发生这种情况的原因是submodules。下面这是重新复现该问题的简单方法:
$ mkdir empty-submodule && cd empty-submodule
$ git init
Initialized empty Git repository in [path ending in empty-submodule/.git]
$ mkdir sub && (cd sub && git init)
Initialized empty Git repository in ... [path ending in empty-submodule/sub/.git]
$ ls
sub
$ ls -a sub
.       ..      .git
$ git add .
error: 'sub/' does not have a commit checked out
fatal: adding files failed
请注意,子目录sub本身就是一个 Git 存储库,但在此子目录中没有检出任何提交。这是一个简单的事实陈述,在这种情况下是正确的,因为我创建了sub,进入了它,并在那里创建了一个新的空 Git 存储库。所以说Git仓库已经完全没有提交。
对于上述事实,我们再添加一个:任何 Git 存储库都不能在其中容纳另一个 Git 存储库。 这样做的原因与安全有关,但就我们的目的而言,这一事实的重要副作用是尝试将子存储库添加到存储库(如 中的超级项目empty-submodule)不会添加存储库本身。相反,它添加了对存储库中提交的引用。这就是子模块的实现方式。1 但要参考一些承诺中的子模块,子模块本身必须具有一定的承诺签出。
解决此问题的方法实际上取决于您想要的结果。有关这方面的更多信息,请参阅下一节。
1从技术上讲,子模块由两部分实现:
超级项目(“外部”存储库)中的每个提交都有对子模块内提交的引用。
为了能够运行git clone 在子模块,外部存储库还应该包含一个.gitmodules文件。这个文件将包含告诉超级项目 Git 如何git clone使用子模块的指令。一旦子模块存储库存在,超级项目 Git 就不再需要git clone在其上运行。因此,可能会意外或有意地完全省略该.gitmodules文件。
这样做会产生一个难以使用的超级项目。我喜欢称其为半途而废的子模块。如果它被完全评估,超级项目将能够克隆子模块,但由于.gitmodules文件丢失,它不能。
解决问题
有多种方法可以解决问题。在你选择一个之前,你应该知道你是否想要一个子模块。这里没有一个正确的答案,因为我应该使用子模块的问题有点像我应该选择哪种口味的冰淇淋:不同的人有不同的偏好。
如果您根本不需要子模块,则需要移动或删除相关.git子目录中的子目录,例如:
rm -rf sub/.git
(如果在 Windows 上使用 PowerShell,另见Nissan 的回答)。
在你这样做之前,你应该:
确定是否要保留其他存储库。如果是这样,请不要删除它!只需将其移动到其他地方,例如,mkdir ../keep && mv sub/.git ../keep。
git checkout在移动或删除存储库(.git目录)之前确定是否需要提交或分支。如果是这样,请进入子模块并检查所需的提交。
如果你确实想要一个子模块,你可能需要在子模块中进行一些提交,或者检查一些现有的提交,就像上面的第 2 步一样。一旦子模块存储库正确提交,您就可以git add了。
这是在名为 的子模块中创建提交的示例sub:
$ cd sub
$ echo this is the submodule > README.md
$ git add .
$ git commit -m initial
[master (root-commit) c834131] initial
 1 file changed, 1 insertion(+)
 create mode 100644 README.md
$ cd ..
现在子模块有一个提交,我可以将它添加到超级项目中。不过这里有一些问题,因为我还应该创建.gitmodule上面脚注 1 中提到的文件。该git submodule add命令为您完成所有工作,但您需要知道git push此子模块存储库的位置。例如:
$ git submodule add ssh://git@github.com/place/where/submodule/lives.git sub
Adding existing repo at 'sub' to the index
现在一切准备就绪,可以在超级项目中提交:
$ git status
On branch master

No commits yet

Changes to be committed:
  (use "git rm --cached <file>..." to unstage)
        new file:   .gitmodules
        new file:   sub

$ cat .gitmodules
[submodule "sub"]
        path = sub
        url = ssh://git@github.com/place/where/submodule/lives.git
子模块实际上还没有发送到 GitHub。在其他人能够使用superproject 之前,我必须创建这个 GitHub 存储库,为其提供足够的(例如,公共)访问权限,并将git push子模块提交到该 GitHub 存储库。然后,我可以git push我的承诺我的子项目会到什么位置,该库应该住在。然后你——一般的“你”——可以git clone使用superproject,它现在有一个.gitmodules包含指令的文件,你的 Git 将能够通过它运行git clone ssh://git@github.com/place/where/submodule/lives.git sub.
子模块有一堆可用性问题,上述所有复杂情况都是其中之一。确保你知道你在做什么。
Hexo+空的博客目录
首先我们要在目录下初始化一个git库,使用git clone,把我们上次没搞定的库克隆下来。

- 在该空文件夹下,鼠标右键,执行Git Bash(省去了cd的时间

克隆我们未竟的代码库
git clone xxxx

之后搭建hexo
根据文档搭建hexo
- 什么是 Hexo?
Hexo 是一个快速、简洁且高效的博客框架。Hexo 使用 Markdown(或其他渲染引擎)解析文章,在几秒内,即可利用靓丽的主题生成静态网页。
- 安装前提
安装 Hexo 相当简单,只需要先安装下列应用程序即可:
Node.js (Node.js 版本需不低于 10.13,建议使用 Node.js 12.0 及以上版本)
Git
- 安装 Hexo
所有必备的应用程序安装完成后,即可使用 npm 安装 Hexo。
$ npm install -g hexo-cli
- 进阶安装和使用
对于熟悉 npm 的进阶用户,可以仅局部安装 hexo 包。
$ npm install hexo


安装以后,可以使用以下两种方式执行 Hexo:
npx hexo <command>
将 Hexo 所在的目录下的 node_modules 添加到环境变量之中即可直接使用 hexo <command>:
echo 'PATH="$PATH:./node_modules/.bin"' >> ~/.profile

安装 Hexo 完成后,请执行下列命令,Hexo 将会在指定文件夹中新建所需要的文件。(我们在githhub.io执行该命令,注意hexo init命令需要在一个空文件夹执行)
如果没有设置 folder ,Hexo 默认在目前的文件夹建立网站。
$ hexo init <folder>
$ cd <folder>
$ npm install
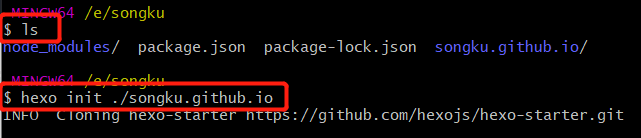
提示我们搭建完成

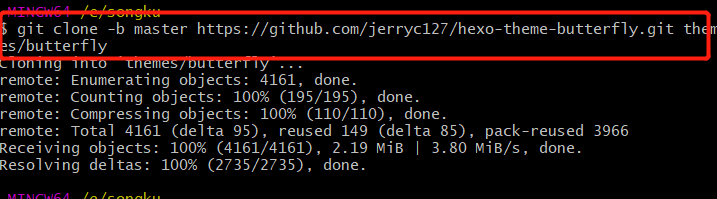
git clone获得butterfly主题
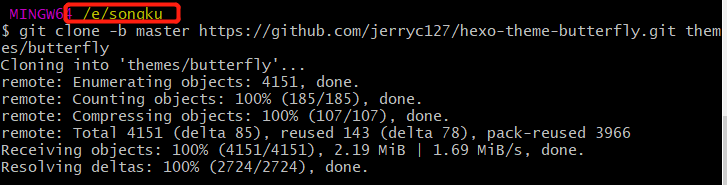
注意我们的目录,依旧是在根目录下完成操作
git clone -b master https://github.com/jerryc127/hexo-theme-butterfly.git themes/butterfly
NPM
It supports Hexo 5.0.0 or later
在hexo博客网站根目录
npm i hexo-theme-butterfly
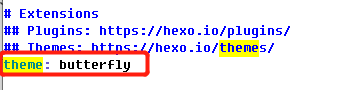
配置
在 hexo 工作文件夹的根配置文件中设置主题_config.yml:
theme: butterfly
如果你没有 pug & stylus 渲染器,试试这个:
npm install hexo-renderer-pug hexo-renderer-stylus
执行两条git命令,初始化这个库并添加文件
git init
git remote add origin git@github.com:tianqixin/runoob-git-test.git
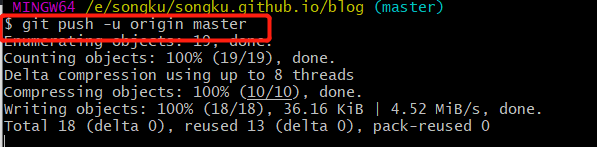
git push -u origin master
版本二 删了重新整
空文件夹songku,裸git clone,之后cd 到主博客文件夹下,看到master标志。

我们删掉其他东西

npm install hexo
echo 'PATH="$PATH:./node_modules/.bin"' >> ~/.profile
hexo init <folder>
cd <folder>
npm install
hexo generate

git clone -b master https://github.com/jerryc127/hexo-theme-butterfly.git themes/butterfly

npm i hexo-theme-butterfly
版本三 删了重新整
这次细心一点,先配好hexo博客
https://zhuanlan.zhihu.com/p/35668237

经过一通cv命令操作,本地4000端口能够看到博客页面了。
npm i hexo-cli -g#安装Hexo
hexo -v#验证是否安装成功
hexo init#初始化文件夹
npm install#安装必备的组件。
hexo g#生成静态网页
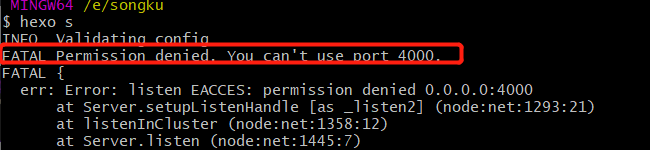
hexo s#打开本地服务器

初始化配置信息
git config --global user.name "runoob"
git config --global user.email test@runoob.com
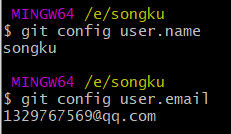
因为之前已经配置过,此时只查看一下
git config user.name
git config user.emal
ssh -T git@github.com#密钥证明
#如果出现了如下图所示你的用户名,那就连接了github和本。

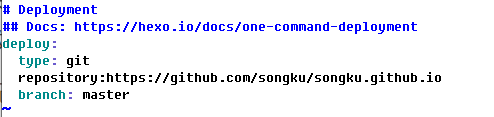
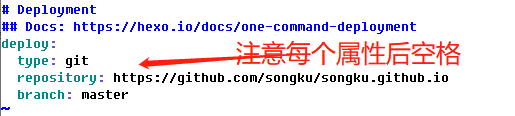
打开博客根目录下的_config.yml文件,这是博客的配置文件,在这里你可以修改与博客相关的各种信息。
修改最后一行的配置:
deploy:
  type: git
  repository: https://github.com/godweiyang/godweiyang.github.io
  branch: master
repository修改为你自己的github项目地址。
npm i hexo-deployer-git#安装一个扩展
hexo new post "article title"#新建一篇文章

然后打开./sources/_posts,可以发现下面多了一个文件夹和一个.md文件,一个用来存放你的图片等数据,另一个就是你的文章文件啦。

Exception: can not read a block mapping entry; a multiline key may not be an implicit key (107:9).
生成成功。


编写完markdown文件后,根目录下输入hexo g生成静态网页,然后输入hexo s可以本地预览效果,最后输入hexo d上传到github上。这时打开你的github.io主页就能看到发布的文章啦。

这是因为配置中出现了"",导致文章无法按照正确yaml语法解析出错,把英文双引号改成中文双引号就好了:
YAML 入门教程
基本语法
- 大小写敏感
- 使用缩进表示层级关系
- 缩进不允许使用tab,只允许空格
- 缩进的空格数不重要,只要相同层级的元素左对齐即可
- '#'表示注释
修改后,成功上线。

hexo d#上传到github上
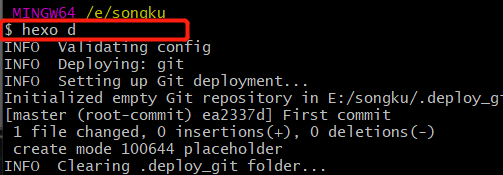
终于成功

今后使用hexo的命令集
hexo new post "name of the page" #name the title for new blog
#...
#edit the .md file in ./sources/_posts
#...
hexo g#in the master catalog
hexo d#sync with github
配置butterfly主题
打开博客主界面
git clone -b master https://github.com/jerryc127/hexo-theme-butterfly.git themes/butterfly
在博客根目录
npm i hexo-theme-butterfly

配置:
_config.yml:
theme: butterfly

保存退出:wq
$ npm install hexo-renderer-pug hexo-renderer-stylus

npm install hexo
echo 'PATH="$PATH:./node_modules/.bin"' >> ~/.profile

vi _config.yml #有我的配置初一给里外里内。
hexo d #提交变化


 957
957


 被折叠的 条评论
为什么被折叠?
被折叠的 条评论
为什么被折叠?
 到【灌水乐园】发言


