


前言
自己搞了个批量创建YOLO所需识别图案的代码,分享给大家,希望可以给大家一定的帮助(简单来说就是yolo目标检测不是需要画框框吗?这里实现的是通过代码可以将所需识别的图案直接放到图片上,并生成相应的txt文件,这样直接就跑深度学习代码就行)

一、需要用到的库
from PIL import Image
import random
import os
二、整体代码
代码如下(示例):
from PIL import Image
import random
import os

def _check_overlap(pos1, pos2):
    """检查两个位置是否重叠"""
    return not (pos1[2] <= pos2[0] or pos1[0] >= pos2[2] or pos1[3] <= pos2[1] or pos1[1] >= pos2[3])

def convert_to_yolo_format(box, img_width, img_height):
    """将图标的位置和大小转换为YOLO格式"""
    x_center = (box[0] + box[2]) / 2.0
    y_center = (box[1] + box[3]) / 2.0
    width = box[2] - box[0]
    height = box[3] - box[1]
    return x_center / img_width, y_center / img_height, width / img_width, height / img_height

# 定义文件夹路径
icons_folder_1 = 'picture/Keycontrol/Type1'#第一个icon文件
icons_folder_2 = 'picture/Keycontrol/Type2'#第二个icon文件
# icons_folder_3 = xxx
backgrounds_folder = 'picture/Keycontrol/picture'#将icon图标添加到的图片集
output_images_folder = 'picture/Keycontrol/output_images'#输出图片的位置
output_labels_folder = 'picture/Keycontrol/output_labels'#输出txt的位置

# 创建输出文件夹
os.makedirs(output_images_folder, exist_ok=True)
os.makedirs(output_labels_folder, exist_ok=True)

# 为每个图标文件夹定义选择范围
selection_range = {
    0: (12, 15),  # 对于第一个文件夹,每次选择10到12个图标
    1: (8, 9),  # 对于第二个文件夹,每次选择8到9个图标
    #记得做相应的添加
}

# 从两个图标文件夹中获取图标文件列表,每个文件夹代表一个类别
icons = {
    0: [os.path.join(icons_folder_1, f) for f in os.listdir(icons_folder_1) if f.endswith(('.png', '.jpg'))],
    1: [os.path.join(icons_folder_2, f) for f in os.listdir(icons_folder_2) if f.endswith(('.png', '.jpg'))],
    #记得做相应的添加
}

# 遍历背景图像
for background_name in os.listdir(backgrounds_folder):
    if background_name.endswith(('.png', '.jpg')):
        background_img = Image.open(os.path.join(backgrounds_folder, background_name))
        background_img = background_img.resize((1080, 1440), Image.Resampling.LANCZOS)

        icons_positions = []
        icons_categories = []  # 用于存储每个图标的类别ID

        # 对每个类别的图标进行处理
        for category_id, icon_files in icons.items():
            min_selection, max_selection = selection_range[category_id]
            selected_icons = random.sample(icon_files, min(len(icon_files), random.randint(min_selection, max_selection)))

            for icon_path in selected_icons:
                icon_img = Image.open(icon_path)
                if icon_img.mode != 'RGBA':
                    icon_img = icon_img.convert('RGBA')

                # 将图标背景转换为透明
                datas = icon_img.getdata()
                newData = []
                for item in datas:
                    if item[0] > 200 and item[1] > 200 and item[2] > 200:  # 将接近白色的像素转换为透明
                        newData.append((255, 255, 255, 0))
                    else:
                        newData.append(item)
                icon_img.putdata(newData)

                icon_img = icon_img.resize((72, 72), Image.Resampling.LANCZOS)
                icon_width, icon_height = icon_img.size

                while True:
                    x = random.randint(0, background_img.width - icon_width)
                    y = random.randint(0, background_img.height - icon_height)
                    icon_position = (x, y, x + icon_width, y + icon_height)

                    if not any(_check_overlap(pos, icon_position) for pos in icons_positions):
                        break

                background_img.paste(icon_img, (x, y), icon_img)
                icons_positions.append(icon_position)
                icons_categories.append(category_id)  # 保存图标的类别ID

        # 保存修改后的背景图像
        output_image_path = os.path.join(output_images_folder, f'modified{background_name}')
        background_img.save(output_image_path)

        # 生成并保存对应的YOLO标注文件
        yolo_positions = [convert_to_yolo_format(pos, background_img.width, background_img.height) for pos in icons_positions]
        label_filename = os.path.splitext(f'modified{background_name}')[0] + '.txt'
        output_label_path = os.path.join(output_labels_folder, label_filename)

        with open(output_label_path, 'w') as file:
            for category_id, pos in zip(icons_categories, yolo_positions):
                file.write(f'{category_id} {" ".join(map(str, pos))}\n')

        print(f"Modified image saved to {output_image_path}")
        print(f"YOLO label file saved to {output_label_path}")
我在代码中是两个种类的添加,如果有添加第三种或者更多,记得在第31和38行那里添加代码
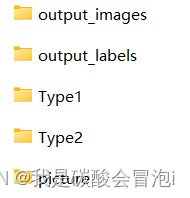
第19-23行分别是定义文件夹的路径,下面这张图片是文件整体逻辑
第19-20行的type1/2的图片


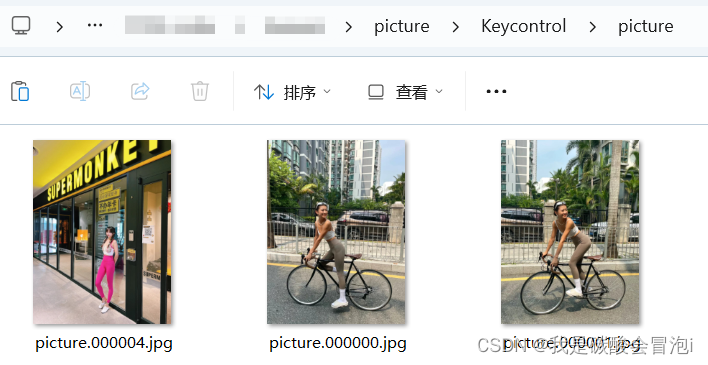
第21行的图片(也就是图标所做的背景图片)
第22-23行的文件
第一张图就是生成好的图片

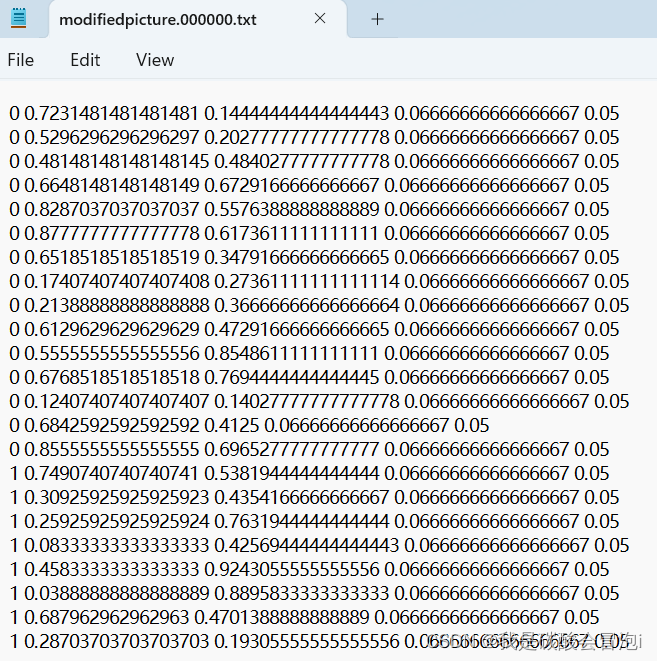
第二张图就是所标注的位置txt文件
最后就可以根据生成好的图片和位置txt文件去做yolo目标检测啦!需要检测的图标和背景图需要自己去找好,然后放到相应的文件夹下面就可以了。
总结
以上就是生成相关检测图片的代码,其中肯定还有不足之处,请大家批评指正。如果大家有疑惑也可以留言,看到了会尽快回复大家的。


 145
145

 被折叠的 条评论
为什么被折叠?
被折叠的 条评论
为什么被折叠?
 到【灌水乐园】发言


