


1.生产者,消费者模型
大致设计思路:
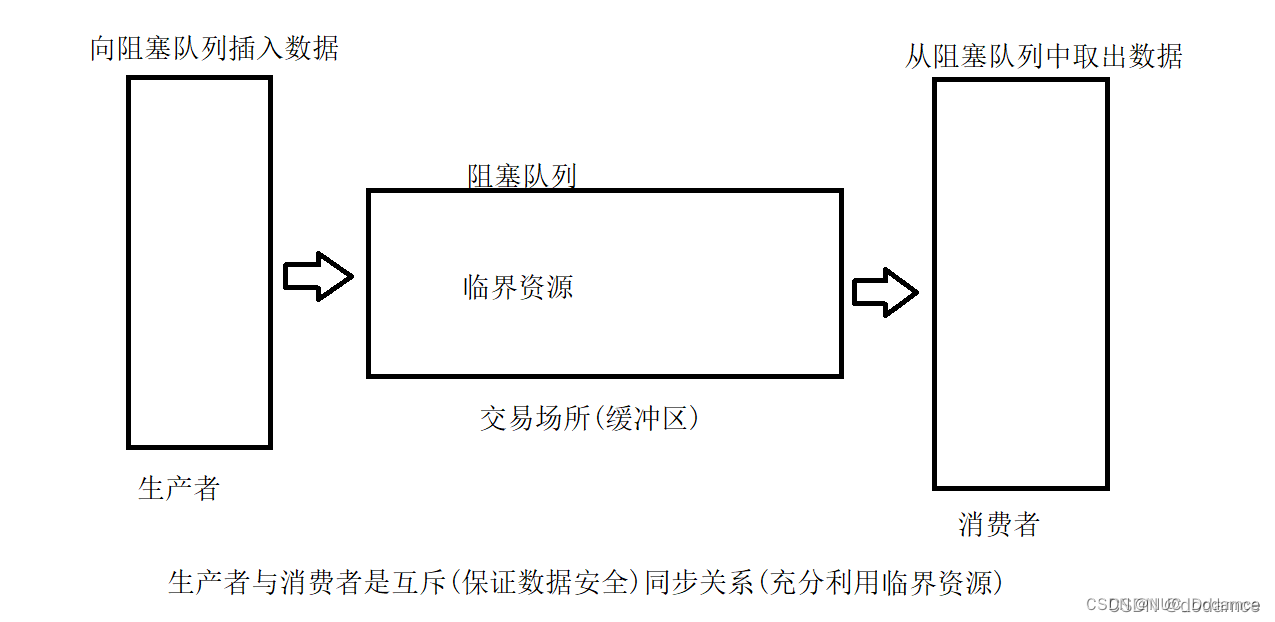
- 通过阻塞队列完成生产者,消费者的解耦
- 阻塞队列中的put和take方法可能会出现阻塞。
- put方法在唤醒队列满的时候要阻塞,take方法在唤醒队列为空的时候要阻塞。
- put方法后破坏了take方法的阻塞条件,唤醒take方法
- take方法破坏了put方法的阻塞条件,唤醒put方法
package 阻塞队列.生产者消费者模型;

class MyBlockQueue {
    private int[] array = new int[10];
    private int head = 0;
    private int till = 0;
    private int size = 0;
    Object locker = new Object();

    //put入队列
    public void put(int num) throws InterruptedException {
        synchronized(locker) {
            while (size == array.length) {
                //阻塞等待
                System.out.println("队列已满,阻塞等待");
                locker.wait();
            }
            array[till++] = num;
            size++;
            if (till >= array.length) {
                till = 0;
            }
            //唤醒take线程
            locker.notify();
        }
    }

    //take出队列
    public int take() throws InterruptedException {
        synchronized (locker) {
            if (size == 0) {
                System.out.println("队列为空,阻塞等待");
                locker.wait();
            }
            int pop = array[head];
            head++;
            if (head >= array.length) {
                head = 0;
            }
            size--;
            locker.notify();//唤醒put线程
            return pop;
        }
    }
}
package 阻塞队列.生产者消费者模型;

public class TestProducerDemo {
    public static void main(String[] args) {
        MyBlockQueue queue=new MyBlockQueue();
        //消费者
        Thread customer=new Thread(){
            public void run() {
                while (true) {
                    try {
                        Thread.sleep(1000);
                        System.out.println("消费元素+ " + queue.take());
                    } catch (InterruptedException e) {
                        e.printStackTrace();
                    }
                }
            }
        };
        customer.start();

        //生产者
        Thread producer =new Thread(){
            public void run(){
                for(int i=0;i<50;i++){
                    try {
                        queue.put(i);
                        System.out.println("生产元素 "+i);
                    } catch (InterruptedException e) {
                        e.printStackTrace();
                    }
                }
            }
        };
        producer.start();

        try {
            producer.join();
            customer.join();
        } catch (InterruptedException e) {
            e.printStackTrace();
        }
    }
}
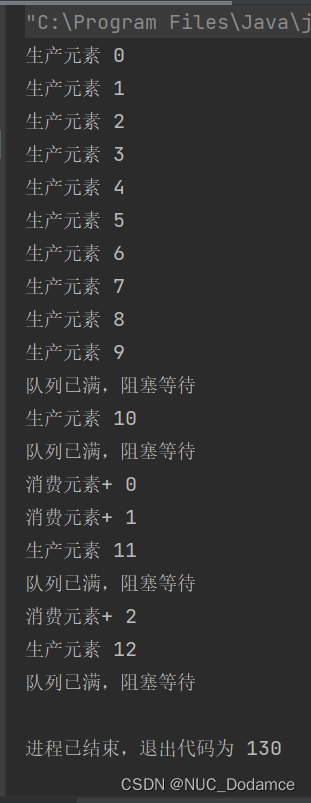
运行截图
2.定时器
Java定时器中可以安排很多任务
这些任务会按照时间顺序,谁先到谁执行
定时器内部使用阻塞优先队列来组织任务,内部提供schedule方法,让调用者向定时器中插入任务。
此外,定时器内部也存在一个线程,这个线程的工作是扫描队头元素,调查这个任务的时间是否就绪,如果就绪则执行这个任务,否则塞回队列中继续执行。
需要特别注意的是:为了避免CPU出现忙等的状态,浪费CPU资源,这里引入wait和notify来节约CPU效率。
当没有到时间的时候进行wait等待,等待的时间可以通过用户的输入计算。当重新添加元素的时候又要唤醒线程进行重新判断任务是否要执行。
package 定时器;

import java.util.concurrent.PriorityBlockingQueue;

class Task implements Comparable<Task>{//描述任务
    private Runnable command;//执行的任务
    public long time;//这个任务多少时间要在什么时候执行

    public void run() {
        command.run();
    }

    public Task(Runnable run, long time) {
        this.command = run;
        this.time = System.currentTimeMillis() + time;
    }

    //指定优先队列的优先级
    @Override
    public int compareTo(Task o) {
        return (int)(this.time-o.time);
    }
}

class MyTimer {
    private PriorityBlockingQueue<Task> queue = new PriorityBlockingQueue<>();//组织任务

    public void schedule(Runnable command, long time) {
        Task task = new Task(command, time);
        queue.put(task);
        synchronized (locker){
            locker.notify();//重新添加任务时唤醒线程,保证新加入的任务不会错过。
        }
    }

    private Object locker=new Object();//解决忙等问题

    public MyTimer() {
        //创建线程,扫描队列。
        Thread thread = new Thread() {
            public void run() {
                while (true) {
                    try {
                        Task task = queue.take();
                        long curTime = System.currentTimeMillis();
                        if (task.time > curTime) {
                            //时间未到
                            queue.put(task);
                            synchronized(locker) {
                                locker.wait(task.time-curTime);
                            }
                        } else {
                            //时间到了
                            task.run();
                        }
                    } catch (InterruptedException e) {
                        e.printStackTrace();
                        break;
                    }
                }
            }
        };
        thread.start();
    }
}
package 定时器;

public class TestTimer {
    public static void main(String[] args) {
        MyTimer timer=new MyTimer();
        System.out.println("开始运行");
        timer.schedule(new Runnable(){
            public void run(){
                System.out.println("Hello Timer");
            }
        },3000);
    }
}
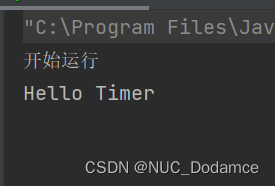
代码运行先打印开始执行,等三秒后打印Hello Timer
3. 线程池
在使用线程前,先创建一批线程。在需要线程的时候从这些线程中拿即可。这样的话效率就比创建销毁线程的效率更高。
public ThreadPoolExecutor(int corePoolSize, int maximumPoolSize,long keepAliveTime,TimeUnit unit,BlockingQueue workQueue)
参数意义
- corePoolSize - 即使空闲时仍保留在池中的线程数,除非设置allowCoreThreadTimeOut
- maximumPoolSize - 池中允许的最大线程数
- keepAliveTime - 当线程数大于核心时,这是多余的空闲线程在终止之前等待新任务的最大时间。
unit - keepAliveTime参数的时间单位 - workQueue - 在执行任务之前用于保存任务的队列。 该队列将仅保存execute方法提交的Runnable任务。(阻塞队列,描述了线程池要执行的任务)
- RejectedExecutionHandler handler 拒绝策略,当任务队列已满时应该进行的操作,处理极端情况。
标注库提供了一些工厂方法,可以创建出不同种风格的线程池实例。
6. . newFixedThreadPool:创建出一个固定线程数量的线程池.(完全没有临时线程的版本)
7. newCachedThreadPool:创建出一个数量可变的线程池.(完全没有正式线程,全是临时线程)
8. newSingleThreadPool:创建出一个只包含一个线程的线程池.(只是特定场景下使用)
9. newScheduleThreadPool:能够设定延时时间的线程池. (插入的任务能够过一会再执行),相当于进阶版的定时器.
eg:
package 线程池;

import java.util.concurrent.ExecutorService;
import java.util.concurrent.Executors;

public class TestPool {
    public static void main(String[] args) {
        //创建线程池实例
        ExecutorService service= Executors.newFixedThreadPool(10);
        //注册一些方法
        for(int i=0;i<20;i++) {
            service.submit(new Runnable() {
                @Override
                public void run() {
                    System.out.println("run");
                }
            });
        }
    }
}
自己定义线程池:
- 描述任务使用Runnable
- 组织任务使用阻塞队列
- 提前创建一批线程
package 线程池;

import java.util.ArrayList;
import java.util.concurrent.BlockingQueue;
import java.util.concurrent.LinkedBlockingQueue;

class MyThreadPool {
    //工作线程
    class workThread extends Thread {
        //从队列中取任务
        private  BlockingQueue<Runnable>queue;
        public workThread(BlockingQueue<Runnable> queue) {
            this.queue=queue;
        }

        public void run(){
            while(true){
                try {
                    Runnable task=queue.take();
                    task.run();
                } catch (InterruptedException e) {
                    e.printStackTrace();
                }
            }
        }
    }

    //阻塞队列组织任务
    private BlockingQueue<Runnable> queue = new LinkedBlockingQueue<>();

    private ArrayList<workThread> list = new ArrayList<>();

    private static final int MAX_WORK_SIZE = 10;

    public void submit(Runnable command) {
        try {
            if (list.size() < MAX_WORK_SIZE) {
                //线程数量不足时,创建新线程,并启动
                workThread work = new workThread(queue);
                work.start();
                list.add(work);
            }
            queue.put(command);
        } catch (InterruptedException e) {
            e.printStackTrace();
        }
    }
}
测试代码:
package 线程池;

public class TestPool {
    public static void main(String[] args) {
        //创建线程池实例
        MyThreadPool threadPool=new MyThreadPool();
        for(int i=0;i<20;i++){
            threadPool.submit(new Runnable() {
                @Override
                public void run() {
                    System.out.println("MyThreadPool");
                }
            });
        }
    }
}


 271
271


 被折叠的 条评论
为什么被折叠?
被折叠的 条评论
为什么被折叠?
 到【灌水乐园】发言


