


最后一节学习多分类的案例-----剪刀,石头,布分类
导读
1. 数据相关
⑴目录设置
每个子目录下都有三种类别: 石头、布、剪刀 .

⑵数据集
这里有一个新的数据集----包含约3000张图像,它们都是使用具有多种模型的CGI产生的(有男性的,女性的,还有许多不同肤色的),它们都是以白色为背景,分辨率为300×300,下面给出了一些示例.

数据集链接
上面给出的数据集链接里包含了训练集,验证集,以及测试集.
⑶获取数据
①有两个zip文件----训练集和测试集
!wget --no-check-certificate \
    https://storage.googleapis.com/laurencemoroney-blog.appspot.com/rps.zip \
    -O /tmp/rps.zip

!wget --no-check-certificate \
    https://storage.googleapis.com/laurencemoroney-blog.appspot.com/rps-test-set.zip \
    -O /tmp/rps-test-set.zip
②压缩至temp目录中
import os
import zipfile

local_zip = '/tmp/rps.zip'
zip_ref = zipfile.ZipFile(local_zip, 'r')
zip_ref.extractall('/tmp/')
zip_ref.close()

local_zip = '/tmp/rps-test-set.zip'
zip_ref = zipfile.ZipFile(local_zip, 'r')
zip_ref.extractall('/tmp/')
zip_ref.close()
③查看其中的文件
rock_dir = os.path.join('/tmp/rps/rock')
paper_dir = os.path.join('/tmp/rps/paper')
scissors_dir = os.path.join('/tmp/rps/scissors')

print('total training rock images:', len(os.listdir(rock_dir)))
print('total training paper images:', len(os.listdir(paper_dir)))
print('total training scissors images:', len(os.listdir(scissors_dir)))

rock_files = os.listdir(rock_dir)
print(rock_files[:10])

paper_files = os.listdir(paper_dir)
print(paper_files[:10])

scissors_files = os.listdir(scissors_dir)
print(scissors_files[:10])
输出结果包含每个类别的数量,一些文件名

④绘制一些文件
%matplotlib inline

import matplotlib.pyplot as plt
import matplotlib.image as mpimg

pic_index = 2

next_rock = [os.path.join(rock_dir, fname)
                for fname in rock_files[pic_index-2:pic_index]]
next_paper = [os.path.join(paper_dir, fname)
                for fname in paper_files[pic_index-2:pic_index]]
next_scissors = [os.path.join(scissors_dir, fname)
                for fname in scissors_files[pic_index-2:pic_index]]

for i, img_path in enumerate(next_rock+next_paper+next_scissors):
  #print(img_path)
  img = mpimg.imread(img_path)
  plt.imshow(img)
  plt.axis('Off')
  plt.show()
图像展示

⑷ 训练数据准备
虽然图像是300×300,设置图像生成器提供150×150方差. 它将即时调整图像的大小并增强训练目录中的图像.
train_datagen = ImageDataGenerator(rescale=1./255)

train_generator = train_datagen.flow_from_directory(
        train_dir,
        target_size=(150,150),
        batch_size=128,
        class_mode='categorical') #多个类别
2. 模型相关
⑴建立模型
model = tf.keras.models.Sequential([

    tf.keras.layers.Conv2D(16, (3,3), activation='relu', input_shape=(150, 150, 3)),
    tf.keras.layers.MaxPooling2D(2, 2),
    # The second convolution
    tf.keras.layers.Conv2D(32, (3,3), activation='relu'),
    tf.keras.layers.MaxPooling2D(2,2),
    # The third convolution
    tf.keras.layers.Conv2D(64, (3,3), activation='relu'),
    tf.keras.layers.MaxPooling2D(2,2),
    tf.keras.layers.Flatten(),
    tf.keras.layers.Dense(512, activation='relu'),
    tf.keras.layers.Dense(3, activation='softmax') #三分类,softmax将所有的值转换为概率
])
⑵模型编译
model.compile(loss = 'categorical_crossentropy', #绝对交叉熵
              optimizer=RMSprop(lr=0.001),
              metrics=['acc'])
⑶结果展示
①epochs=100

②epochs=25

⑷模型测试
import numpy as np
from google.colab import files
from keras.preprocessing import image

uploaded = files.upload()

for fn in uploaded.keys():

  # predicting images
  path = fn
  img = image.load_img(path, target_size=(150, 150))
  x = image.img_to_array(img)
  x = np.expand_dims(x, axis=0)

  images = np.vstack([x])
  classes = model.predict(images, batch_size=10)
  print(fn)
  print(classes)
某张图像的预测输出形式如下,测试结果中概率顺序依次对应为布、石头、剪刀(按字母顺序排序).
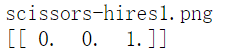
考虑这样一只手,通过神经网络最后的三个神经元,然后softmax输出三种类型的概率值(总和为1),类别判为概率最大值所对应的类别.


 877
877


 被折叠的 条评论
为什么被折叠?
被折叠的 条评论
为什么被折叠?
 到【灌水乐园】发言


