


springBoot
学习环境: jdk1.8 maven3.6.1 idea springboot
目录:

main/java/com.text.springbootdemo/application 程序的主入口
Main/resources/application.properties springboot 配置文件
建立包controller层时需要在com.text.springbootdemo包下建立才有效果


在配置文件下:
#更改端口号: server.port=8081 //默认的端口号为8080
彩蛋:在配置文件source下创建banner.txt
Springboot自动配置原理
• pom.xml中依赖不需要写版本号
•启动器
org.springframework.boot
spring-boot-starter
比如spring-boot-start-web
• 
注解:;标注是一个springboot类
@EnableAutoConfiguration //自动配置
@SpringBootConfiguration //springboot配置
#掌握yaml
#key - value
#name: wuchuan
#可以存值或对象
student:
name: wuchuan
age: 16
#行内写法
animal: {name: xiao,age: 3}
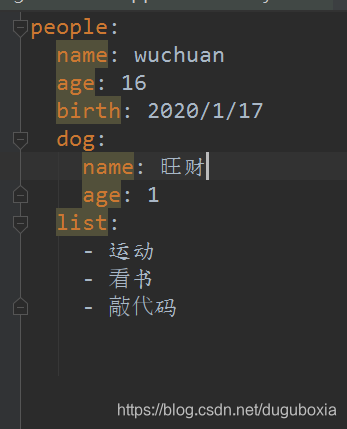
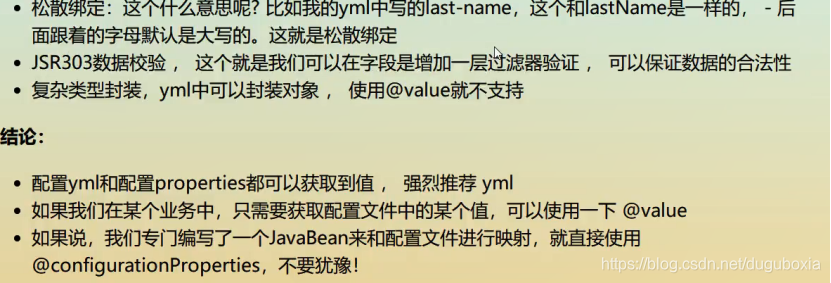
使用yaml语法给对象赋值
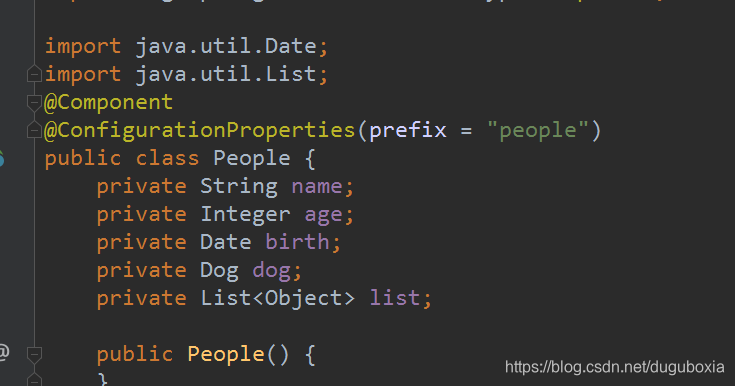
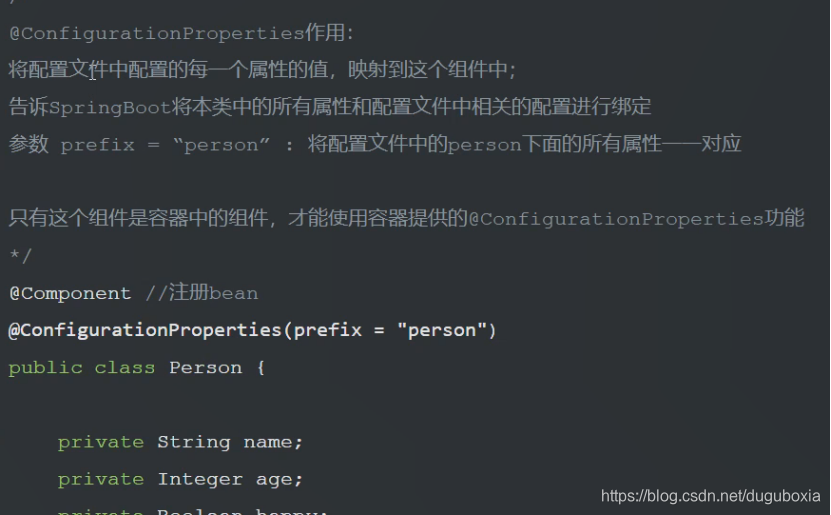
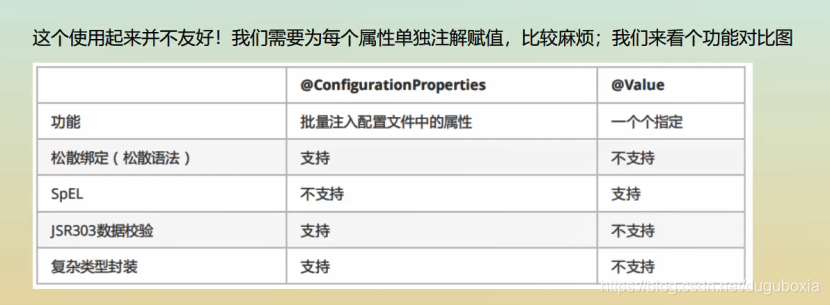
Properity与yaml使用区别(单个属性的注入与多个属性的注入)
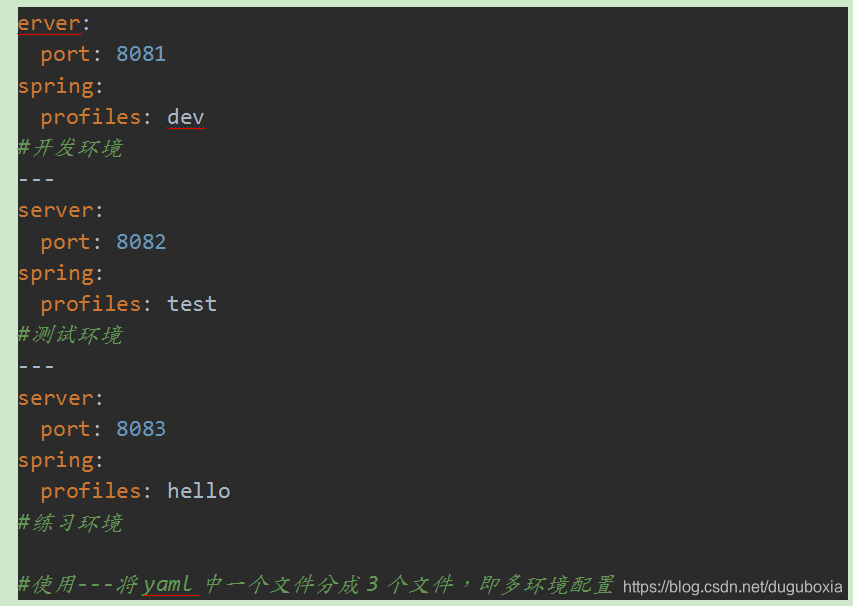
erver:
port: 8081
spring:
profiles: dev
#开发环境
server:
port: 8082
spring:
profiles: test
#测试环境
server:
port: 8083
spring:
profiles: hello
#练习环境
#使用—将yaml中一个文件分成3个文件,即多环境配置
可以选择激活哪一个端口:执行的命令 -->spring.profiles.active

debug: true 此命令可以查看哪些自动配置类生效,哪些配置类未生效
Springboot web开发
解决的问题:

静态资源:

对于js,css访问时直接在网站名输入localhost:8080/对应的css文件名
首页页面的定制
可以在static下面创建一个index.html文件即可
认识模板引擎thymeleaf
第一步:导入jar依赖
第二步:认识thymeleaf语法
thymeleaf中文版链接:
https://fanlychie.github.io/post/thymeleaf.html
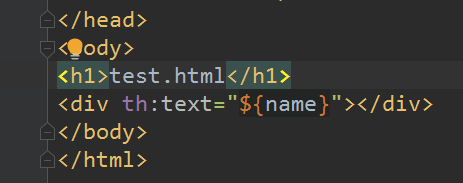
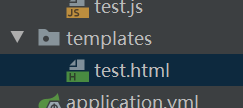
在templates下的所有页面,只能通过controller实现跳转,页面是html

举个例子:

Thymeleaf语法规则:略
Springboot-----springmvc扩展机制:
为了让SpringBoot保持对SpringMVC的全面支持和扩展,而且还要维持SpringBoot不写xml配置的优势,我们需要添加一些简单的配置类即可实现;
做法:需要新建一个@configuration类
新建config->myMvcConfig

第一个参数:访问路径 第二个参数:templates下页面的文件名
员工管理系统项目
导入静态资源:css/img/js/ 放在static下 html放入templates下
Set-get-toString方法--------》认识lombok:
Lombok能以简单的注解形式来简化java代码,提高开发人员的开发效率。例如开发中经常需要写的javabean,都需要花时间去添加相应的getter/setter,也许还要去写构造器、equals等方法,而且需要维护,当属性多时会出现大量的getter/setter方法,这些显得很冗长也没有太多技术含量,一旦修改属性,就容易出现忘记修改对应方法的失误。
Lombok能通过注解的方式,在编译时自动为属性生成构造器、getter/setter、equals、hashcode、toString方法。出现的神奇就是在源码中没有getter和setter方法,但是在编译生成的字节码文件中有getter和setter方法。这样就省去了手动重建这些代码的麻烦,使代码看起来更简洁些。
Lombok的使用跟引用jar包一样,可以在官网(https://projectlombok.org/download)下载jar包,也可以使用maven添加依赖
数据设计:
当前只是模拟数据,未涉及数据库,详细见下一部分
涉及两个表 部门表和员工表
部门表:
//员工表
public class Employee {
    private Integer id;
    private String employeeName;
    private Integer gender;//性别  0 女 1 男
    private String email;
    private Department department;
    private Date birth;

    public Integer getId() {
        return id;
    }

    public String getEmployeeName() {
        return employeeName;
    }

    public Integer getGender() {
        return gender;
    }

    public String getEmail() {
        return email;
    }

    public Department getDepartment() {
        return department;
    }

    public Date getBirth() {
        return birth;
    }

    public void setId(Integer id) {
        this.id = id;
    }

    public void setEmployeeName(String employeeName) {
        this.employeeName = employeeName;
    }

    public void setGender(Integer gender) {
        this.gender = gender;
    }

    public void setEmail(String email) {
        this.email = email;
    }

    public void setDepartment(Department department) {
        this.department = department;
    }

    public void setBirth() {
        this.birth = new Date();
    }

    public Employee(Integer id, String employeeName, Integer gender, String email, Department department) {
        this.id = id;
        this.employeeName = employeeName;
        this.gender = gender;
        this.email = email;
        this.department = department;
        //日期自动生成
        this.birth = new Date();
    }

    public Employee() {
    }

    @Override
    public String toString() {
        return "Employee{" +
                "id=" + id +
                ", employeeName='" + employeeName + '\'' +
                ", gender=" + gender +
                ", email='" + email + '\'' +
                ", department=" + department +
                ", birth=" + birth +
                '}';
    }
员工表:(注意日期自动生成)
//员工表
public class Employee {
    private Integer id;
    private String employeeName;
    private Integer gender;//性别  0 女 1 男
    private String email;
    private Department department;
    private Date birth;

    public Integer getId() {
        return id;
    }

    public String getEmployeeName() {
        return employeeName;
    }

    public Integer getGender() {
        return gender;
    }

    public String getEmail() {
        return email;
    }

    public Department getDepartment() {
        return department;
    }

    public Date getBirth() {
        return birth;
    }

    public void setId(Integer id) {
        this.id = id;
    }

    public void setEmployeeName(String employeeName) {
        this.employeeName = employeeName;
    }

    public void setGender(Integer gender) {
        this.gender = gender;
    }

    public void setEmail(String email) {
        this.email = email;
    }

    public void setDepartment(Department department) {
        this.department = department;
    }

    public void setBirth() {
        this.birth = new Date();
    }

    public Employee(Integer id, String employeeName, Integer gender, String email, Department department) {
        this.id = id;
        this.employeeName = employeeName;
        this.gender = gender;
        this.email = email;
        this.department = department;
        //日期自动生成
        this.birth = new Date();
    }

    public Employee() {
    }

    @Override
    public String toString() {
        return "Employee{" +
                "id=" + id +
                ", employeeName='" + employeeName + '\'' +
                ", gender=" + gender +
                ", email='" + email + '\'' +
                ", department=" + department +
                ", birth=" + birth +
                '}';
    }
dao层:
//部门dao
@Repository
public class DepartmentDao {

//    模拟数据库的数据
    public static Map<Integer, Department> departments = null;
    static {
        //创建一个部门表
        departments = new HashMap<Integer, Department>();

        departments.put(1001,new Department(1001,"市场部"));
        departments.put(1002,new Department(1002,"教研部"));
        departments.put(1003,new Department(1003,"后勤部"));
        departments.put(1004,new Department(1004,"保安部"));
        departments.put(1005,new Department(1005,"教务部"));
        departments.put(1006,new Department(1006,"学生部"));
    }

//    实现增删改查
    //获得所有部门信息
    public Collection<Department> getDepartment(){
        return departments.values();
    }
    //通过部门获得id
    public Department getDepartmentById(Integer id){
        return departments.get(id);
    }
}
//employeeDao员工dao
@Repository
public class EmployeeDao {
    //模拟数据
    public static Map<Integer, Employee> employees =null;
    //员工有所属部门
    @Autowired
    private DepartmentDao departmentDao;
    static {
        employees =new HashMap<Integer, Employee>();
        employees.put(1001,new Employee(1001,"张一",1,"1008611@qq.com",new Department(1001,"市场部")));
        employees.put(1002,new Employee(1002,"张二",0,"1008611@qq.com",new Department(1002,"教研部")));
        employees.put(1003,new Employee(1003,"张三",1,"1008611@qq.com",new Department(1003,"后勤部")));
        employees.put(1004,new Employee(1004,"张四",0,"1008611@qq.com",new Department(1004,"保安部")));
        employees.put(1005,new Employee(1005,"张五",1,"1008611@qq.com",new Department(1005,"教务部")));
        employees.put(1006,new Employee(1006,"张六",0,"1008611@qq.com",new Department(1006,"学生部")));

    }
    //主键自增
    private static Integer initId=1007;

    //增加一个员工

    public void save(Employee employee){
        if (employee.getId()==null){
            employee.setId(initId++);
        }
        //主键关联
        employee.setDepartment(departmentDao.getDepartmentById(employee.getDepartment().getId()));
        employees.put(employee.getId(),employee);
    }
    //查询所有员工
    public Collection<Employee> getAll(){
        return employees.values();
    }
    //通过id查询员工
    public Employee getEmployeeById(Integer id){
        return employees.get(id);
    }
    //删除员工
    public void delete(Integer id){
        employees.remove(id);
    }
    //修改员工信息
加载首页:
可以在配置文件config中写。访问的路径为“/”,“index.html”
Q:为何没有样式?css等等
A:模板引擎thymeleaf需要相应的格式:
html中修改如下:
命名空间:

css路径:
js
图片类似

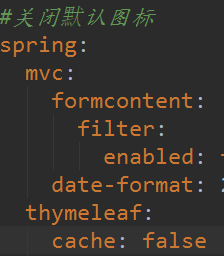
yml中:关闭模板引擎的缓存
命令:spring.thymeleaf.cache=false
更改访问路径:
server.servlet.context-path=/xxx
国际化:(i18n即是中英文可以切换)
保证file-encoding是utf-8
登录功能;
判断字符串是否为空,返回类型为boolean

对于错误登录后,给出错误信息给用户并显示出来

拦截器
登录拦截器(重点):描述;对于某一项目而言,用户输入信息登录到主页面时需要验证信息,通过了才能进入主页面
需要在config下面配置:
实现HanderInterceptor接口
使用第一个即可,return true 放行,反之不放行
不能拦截的有:登录页面,请求,静态资源,
举个例子:
在config中创建登录拦截器类
拦截时需要用户的session

在控制层中:

修改配置:

获取session的用户名格式

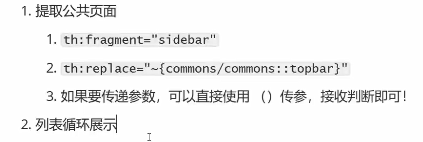
展示员工列表
<tr>
									<th>id</th>
									<th>employeeName</th>
									<th>gender</th>
									<th>email</th>
									<th>department</th>
									<th>birth</th>
									<th>操作</th>
								</tr>
							</thead>
							<tbody>
								<tr th:each="emp:${employees}">
                                    <td th:text="${emp.getId()}"></td>
                                    <td th:text="${emp.getEmployeeName()}"></td>
                                    <td th:text="${emp.getGender()==0?'女':'男'}"></td>
                                    <td th:text="${emp.getEmail()}"></td>
                                    <td th:text="${emp.getDepartment().getDepartmentName()}"></td>
                                    <td th:text="${#dates.format(emp.getBirth(),'yyyy-MM-dd HH:mm:ss')}"></td>
                                    <td>
                                        <button class="btn btn-sm btn-primary">编辑</button>
                                        <button class="btn btn-sm btn-danger">删除</button>
                                    </td>
对于性别可以用判断语句显示男女,调用#dates.format(date ,格式化)日期可以格式化:年月日时分秒
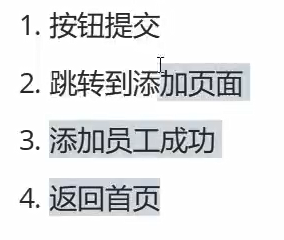
添加员工页面
<main role="main" class="col-md-9 ml-sm-auto col-lg-10 pt-3 px-4">
                    <form th:action="@{/add}" method="post">
                        <div class="form-group">
                            <label>employeeName</label>
                            <input type="text" name="employeeName" class="form-control" placeholder="张某">
                        </div>
                        <div class="form-group">
                            <label>Email</label>
                            <input type="email" name="Email" class="form-control" placeholder="1008611@qq.com">
                        </div>
                        <div class="form-group">
                            <label>Gender</label><br/>
                            <div class="form-check form-check-inline">
                                <input class="form-check-input" type="radio" name="gender"  value="1">
                                <label class="form-check-label">男</label>
                            </div>
                            <div class="form-check form-check-inline">
                                <input class="form-check-input" type="radio" name="gender"  value="0">
                                <label class="form-check-label">女</label>
                            </div>
                        </div>
                        <div class="form-group">
                            <label>department</label>
<!--                               注意:这里传参数是department的id而不是对象department-->
                            <select class="form-control" name="department.id">
                                <option th:each="dep:${department}" th:text="${dep.getDepartmentName()}" th:value="${dep.getId()}"></option>
                            </select>
                        </div>
                        <div class="form-group">
                            <label>birth</label>
                            <input type="text" class="form-control" placeholder="xxx" name="birth">
                        </div>
                        <button type="submit" class="btn btn-primary">添加</button>
                    </form>
				</main>
注意:department是类,传值时需要传入其id,部门用循环遍历处理
controller层:
@Controller
public class EmployeeController {

    @Autowired
     EmployeeDao employeeDao;
    @Autowired
    DepartmentDao departmentDao;
    @RequestMapping("/emp")
    public String list(Model model){
        Collection<Employee> employees = employeeDao.getAll();
        //System.out.println("员工所有信息  "+employeeDao.getAll());
        model.addAttribute("employees",employees);
        return "emp/list";
    }
    @GetMapping("/add")
    public String toAdd(Model model){
        //查询部门的消息
        Collection<Department> department = departmentDao.getDepartment();
        model.addAttribute("department",department);
        return "emp/addEmployee";
    }

    @PostMapping("/add")
    public String addEmployee(Employee employee){
        employeeDao.save(employee);
        return "redirect:/emp";
    }
注意;a标签请求方式为get,表单提交请求方式为post
编辑员工信息
思路:点击编辑->查询员工信息->点击修改->返回查询列表页面
<tbody>
								<tr th:each="emp:${employees}">
                                    <td th:text="${emp.getId()}"></td>
                                    <td th:text="${emp.getEmployeeName()}"></td>
                                    <td th:text="${emp.getGender()==0?'女':'男'}"></td>
                                    <td th:text="${emp.getEmail()}"></td>
                                    <td th:text="${emp.getDepartment().getDepartmentName()}"></td>
                                    <td th:text="${#dates.format(emp.getBirth(),'yyyy-MM-dd HH:mm:ss')}"></td>
                                    <td>
                                        <a class="btn btn-sm btn-primary" th:href="@{'/emp/'+${emp.getId()}}">编辑</a>
                                        <a class="btn btn-sm btn-danger" th:href="@{'/del/'+${emp.getId()}}">删除</a>
                                    </td>
                                </tr>
							</tbody>
注意:路径的获取(需要传入id到后台,实现修改操作)
controller层:先通过a标签以get方式进入然后将数据返回到修改页面,最后修改数据,点击提交
@GetMapping("/emp/{id}")
    public String toUpdate(@PathVariable("id")Integer id,Model model){
        //查出原来的员工数据
        Employee employee = employeeDao.getEmployeeById(id);
        model.addAttribute("employee",employee);
        //查询部门的消息
        Collection<Department> department = departmentDao.getDepartment();
        model.addAttribute("department",department);
        System.out.println("员工性别为"+employee.getGender());
        return "emp/update";
    }

    @PostMapping("/updateEmployee")
    public String update(Employee employee){
        employeeDao.save(employee);
        return "redirect:/emp";
    }
Q:@PathVariable注解是什么?
A:链接:单击了解详情@PathVariable
简单理解:接收请求路径中占位符的值
刚起手操作时小问题:对于单选按钮,选择按钮,单选按钮需给定value值,选择按钮需要id,详细见页面
<main role="main" class="col-md-9 ml-sm-auto col-lg-10 pt-3 px-4">
                    <form th:action="@{/updateEmployee}" method="post">
                        <input type="hidden" name="id" th:value="${employee.getId()}">
                        <div class="form-group">
                            <label>employeeName</label>
                            <input type="text" name="employeeName" class="form-control" th:value="${employee.getEmployeeName()}">
                        </div>
                        <div class="form-group">
                            <label>Email</label>
                            <input type="email" name="Email" class="form-control" th:value="${employee.getEmail()}" >
                        </div>
                        <div class="form-group">
                            <label>Gender</label><br/>
                            <div class="form-check form-check-inline">
                                <input th:checked="${employee.getGender()==1}" class="form-check-input" type="radio" name="gender" value="1" >
                                <label class="form-check-label">男</label>
                            </div>
                            <div class="form-check form-check-inline">
                                <input th:checked="${employee.getGender()==0}" class="form-check-input" type="radio" name="gender" value="0" >
                                <label class="form-check-label">女</label>
                            </div>
                        </div>
                        <div class="form-group">
                            <label>department</label>
<!--                               注意:这里传参数是department的id而不是对象department-->
                            <select class="form-control" name="department.id">
                                <option th:selected="${dep.getId()==employee.getDepartment().getId()}" th:each="dep:${department}" th:text="${dep.getDepartmentName()}" th:value="${dep.getId()}"></option>
                            </select>
                        </div>
                        <div class="form-group">
                            <label>birth</label>
                            <input type="text" class="form-control" th:value="${#dates.format(employee.getBirth(),'yyyy-MM-dd HH:mm:ss')}" name="birth">
                        </div>
                        <button type="submit" class="btn btn-primary">修改</button>
                    </form>
				</main>
日期格式化#dates
删除员工
运用到@PathVariable
controller层:
@GetMapping("/del/{id}")
    public String delete(@PathVariable("id") Integer id){
        employeeDao.delete(id);
        return "redirect:/emp";
    }
crud(增删改查搞定)
404页面
500页面
在templates下创建error文件即可

注销登录:
销毁session值,方法:
@RequestMapping("/loginOut")
    public String loginOut(HttpSession session){
        session.invalidate();//销毁session
        return "redirect:/index.html";
自此:一个简单基本的springBoot项目创建完毕。


 2459
2459


 被折叠的 条评论
为什么被折叠?
被折叠的 条评论
为什么被折叠?
 到【灌水乐园】发言


