


文章目录
环境
- RHEL 9.3
- Red Hat OpenShift Local 2.32
安装
Red Hat OpenShift Local将最小的OpenShift Container Platform(OCP)4集群和Podman容器运行时引入到本地计算机。这些运行时为开发和测试提供了最小环境。Red Hat OpenShift Local主要用于在开发者的桌面上运行。
Red Hat OpenShift Local包含 crc 命令行界面(CLI),使用所需的容器运行时来与Red Hat OpenShift Local实例交互。
需求
硬件
- 4个物理CPU核
- 9 GB内存
- 35 GB存储
注:9 GB内存貌似不够,我后来扩展到了16 GB内存。35 GB存储也不够, /home 至少需要50 GB存储。
操作系统
- 最新的两个RHEL/CentOS 8和9 release,以及最新的两个稳定Fedora release。
- 若使用RHEL,必须已在Red Hat Customer Portal注册。
- 不支持Ubuntu 18.04 LTS或更高版本,以及Debian 10或更高版本,需要手工搭建。
软件包
需要 libvirt 和 NetworkManager :
- Fedora/Red Hat Enterprise Linux/CentOS:
sudo dnf install NetworkManager - Debian/Ubuntu:
sudo apt install qemu-kvm libvirt-daemon libvirt-daemon-system network-manager
安装
在 https://console.redhat.com/openshift/create/local 处,下载最新的Red Hat OpenShift Local。
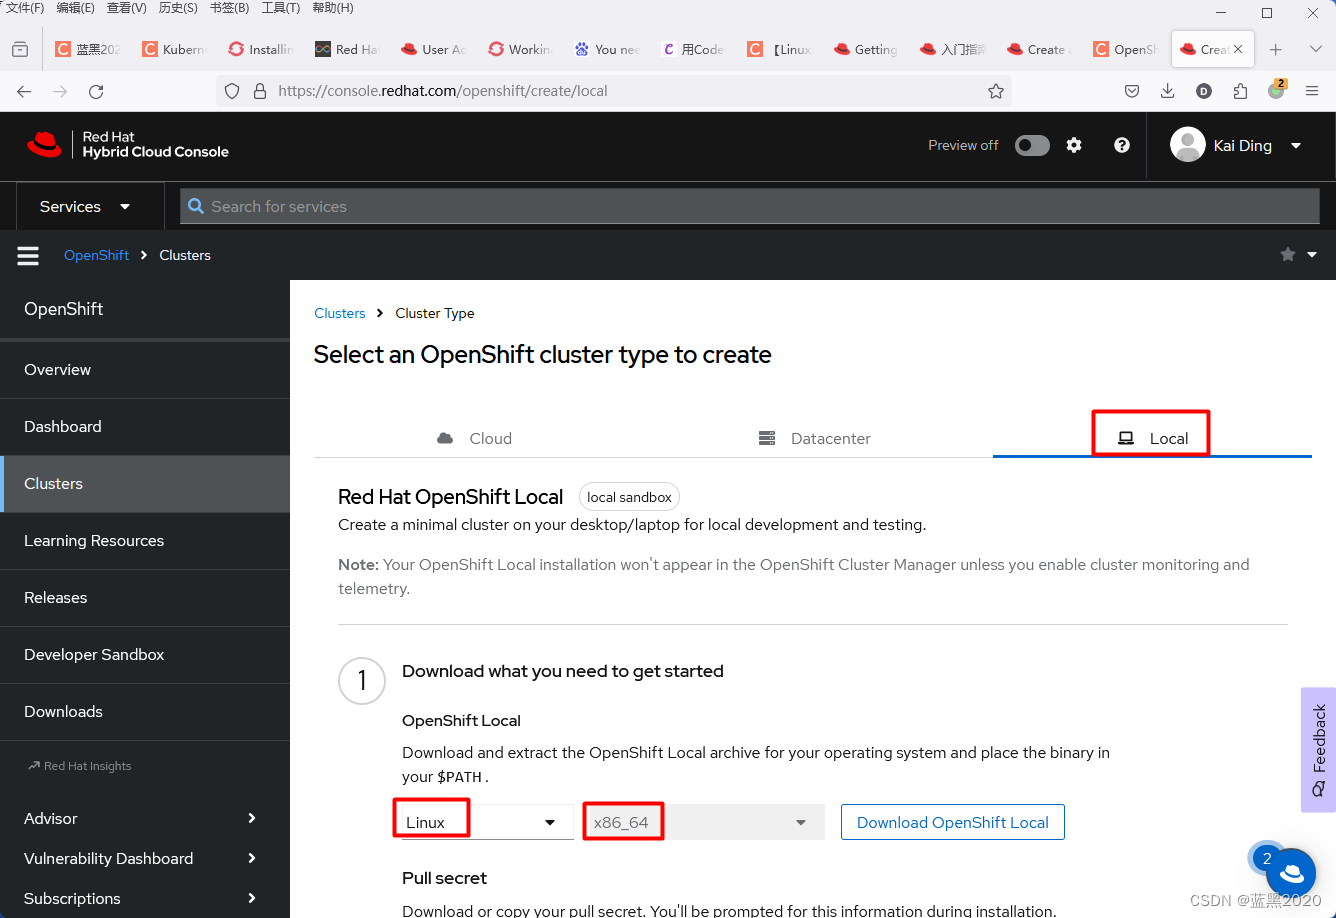
我下载的文件是 crc-linux-amd64.tar.xz 。
解压:
tar xvf crc-linux-amd64.tar.xz
解压后,生成了 crc 文件。为了方便,将其加入PATH。修改 ~/.bashrc 文件,添加如下内容:
export PATH=/home/ding/Downloads/crc-linux-2.32.0-amd64:$PATH
然后source一下:
. ~/.bashrc
注:本例中使用的是bash,如果使用其它shell,则要做相应的调整。
查看版本:
$ crc version
CRC version: 2.32.0+54a6f9
OpenShift version: 4.14.8
Podman version: 4.4.4
搭建环境:
crc setup
报错说 You need to enable virtualization in BIOS 。这是因为我使用了VMWare Workstation,默认没有开启虚拟机的虚拟化。说白了就是需要虚拟嵌套虚拟。
在虚拟机设置里,勾选“虚拟化Intel VT-x/EPT或AMD-V/RVI”,如下图所示:
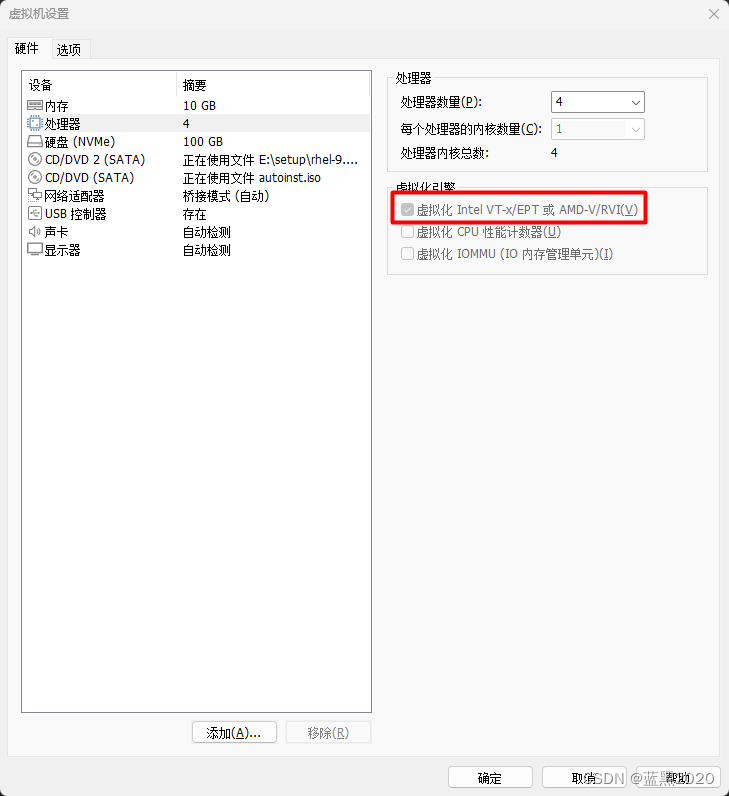
注:需要关闭虚拟机才能修改该选项。
然后再次运行 crc setup 搭建环境,这次成功了:
$ crc setup
INFO Using bundle path /home/ding/.crc/cache/crc_libvirt_4.14.8_amd64.crcbundle
INFO Checking if running as non-root
INFO Checking if running inside WSL2
INFO Checking if crc-admin-helper executable is cached
INFO Checking if running on a supported CPU architecture
INFO Checking if crc executable symlink exists
INFO Checking minimum RAM requirements
INFO Checking if Virtualization is enabled
INFO Checking if KVM is enabled
INFO Checking if libvirt is installed
INFO Installing libvirt service and dependencies
INFO Using root access: Installing virtualization packages
[sudo] password for ding:
INFO Checking if user is part of libvirt group
INFO Adding user to libvirt group
INFO Using root access: Adding user to the libvirt group
INFO Checking if active user/process is currently part of the libvirt group
INFO Checking if libvirt daemon is running
WARN No active (running) libvirtd systemd unit could be found - make sure one of libvirt systemd units is enabled so that it's autostarted at boot time.
INFO Starting libvirt service
INFO Using root access: Executing systemctl daemon-reload command
INFO Using root access: Executing systemctl start libvirtd
INFO Checking if a supported libvirt version is installed
INFO Checking if crc-driver-libvirt is installed
INFO Installing crc-driver-libvirt
INFO Checking crc daemon systemd service
INFO Setting up crc daemon systemd service
INFO Checking crc daemon systemd socket units
INFO Setting up crc daemon systemd socket units
INFO Checking if systemd-networkd is running
INFO Checking if NetworkManager is installed
INFO Checking if NetworkManager service is running
INFO Checking if /etc/NetworkManager/conf.d/crc-nm-dnsmasq.conf exists
INFO Writing Network Manager config for crc
INFO Using root access: Writing NetworkManager configuration to /etc/NetworkManager/conf.d/crc-nm-dnsmasq.conf
INFO Using root access: Changing permissions for /etc/NetworkManager/conf.d/crc-nm-dnsmasq.conf to 644
INFO Using root access: Executing systemctl daemon-reload command
INFO Using root access: Executing systemctl reload NetworkManager
INFO Checking if /etc/NetworkManager/dnsmasq.d/crc.conf exists
INFO Writing dnsmasq config for crc
INFO Using root access: Writing NetworkManager configuration to /etc/NetworkManager/dnsmasq.d/crc.conf
INFO Using root access: Changing permissions for /etc/NetworkManager/dnsmasq.d/crc.conf to 644
INFO Using root access: Executing systemctl daemon-reload command
INFO Using root access: Executing systemctl reload NetworkManager
INFO Checking if libvirt 'crc' network is available
INFO Setting up libvirt 'crc' network
INFO Checking if libvirt 'crc' network is active
INFO Starting libvirt 'crc' network
INFO Checking if CRC bundle is extracted in '$HOME/.crc'
INFO Checking if /home/ding/.crc/cache/crc_libvirt_4.14.8_amd64.crcbundle exists
INFO Getting bundle for the CRC executable
INFO Downloading bundle: /home/ding/.crc/cache/crc_libvirt_4.14.8_amd64.crcbundle...
4.36 GiB / 4.36 GiB [----------------------------------------------------------------------------------------------------------------------------------------------------------------------------------------------------] 100.00% 1.33 MiB/s
INFO Uncompressing /home/ding/.crc/cache/crc_libvirt_4.14.8_amd64.crcbundle
crc.qcow2:  17.12 GiB / 17.12 GiB [-------------------------------------------------------------------------------------------------------------------------------------------------------------------------------------------------] 100.00%
oc:  145.59 MiB / 145.59 MiB [------------------------------------------------------------------------------------------------------------------------------------------------------------------------------------------------------] 100.00%
Your system is correctly setup for using CRC. Use 'crc start' to start the instance
注:下载bundle那一步特别慢,bundle有4.36 GiB,下载了半个多小时。
接下来,启动crc:
$ crc start
INFO Using bundle path /home/ding/.crc/cache/crc_libvirt_4.14.8_amd64.crcbundle
INFO Checking if running as non-root
INFO Checking if running inside WSL2
INFO Checking if crc-admin-helper executable is cached
INFO Checking if running on a supported CPU architecture
INFO Checking if crc executable symlink exists
INFO Checking minimum RAM requirements
INFO Checking if Virtualization is enabled
INFO Checking if KVM is enabled
INFO Checking if libvirt is installed
INFO Checking if user is part of libvirt group
INFO Checking if active user/process is currently part of the libvirt group
INFO Checking if libvirt daemon is running
INFO Checking if a supported libvirt version is installed
INFO Checking if crc-driver-libvirt is installed
INFO Checking crc daemon systemd socket units
INFO Checking if systemd-networkd is running
INFO Checking if NetworkManager is installed
INFO Checking if NetworkManager service is running
INFO Checking if /etc/NetworkManager/conf.d/crc-nm-dnsmasq.conf exists
INFO Checking if /etc/NetworkManager/dnsmasq.d/crc.conf exists
INFO Checking if libvirt 'crc' network is available
INFO Checking if libvirt 'crc' network is active
INFO Loading bundle: crc_libvirt_4.14.8_amd64...
CRC requires a pull secret to download content from Red Hat.
You can copy it from the Pull Secret section of https://console.redhat.com/openshift/create/local.
? Please enter the pull secret
此处需要输入pull secret,在下载页面可以获取:
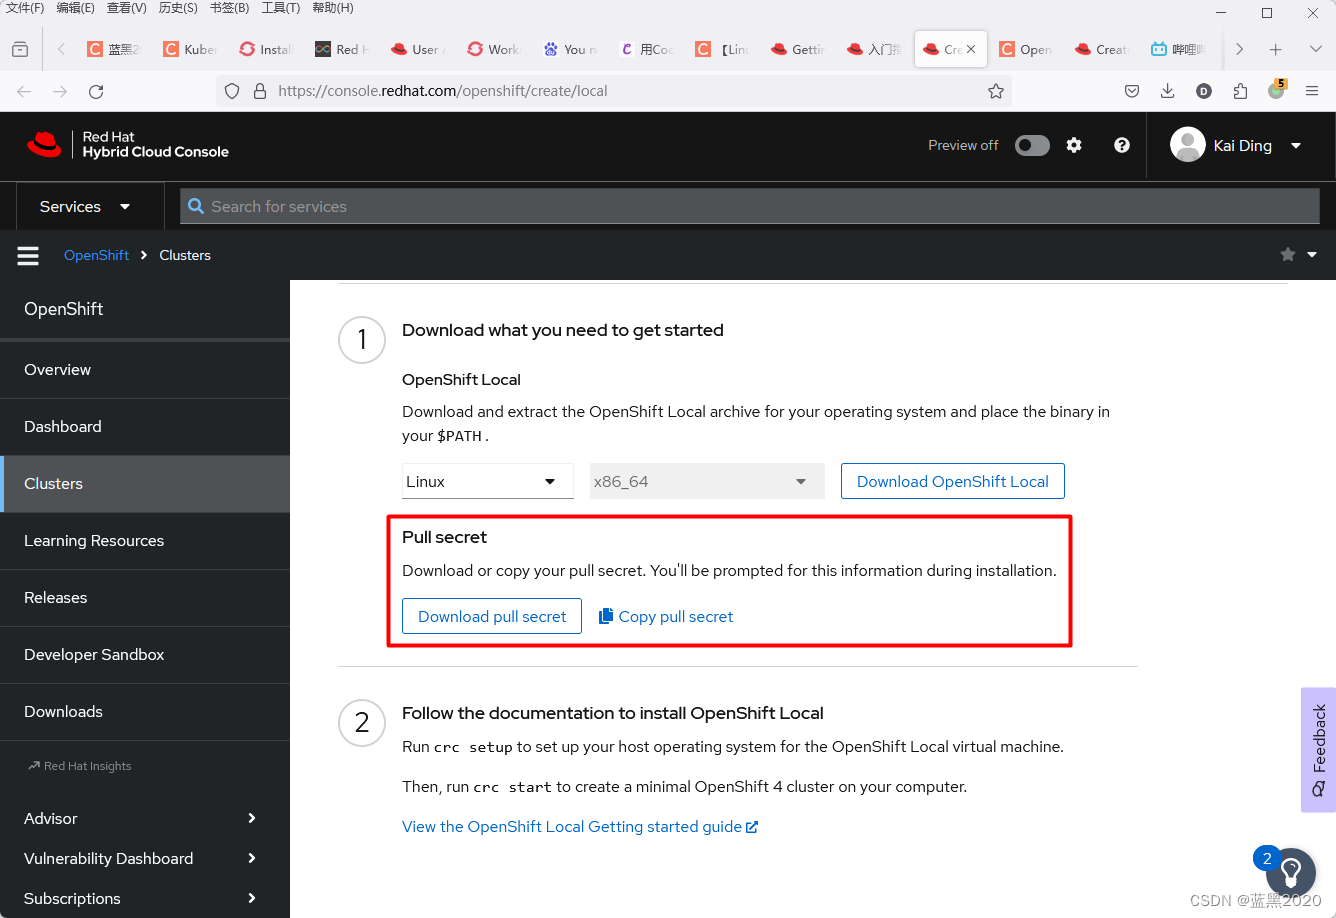
复制pull secret,并回车:
......
? Please enter the pull secret **************************************************************************************************************************************************************************************************************INFO Creating CRC VM for OpenShift 4.14.8...
INFO Generating new SSH key pair...
INFO Generating new password for the kubeadmin user
INFO Starting CRC VM for openshift 4.14.8...
INFO CRC instance is running with IP 192.168.130.11
INFO CRC VM is running
INFO Updating authorized keys...
INFO Configuring shared directories
INFO Check internal and public DNS query...
INFO Check DNS query from host...
INFO Verifying validity of the kubelet certificates...
INFO Starting kubelet service
INFO Waiting for kube-apiserver availability... [takes around 2min]
INFO Adding user's pull secret to the cluster...
INFO Updating SSH key to machine config resource...
INFO Waiting until the user's pull secret is written to the instance disk...
INFO Changing the password for the kubeadmin user
INFO Updating cluster ID...
INFO Updating root CA cert to admin-kubeconfig-client-ca configmap...
INFO Starting openshift instance... [waiting for the cluster to stabilize]
INFO 6 operators are progressing: image-registry, ingress, kube-storage-version-migrator, network, openshift-controller-manager, ...
INFO 4 operators are progressing: image-registry, ingress, openshift-controller-manager, operator-lifecycle-manager-packageserver
INFO 3 operators are progressing: image-registry, ingress, openshift-controller-manager
INFO 3 operators are progressing: image-registry, ingress, openshift-controller-manager
INFO 3 operators are progressing: image-registry, ingress, openshift-controller-manager
INFO 3 operators are progressing: image-registry, ingress, openshift-controller-manager
INFO Operator ingress is progressing
INFO All operators are available. Ensuring stability...
INFO Operators are stable (2/3)...
INFO Operators are stable (3/3)...
INFO Adding crc-admin and crc-developer contexts to kubeconfig...
Started the OpenShift cluster.

The server is accessible via web console at:
  https://console-openshift-console.apps-crc.testing

Log in as administrator:
  Username: kubeadmin
  Password: MGYZW-7CR7e-JSAoF-3oNH3

Log in as user:
  Username: developer
  Password: developer

Use the 'oc' command line interface:
  $ eval $(crc oc-env)
  $ oc login -u developer https://api.crc.testing:6443
从输出可见,有两种使用方式:
- web console:
https://console-openshift-console.apps-crc.testing(kubeadmin/MGYZW-7CR7e-JSAoF-3oNH3developer/developer) - 命令行:先用
eval $(crc oc-env),然后就可以使用oc命令了。
注: crc oc-env 的结果如下:
$ crc oc-env
export PATH="/home/ding/.crc/bin/oc:$PATH"
# Run this command to configure your shell:
# eval $(crc oc-env)
eval 表示运行命令,本例中也就是运行export命令。
如果嫌麻烦,也可以把该export命令放到 ~/.bashrc 里,以后就不用每次都运行 eval $(crc oc-env) 了。具体方法参见前面。
查看 oc 版本:
$ oc version
Client Version: 4.14.8
Kustomize Version: v5.0.1
Server Version: 4.14.8
Kubernetes Version: v1.27.8+4fab27b
使用Red Hat OpenShift Local
预设置
Red Hat OpenShift Local预设置代表一个托管的容器运行时,以及运行它的实例所需的系统资源绑定。Red Hat OpenShift Local提供以下预设置:
- openshift:最小的预配置的OCP 4.14集群
- microshift:MicroShift
- podman:podman容器运行时
设置Red Hat OpenShift Local
crc setup
crc setup 命令为Red Hat OpenShift Local实例搭建主机环境。
crc setup 命令会创建 ~/.crc 目录(如果该目录不存在)。
注意:不要以 root 用户或管理员运行 crc ,而要使用user帐户。
启动实例
crc start
访问OpenShift集群
访问OpenShift web console
$ crc console
Opening the OpenShift Web Console in the default browser...
自动打开浏览器,如下:
其地址为: https://console-openshift-console.apps-crc.testing
要想查看用户名和密码,使用如下命令:
$ crc console --credentials
To login as a regular user, run 'oc login -u developer -p developer https://api.crc.testing:6443'.
To login as an admin, run 'oc login -u kubeadmin -p wYUUp-aWcy7-3z27T-jSjQH https://api.crc.testing:6443'
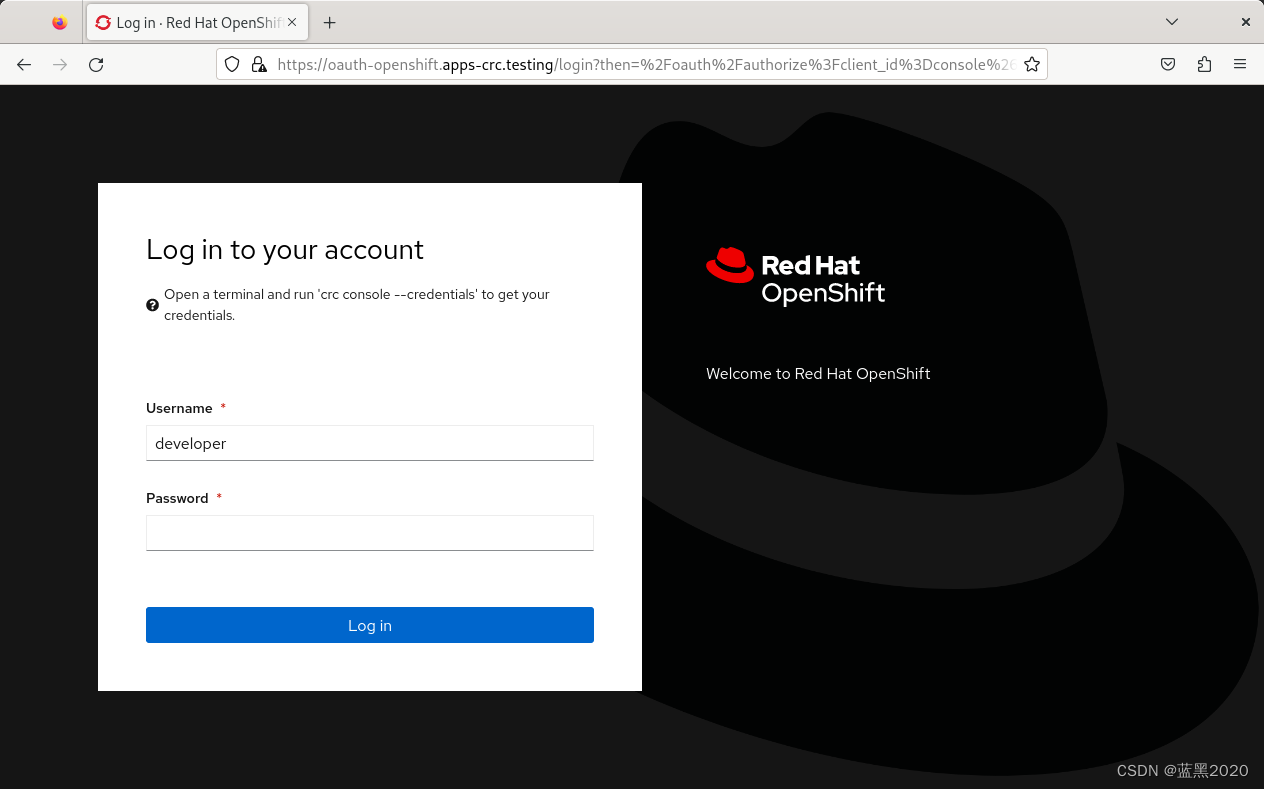
使用 developer/developer 登录console,如下:
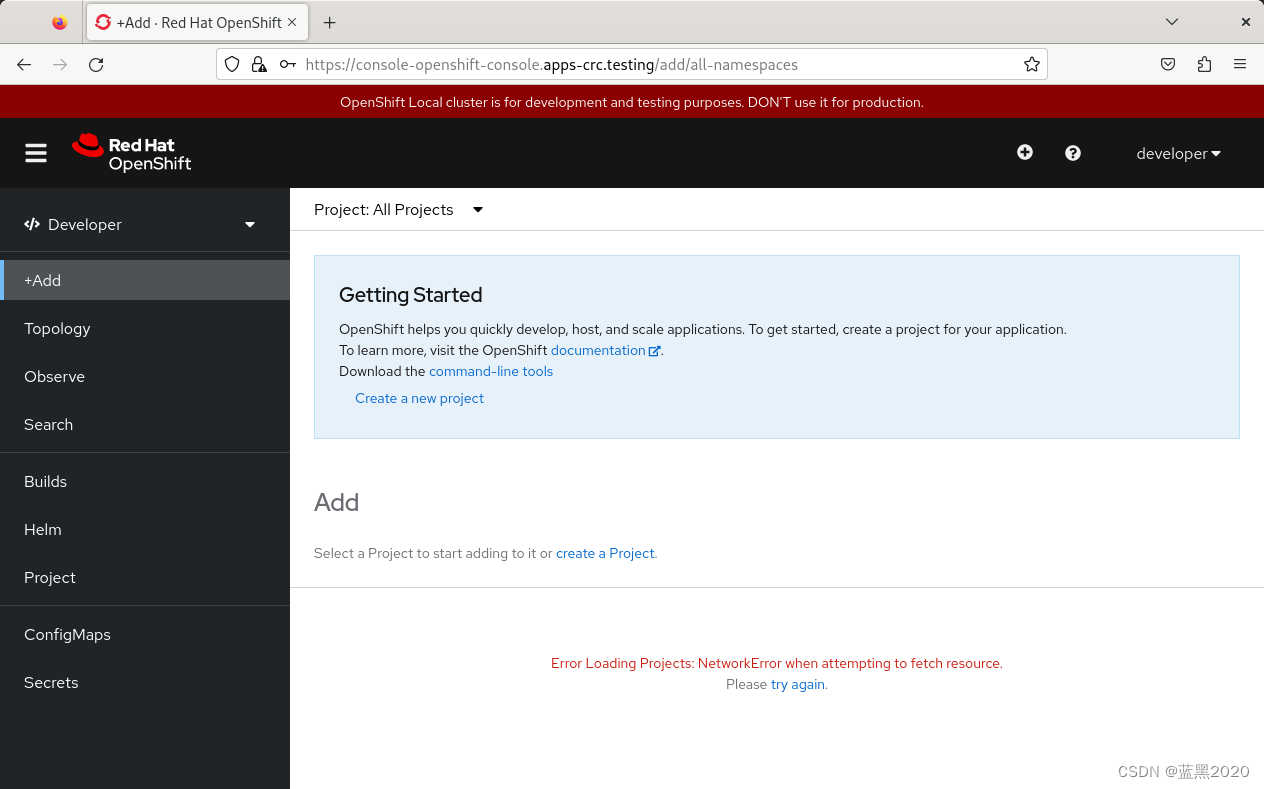
注意图片上有个报错信息,与网络有关,稍后会提到。
使用OpenShift CLI访问OpenShift集群
使用OpenShift CLI( oc )访问由Red Hat OpenShift Local管理的OCP集群。
$ oc login -u developer https://api.crc.testing:6443
error: dial tcp 192.168.130.11:6443: connect: no route to host - verify you have provided the correct host and port and that the server is currently running.
报错说 no route to host 。其实访问web console时,从截图上可以看到,也报错了。
$ ip addr
1: lo: <LOOPBACK,UP,LOWER_UP> mtu 65536 qdisc noqueue state UNKNOWN group default qlen 1000
    link/loopback 00:00:00:00:00:00 brd 00:00:00:00:00:00
    inet 127.0.0.1/8 scope host lo
       valid_lft forever preferred_lft forever
    inet6 ::1/128 scope host
       valid_lft forever preferred_lft forever
2: ens160: <BROADCAST,MULTICAST,UP,LOWER_UP> mtu 1500 qdisc mq state UP group default qlen 1000
    link/ether 00:0c:29:16:52:eb brd ff:ff:ff:ff:ff:ff
    altname enp3s0
    inet 192.168.1.12/24 brd 192.168.1.255 scope global dynamic noprefixroute ens160
       valid_lft 82326sec preferred_lft 82326sec
    inet6 2408:8207:18b0:e4c0:20c:29ff:fe16:52eb/64 scope global dynamic noprefixroute
       valid_lft 199309sec preferred_lft 112909sec
    inet6 fe80::20c:29ff:fe16:52eb/64 scope link noprefixroute
       valid_lft forever preferred_lft forever
3: virbr0: <NO-CARRIER,BROADCAST,MULTICAST,UP> mtu 1500 qdisc noqueue state DOWN group default qlen 1000
    link/ether 52:54:00:54:2d:98 brd ff:ff:ff:ff:ff:ff
    inet 192.168.122.1/24 brd 192.168.122.255 scope global virbr0
       valid_lft forever preferred_lft forever
4: crc: <NO-CARRIER,BROADCAST,MULTICAST,UP> mtu 1500 qdisc noqueue state DOWN group default qlen 1000
    link/ether 52:54:00:fd:be:d0 brd ff:ff:ff:ff:ff:ff
    inet 192.168.130.1/24 brd 192.168.130.255 scope global crc
       valid_lft forever preferred_lft forever
可见,并没有 192.168.130.11 这个IP地址。这是从哪来的呢?
查看 /etc/NetworkManager/dnsmasq.d/crc.conf :
server=/apps-crc.testing/192.168.130.11
server=/crc.testing/192.168.130.11
查看 /etc/hosts :
127.0.0.1        localhost localhost.localdomain localhost4 localhost4.localdomain4
::1              localhost localhost.localdomain localhost6 localhost6.localdomain6

# Added by CRC
192.168.130.11   api.crc.testing canary-openshift-ingress-canary.apps-crc.testing console-openshift-console.apps-crc.testing default-route-openshift-image-registry.apps-crc.testing downloads-openshift-console.apps-crc.testing oauth-openshift.apps-crc.testing
# End of CRC section
可见,是CRC添加的这个IP地址。
我在网上google了一下,搜到这个issue:https://github.com/crc-org/crc/issues/695 。
里面提到,要修改 /etc/resolv.conf ,添加:
nameserver 192.168.130.11 # IP address of the crc vm
完整内容如下:
# Generated by NetworkManager
nameserver 192.168.130.11 # IP address of the crc vm
nameserver 127.0.0.1
options edns0 trust-ad
然后重新搭建crc:
crc delete -f && crc setup && crc start
这次OK了。
$ oc login -u developer https://api.crc.testing:6443
Logged into "https://api.crc.testing:6443" as "developer" using existing credentials.

You don't have any projects. You can try to create a new project, by running

    oc new-project <projectname>
但是,没过一会儿,又开始报错了。
注:貌似和修改 /etc/resolv.conf 无关,暂时OK是因为重启了crc。
真正的原因我也没搞明白,可能是因为内存不够用?参见下面。
由于crc启动特别慢,占的内存非常大,所以我给虚拟机增大了内存,由10240MB增大到了16384MB。然后重启虚拟机,再重新搭建crc环境,这次貌似好了,而且 /etc/resolv.conf 被自动恢复成原来的内容了。看来之前报错不是 /etc/resolv.conf 的问题,难道是因为内存不够用?
访问内部 OpenShift registry
在Red Hat OpenShift Local实例中运行的OCP集群默认包含一个内部容器image registry,可用作本地开发的容器image的发布目标。要访问内部的OCP registry,操作如下:
查看当前用户:
$ oc whoami
kubeadmin
登录registry:
$ oc registry login --insecure=true
info: Using registry public hostname default-route-openshift-image-registry.apps-crc.testing
Saved credentials for default-route-openshift-image-registry.apps-crc.testing into /run/user/1000/containers/auth.json
创建一个project:
$ oc new-project demo
Now using project "demo" on server "https://api.crc.testing:6443".

You can add applications to this project with the 'new-app' command. For example, try:

    oc new-app rails-postgresql-example

to build a new example application in Ruby. Or use kubectl to deploy a simple Kubernetes application:

    kubectl create deployment hello-node --image=registry.k8s.io/e2e-test-images/agnhost:2.43 -- /agnhost serve-hostname
注:OCP里的project类似于Kubernetes里的namespace。
镜像一个容器image例子:
$ oc image mirror registry.access.redhat.com/ubi8/ubi:latest=default-route-openshift-image-registry.apps-crc.testing/demo/ubi8:latest --insecure=true --filter-by-os=linux/amd64
default-route-openshift-image-registry.apps-crc.testing/
  demo/ubi8
    blobs:
      registry.access.redhat.com/ubi8/ubi sha256:179275e28757e902d242e99738cd114c81b0ed29ff316bb4a894520ff0d1788f 6.271KiB
      registry.access.redhat.com/ubi8/ubi sha256:e5dd65eaa63224754368dcdbf2fea59a5ac3226ace1879d2899343d46d7fffa0 75.11MiB
    manifests:
      sha256:1a6f007562e41dae23fb3a573664d48018d094ec3cd01c96474cbbf7aef54572 -> latest
  stats: shared=0 unique=2 size=75.12MiB ratio=1.00

phase 0:
  default-route-openshift-image-registry.apps-crc.testing demo/ubi8 blobs=2 mounts=0 manifests=1 shared=0

info: Planning completed in 2.22s
uploading: default-route-openshift-image-registry.apps-crc.testing/demo/ubi8 sha256:e5dd65eaa63224754368dcdbf2fea59a5ac3226ace1879d2899343d46d7fffa0 75.11MiB
sha256:1a6f007562e41dae23fb3a573664d48018d094ec3cd01c96474cbbf7aef54572 default-route-openshift-image-registry.apps-crc.testing/demo/ubi8:latest
info: Mirroring completed in 3.84s (20.47MB/s)
查看imagestream:
$ oc get is
NAME   IMAGE REPOSITORY                                                    TAGS     UPDATED
ubi8   default-route-openshift-image-registry.apps-crc.testing/demo/ubi8   latest   About a minute ago
在imagestream中启用image查找:
$ oc set image-lookup ubi8
imagestream.image.openshift.io/ubi8 image lookup updated
该设置允许imagestream作为image源,而无需提供内部registry的完整URL。
使用刚刚push的image创建pod:
$ oc run demo --image=ubi8 --command -- sleep 600s
Warning: would violate PodSecurity "restricted:v1.24": allowPrivilegeEscalation != false (container "demo" must set securityContext.allowPrivilegeEscalation=false), unrestricted capabilities (container "demo" must set securityContext.capabilities.drop=["ALL"]), runAsNonRoot != true (pod or container "demo" must set securityContext.runAsNonRoot=true), seccompProfile (pod or container "demo" must set securityContext.seccompProfile.type to "RuntimeDefault" or "Localhost")
pod/demo created
查看pod:
$ oc get pod
NAME   READY   STATUS    RESTARTS   AGE
demo   1/1     Running   0          50s
使用odo部署示例应用
可以使用 odo 来创建OpenShift project和应用。本例将一个示例应用部署到Red Hat OpenShift Local实例中运行的OCP集群。
安装odo
参见 https://odo.dev/docs/overview/installation 。
下载:
curl -L https://developers.redhat.com/content-gateway/rest/mirror/pub/openshift-v4/clients/odo/v3.15.0/odo-linux-amd64 -o odo
安装:
sudo install -o root -g root -m 0755 odo /usr/local/bin/odo
查看版本:
$ odo version
odo v3.15.0 (10b5e8a8f)

Server: https://api.crc.testing:6443
Kubernetes: v1.27.8+4fab27b
Podman Client: 4.6.1
登录:
$ odo login -u developer -p developer
? Help odo improve by allowing it to collect usage data. Read about our privacy statement: https://developers.redhat.com/article/tool-data-collection. You can change your preference later by changing the ConsentTelemetry preference. (Y/n? Help odo improve by allowing it to collect usage data. Read about our privacy statement: https://developers.redhat.com/article/tool-data-collection. You can change your preference later by changing the ConsentTelemetry preference. Yes
Connecting to the OpenShift cluster

Login successful.

You don't have any projects. You can try to create a new project, by running

    odo create project <projectname>
注:官网上的odo貌似是v2,而我下载的odo是v3,二者不太兼容,参见 https://odo.dev/docs/user-guides/v3-migration-guide 。
关于odo,后面的例子我没再继续做。
停止实例
$ crc stop
INFO Stopping kubelet and all containers...
INFO Stopping the instance, this may take a few minutes...
Stopped the instance
删除实例
$ crc delete
Do you want to delete the instance? [y/N]: y
Deleted the instance
注意:该命令会导致Red Hat OpenShift Local实例中存储的数据丢失。
参考
https://access.redhat.com/documentation/en-us/red_hat_openshift_local/2.32/html-single/getting_started_guide/indexhttps://developers.redhat.com/products/openshift-local/overviewhttps://console.redhat.com/openshift/create/localhttps://github.com/crc-org/crc/issues/695https://odo.dev/docs/overview/installation


 917
917

 被折叠的 条评论
为什么被折叠?
被折叠的 条评论
为什么被折叠?
 到【灌水乐园】发言


