


前言
有时候要在 Flutter 应用程序中使用不同的字体,就好像会使用 UI 创建的自定义字体,或者可能会使用 Google Flonts 中的字体。在 Flutter 应用程序中使用字体分两步完成:
- 在
pubspec.yaml中声明它们,以确保它们包含在应用程序中 - 通过
TextStyle属性使用字体
1.在 pubsec.yaml 声明字体
name: my_application
description: A new Flutter project.

dependencies:
 flutter:
   sdk: flutter
flutter:

 # The following line ensures that the Material Icons font is
 # included with your application, so that you can use the icons in
 # the material Icons class.
 uses-material-design: true
 fonts:
  - family: NotoSns
    fonts:
      # https://fonts.google.com/specimen/Noto+Sans+TC -->对应字体下载地址 这里可以不填 只是注释
      - asset: fonts/NotoSansTC-Black.otf
  - family: Sriaskdi
    fonts:
      # https://fonts.google.com/specimen/Srisakdi
      - asset: fonts/Srisakdi-Regular.ttf
  - family: NotoSerifTC
    fonts:
      # https://fonts.google.com/specimen/Noto+Serif+TC
      - asset: fonts/NotoSerifTC-Black.ttf
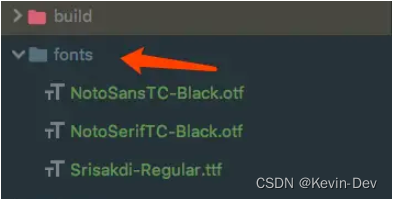
上面格式不能错一点,否则会编译不通过,上面还添加了对应字体的下载地址。把下载好的字体文件放到 fonts 下:
family 是字体的名称,可以在TextStyle的fontFamily属性中使用,asset是相对于pubspec.yaml文件的路径,这些文件包含字体中字形的轮廓,在构建应用程序时,这些文件会包含在应用程序的asset包中。
可以给字体设置粗细、倾斜等样式
2. 代码实现
import 'package:flutter/material.dart';
//显示的内容
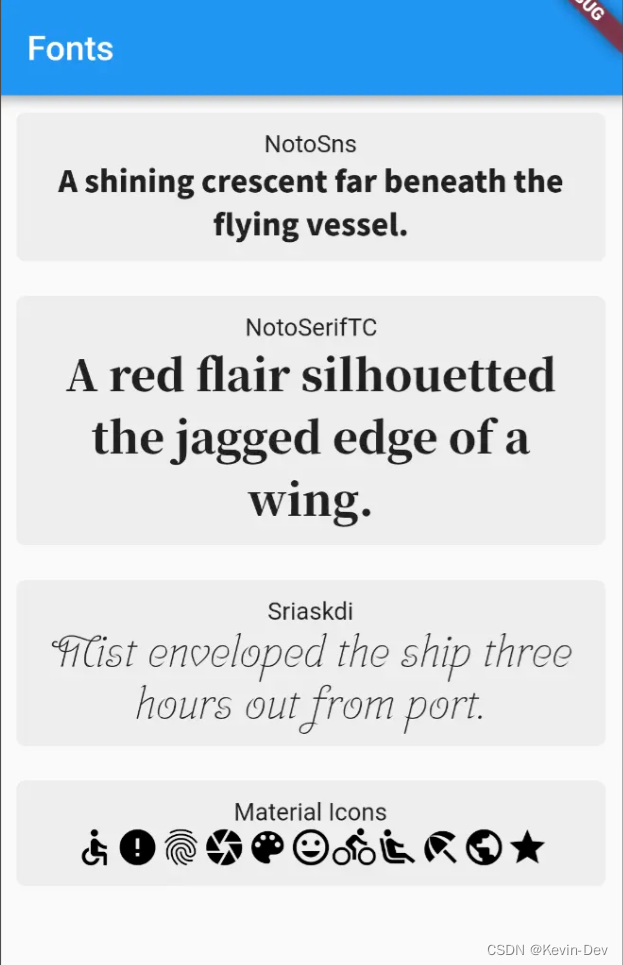
const String words1 = "Almost before we knew it, we had left the ground.";
const String words2 = "A shining crescent far beneath the flying vessel.";
const String words3 = "A red flair silhouetted the jagged edge of a wing.";
const String words4 = "Mist enveloped the ship three hours out from port.";
void main() {
runApp(new MyApp());
}
class MyApp extends StatelessWidget {
@override
Widget build(BuildContext context) {
return new MaterialApp(
title: 'Flutter Fonts',
theme: new ThemeData(
primarySwatch: Colors.blue,
),
home: new FontsPage(),
);
}
}
class FontsPage extends StatefulWidget {
@override
_FontsPageState createState() => new _FontsPageState();
}
class _FontsPageState extends State<FontsPage> {
@override
Widget build(BuildContext context) {
// https://fonts.google.com/specimen/Noto+Sans+TC
var NotoSnsContainer = new Container(
child: new Column(
children: <Widget>[
new Text(
"NotoSns",
),
new Text(
words2,
textAlign: TextAlign.center,
style: new TextStyle(
fontFamily: "NotoSns",-->务必和pubspec.yaml定义的标识对应
fontSize: 17.0,
),
),
],
),
margin: const EdgeInsets.all(10.0),
padding: const EdgeInsets.all(10.0),
decoration: new BoxDecoration(
color: Colors.grey.shade200,
borderRadius: new BorderRadius.all(new Radius.circular(5.0)),
),
);
// https://fonts.google.com/specimen/Noto+Serif+TC
var NotoSerifTCContainer = new Container(
child: new Column(
children: <Widget>[
new Text(
"NotoSerifTC",
),
new Text(
words3,
textAlign: TextAlign.center,
style: new TextStyle(
fontFamily: "NotoSerifTC",
fontSize: 25.0,
),
),
],
),
margin: const EdgeInsets.all(10.0),
padding: const EdgeInsets.all(10.0),
decoration: new BoxDecoration(
color: Colors.grey.shade200,
borderRadius: new BorderRadius.all(new Radius.circular(5.0)),
),
);
// https://fonts.google.com/specimen/Srisakdi
var SriaskdiContainer = new Container(
child: new Column(
children: <Widget>[
new Text(
"Sriaskdi",
),
new Text(
words4,
textAlign: TextAlign.center,
style: new TextStyle(
fontFamily: "Sriaskdi",
fontSize: 25.0,
),
),
],
),
margin: const EdgeInsets.all(10.0),
padding: const EdgeInsets.all(10.0),
decoration: new BoxDecoration(
color: Colors.grey.shade200,
borderRadius: new BorderRadius.all(new Radius.circular(5.0)),
),
);
// Material Icons font - included with Material Design
String icons = "";
// https://material.io/icons/#ic_accessible
// accessible:  or 0xE914 or E914
icons += "\u{E914}";
// https://material.io/icons/#ic_error
// error:  or 0xE000 or E000
icons += "\u{E000}";
// https://material.io/icons/#ic_fingerprint
// fingerprint:  or 0xE90D or E90D
icons += "\u{E90D}";
// https://material.io/icons/#ic_camera
// camera:  or 0xE3AF or E3AF
icons += "\u{E3AF}";
// https://material.io/icons/#ic_palette
// palette:  or 0xE40A or E40A
icons += "\u{E40A}";
// https://material.io/icons/#ic_tag_faces
// tag faces:  or 0xE420 or E420
icons += "\u{E420}";
// https://material.io/icons/#ic_directions_bike
// directions bike:  or 0xE52F or E52F
icons += "\u{E52F}";
// https://material.io/icons/#ic_airline_seat_recline_extra
// airline seat recline extra:  or 0xE636 or E636
icons += "\u{E636}";
// https://material.io/icons/#ic_beach_access
// beach access:  or 0xEB3E or EB3E
icons += "\u{EB3E}";
// https://material.io/icons/#ic_public
// public:  or 0xE80B or E80B
icons += "\u{E80B}";
// https://material.io/icons/#ic_star
// star:  or 0xE838 or E838
icons += "\u{E838}";
var materialIconsContainer = new Container(
child: new Column(
children: <Widget>[
new Text(
"Material Icons",
),
new Text(
icons,
textAlign: TextAlign.center,
style: new TextStyle(
inherit: false,
fontFamily: "MaterialIcons",
color: Colors.black,
fontStyle: FontStyle.normal,
fontSize: 25.0,
),
),
],
),
margin: const EdgeInsets.all(10.0),
padding: const EdgeInsets.all(10.0),
decoration: new BoxDecoration(
color: Colors.grey.shade200,
borderRadius: new BorderRadius.all(new Radius.circular(5.0)),
),
);
return new Scaffold(
appBar: new AppBar(
title: new Text("Fonts"),
),
body: new ListView(
//主界面
children: <Widget>[
//字体样式一
NotoSnsContainer,
//字体样式二
NotoSerifTCContainer,
//字体样式三
SriaskdiContainer,
//material图标
materialIconsContainer,
],
),
);
}
}
3. 效果图


 881
881

 被折叠的 条评论
为什么被折叠?
被折叠的 条评论
为什么被折叠?
 到【灌水乐园】发言


