


一. 项目场景:
提示:这里简述项目相关背景:
目前我在使用QCustomPlot过程中,由于需要频繁添加数据并刷新图表,考虑还是开启opengl功能。但是在开启opengl之后,由于多图表显示以及自适应高分辨率的使用,导致出现了两个问题,记录如下。
1. 下载freeglut源码
freeglut官网下载地址
2. 编译freeglut源码
(1)创建build文件夹,来存放cmake编译之后产生的项目文件

(2) cmake编译
打开VsCode,打开源码文件,进入build文件夹,然后cmake
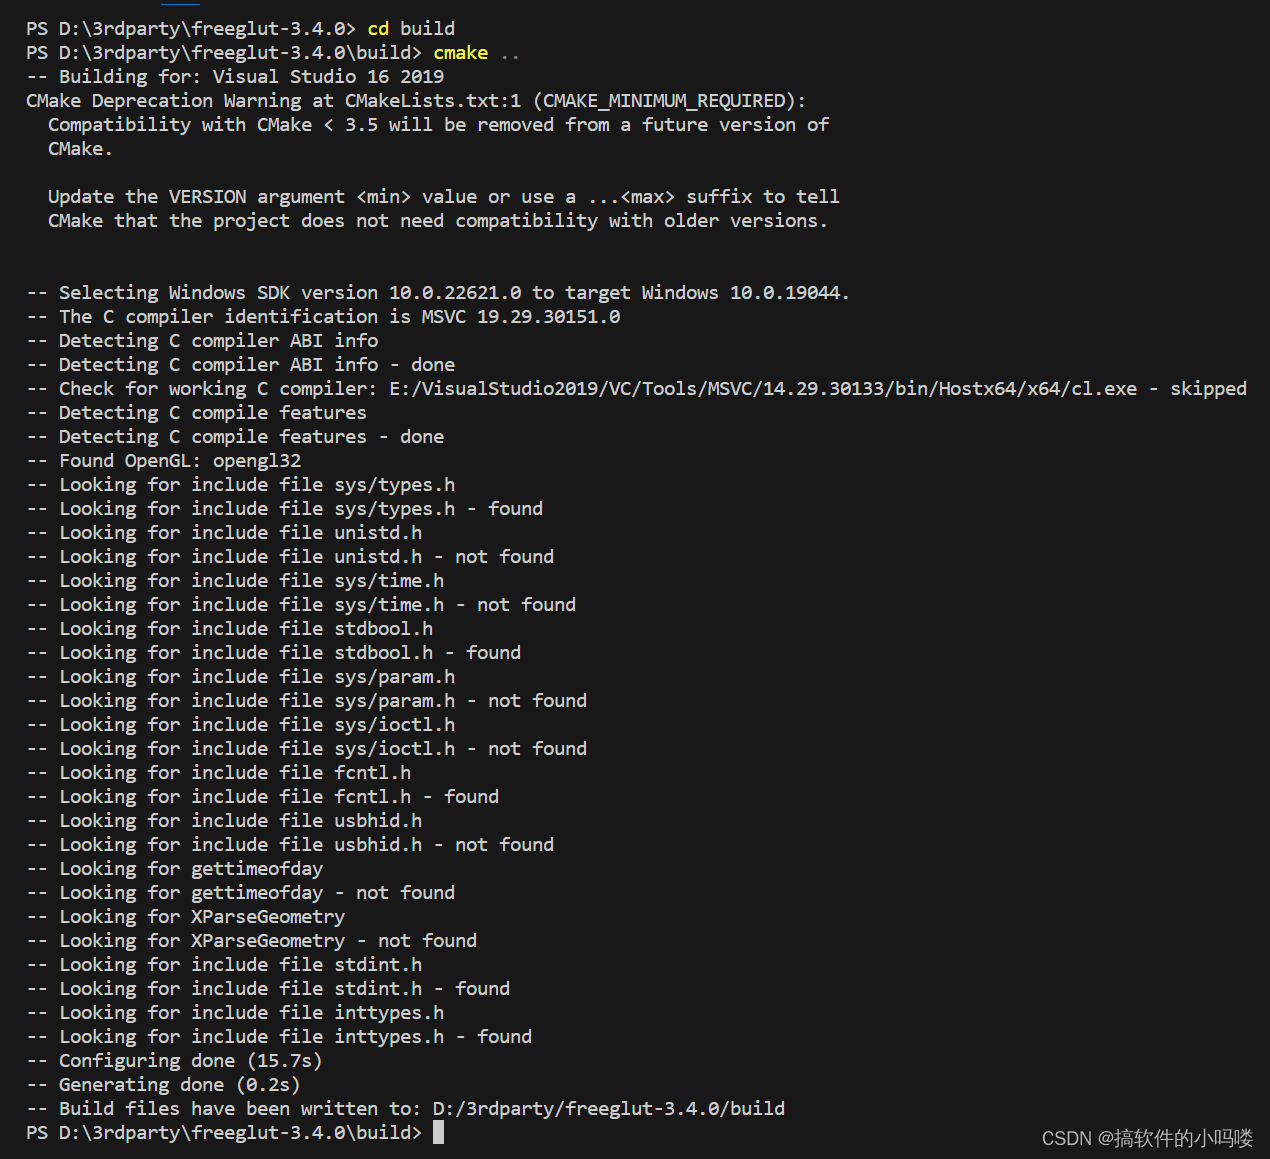
在build文件夹内生成sln项目文件

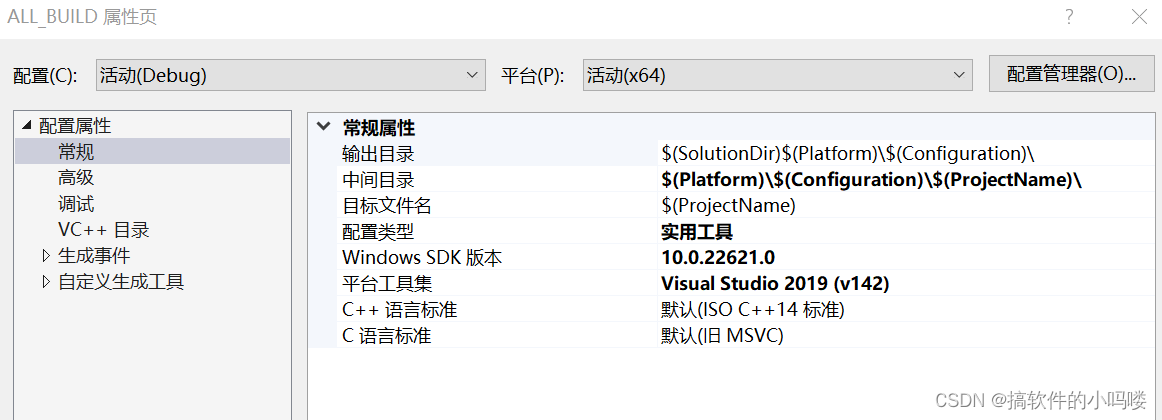
(3)我使用的是VS2019+v142工具集,选择ALL_BUILD,使用Debug和Release进行编译生成Debug和Release下的动态库文件。
生成的dll在bin文件夹中,生成的lib文件子啊lib文件夹内。


3. QCustomPlot添加OpenGl
# test.pro文件

QT      += printsupport opengl
DEFINES += QCUSTOMPLOT_USE_OPENGL

win32: LIBS += -L$$PWD/../../3rdparty/freeglut/ -lfreeglut -lfreeglut_static -lopengl32
INCLUDEPATH += $$PWD/../../3rdparty/freeglut
DEPENDPATH += $$PWD/../../3rdparty/freeglut
# test.cpp
# qcustomplot开启opengl

_plot->setOpenGl(true);
二. 问题描述
正常时的图片如下:

在开启opengl之后,出现了两个问题。
问题一: 当界面上有多张qcustomplot图表时,多张图表的刷新会出现混乱。

问题二: Qt开启高分辨率自适应策略时,QCustomPlot开启opengl之后,图表内的像素比例会出现问题,导致图表显示异常。

解决方案:
问题一:
那是因为在开启opengl之后,opengl内部的上下文出现紊乱导致的。在qcustomplot.cpp内找到这个函数,添加下面代码即可。
#  qcustomplot.cpp

void QCPPaintBufferGlFbo::draw(QCPPainter *painter) const
{
  if (!painter || !painter->isActive())
  {
    qDebug() << Q_FUNC_INFO << "invalid or inactive painter passed";
    return;
  }
  if (!mGlFrameBuffer)
  {
    qDebug() << Q_FUNC_INFO << "OpenGL frame buffer object doesn't exist, reallocateBuffer was not called?";
    return;
  }

// 添加这行代码即可
  if(QOpenGLContext::currentContext() != mGlContext.toStrongRef()){
      mGlContext.toStrongRef()->makeCurrent(mGlContext.toStrongRef()->surface());
  }

  painter->drawImage(0, 0, mGlFrameBuffer->toImage());
}
问题二:
在QCustomPlot的构造函数中,更改像素比列为从当前桌面获取。
setBufferDevicePixelRatio(QApplication::desktop()->devicePixelRatioF());
#  qcustomplot.cpp

QCustomPlot::QCustomPlot(QWidget *parent) :
  QWidget(parent),
  xAxis(0),
  yAxis(0),
  xAxis2(0),
  yAxis2(0),
  legend(0),
  mBufferDevicePixelRatio(1.0), // will be adapted to primary screen below
  mPlotLayout(0),
  mAutoAddPlottableToLegend(true),
  mAntialiasedElements(QCP::aeNone),
  mNotAntialiasedElements(QCP::aeNone),
  mInteractions(0),
  mSelectionTolerance(8),
  mNoAntialiasingOnDrag(false),
  mBackgroundBrush(Qt::white, Qt::SolidPattern),
  mBackgroundScaled(true),
  mBackgroundScaledMode(Qt::KeepAspectRatioByExpanding),
  mCurrentLayer(0),
  mPlottingHints(QCP::phCacheLabels|QCP::phImmediateRefresh),
  mMultiSelectModifier(Qt::ControlModifier),
  mSelectionRectMode(QCP::srmNone),
  mSelectionRect(0),
  mOpenGl(false),
  mMouseHasMoved(false),
  mMouseEventLayerable(0),
  mMouseSignalLayerable(0),
  mReplotting(false),
  mReplotQueued(false),
  mOpenGlMultisamples(16),
  mOpenGlAntialiasedElementsBackup(QCP::aeNone),
  mOpenGlCacheLabelsBackup(true)
{
  setAttribute(Qt::WA_NoMousePropagation);
  setAttribute(Qt::WA_OpaquePaintEvent);
  setFocusPolicy(Qt::ClickFocus);
  setMouseTracking(true);
  QLocale currentLocale = locale();
  currentLocale.setNumberOptions(QLocale::OmitGroupSeparator);
  setLocale(currentLocale);
#ifdef QCP_DEVICEPIXELRATIO_SUPPORTED
#  ifdef QCP_DEVICEPIXELRATIO_FLOAT
  setBufferDevicePixelRatio(QApplication::desktop()->devicePixelRatioF());	//将代码中获取设备像素比例改成从桌面获取
//  setBufferDevicePixelRatio(QWidget::devicePixelRatioF());
#  else
  setBufferDevicePixelRatio(QWidget::devicePixelRatio());
#  endif
#endif

  mOpenGlAntialiasedElementsBackup = mAntialiasedElements;
  mOpenGlCacheLabelsBackup = mPlottingHints.testFlag(QCP::phCacheLabels);
  // create initial layers:
  mLayers.append(new QCPLayer(this, QLatin1String("background")));
  mLayers.append(new QCPLayer(this, QLatin1String("grid")));
  mLayers.append(new QCPLayer(this, QLatin1String("main")));
  mLayers.append(new QCPLayer(this, QLatin1String("axes")));
  mLayers.append(new QCPLayer(this, QLatin1String("legend")));
  mLayers.append(new QCPLayer(this, QLatin1String("overlay")));
  updateLayerIndices();
  setCurrentLayer(QLatin1String("main"));
  layer(QLatin1String("overlay"))->setMode(QCPLayer::lmBuffered);

  // create initial layout, axis rect and legend:
  mPlotLayout = new QCPLayoutGrid;
  mPlotLayout->initializeParentPlot(this);
  mPlotLayout->setParent(this); // important because if parent is QWidget, QCPLayout::sizeConstraintsChanged will call QWidget::updateGeometry
  mPlotLayout->setLayer(QLatin1String("main"));
  QCPAxisRect *defaultAxisRect = new QCPAxisRect(this, true);
  mPlotLayout->addElement(0, 0, defaultAxisRect);
  xAxis = defaultAxisRect->axis(QCPAxis::atBottom);
  yAxis = defaultAxisRect->axis(QCPAxis::atLeft);
  xAxis2 = defaultAxisRect->axis(QCPAxis::atTop);
  yAxis2 = defaultAxisRect->axis(QCPAxis::atRight);
  legend = new QCPLegend;
  legend->setVisible(false);
  defaultAxisRect->insetLayout()->addElement(legend, Qt::AlignRight|Qt::AlignTop);
  defaultAxisRect->insetLayout()->setMargins(QMargins(12, 12, 12, 12));

  defaultAxisRect->setLayer(QLatin1String("background"));
  xAxis->setLayer(QLatin1String("axes"));
  yAxis->setLayer(QLatin1String("axes"));
  xAxis2->setLayer(QLatin1String("axes"));
  yAxis2->setLayer(QLatin1String("axes"));
  xAxis->grid()->setLayer(QLatin1String("grid"));
  yAxis->grid()->setLayer(QLatin1String("grid"));
  xAxis2->grid()->setLayer(QLatin1String("grid"));
  yAxis2->grid()->setLayer(QLatin1String("grid"));
  legend->setLayer(QLatin1String("legend"));

  // create selection rect instance:
  mSelectionRect = new QCPSelectionRect(this);
  mSelectionRect->setLayer(QLatin1String("overlay"));

  setViewport(rect()); // needs to be called after mPlotLayout has been created

  replot(rpQueuedReplot);
  }


 429
429

 被折叠的 条评论
为什么被折叠?
被折叠的 条评论
为什么被折叠?
 到【灌水乐园】发言


