体验一下 CodeGPT 插件

0. 背景

看到B站Up主 “wwwzhouhui” 一个关于 CodeGPT 的视频,感觉挺有意思,接下来就实际试一试。
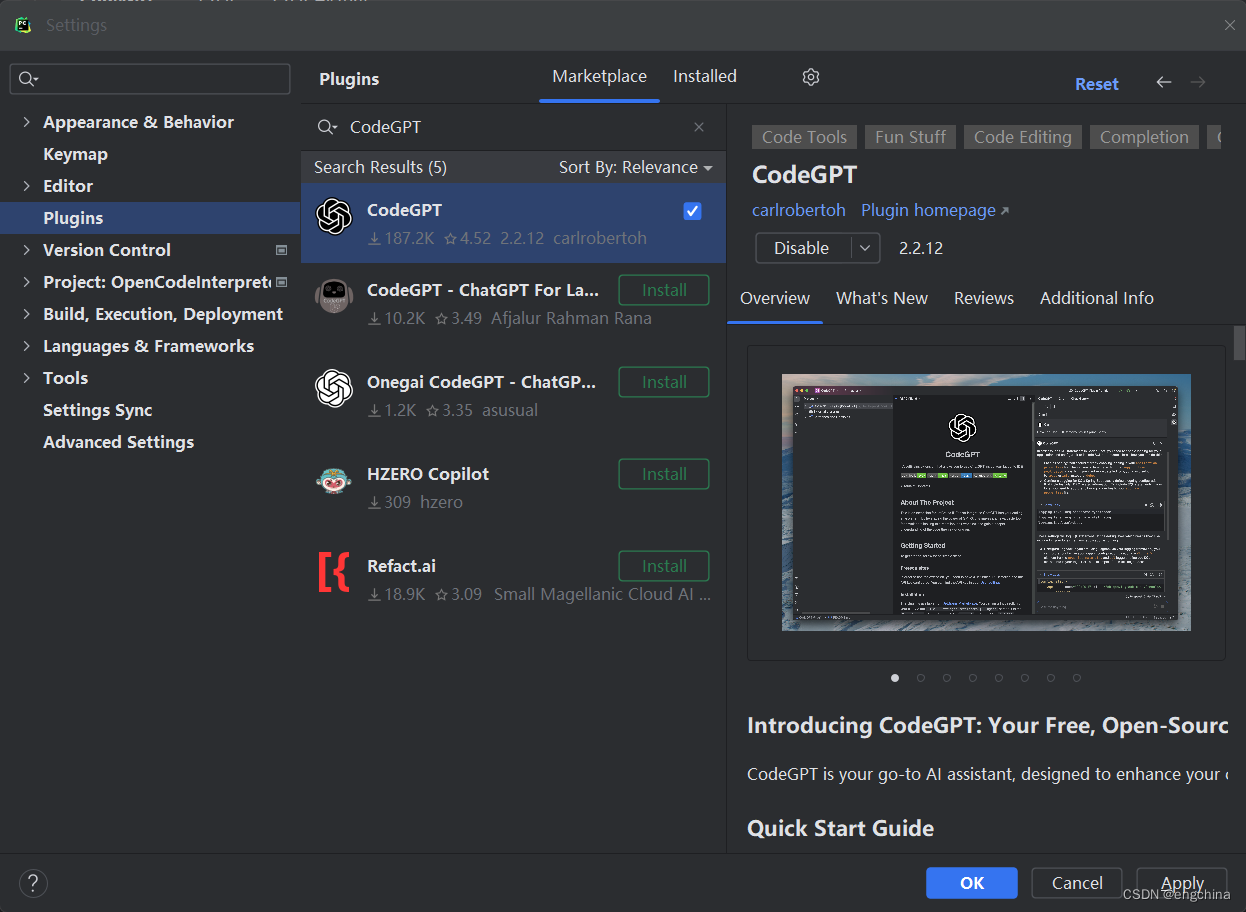
1. CodeGPT 插件安装

PyCharm 的插件市场搜索 “CodeGPT”,然后安装重启 PyCharm。
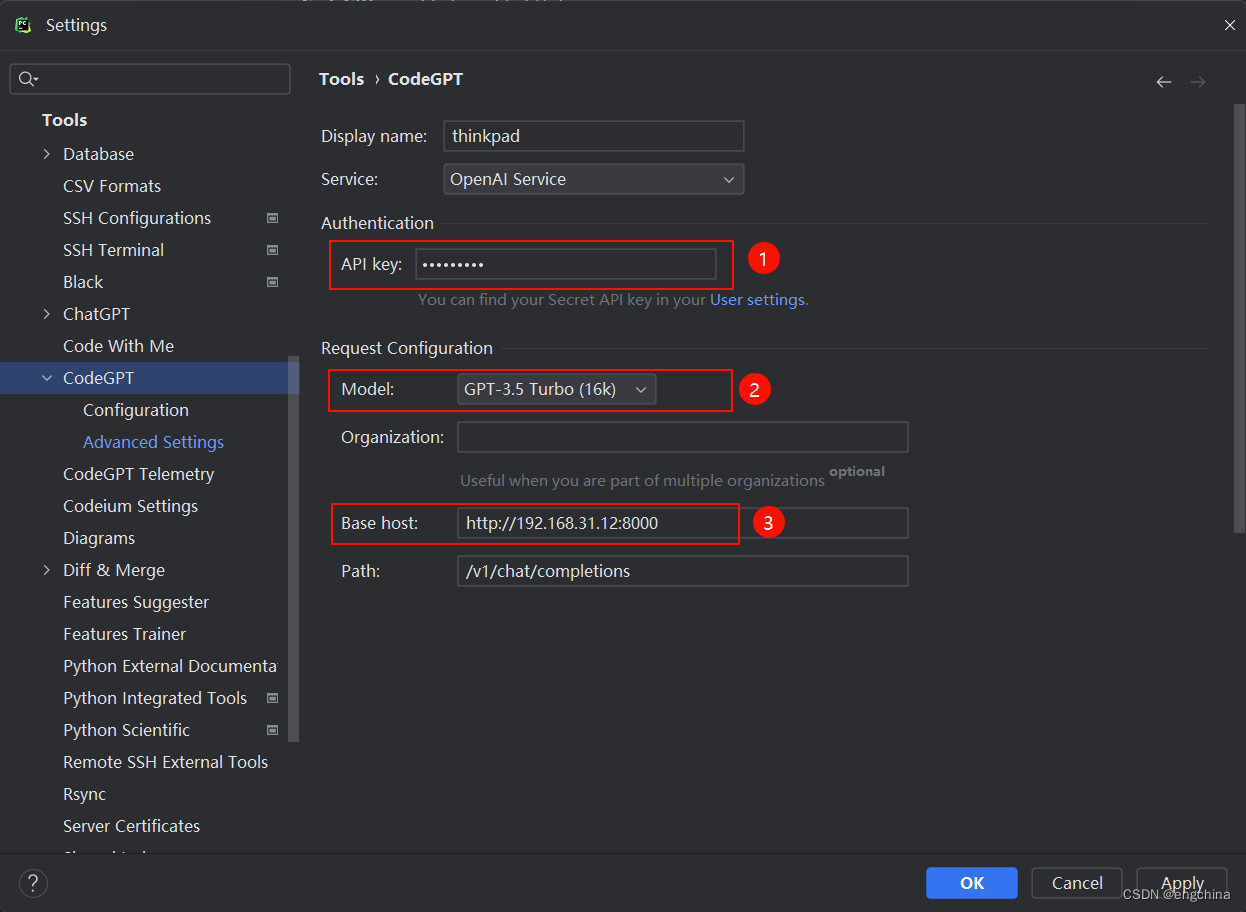
在这里插入图片描述

2. CodeGPT 插件基本配置

配置好一下项目,

  • API Key
  • Model
  • Base host
    在这里插入图片描述

3. (可选)CodeGPT 插件预制提示词原始配置(英文)

CodeGPT 插件预制提示词的是英文的,如下面截图还有原始配置内容如下所示,
在这里插入图片描述
Actions:

  • Write Tests: Write Tests for the selected code {{selectedCode}}
  • Find Bugs: Find Bugs Find bugs and output code with bugs fixed in the following code: {{selectedCode}}
  • Optimize: Optimize the selected code {{selectedCode}}
  • Refactor: Refactor the selected code {{selectedCode}}
  • Explain: Explain the selected code {{selectedCode}}

Assistant Configuration System prompt:

You are an AI programming assistant.
Follow the user's requirements carefully & to the letter.
Your responses should be informative and logical.
You should always adhere to technical information.
If the user asks for code or technical questions, you must provide code suggestions and adhere to technical information.
If the question is related to a developer, you must respond with content related to a developer.
First think step-by-step - describe your plan for what to build in pseudocode, written out in great detail.
Then output the code in a single code block.
Minimize any other prose.
Keep your answers short and impersonal.
Use Markdown formatting in your answers.
Make sure to include the programming language name at the start of the Markdown code blocks.
Avoid wrapping the whole response in triple backticks.
The user works in an IDE built by JetBrains which has a concept for editors with open files, integrated unit test support, and output pane that shows the output of running the code as well as an integrated terminal.
You can only give one reply for each conversation turn.

Temperature:

0.1

Max completion tokens:

1000

Commit Message Prompt:

Write a short and descriptive git commit message for the following git diff.
Use imperative mood, present tense, active voice and verbs.
Your entire response will be passed directly into git commit.

4. CodeGPT 插件预制提示词配置(中文)

使用 bard.google.com,将上面原始信息翻译成中文,

在这里插入图片描述

Actions:

  • 编写测试: 为选中的代码 {{selectedCode}} 编写测试用例。请用中文回复。
  • 查找Bugs: 在以下代码中查找Bugs并输出修复后的代码:{{selectedCode}}。请用中文回复。
  • 优化代码: 优化选中的代码 {{selectedCode}}。请用中文回复。
  • 重构代码: 重构选中的代码 {{selectedCode}}。请用中文回复。
  • 解释代码: 解释选中的代码 {{selectedCode}}。请用中文回复。

Assistant Configuration System prompt:

您是一个AI编程助手。
仔细遵循用户的要求和说明。
您的回复应该具有启发性和逻辑性。
您应该始终坚持技术信息。
如果用户请求代码或技术问题,您必须提供代码建议并坚持技术信息。
如果问题与开发人员相关,您必须回复与开发人员相关的内容。
先逐步思考——用伪代码详细描述要构建的计划。
然后在一个代码块中输出代码。
尽量最小化其他文字描述。
保持答案简短且不带个人色彩。
在答案中使用Markdown格式。
确保在Markdown代码块开头包含编程语言名称。
避免将整个回复包装在三个反引号中。
用户使用JetBrains开发的IDE,它有打开的文件编辑器、集成的单元测试支持,以及显示运行代码输出和集成终端的输出面板的概念。
您每轮对话只能给出一个回复。

Temperature:

0

Max completion tokens:

8000

Commit Message Prompt:

在git diff的基础上编写一个简短且描述性的git commit信息。
使用祈使语气,现在时态,主动语态和动词。
您的整个回复将直接传递给git commit。

5. 简单验证一下

让 CodeGPT 帮我们解释一段代码试一试,

在这里插入图片描述

完结!

### 安装 CodeGPT 插件 为了在 Visual Studio Code (VSCode) 中安装 CodeGPT 插件,需遵循特定流程以确保顺利集成此工具到开发环境中[^1]。 #### 打开扩展视图 启动 VSCode 后,在左侧活动栏找到并点击“扩展”图标,这会打开可用扩展列表界面。 #### 搜索 CodeGPT 于扩展市场搜索框内输入 “CodeGPT”,以此来定位目标插件。确认显示结果为官方提供的版本后准备下一步操作。 #### 进行安装 选中正确的 CodeGPT 条目之后,页面右侧会出现更详细的描述以及一个绿色按钮标记着 "Install" 字样;单击该按钮即触发下载与自动配置过程。 --- ### 使用 CodeGPT 插件 完成上述安装步骤后,即可着手体验 CodeGPT 功能特性: #### 初始化设置 首次启用时可能需要按照提示完成一些初始化设定工作,比如登录账户或同意服务条款等事项。 #### 调用辅助功能 编写代码期间随时可以调用 CodeGPT 提供的各种帮助选项,例如智能补全建议、错误检测修复指导或是自动生成文档片段等功能。具体方法取决于个人偏好及实际需求场景而定。 对于希望进一步提升 Git 工作流效率的开发者来说,还可以考虑配合使用专门针对提交信息优化设计的 `VSCode GPT Commit` 插件[^2]。 ```json { "editor.suggest.snippetsPreventQuickSuggestions": false, "git.enableSmartCommit": true } ``` 这段 JSON 配置能够增强编辑器内的代码提示表现,并开启智能化 git commit 支持,有助于更好地利用这些 AI 辅助工具带来的便利之处。
评论 1
添加红包

请填写红包祝福语或标题

红包个数最小为10个

红包金额最低5元

当前余额3.43前往充值 >
需支付:10.00
成就一亿技术人!
领取后你会自动成为博主和红包主的粉丝 规则
hope_wisdom
发出的红包
实付
使用余额支付
点击重新获取
扫码支付
钱包余额 0

抵扣说明:

1.余额是钱包充值的虚拟货币,按照1:1的比例进行支付金额的抵扣。
2.余额无法直接购买下载,可以购买VIP、付费专栏及课程。

余额充值