


- 前言
大家好,我是作者蜉蝣,在之前的博客中我告诉大家如何用matlab调用dlib: matlab调用dlib
相信这有帮到当时一头雾水的你们。然而dlib虽然强大,但是仍然存在很多bug。这次蜉蝣就给大家带来matlab如何使用dlib的face_landmark以及这其中存在的问题。下面先附上我用matlab的调用成果: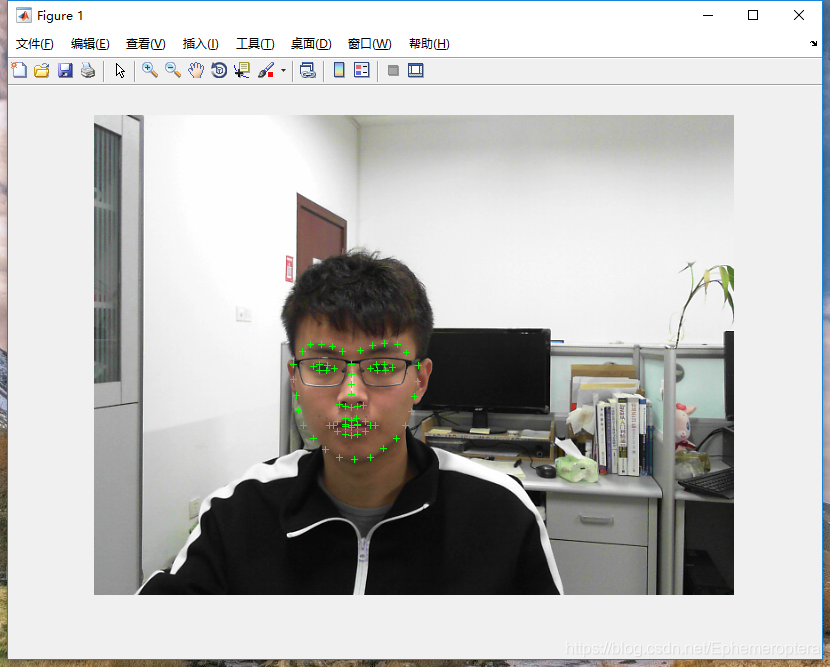
- 方法
在教学之前,我们先看看dlib中如何实现landmark,为此我们可以仿照作者思路编写面向matlab的c++接口。
首先定位到:…\dlib-19.1\examples ,打开 face_landmark_detection_ex.cpp 文件。注意到开头的注释中有:
Finally, note that the face detector is fastest when compiled with at least
    SSE2 instructions enabled.  So if you are using a PC with an Intel or AMD
    chip then you should enable at least SSE2 instructions.  If you are using
    cmake to compile this program you can enable them by using one of the
    following commands when you create the build project:
        cmake path_to_dlib_root/examples -DUSE_SSE2_INSTRUCTIONS=ON
        cmake path_to_dlib_root/examples -DUSE_SSE4_INSTRUCTIONS=ON
        cmake path_to_dlib_root/examples -DUSE_AVX_INSTRUCTIONS=ON
    This will set the appropriate compiler options for GCC, clang, Visual
    Studio, or the Intel compiler.  If you are using another compiler then you
    need to consult your compiler's manual to determine how to enable these
    instructions.  Note that AVX is the fastest but requires a CPU from at least
    2011.  SSE4 is the next fastest and is supported by most current machines.
这里作者想告诉我们,启用SSE2/4,或者AVX指令集可以加速人脸检测模块。所以在后面的Cmake命令中我们可以开启相关指令集加速程序运行。当然前提也是你的处理器要有支持的指令集,那么问题来了,如何知道自己的CPU支持哪些指令集呢?问题不大!大家可以网上下载一个叫做CPU—Z的应用就可以查看自己硬件情况啦。下面是我的CPU信息:
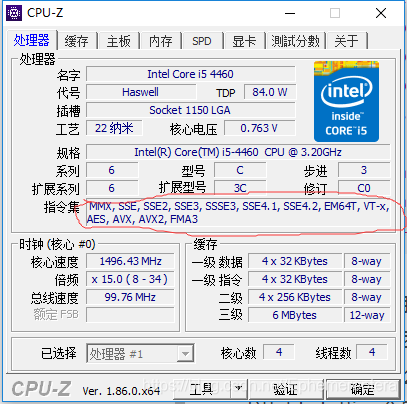
看来我的CPU都支持这些指令集,那你们也赶紧看看吧。
好了!言归正传,我们得看看代码如何实现的吧,为了方便大家理解,我将关键语句提炼出来并注以注释:
frontal_face_detector detector = get_frontal_face_detector();//开启人脸检测器detector
 shape_predictor sp;  //开启轮廓(即landmarks)预测器sp
 deserialize(argv[1]) >> sp; //给sp加载训练模型即shape_predictor_68_face_landmarks.dat文件,
 							可在"http://dlib.net/files/shape_predictor_68_face_landmarks.dat.bz2"下载

for (int i = 2; i < argc; ++i) //遍历所有图片
        {
              array2d<rgb_pixel> img;
            load_image(img, argv[i]);  //读取当前图像
            pyramid_up(img);    //放大图像

            std::vector<rectangle> dets = detector(img); //检测当前图像中的人脸ROI(可能多个)
            std::vector<full_object_detection> shapes;//保存68landmarks向量shapes

            for (unsigned long j = 0; j < dets.size(); ++j)  //遍历当前图像所有人脸ROI
            {
                full_object_detection shape = sp(img, dets[j]);//检测人脸ROI中的68 landmarks
                shapes.push_back(shape); //保存当前ROI内容入栈
            }

            win.clear_overlay();
            win.set_image(img);//显示当前图像
            win.add_overlay(render_face_detections(shapes));//添加轮廓线条(由68landmarks渲染生成)
        }
    }
怎么样?是不是不难!那我们对…/example用Cmake编译和生成的face_landmark_detection_ex.exe试一试吧!
定位到…\dlib-19.1\examples\build\Release下,对了别忘记训练文件shape_predictor_68_face_landmarks.dat和图片也要放在这里哦。
打开控制台,进入当前目录,参考我的she.jpg图像:
face_landmark_detection_ex.exe shape_predictor_68_face_landmarks.dat she.jpg
结果有:
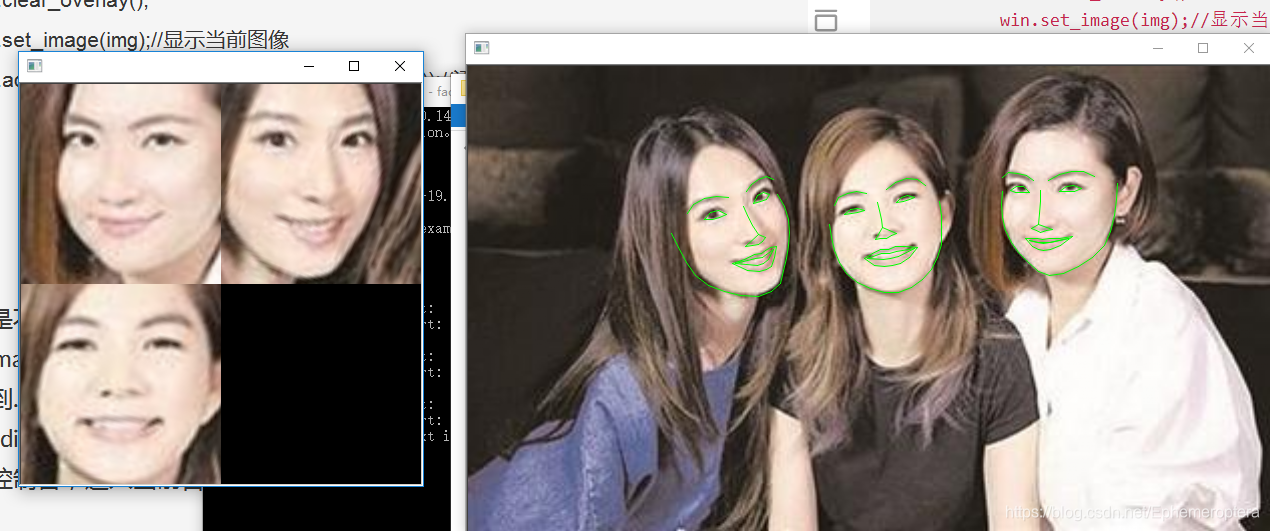
以上只是小试牛刀,接下来我们就要正式的用matlab实现调用此功能,那么就得试着去写一个c++接口啦!
首先定位到:…\dlib-19.1\dlib\matlab下 新建一个cpp文件我就取名face_landmarks.cpp吧。
在编写之前我们必须得清楚matlab数据类型和dlib数据类型的转换,因此不妨打开
example_mex_function.cpp
注释中有如下说明:
VALID INPUT AND OUTPUT ARGUMENTS
        The mex wrapper can handle the following kinds of input and output arguments:
            - Types corresponding to a MATLAB matrix
                - a dlib::matrix containing any kind of scalar value.
                - a dlib::array2d containing any kind of scalar value.
                - a dlib::vector containing any kind of scalar value.
                - a dlib::point
                - matrix_colmajor or fmatrix_colmajor
                  These are just typedefs for matrix containing double or float and using a
                  column major memory layout.  However, they have the special distinction
                  of being fast to use in mex files since they sit directly on top of
                  MATLAB's built in matrices.  That is, while other types of arguments copy
                  a MATLAB object into themselves, the matrix_colmajor and fmatrix_colmajor
                  do no such copy and are effectively zero overhead methods for working on
                  MATLAB's matrices.

            - RGB color images
                - dlib::array2d<dlib::rgb_pixel> can be used to represent
                  MATLAB uint8 MxNx3 images.

            - Types corresponding to a MATLAB scalar
                - any kind of scalar value, e.g. double, int, etc.

            - Types corresponding to a MATLAB string
                - std::string

            - Types corresponding to a MATLAB cell array
                - a std::vector or dlib::array containing any of the above
                  types of objects or std::vector or dlib::array objects.

            - matlab_struct and matlab_object.  These are special types defined in the
              call_matlab.h file and correspond to matlab structs and arbitrary matlab
              objects respectively.
可以看到编者清楚地给出了matlab和dlib变量之间的替代关系,大致意思归纳如下:
| MATLAB | DLIB |
|---|---|
| matrix | matrix、array2d、vector、point 、matrix_colmajor or fmatrix_colmajor |
| 图片MxNx3(uint8) | array2d<rgb_pixel> |
| 标量(int\double\etc.) | 同matlab |
| string | std::string |
| cell | std::vector、dlib::array |
注意到在面向matlab中,仅有array2d<rgb_pixel> 支持了非标量类型rgb_pixel,而其他结构仅支持标量(int\double\etc.)类型,例如在写接口中:std::vector<rgb_pixel>是不允许的!!!
还有接口中也可以使用matlab中的一些函数,在头文件call_matlab.h提供了可支持的几个matlab函数,其中调用格式为:call_matlab(f, A, returns(result)); f为matlab函数,A为输入,result输出。例如:call_matlab(“eigs”, m, returns(v), returns(d)); 求矩阵v的特征值,返回结果为d。
当然还有其他一些调用格式,具体请参考函数example_mex_callback\class\function\struct.cpp
-
编写face_landmarks.cpp
遵循编写格式,在添加好需要的头文件后,我们需要在函数入口mex_function(类似main)定义输入输出变量。其中定义规则如下:因为mex_function是void型,所以输入输出以引用的形式表达:输入参数:const <类型>& 变量名
输出参数:<类型>& 变量名
在这里我们希望送进去一张图片,返回给我们人脸的ROI和其中的landmarks.因此入口不妨这样写:
void mex_function(
	const array2d<rgb_pixel>& img,
	matrix<double,1,4>& bboxes,
	matrix<double,68,2>& shape
	)
其中bboxes是人脸ROI坐标,shapes是landmarks集合。
后续提取landmark操作,上面已经说过,这里不再赘述,如果有想参考我的代码同学可以打开下面链接下载:(https://download.csdn.net/download/ephemeroptera/10769656)
- 用Cmake编译和生成
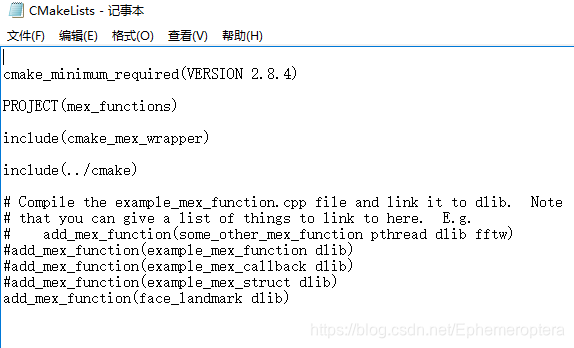
定位到…\dlib\matlab,打开CMakeLists.txt ,注释掉其他工程 ,添加face_landmark如下:
-
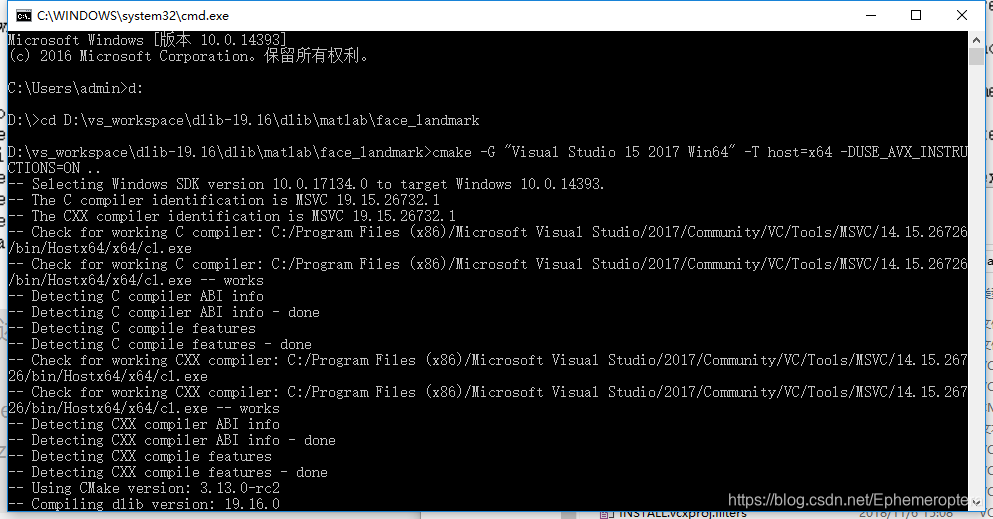
新建文件夹face_landmark并进入,打开控制台 进入当前目录,输入:
cmake -G “Visual Studio 15 2017 Win64” -T host=x64 -DUSE_AVX_INSTRUCTIONS=ON … (vs2017+AVX指令集+64位)
读者可以按照自己的配置参考。
接下来用VS打开ALL_BUILD修复配置,具体可参考我另一篇博客
(https://blog.csdn.net/Ephemeroptera/article/details/83687043)
右键配置face_landmark属性,
链接器->常规: 添加 …\MATLAB\R2018a\extern\lib\win64\microsoft 到附加目录库。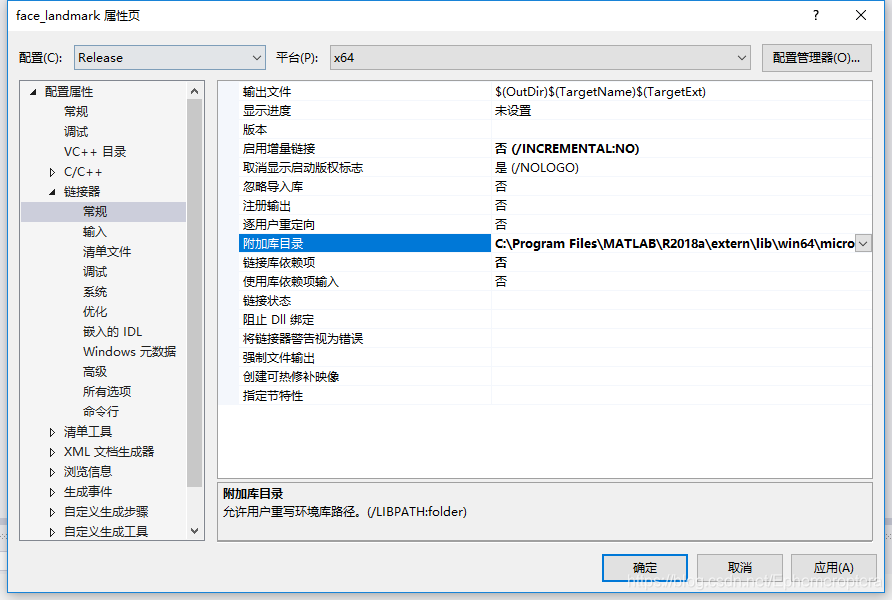
链接器->输入:添加libut.lib ,libmat.lib到附加依赖项

链接器->命令行:添加/EXPORT:mexFunction
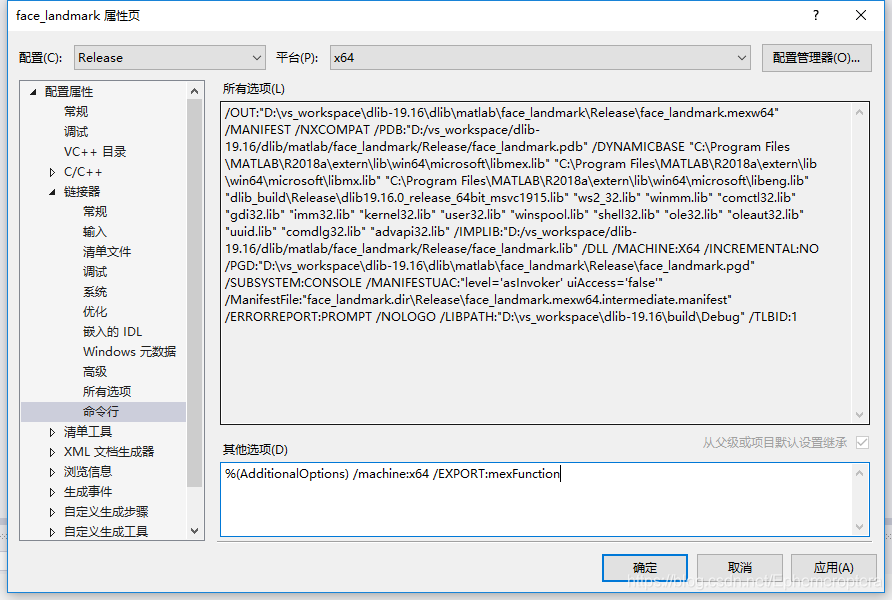
这样配置就修复好了,还有注意你的配置平台和编译平台要一致哦,我的是Release+X64。
然后右键face_landmark重新生成就可以了。

- matlab调用摄像头试一试
成功生成后会在…/face_landmark/Release(Debug)下生成.mexw64文件。在/dlib/matlab下添加训练文件shape_predictor_68_face_landmarks.dat。
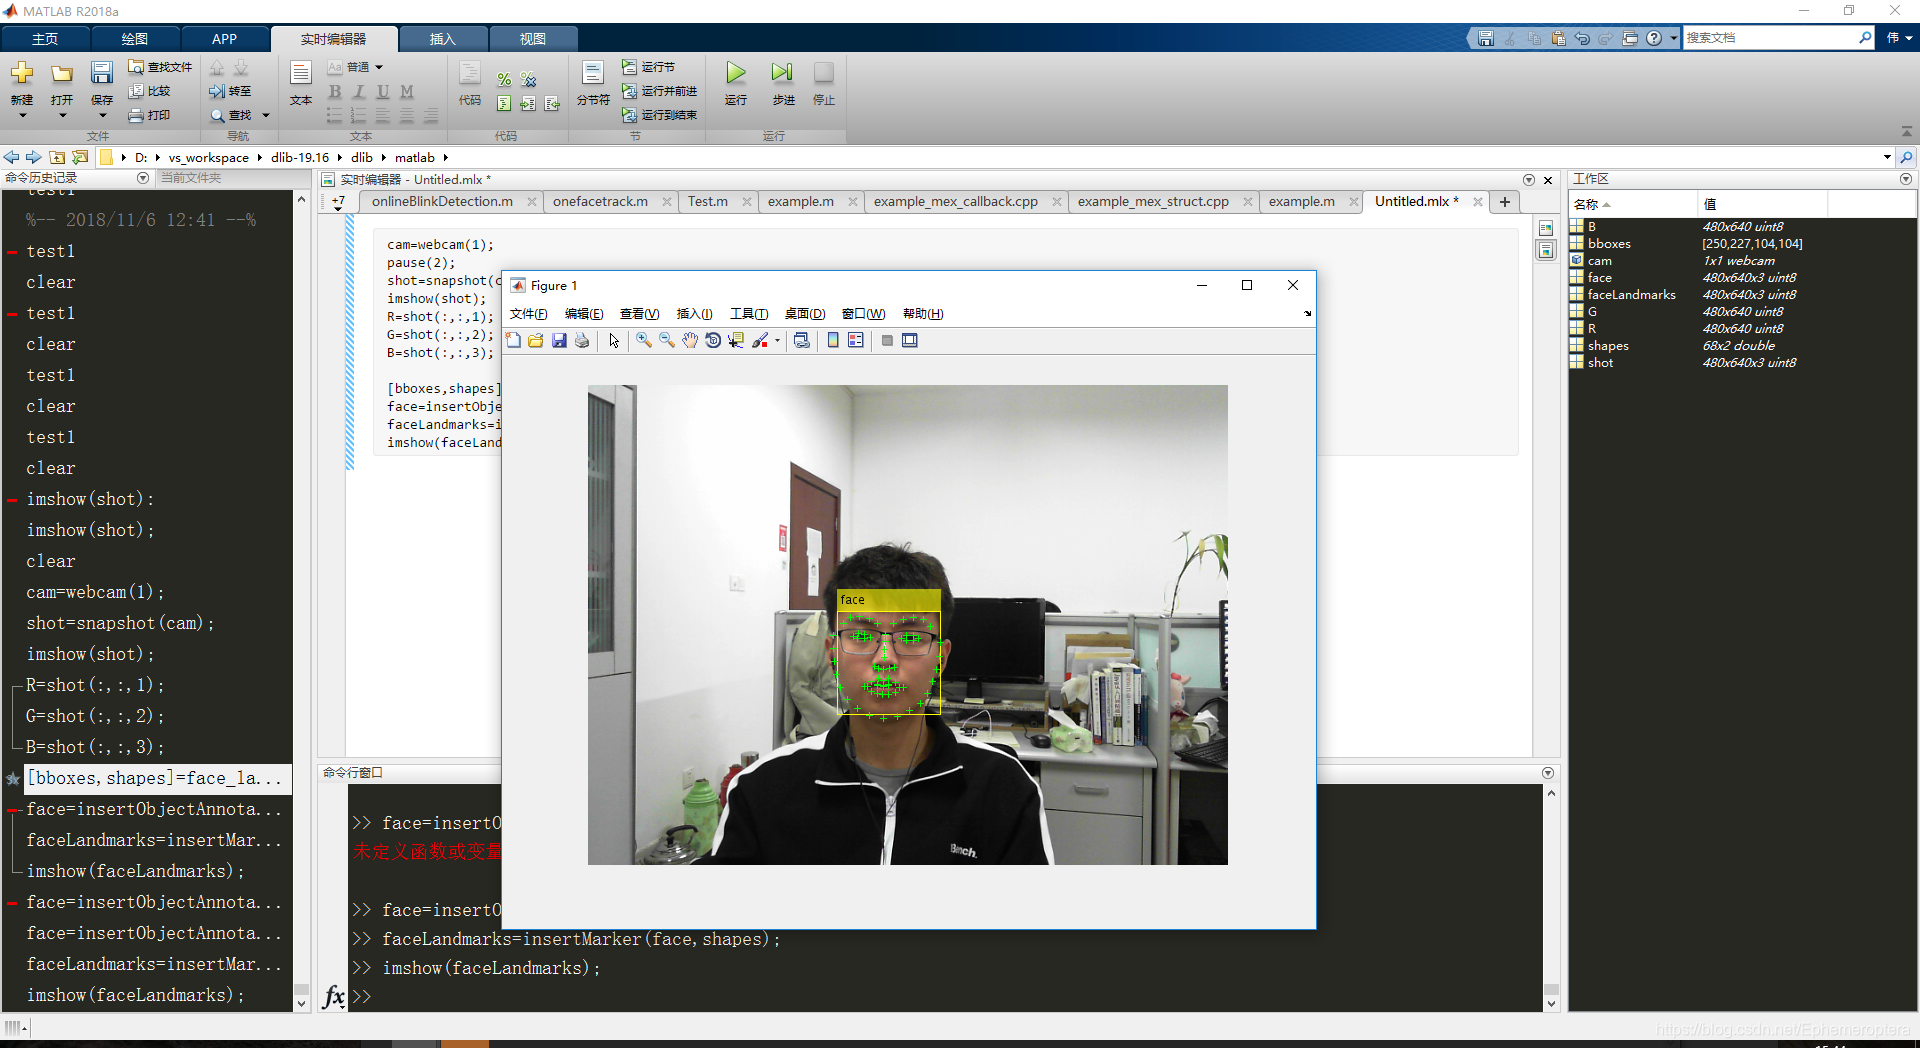
打开matlab定位到…/dlib/matlab, 将face_landmark及其子文件夹添加路径。现在我们开始写一个脚本试一试吧。
cam=webcam(1);%打开网络摄像头
pause(2);
shot=snapshot(cam); %捕捉一张
imshow(shot);

[bboxes,shapes]=face_landmark(shot);    %调用dlib c++接口
face=insertObjectAnnotation(shot,'rectangle',bboxes,'face');  %添加ROI框
faceLandmarks=insertMarker(face,shapes); %添加landmarks
imshow(faceLandmarks);
结果如下;
- 结束语
以上就是matlab调用dlib实现landmark的大致过程,讲解过程可能存在一些错误,欢迎广大读者来纠正。本人也是从事视觉开发相关方向,matlab作为一种强大的科研工具如果能结合一些有力的的工具我觉得能为更多的科研人员带来便捷。在阐述本教程之前,不知道有没有和我一样困惑的读者,晚上很少有关于matlab调用dlib的说明,虽然dlib库作者提供了matlab接口,但是里面存在的一些漏洞让一些初学者苦不堪言,希望这篇文章有帮助到大家。好了,我是作者蜉蝣,如果你有更好的方法或者一些问题欢迎在下面留言,我们下次见!(转载必须注明出处,作者:Ephemeroptera(蜉蝣))


 5919
5919


 被折叠的 条评论
为什么被折叠?
被折叠的 条评论
为什么被折叠?
 到【灌水乐园】发言


