


gitlab安装
docker形式部署
官网参考地址:https://docs.gitlab.com/ee/install/docker.html
设置目录环境变量:vi /etc/profile
export GITLAB_HOME=/srv/gitlab
安装
sudo docker run --detach \
  --hostname 本机地址\
  --publish 本机端口1:443 --publish 本机端口2:80 --publish 本机端口3:22 \
  --name gitlab \
  --restart always \
  --volume $GITLAB_HOME/config:/etc/gitlab:Z \
  --volume $GITLAB_HOME/logs:/var/log/gitlab:Z \
  --volume $GITLAB_HOME/data:/var/opt/gitlab:Z \
  --shm-size 256m \
  gitlab/gitlab-ce:版本号
老版本admin是第一次登录用户,新版本需到指定目录查看
sudo docker exec -it gitlab grep 'Password:' /etc/gitlab/initial_root_password
配置对外访问地址和端口
docker exec -it gitlab /bin/bash
vim /etc/gitlab/gitlab.rb
添加
external_url 'http:\\xxx……'
nginx['listen_port'] = 80
重新加载配置
gitlab-ctl reconfigure
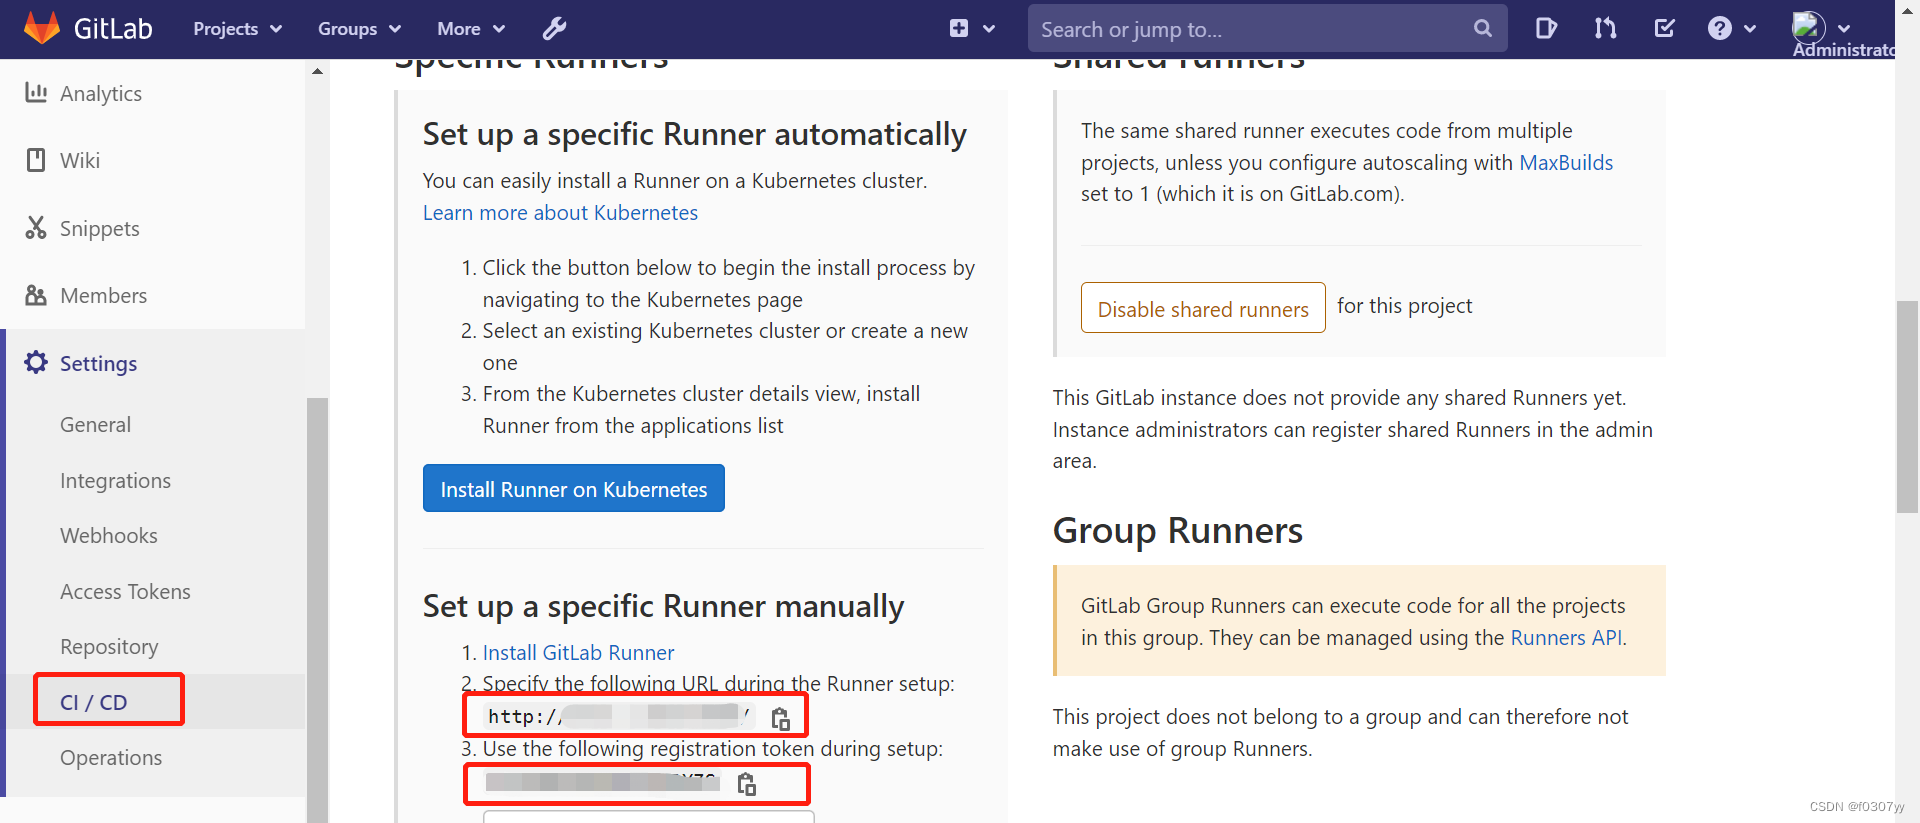
查看runner的信息备用
公用runner
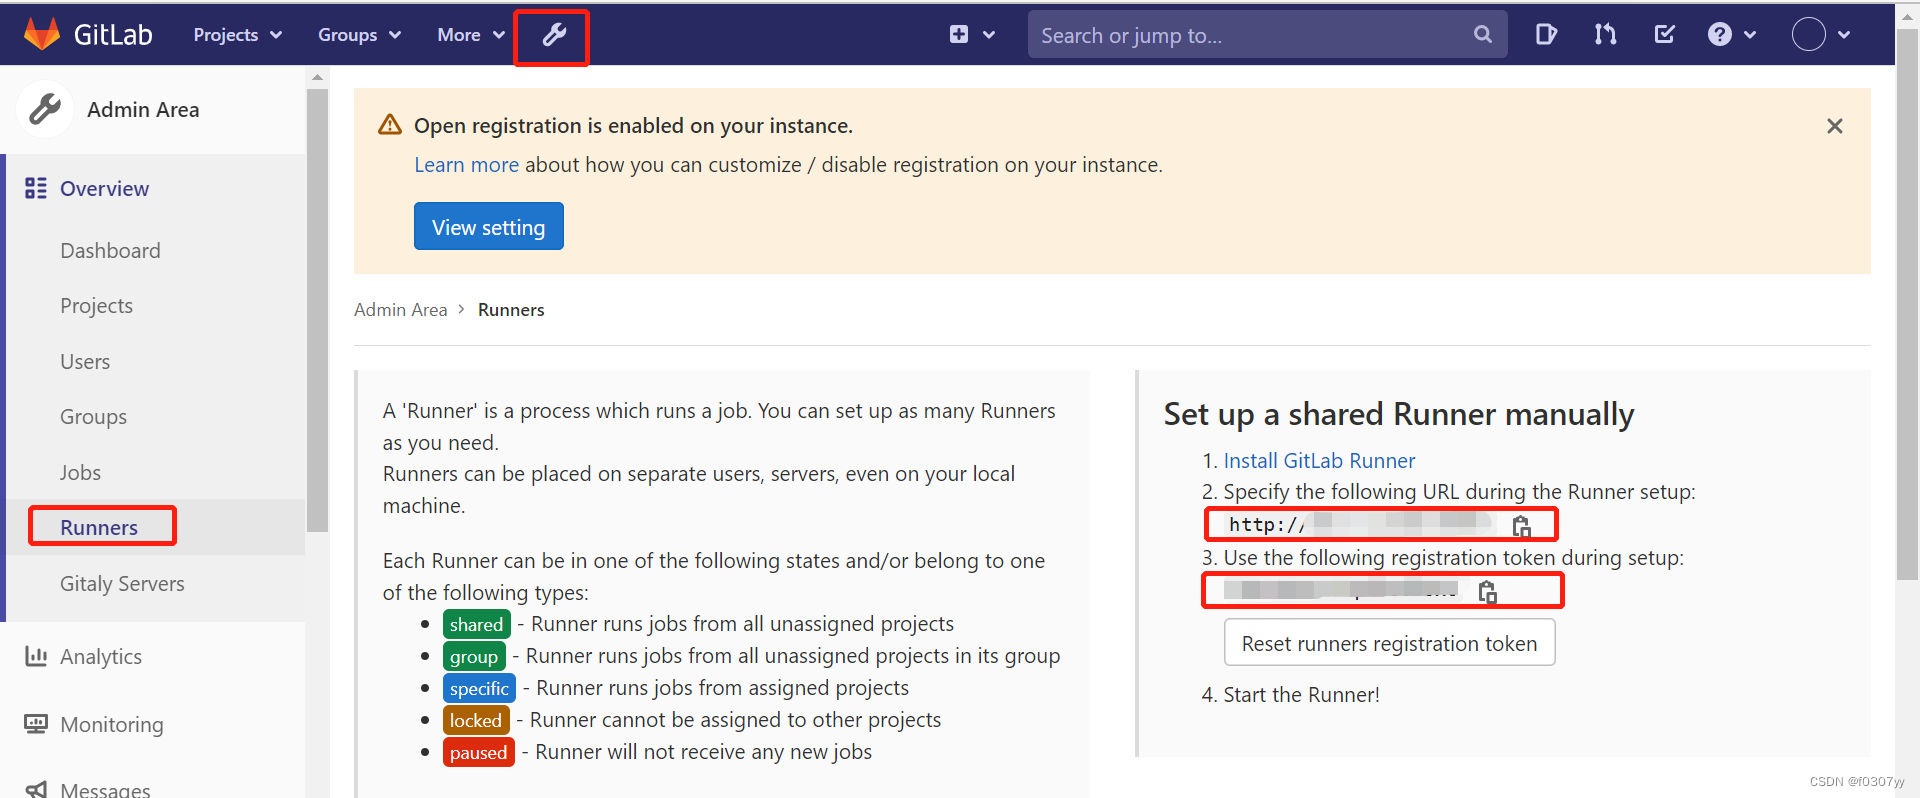
项目特定runner
gitlab-runner安装
linux直接安装
官网参考地址:https://docs.gitlab.com/runner/install/linux-repository.html
curl -s https://packages.gitlab.com/install/repositories/runner/gitlab-runner/script.rpm.sh | sudo bash
sudo yum install gitlab-runner-13.7.0-1
向gitlab注册,根据提示填入gitlab的url及token,并填写tag名称及执行器
官网参考地址:https://docs.gitlab.com/runner/register/index.html
sudo gitlab-runner register
docker形式安装
官网参考地址:https://docs.gitlab.com/runner/install/docker.html
安装
docker run -d --name gitlab-runner --restart always \
  -v /srv/gitlab-runner/config:/etc/gitlab-runner \
  -v /var/run/docker.sock:/var/run/docker.sock \
  gitlab/gitlab-runner:版本号
向gitlab注册,根据提示填入gitlab的url及token,并填写tag名称及执行器
docker run --rm -it -v /srv/gitlab-runner/config:/etc/gitlab-runner gitlab/gitlab-runner:v13.7.0 register
maven安装
gitlab-runner 服务器需安装maven环境(maven依赖JCK,需安装JDK)
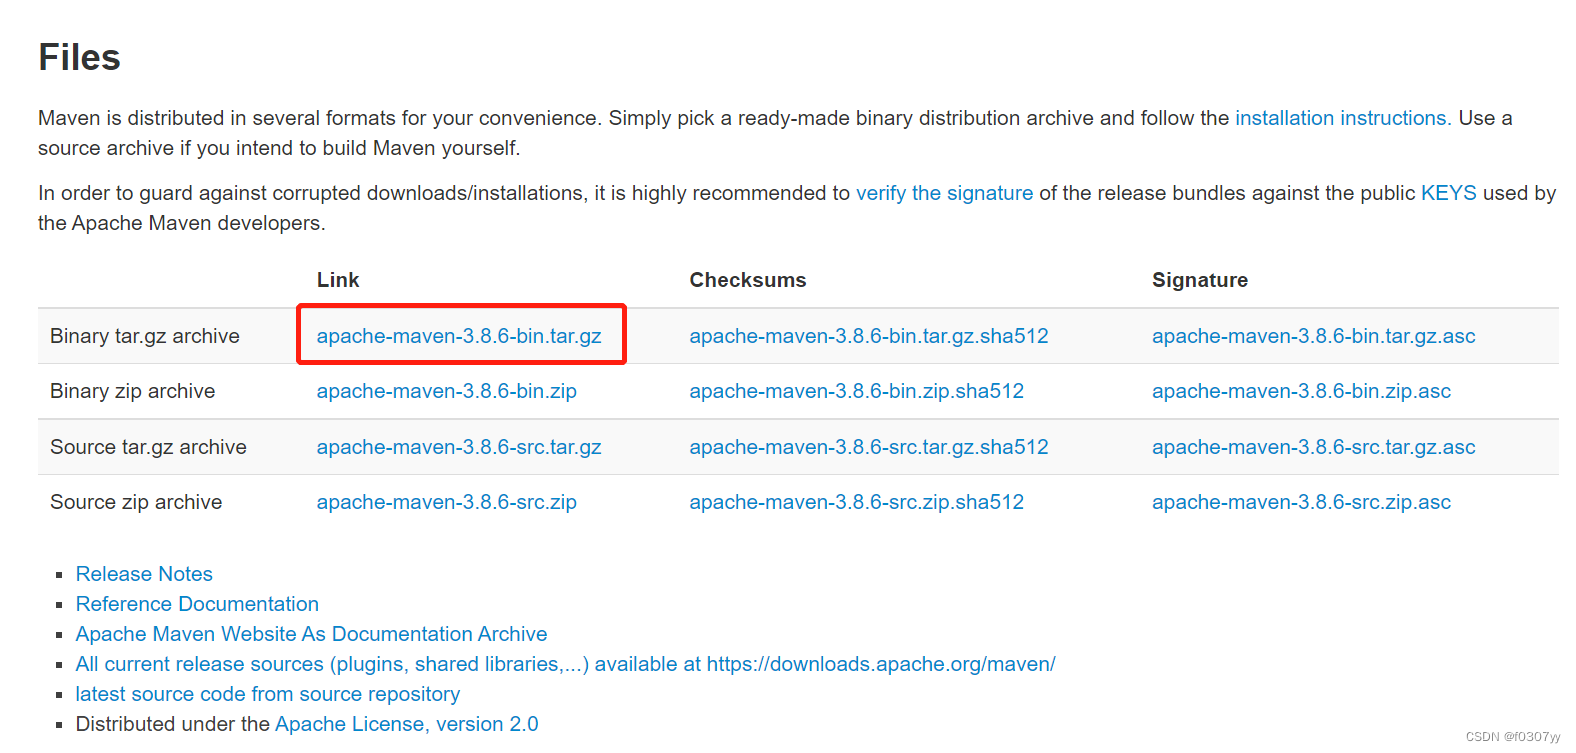
maven官网地址:https://maven.apache.org/download.cgi
创建maven安装目录
mkdir -p /usr/local/maven
解压
tar -zxvf apache-maven-3.8.6-bin.tar.gz -C /usr/local/maven
创建资源库目录
mkdir -p /m2/repository
修改配置:vi /usr/local/maven/apache-maven-3.8.6/conf/settings.xml
<?xml version="1.0" encoding="UTF-8"?>

<settings xmlns="http://maven.apache.org/SETTINGS/1.2.0"
          xmlns:xsi="http://www.w3.org/2001/XMLSchema-instance"
          xsi:schemaLocation="http://maven.apache.org/SETTINGS/1.2.0 https://maven.apache.org/xsd/settings-1.2.0.xsd">

  <localRepository>/m2/repository</localRepository>

  <pluginGroups>
  </pluginGroups>

  <proxies>
  </proxies>

  <servers>
  </servers>

  <mirrors>
    <mirror>
   	  <id>alimaven</id>
   	  <name>aliyun maven</name>
	  <url>http://maven.aliyun.com/nexus/content/groups/public/</url>
   	  <mirrorOf>central</mirrorOf>
    </mirror>
  </mirrors>

  <profiles>
  </profiles>
</settings>
添加环境变量:vi /etc/profile
MAVEN_HOME=/usr/local/maven/apache-maven-3.8.6
PATH=$MAVEN_HOME/bin:$PATH
export MAVEN_HOME PATH
重新加载配置文件
source /etc/profile
测试
mvn -version
#.gitlab-ci.yml模板示例
stages:
  - build
  - deploy

auto-build:
  stage: build
  tags: ["lnx"] #注册的runner的tag
  only:
    - master #指定分支
  script:
    - mvn clean package -Dmaven.test.skip=true -f pom.xml
    - cp target/test.jar /home/test

deploy:
  stage: deploy
  tags: ["lnx"]
  only:
    - master
  dependencies:
    - auto-build
  script:
    #本地运行
    #- nohup java -jar /home/test/test.jar --spring.profiles.active=prod > ./test.log 2>&1 &
    #上传到远程服务器运行
    - scp /home/test/righton-covid19-0.0.1-SNAPSHOT.jar user@ip:/home/test
    - ssh user@ip 'nohup java -jar /home/test/test.jar --spring.profiles.active=prod > ./test.log 2>&1 &'
gitlab-runner配合ssh参考https://docs.gitlab.com/ee/ci/ssh_keys/
生成ssh密钥对
ssh-keygen
将生成的公钥(id_rsa.pub)上传到远程服务器,在远程服务器添加公钥
cat id_rsa.pub >>/root/.ssh/authorized_keys
设置 SSH,打开密钥登录功能,vi 设置 SSH,打开密钥登录功能
RSAAuthentication yes
PubkeyAuthentication yes
PermitRootLogin yes

service sshd restart
问题
ci/cd执行成功后,再提交报错
fatal: git fetch-pack: expected shallow list
fatal: The remote end hung up unexpectedly
解决方案:升级git
yum install http://opensource.wandisco.com/centos/7/git/x86_64/wandisco-git-release-7-2.noarch.rpm
#安装git
yum install git
#更新git
yum update git


 709
709


 被折叠的 条评论
为什么被折叠?
被折叠的 条评论
为什么被折叠?
 到【灌水乐园】发言


