一、一对多关系
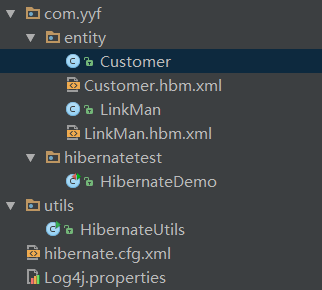
Customer.java
/**
* Created by Donald on 2016/11/19.
*/
public class Customer {
private Integer cid;
private String custName;
private String custLevel;
private String custSource;
private String custPhone;
private String custMobile;
/**
* 在客户实体类里面表示多个联系人,一个客户有多个联系人
* hibernate要求使用集合表示多的数据,使用set集合
* */
private Set<LinkMan> setLinkMan = new HashSet<LinkMan>();
public Set<LinkMan> getSetLinkMan() {
return setLinkMan;
}
public void setSetLinkMan(Set<LinkMan> setLinkMan) {
this.setLinkMan = setLinkMan;
}
public Integer getCid() {
return cid;
}
public void setCid(Integer cid) {
this.cid = cid;
}
public String getCustName() {
return custName;
}
public void setCustName(String custName) {
this.custName = custName;
}
public String getCustLevel() {
return custLevel;
}
public void setCustLevel(String custLevel) {
this.custLevel = custLevel;
}
public String getCustSource() {
return custSource;
}
public void setCustSource(String custSource) {
this.custSource = custSource;
}
public String getCustPhone() {
return custPhone;
}
public void setCustPhone(String custPhone) {
this.custPhone = custPhone;
}
public String getCustMobile() {
return custMobile;
}
public void setCustMobile(String custMobile) {
this.custMobile = custMobile;
}
}
Customer.hbm.xml
<?xml version="1.0" encoding="UTF-8"?>
<!DOCTYPE hibernate-mapping PUBLIC
"-//Hibernate/Hibernate Configuration DTD 3.0//EN"
"http://www.hibernate.org/dtd/hibernate-mapping-3.0.dtd">
<hibernate-mapping>
<class name="com.yyf.entity.Customer" table="t_customer">
<id name="cid" column="cid">
<generator class="native"></generator>
</id>
<property name="custName" column="custName" ></property>
<property name="custLevel" column="custLevel"></property>
<property name="custSource" column="custSource"></property>
<property name="custPhone" column="custPhone"></property>
<property name="custMobile" column="custMobile"></property>
<set name="setLinkMan" cascade="save-update,delete">
<key column="clid"></key>
<one-to-many class="com.yyf.entity.LinkMan" />
</set>
</class>
</hibernate-mapping>
LinkMan.java
/**
* Created by Donald on 2016/11/19.
*/
public class LinkMan {
private Integer lkm_id;
private String lkm_name;
private String lkm_gander;
private String lkm_phone;
/**
* 在联系人实体类里面表示所属客户,
* 一个联系人只能属于一个客户
*/
private Customer customer;
public Customer getCustomer() {
return customer;
}
public void setCustomer(Customer customer) {
this.customer = customer;
}
public Integer getLkm_id() {
return lkm_id;
}
public void setLkm_id(Integer lkm_id) {
this.lkm_id = lkm_id;
}
public String getLkm_name() {
return lkm_name;
}
public void setLkm_name(String lkm_name) {
this.lkm_name = lkm_name;
}
public String getLkm_gander() {
return lkm_gander;
}
public void setLkm_gander(String lkm_gander) {
this.lkm_gander = lkm_gander;
}
public String getLkm_phone() {
return lkm_phone;
}
public void setLkm_phone(String lkm_phone) {
this.lkm_phone = lkm_phone;
}
}
LinkMan.hbm.xml
<?xml version="1.0" encoding="UTF-8"?>
<!DOCTYPE hibernate-mapping PUBLIC
"-//Hibernate/Hibernate Configuration DTD 3.0//EN"
"http://www.hibernate.org/dtd/hibernate-mapping-3.0.dtd">
<hibernate-mapping>
<class name="com.yyf.entity.LinkMan" table="t_linkman">
<id name="lkm_id" column="lkm_id">
<generator class="native"></generator>
</id>
<property name="lkm_name" column="lkm_name"></property>
<property name="lkm_gander" column="lkm_gander"></property>
<property name="lkm_phone" column="lkm_phone"></property>
<many-to-one name="customer" class="com.yyf.entity.Customer" column="clid" ></many-to-one>
</class>
</hibernate-mapping>
hibernate.cfg.xml
<?xml version="1.0" encoding="UTF-8"?>
<!DOCTYPE hibernate-configuration PUBLIC
"-//Hibernate/Hibernate Configuration DTD 3.0//EN"
"http://www.hibernate.org/dtd/hibernate-configuration-3.0.dtd">
<hibernate-configuration>
<session-factory>
<property name="hibernate.connection.driver_class">com.mysql.jdbc.Driver</property>
<property name="hibernate.connection.url">jdbc:mysql://127.0.0.1:3306/hibernate</property>
<property name="hibernate.connection.username">root</property>
<property name="hibernate.connection.password">admin</property>
<property name="hibernate.show_sql">true</property>
<property name="hibernate.format_sql">true</property>
<property name="hibernate.hbm2ddl.auto">update</property>
<property name="hibernate.dialect">org.hibernate.dialect.MySQLDialect</property>
<property name="hibernate.current_session_context_class">thread</property>
<mapping resource="com/yyf/entity/Customer.hbm.xml" />
<mapping resource="com/yyf/entity/LinkMan.hbm.xml" />
</session-factory>
</hibernate-configuration>
首先
为方便操作,减少代码量,可以在一对多中的“一”的Xxx.hbm.xml里进行配置,如下图:
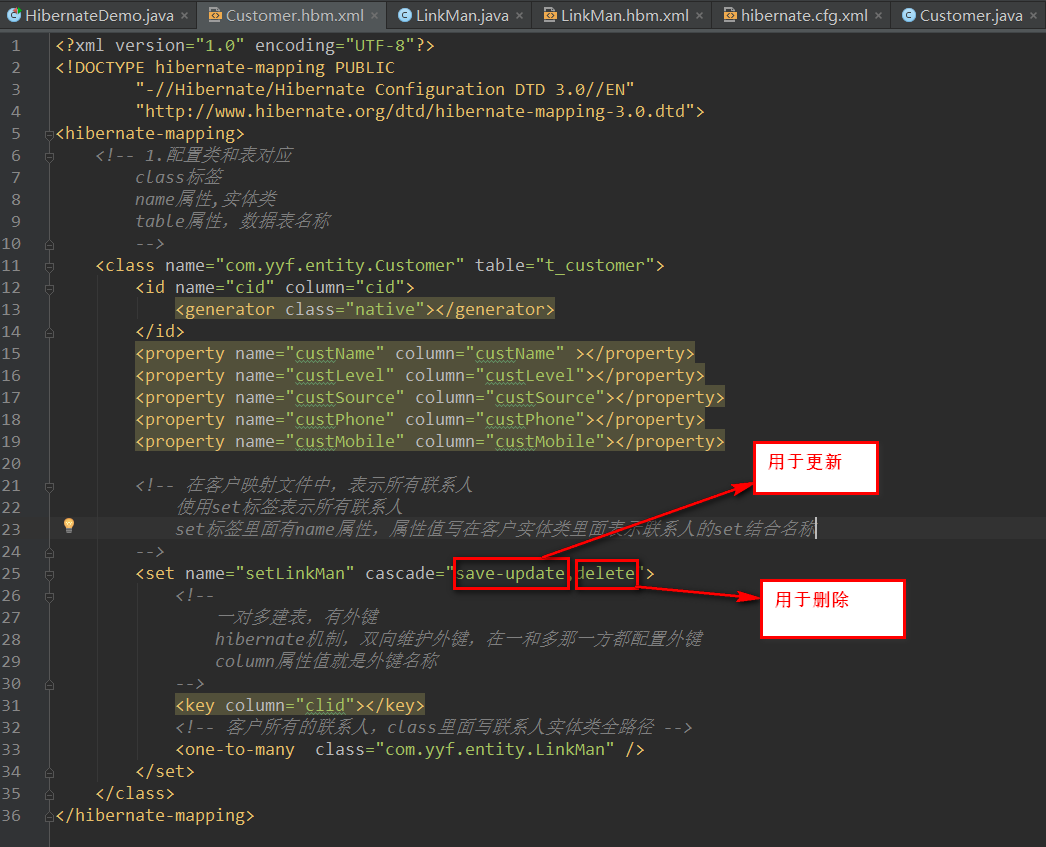
二、级联操作 — 更新
/**
* 简化写法
* 一般根据客户添加联系人
* (1)在客户映射文件中进行配置
* 在客户映射文件里面set标签进行配置
*
* (2)创建客户和联系人对象,
* 只需要把联系人放在客户里面就可以了,
* 最终只需要保存客户就可以了。
*/
@Test
public void testAdd2() {
SessionFactory sessionFactory = null;
Session session = null;
Transaction tx = null;
try{
sessionFactory = HibernateUtils.getSessionFactory();
session = sessionFactory.openSession();
tx = session.beginTransaction();
Customer customer = new Customer();
customer.setCustName("百度");
customer.setCustLevel("普通客户");
customer.setCustSource("网络");
customer.setCustPhone("110");
customer.setCustMobile("999");
LinkMan linkMan = new LinkMan();
linkMan.setLkm_name("小红");
linkMan.setLkm_gander("男");
linkMan.setLkm_phone("911");
customer.getSetLinkMan().add(linkMan);
session.save(customer);
tx.commit();
}catch (Exception e){
tx.rollback();
}
}
三、级联操作 — 删除
/**
* 1. 删除某个客户,把客户里面所有的联系人删除
*
* (1)使用属性cascade属性值delete
*
* (2)在代码中直接删除客户
* 根据id查询对象,调用session里面delete方法删除
*/
@Test
public void testDelete() {
SessionFactory sessionFactory = null;
Session session = null;
Transaction tx = null;
try{
sessionFactory = HibernateUtils.getSessionFactory();
session = sessionFactory.openSession();
tx = session.beginTransaction();
Customer customer = session.get(Customer.class, 2);
session.delete(customer);
tx.commit();
}catch (Exception e){
tx.rollback();
}
}
四、操作 — inverse
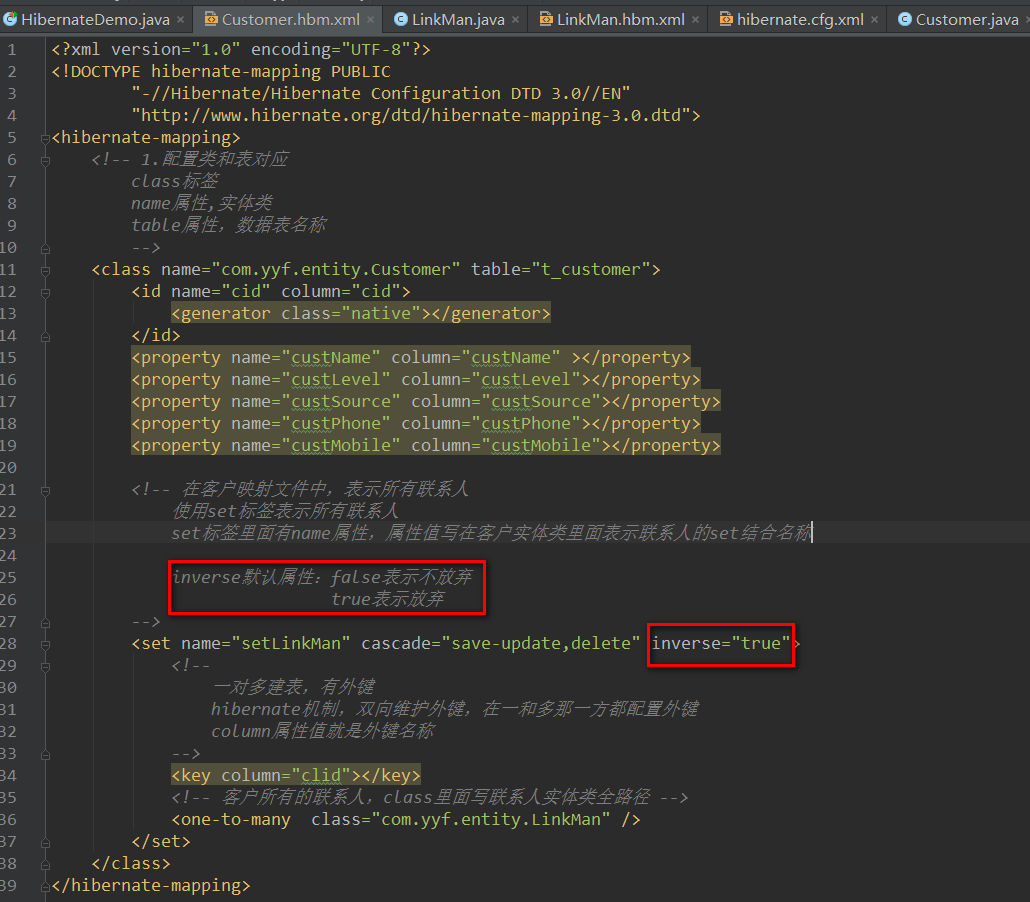
若不加这个属性则在更新外键时候,则会双向维护,即更新两次,造成不必要的浪费
/**
* inverse属性
*
* (1)因为hibernate双向维护外键,在客户和联系人里面都需要
* 维护外键,修改客户时候修改一次外键,修改联系人时候也修改一次外键,造成效率问题
*
* (2)解决方式:让其中的一方不维护外键
* - 一对多里面,让其中一方放弃外键维护
* - 一个国家有总统。国家有很多人,总统不能认识国家所有人,国家所有人可以认识总统
*
* (3)具体实现:
* 在放弃关系维护映射文件中,进行配置,在set标签上使用inverse
*/
@Test
public void testUpdate() {
SessionFactory sessionFactory = null;
Session session = null;
Transaction tx = null;
try{
sessionFactory = HibernateUtils.getSessionFactory();
session = sessionFactory.openSession();
tx = session.beginTransaction();
Customer customer = session.get(Customer.class, 2);
LinkMan linkMan = session.get(LinkMan.class, 1);
customer.getSetLinkMan().add(linkMan);
linkMan.setCustomer(customer);
tx.commit();
}catch (Exception e){
tx.rollback();
}
}


 325
325

 被折叠的 条评论
为什么被折叠?
被折叠的 条评论
为什么被折叠?
 到【灌水乐园】发言


