


elasticsearch是基于lucence的开源搜索引擎,屏蔽了lucene复杂的api,类似solr,但是他比solr更优秀,他也是elk日志分析系统的一部分。
确保安装了jdk1.8,下载elasticsearch6.0.0版本。这里给出百度盘的链接:http://pan.baidu.com/s/1i4UKaLf
单机安装,基本不用任何配置,直接解压启动,即可。这里不再多说。
unzip elasticsearch-6.0.0.zip
cd elasticsearch-6.0.
bin/elasticsearch -d这里介绍一下elasticsearch-head插件的安装,在5.x之后的版本中,插件不再依赖elasticsearch,他自己单独安装并运行。下载地址:https://github.com/mobz/elasticsearch-head/archive/master.zip
elasticsearch-head插件的运行需要node6.x以上环境,确保机器安装了node6.x版本。
下载的elasticsearch-head项目需要通过npm的方式安装依赖,安装完成即可使用npm run start命令来启动插件。
cd elasticsearch-head-master
npm install
npm run start
分布式环境搭建准备
这里为了模拟分布式环境,采用一台机器,开启三个elasticsearch的实例,分别对他们进行配置,让他们组成一个集群
master port->9200
slave1 port->8200
slave2 port->7200
对elasticsearch-6.0.0进行复制三份,分别取名es_master,es_slave1,es_slave2,然后对各自进行配置,这里区别一点就是各自的端口和节点名称不一样,其余配置信息一致。
master节点的config/elasticsearch.yml
cluster.name: buejee
node.name: master
network.host: 0.0.0.0
http.port: 9200
discovery.zen.ping.unicast.hosts: ["127.0.0.1"]

http.cors.enabled: true
http.cors.allow-origin: "*"cluster.name: buejee
node.name: slave1
network.host: 0.0.0.0
http.port: 8200
discovery.zen.ping.unicast.hosts: ["127.0.0.1"]
http.cors.enabled: true
http.cors.allow-origin: "*"cluster.name: buejee
node.name: slave2
network.host: 0.0.0.0
http.port: 7200
discovery.zen.ping.unicast.hosts: ["127.0.0.1"]
http.cors.enabled: true
http.cors.allow-origin: "*"cluster.name是elasticsearch集群的名字,这个可以随便定义,但是组成集群的节点配置需要相同,elasticsearch通过广播的方式查找集群名称一样集群节点。
node.name是集群节点名称,这个可以随便定义。
network.host指定节点的ip,如果指定0.0.0.0,即允许远程访问
http.port指定elasticsearch运行的端口,默认是9200
访问http://192.168.56.100:9100
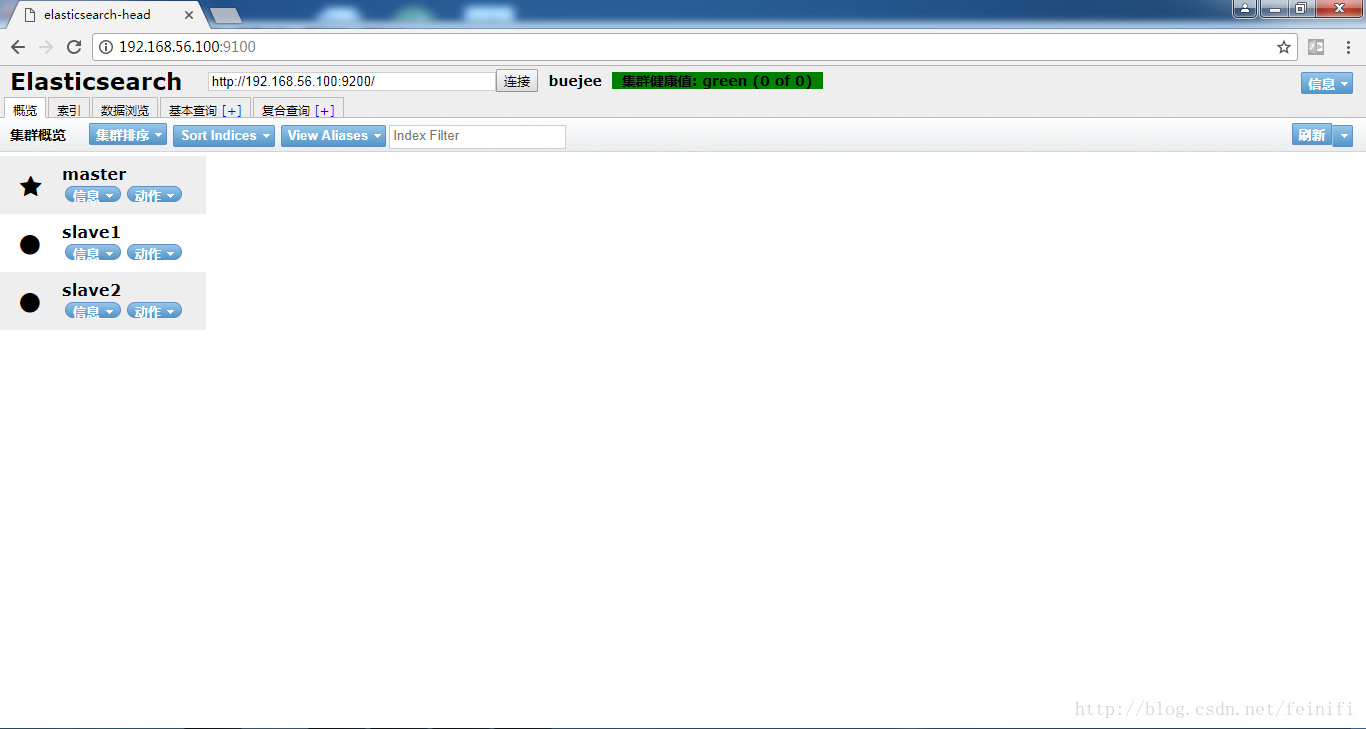
看到集群状态:green,集群有三个节点,分别是master,slave1,slave2。符合我们的预期。


 444
444

 被折叠的 条评论
为什么被折叠?
被折叠的 条评论
为什么被折叠?
 到【灌水乐园】发言


