


课程转跳:SpringCloud微服务Day1-01.微服务课程介绍_哔哩哔哩_bilibili
目录
一、服务拆分
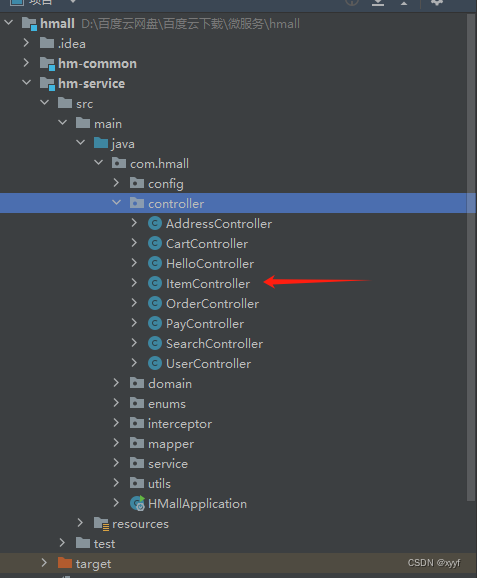
新建一个maven项目将商品服务拆分出去

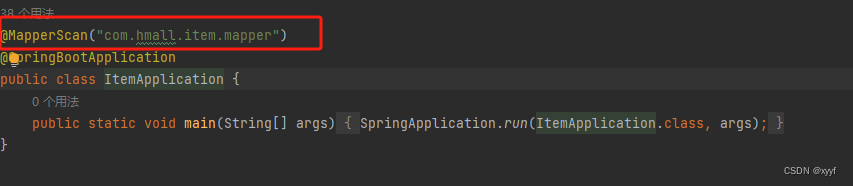
更改包扫描
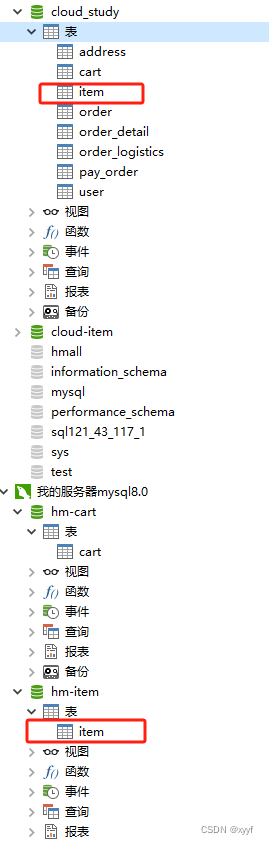
新建一个数据库用于商品服务,同样将表拆分出去
更改配置文件的服务名和数据库名

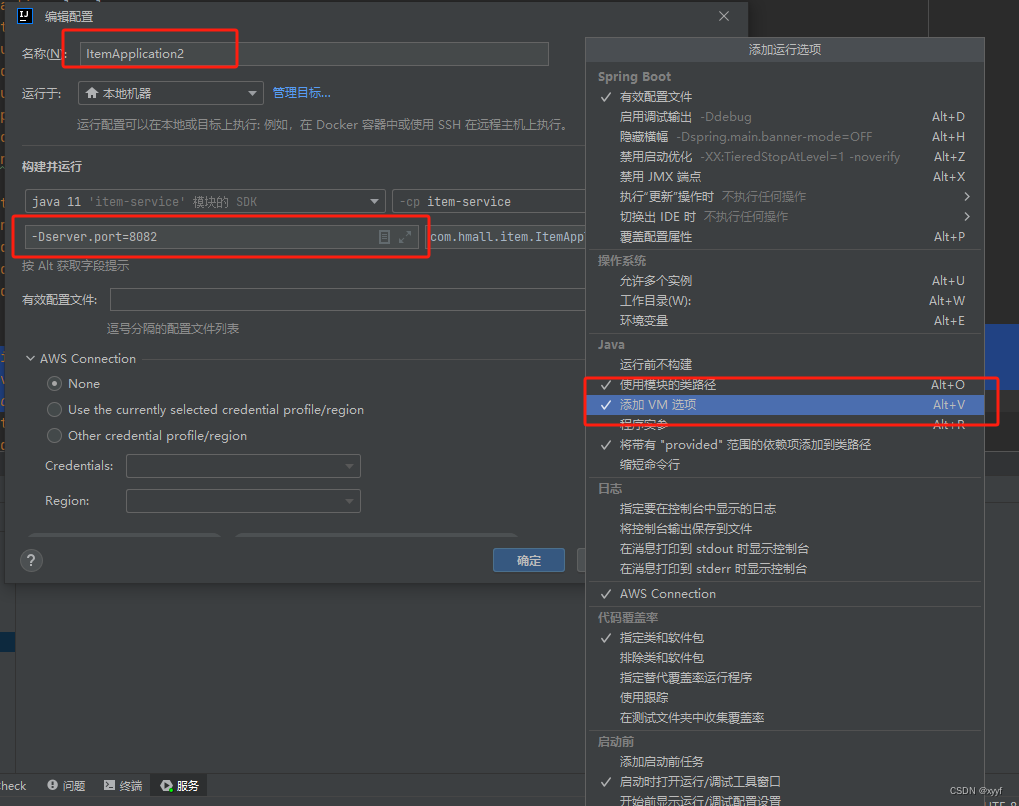
启动多个实例:
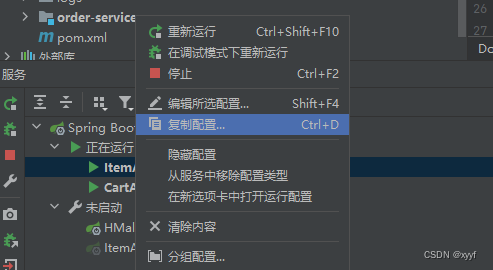
复制配置修改名称,修改运行端口
![]()
启动成功。
二、服务注册发现(nacos)
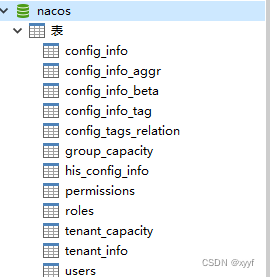
创建数据库导入需要的sql文件
centos使用docker安装nacos
https://hub.docker.com/r/nacos/nacos-server
运行:(前提安装docker)
docker pull nacos/nacos-server
docker images

mkdir -p /mydata/nacos/logs/
mkdir -p /mydata/nacos/init.d/
vim /mydata/nacos/init.d/custom.properties
日志映射文件夹和配置
配置文件内容:(配置好自己的mysql信息)
server.contextPath=/nacos
server.servlet.contextPath=/nacos
server.port=8848spring.datasource.platform=mysql
#配置持久化数据库相关信息 ####################################################
db.num=1
db.url.0=jdbc:mysql://xxx.xxx.xxx.x:3306/nacos?characterEncoding=utf8&connectTimeout=1000&socketTimeout=3000&autoReconnect=true
db.user=root
db.password=root
##########################################################################nacos.cmdb.dumpTaskInterval=3600
nacos.cmdb.eventTaskInterval=10
nacos.cmdb.labelTaskInterval=300
nacos.cmdb.loadDataAtStart=false
management.metrics.export.elastic.enabled=false
management.metrics.export.influx.enabled=false
server.tomcat.accesslog.enabled=true
server.tomcat.accesslog.pattern=%h %l %u %t "%r" %s %b %D %{User-Agent}i
nacos.security.ignore.urls=/,/**/*.css,/**/*.js,/**/*.html,/**/*.map,/**/*.svg,/**/*.png,/**/*.ico,/console-fe/public/**,/v1/auth/login,/v1/console/health/**,/v1/cs/**,/v1/ns/**,/v1/cmdb/**,/actuator/**,/v1/console/server/**
nacos.naming.distro.taskDispatchThreadCount=1
nacos.naming.distro.taskDispatchPeriod=200
nacos.naming.distro.batchSyncKeyCount=1000
nacos.naming.distro.initDataRatio=0.9
nacos.naming.distro.syncRetryDelay=5000
nacos.naming.data.warmup=true
nacos.naming.expireInstance=true
运行run
docker run -d -p 8848:8848 -p 9848:9848 -p 9849:9849 --name nacos --privileged=true --restart=always -e JVM_XMS=256m -e JVM_XMX=256m -e MODE=standalone -e PREFER_HOST_MODE=hostname -v /mydata/nacos/logs:/home/nacos/logs -v /mydata/nacos/init.d/custom.properties:/home/nacos/init.d/custom.properties --restart=always nacos/nacos-server
访问地址进入控制台xxx.xxx.xxx.x:8848/nacos

服务注册:引入依赖
<dependency>
    <groupId>com.alibaba.cloud</groupId>
    <artifactId>spring-cloud-starter-alibaba-nacos-discovery</artifactId>
</dependency>
配置文件:

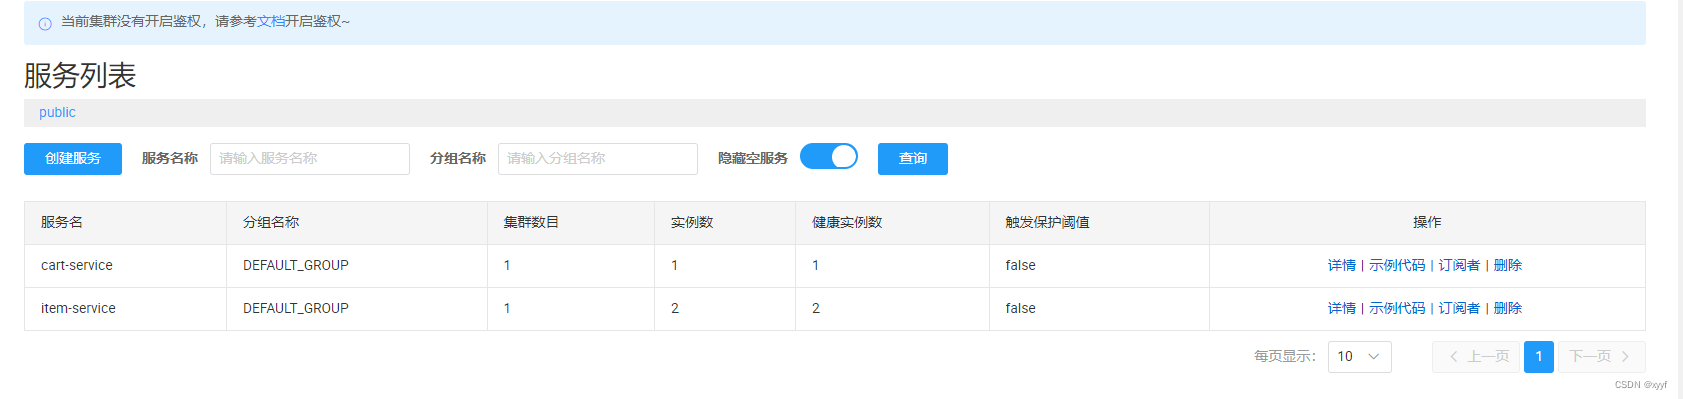
类似的方式启动了cart服务

nacos服务列表:
openfeign便捷调用服务:
新建模块hm-api引入依赖:
<dependency>
    <groupId>org.springframework.cloud</groupId>
    <artifactId>spring-cloud-starter-openfeign</artifactId>
</dependency>
<dependency>
    <groupId>org.springframework.cloud</groupId>
    <artifactId>spring-cloud-starter-loadbalancer</artifactId>
</dependency>
创建client:
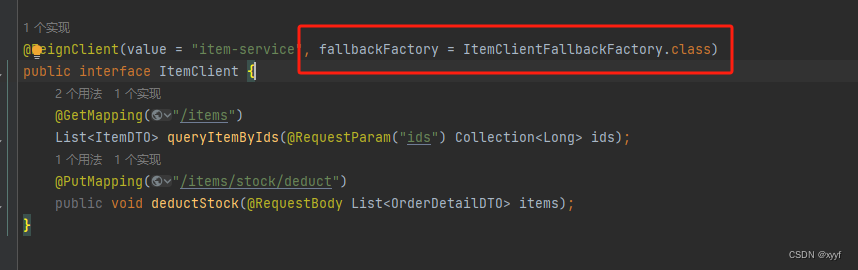
@FeignClient("item-service")
public interface ItemClient {
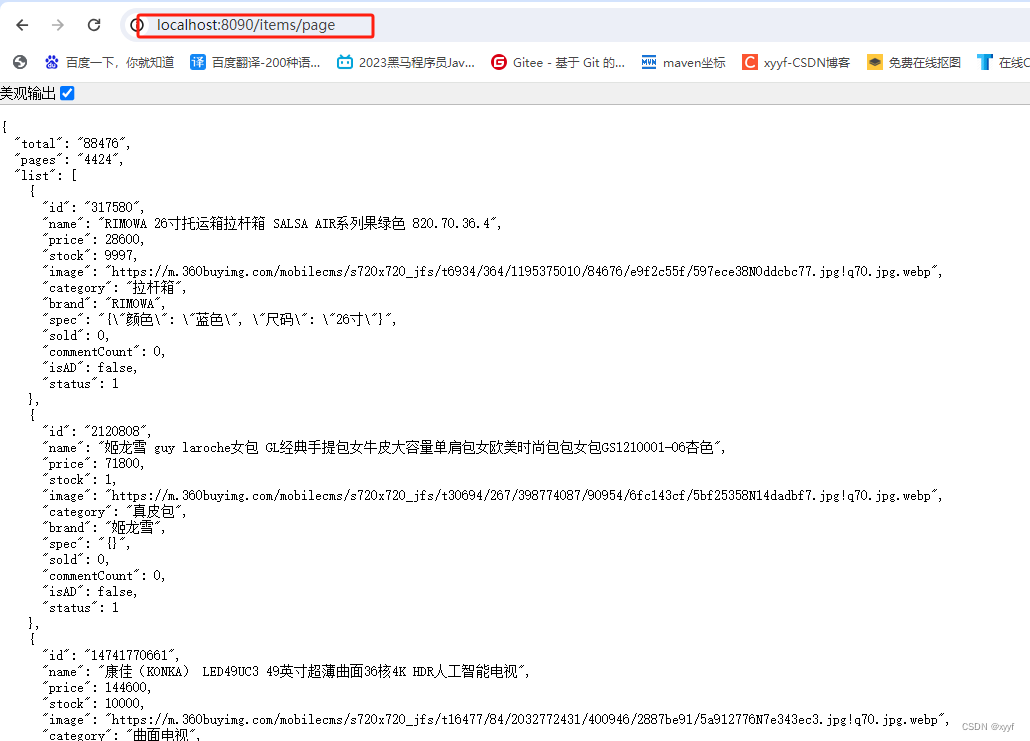
@GetMapping("/items")
List<ItemDTO> queryItemByIds(@RequestParam("ids") Collection<Long> ids);
}返回类:
package com.hmall.api.dto;


import io.swagger.annotations.ApiModel;
import io.swagger.annotations.ApiModelProperty;
import lombok.Data;

@Data
@ApiModel(description = "商品实体")
public class ItemDTO {
    @ApiModelProperty("商品id")
    private Long id;
    @ApiModelProperty("SKU名称")
    private String name;
    @ApiModelProperty("价格(分)")
    private Integer price;
    @ApiModelProperty("库存数量")
    private Integer stock;
    @ApiModelProperty("商品图片")
    private String image;
    @ApiModelProperty("类目名称")
    private String category;
    @ApiModelProperty("品牌名称")
    private String brand;
    @ApiModelProperty("规格")
    private String spec;
    @ApiModelProperty("销量")
    private Integer sold;
    @ApiModelProperty("评论数")
    private Integer commentCount;
    @ApiModelProperty("是否是推广广告,true/false")
    private Boolean isAD;
    @ApiModelProperty("商品状态 1-正常,2-下架,3-删除")
    private Integer status;
}
购物车服务引入依赖:
<dependency>
    <groupId>com.heima</groupId>
    <artifactId>hm-api</artifactId>
    <version>1.0.0</version>
</dependency>
启动类添加注解
@EnableFeignClients(basePackages = "com.hmall.api.client")业务调用
private final ItemClient itemClient;
private void handleCartItems(List<CartVO> vos) {
        // 1.获取商品id
        Set<Long> itemIds = vos.stream().map(CartVO::getItemId).collect(Collectors.toSet());
        List<ItemDTO> items = itemClient.queryItemByIds(itemIds);
        // 3.转为 id 到 item的map
        Map<Long, ItemDTO> itemMap = items.stream().collect(Collectors.toMap(ItemDTO::getId, Function.identity()));
        // 4.写入vo
        for (CartVO v : vos) {
            ItemDTO item = itemMap.get(v.getItemId());
            if (item == null) {
                continue;
            }
            v.setNewPrice(item.getPrice());
            v.setStatus(item.getStatus());
            v.setStock(item.getStock());
        }
    }
三、网关登录校验
创建网关模块,引入springcloud的网关依赖
<dependency>
    <groupId>org.springframework.cloud</groupId>
    <artifactId>spring-cloud-starter-gateway</artifactId>
</dependency>
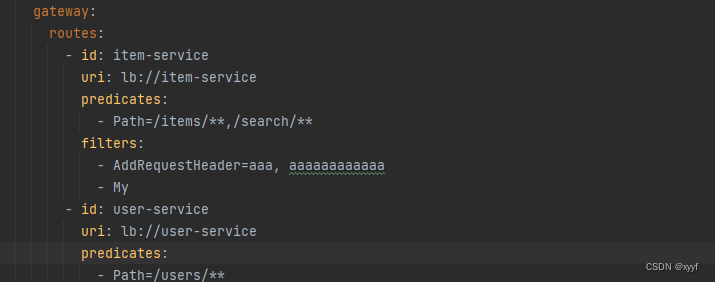
配置网关转跳路由和过滤器,我的网关端口为8090
uri:lb://nacos中服务的名字
predicates: 服务接口路径
filters: 官方提供的过滤器或自定义过滤器
自定义过滤器有两种GatewayFilterFactory和GlobalFilter,前者可以设置单个服务过滤,也可以设置全局过滤,后者创建完后自动生效全局过滤实现更加简单。
启动,测试
登录校验过滤器实现:将过滤校验所需的配置类和工具类转移到网关
配置jwt和无需过滤的接口路径

@Component
@RequiredArgsConstructor
public class AuthGlobalFilter implements GlobalFilter, Ordered {
    private final AuthProperties authProperties;
    private final JwtTool jwtTool;
    private final AntPathMatcher antPathMatcher = new AntPathMatcher();
    @Override
    public Mono<Void> filter(ServerWebExchange exchange, GatewayFilterChain chain) {
        ServerHttpRequest request = exchange.getRequest();
        //检查接口是否无需过滤,是则放行
        if(isExclude(request.getPath().toString())){
            return chain.filter(exchange);
        }
        //登录校验
        String token = null;
        List<String> authorization = request.getHeaders().get("authorization");
        if(authorization != null && !authorization.isEmpty()){
            token = authorization.get(0);
        }
        Long userId ;
        try {
             userId = jwtTool.parseToken(token);
        } catch (Exception e) {
            //如果无法生成userId则说明没登录,返回401
            ServerHttpResponse response = exchange.getResponse();
            response.setStatusCode(HttpStatus.UNAUTHORIZED);
            return response.setComplete();
        }
        //如果登录了,则把userId放入请求头发送给接口服务,以便服务需要用户信息
        ServerWebExchange newExchange = exchange.mutate().request(builder -> builder.header("user-info", String.valueOf(userId))).build();
        return chain.filter(newExchange);
    }
    //判断路径是否无需过滤
    private boolean isExclude(String path) {
        List<String> excludePaths = authProperties.getExcludePaths();
        for (String excludePath : excludePaths) {
            if (antPathMatcher.match(excludePath, path)) {
                return true;
            }
        }
        return false;
    }

    //过滤器优先级,越小则越高
    @Override
    public int getOrder() {
        return 0;
    }
}
在common中编写拦截器获取userId

public class UserInfoInterceptor implements HandlerInterceptor {
//请求前将userId存入
    @Override
    public boolean preHandle(HttpServletRequest request, HttpServletResponse response, Object handler) throws Exception {
        String userId = request.getHeader("user-info");
        if(StrUtil.isNotBlank(userId)){
            UserContext.setUser(Long.parseLong(userId));
        }
        return true;
    }
//出请求后删除userId
    @Override
    public void afterCompletion(HttpServletRequest request, HttpServletResponse response, Object handler, Exception ex) throws Exception {
        UserContext.removeUser();
    }
}
这样就实现了网关登录校验并且将用户信息传递给其他服务,但其他服务互相调用时还是不会传递用户信息。
所以我们需要在服务之间发送http请求是带上用户信息的请求头。
借助feign提供的拦截器在发送请求前添加用户信息的请求头:
public class DefaultFeignConfig {
    @Bean
    public RequestInterceptor userInfoRequestInterceptor(){
        return new RequestInterceptor() {
            @Override
            public void apply(RequestTemplate requestTemplate) {
                Long user = UserContext.getUser();
                if(user != null)
                  requestTemplate.header("user-info", user.toString());
            }
        };
    }
}
四、nacos配置管理
引入依赖
<dependency>
    <groupId>org.springframework.cloud</groupId>
    <artifactId>spring-cloud-starter-bootstrap</artifactId>
</dependency>
<dependency>
    <groupId>com.alibaba.cloud</groupId>
    <artifactId>spring-cloud-starter-alibaba-nacos-config</artifactId>
</dependency>
登录nacos后台添加配置
spring:
datasource:
url: jdbc:mysql://${hm.db.host}:${hm.db.port:3306}/${hm.db.database}}?characterEncoding=UTF-8&autoReconnect=true&serverTimezone=Asia/Shanghai
driver-class-name: com.mysql.cj.jdbc.Driver
username: root
password: ${hm.db.pw}
mybatis-plus:
configuration:
default-enum-type-handler: com.baomidou.mybatisplus.core.handlers.MybatisEnumTypeHandler
global-config:
db-config:
update-strategy: not_null
id-type: auto

 编写bootstrap.yml
该文件读取在application.yml之前用于读取nacos中的配置文件
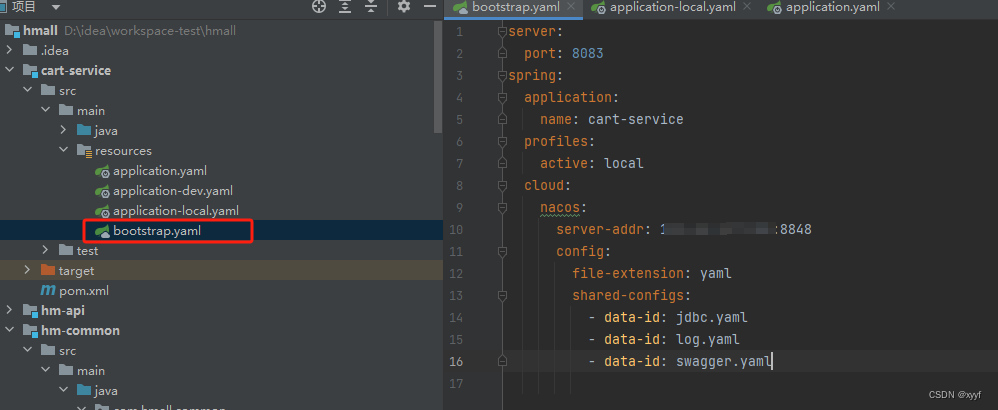
application.yml:

启动查看日志:
 成功拉取配置文件 。
配置热部署:
1.@ConfigurationProperties
@Data
@Component
@ConfigurationProperties(prefix = "hm.cart")
public class CartProperties {
    private Integer maxItems;
}
2.@RefreshScope + @Value
@Data
@Component
@RefreshScope
public class CartProperties {
    @Value("${hm.cart.maxItems}")
    private Integer maxItems;
}
nacos配置:

五、服务保护(sentinel)
下载:Release v1.8.7 · alibaba/Sentinel · GitHub

下载完成后可以直接在本地java -jar 运行。
官方中文文档:
java -Dserver.port=8080 -Dcsp.sentinel.dashboard.server=localhost:8080 -Dproject.name=sentinel-dashboard -jar sentinel-dashboard.jar
访问ip:8088
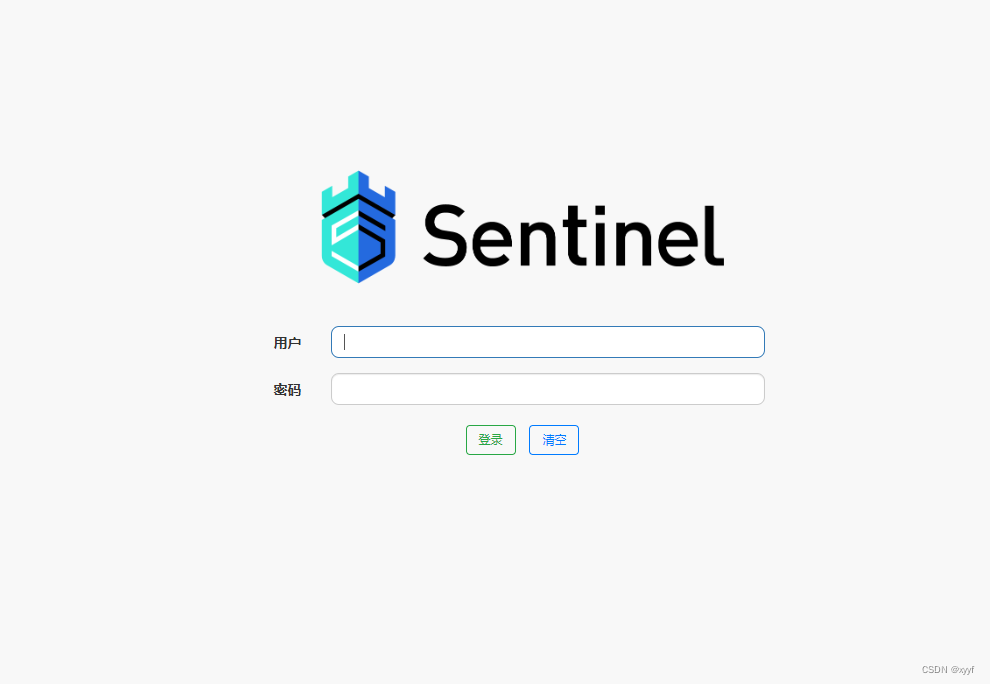
账号:sentinel 密码:sentinel
服务yaml配置
spring:
  cloud:
    sentinel:
      transport:
        dashboard: localhost:8080
      eager: true
      #请求方法前缀
      http-method-specify: true
#feign整合sentinel,用于管理服务间请求
feign:
  sentinel:
    enabled: true
启动项目并访问任意一个端口。
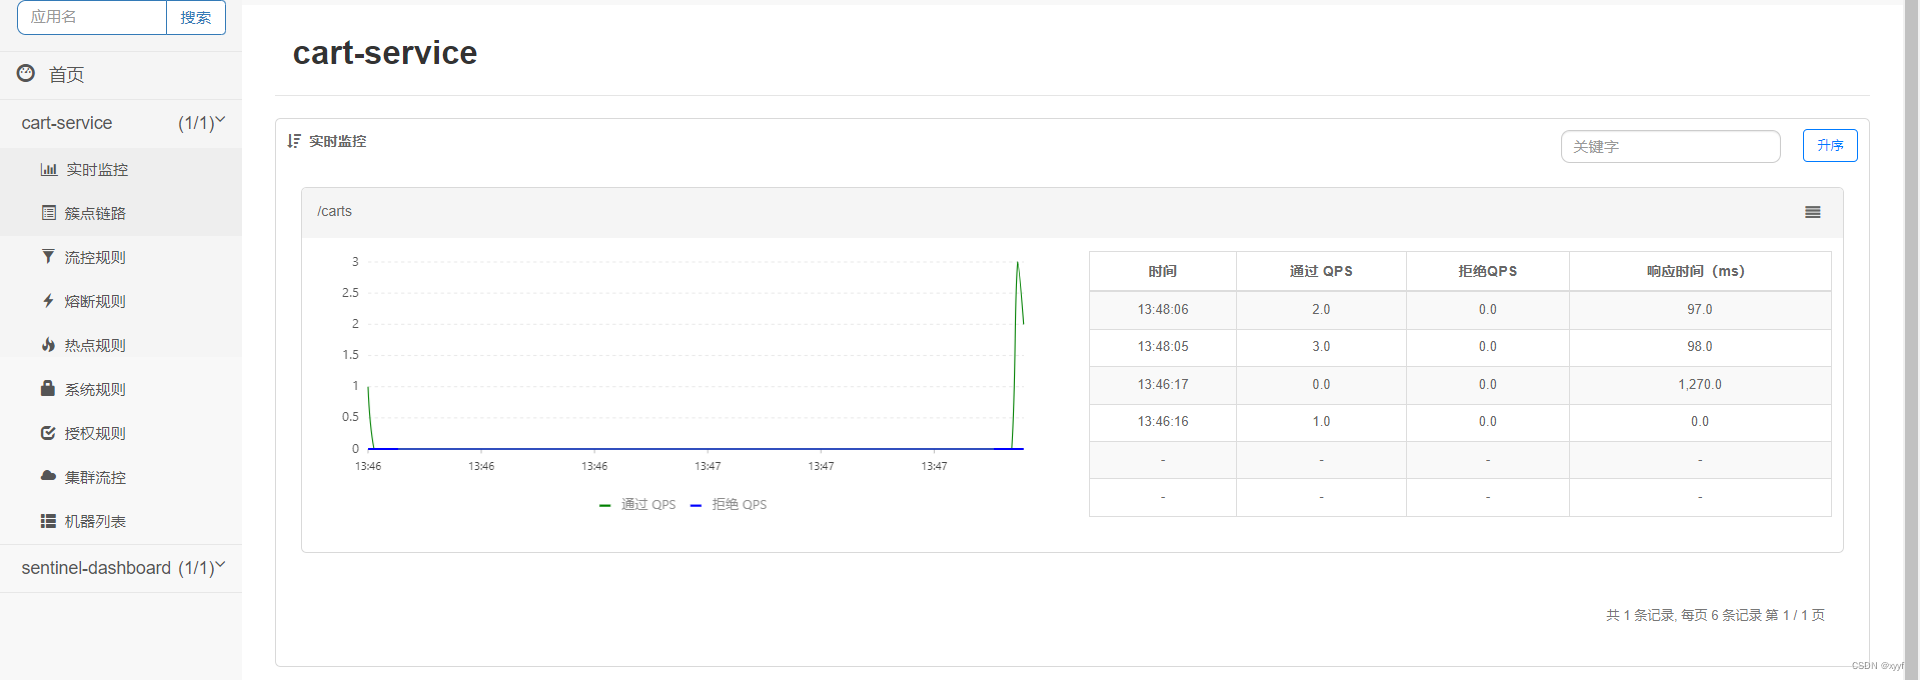
控制接口限流:
 线程隔离:
线程隔离:
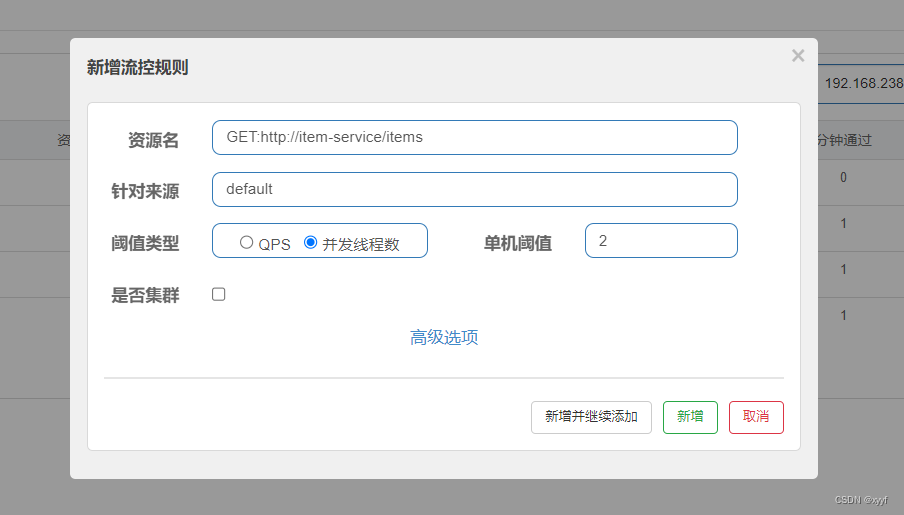
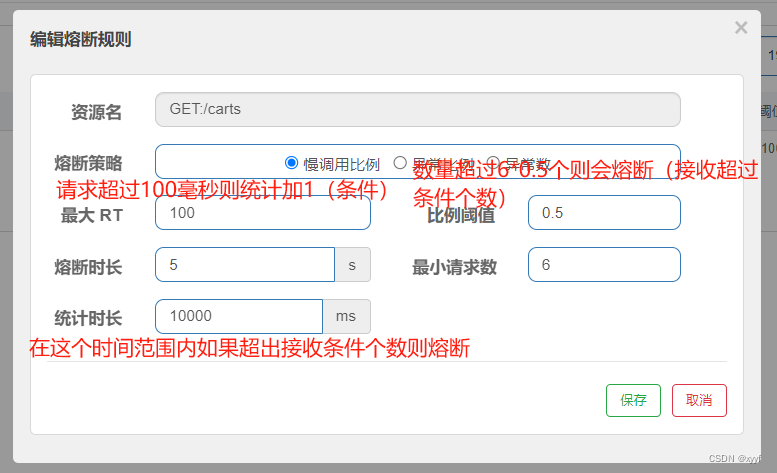
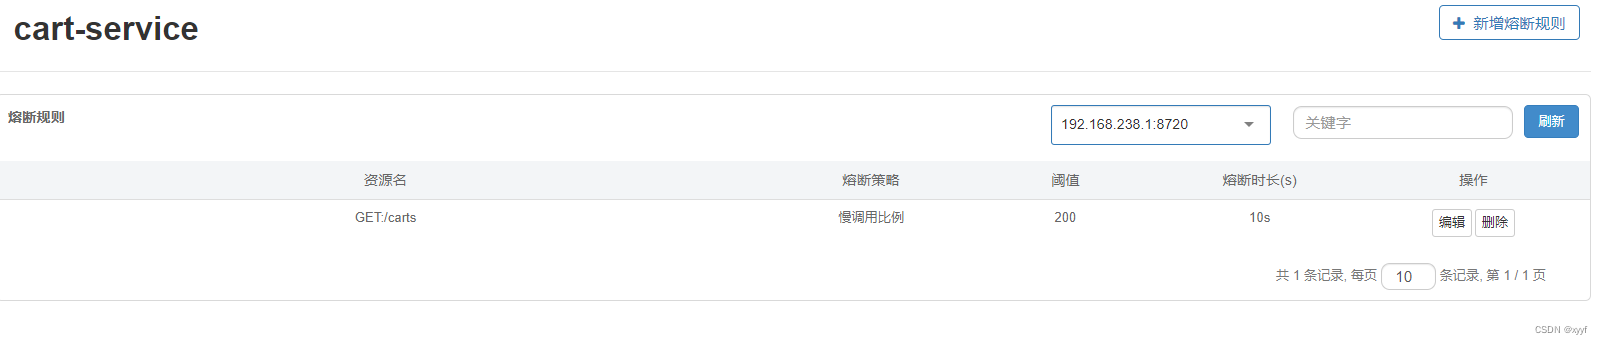
熔断:
超出限流Fallback处理:
@Slf4j
public class ItemClientFallbackFactory implements FallbackFactory<ItemClient> {
    @Override
    public ItemClient create(Throwable cause) {
        return new ItemClient() {
            @Override
            public List<ItemDTO> queryItemByIds(Collection<Long> ids) {
                log.error("查询异常", cause);
                return Collections.emptyList();
            }

            @Override
            public void deductStock(List<OrderDetailDTO> items) {
                throw new RuntimeException(cause);
            }
        };
    }
}
public class DefaultFeignConfig {
    @Bean
    public ItemClientFallbackFactory itemClientFallbackFactory(){
        return new ItemClientFallbackFactory();
    }
}
设置qps为1,一秒只接收一次请求,方便测试。
进入swagger调试:
一秒内第一次:

一秒内第二次:

后端:
 sentinel配置持久化 (使用nacos配置)
引入对呀sentinel版本的依赖
<dependency>
    <groupId>com.alibaba.csp</groupId>
    <artifactId>sentinel-datasource-nacos</artifactId>
    <version>1.8.6</version>
</dependency>
nacos创建配置文件sentinel.json配置:
[
{
"resource": "GET:/carts",
"count": 200.0,
"grade": 0,
"slowRatioThreshold": 0.5,
"timeWindow": 10
}
]
添加springboot配置sentinel下:
datasource:
  ds2:
    nacos:
      server-addr: xxx.xxx.xxx.xxx:8848
      data-id: sentinel.json
      group-id: DEFAULT_GROUP
      data-type: json
      rule-type: degrade
重启服务


 3229
3229


 被折叠的 条评论
为什么被折叠?
被折叠的 条评论
为什么被折叠?
 到【灌水乐园】发言


