一、建立Qt工程
1、建立工程项目

2、在项目的.pro文件中添加语句
INCLUDEPATH += F:\OpenCV4.5.0\opencv\buildmingw\install\include
CONFIG(debug, debug|release): {
LIBS += F:\OpenCV4.5.0\opencv\buildmingw\install\x64\mingw\bin\libopencv_*d.dll
} else:CONFIG(release, debug|release): {
LIBS += -LF:\OpenCV4.5.0\opencv\buildmingw\install\x64\mingw\bin\
    -llibopencv_core450 \
    -llibopencv_highgui450 \
    -llibopencv_imgcodecs450 \
    -llibopencv_imgproc450 \
    -llibopencv_features2d450 \
    -llibopencv_calib3d450 \
    -llibopencv_objdetect450
}
3、在文件F:\OpenCV4.5.0\opencv\buildmingw\install\etc\haarcascades下找到人脸识别分类器,放到自已项目文件夹

完成项目配置
二、界面设计
1、界面及属性设置

2、在头文件中声明变量及设置槽函数,并生成对应定义函数

对应代码
#include <opencv2/opencv.hpp>
#include <vector>

using namespace cv;
using namespace std;

#include <QImage>
private:
Mat srcImage,gray_image,srcImage1;
QImage disImage;
private slots:
void loadPicture();
/******人脸识别***/
void detectFace();3、建立槽函数,并生成对应槽函数,并连接

对应代码
#include <opencv2/objdetect/objdetect.hpp>
#include <opencv2/imgproc/imgproc.hpp>


#include <QMessageBox>
#include <QPixmap>
#include <QFileDialog>
connect(ui->loadBtn,SIGNAL(clicked()),this, SLOT(loadPicture()));
/***********人脸识别********************/
connect(ui->detectBtn, SIGNAL(clicked(bool)), this, SLOT(detectFace()));三、完成功能代码
//载入图片
void MainWindow::loadPicture()
{
    QString Fileadd = QFileDialog::getOpenFileName(this,"打开图片");
    if(Fileadd.isEmpty())
    {
        QMessageBox::information(this,"警告","没有选择文件");
        return ;
    }

    srcImage = imread(Fileadd.toLatin1().data());  //读取图片
    cvtColor(srcImage,srcImage1,COLOR_BGR2RGB);    // 图像格式转换
    QImage disImage = QImage((const unsigned char*)(srcImage1.data),srcImage1.cols,srcImage1.rows,QImage::Format_RGB888);

    ui->viewLabel->setPixmap(QPixmap::fromImage(disImage.scaled(ui->viewLabel->size(), Qt::KeepAspectRatio)));
    ui->viewLabel->setScaledContents(true);
}
人脸识别
void MainWindow::detectFace()
{
    CascadeClassifier face_detector;
    CascadeClassifier eyes_detector;

    string fDetectorPath = "D:\\Users\\lenovo\\documents\\OpencvFace\\haarcascade_frontalface_alt.xml";
    face_detector.load(fDetectorPath);
    string eDetectorPath = "D:\\Users\\lenovo\\documents\\OpencvFace\\haarcascade_eye_tree_eyeglasses.xml";
    eyes_detector.load(eDetectorPath);
    vector<Rect> faces;
    Mat imgSrc = srcImage1;
    Mat imgGray;

    cvtColor(imgSrc, imgGray, COLOR_RGB2GRAY);
    equalizeHist(imgGray, imgGray);
    face_detector.detectMultiScale(imgGray, faces, 1.1, 2, 0 | CASCADE_SCALE_IMAGE, Size(30, 30));//-- 多尺寸检测人脸
    for (int i = 0; i < faces.size(); i++)
    {
        Point center(faces[i].x + faces[i].width * 0.5, faces[i].y + faces[i].height * 0.5);
        ellipse(imgSrc, center, Size(faces[i].width * 0.5, faces[i].height * 0.5), 0, 0, 360, Scalar(255, 0, 255), 4, 8, 0);
        Mat faceROI = imgGray(faces[i]);
        vector<Rect> eyes;
        eyes_detector.detectMultiScale(faceROI, eyes, 1.1, 2, 0 | CASCADE_SCALE_IMAGE, Size(30, 30));//-- 在每张人脸上检测双眼
        for (int j = 0; j < eyes.size(); j++)
        {
            Point center(faces[i].x + eyes[j].x + eyes[j].width * 0.5, faces[i].y + eyes[j].y + eyes[j].height * 0.5);
            int radius = cvRound((eyes[j].width + eyes[i].height) * 0.25);
            circle(imgSrc, center, radius, Scalar(255, 0, 0), 4, 8, 0);
        }
     }

     Mat imgDst = imgSrc;
     QImage disImage = QImage((const unsigned char*)(imgDst.data),imgDst.cols,imgDst.rows,QImage::Format_RGB888);

     ui->viewLabel->setPixmap(QPixmap::fromImage(disImage.scaled(ui->viewLabel->size(), Qt::KeepAspectRatio)));
     ui->viewLabel->setScaledContents(true);

}
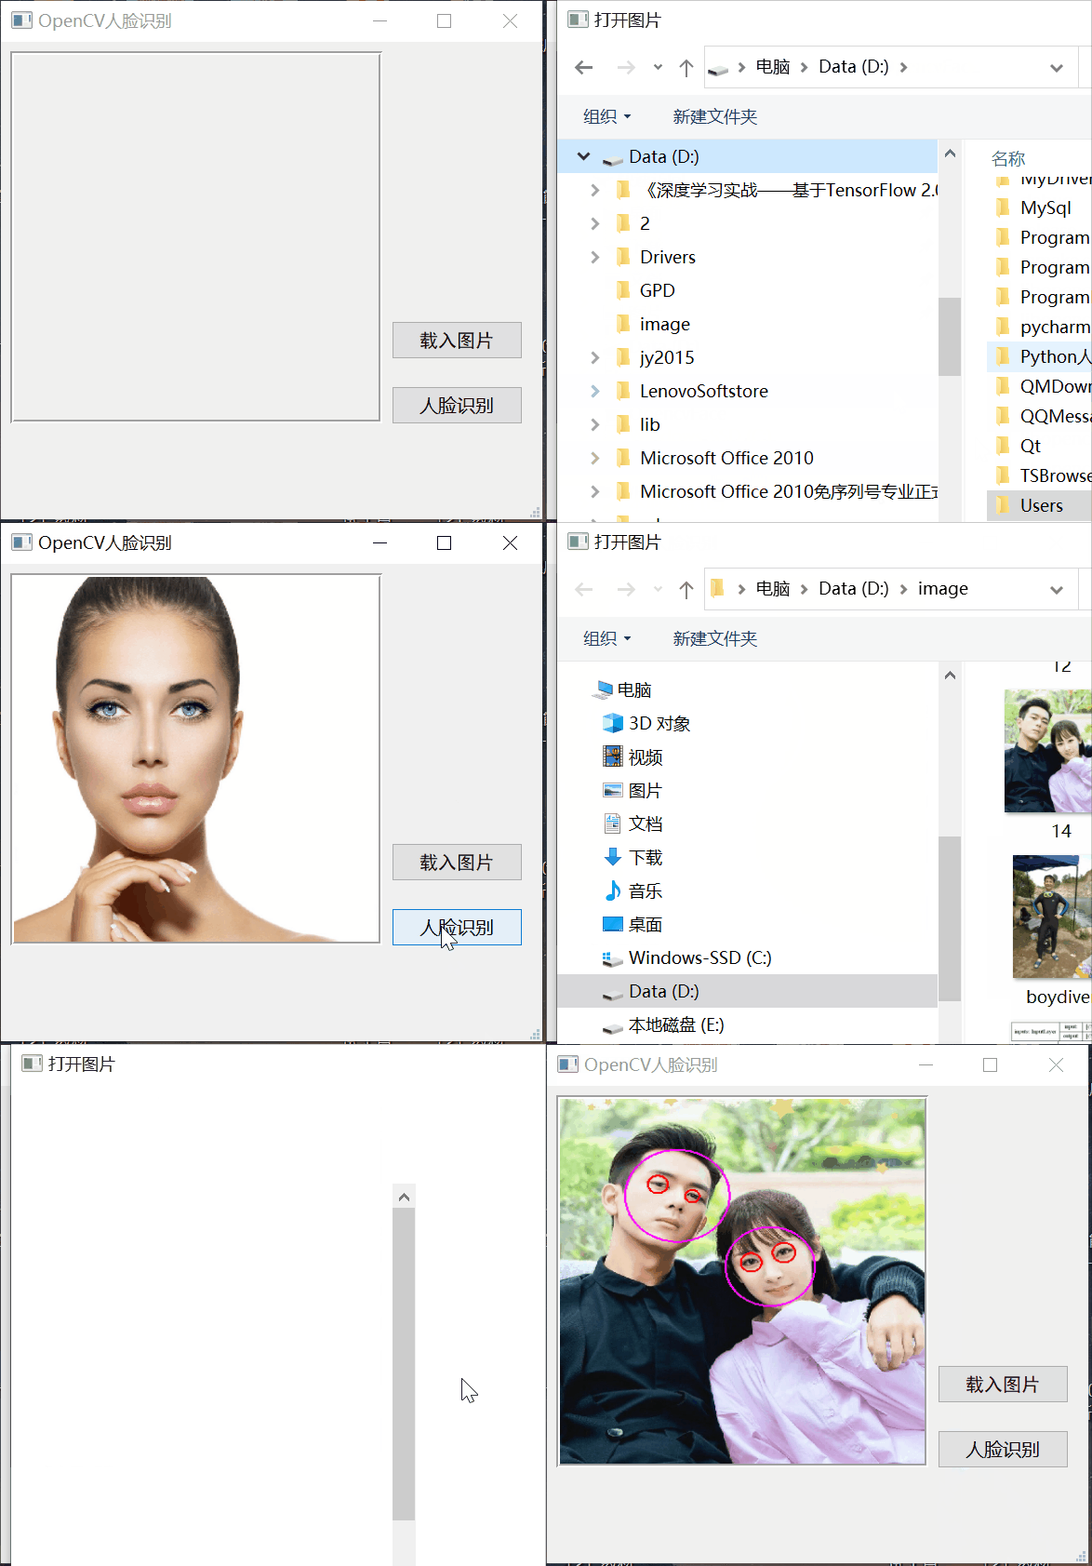
四、运行


 423
423


 被折叠的 条评论
为什么被折叠?


