


Vue路由
一、路由的封装抽离
目标:将路由模块抽离出来。 好处:拆分模块,利于维护
router/main.js
import Vue from 'vue'
// 导入VueRouter
import VueRouter from 'vue-router'
import Home from '@/views/Home'
import About from '@/views/About'

// 使用vue插件 vue的插件想要生效必须调用一个方法 Vue.use(XXX)
Vue.use(VueRouter)
// 创建一个路由对象
const router = new VueRouter({
  // 路由的规则
  // route: 一条路由规则
  routes:[
    {
      // 路径 锚点
      // 组件
      path:'/home',
      component:Home
    },
    {
      path:'/about',
      component:About
    },
    {
      path:'/',
      redirect:'/home'
    }
  ]
})

export default router
main.js
import Vue from 'vue'
import App from './App.vue'
import router from './router/main'

Vue.config.productionTip = false

new Vue({
  render: h => h(App),
  router

}).$mount('#app')
二、声明式导航
1.导航链接
组件router-link 替代 a标签,能跳转,能高亮
- vue-router提供了一个全局组件 router-link
- router-link实质上最终会渲染成a链接 to属性等价于提供 href属性(to无需#)
- router-link提供了声明式导航高亮的功能(自带类名)
<template>
  <div class="box">
    <router-link to="/home">Home</router-link> | <router-link to="/about">About</router-link>
      <router-view></router-view>
  </div>
</template>

<style>
.box{
  padding-right: 200px;
  padding-top: 130px;
  text-align: right;
}
.box .active{
  font-weight: 700;
}
</style>

2.两个类名
说明:router-link 会自动给当前导航添加两个类名
router-link-active: 激活的导航链接 模糊匹配
to=“/my” 可以匹配 /my /my/a /my/b …
router-link-exact-active: 激活的导航链接 精确匹配
to=“/my” 仅可以匹配 /my
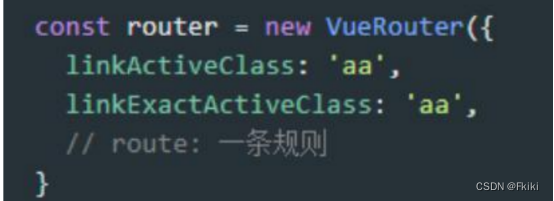
可以修改默认高亮的类名
3.跳转传参
目标:在跳转路由时, 可以给路由对应的组件内传值
在router-link上的to属性传值, 语法格式如下
/path?参数名=值
/path/值 – 需要路由对象提前配置 path: “/path/参数名”
对应页面组件接收传递过来的值
$route.query.参数名
$route.params.参数名
main.js
routes:[
    {
      // 路径 锚点
      // 组件
      path:'/home',
      component:Home
    },
    {
      path:'/about/:name',
      component:About
    }
  ]
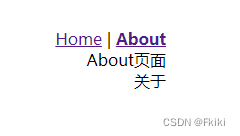
Home.vue
<template>
  <div>
    Home页面
    <div>{{ $route.query.name }}</div>
  </div>
</template>

About.vue
<template>
  <div>
    About页面
    <div>{{ $route.params.name }}</div>
  </div>
</template>
三、vue路由-重定向
重定向:匹配path后, 强制跳转path路径
网页打开url默认hash值是/路径
redirect是设置要重定向到哪个路由路径
routes:[
    {
      // 路径 锚点
      // 组件
      path:'/home',
      component:Home
    },
    {
      path:'/about/:name',
      component:About
    },
    {
      path:'/',
      redirect:'/home'
    }
  ]
四、路由-模式设置
hash路由例如: http://localhost:8080/#/home
history路由例如: http://localhost:8080/home (以后上线需要服务器端支持)
const router = new VueRouter({
  // 路由的规则
  // route: 一条路由规则
  routes:[
    {
      // 路径 锚点
      // 组件
      path:'/home',
      component:Home
    },
    {
      path:'/about/:name',
      component:About
    },
    {
      path:'/',
      redirect:'/home'
    },
  ],
  mode:'history'
})
五、编程式导航
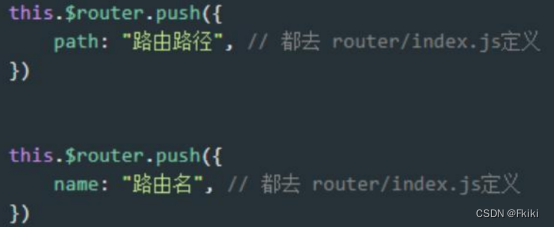
1.基本跳转
编程式导航:用JS代码来进行跳转
语法: path或者name任选一个
main.js
routes:[
    {
      // 路径 锚点
      // 组件
      path:'/home',
      name:'Home',
      component:Home
    },
    {
      path:'/about/:name',
      component:About
    },
    {
      path:'/',
      redirect:'/home'
    },
  ],
App.vue
<template>
  <div class="box">
    <router-link to="/home?name=首页">Home</router-link> | <router-link to="/about/关于">About</router-link>
    <button @click="btn('/home','Home')">跳转到首页</button>
      <router-view></router-view>
  </div>
</template>

<script>
export default {
  methods:{
    btn(pathname,name){
      this.$router.push({
        // path跳转
        path:pathname,
        // name跳转
        name:name
      })
    }
  }
}
</script>
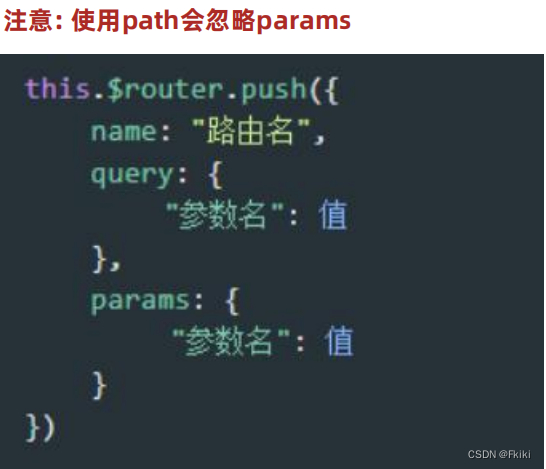
2.路由传参
语法: query或params都可以传参
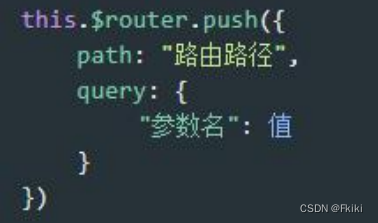
query传:
r
o
u
t
e
.
q
u
e
r
y
.
x
x
x
接收
p
a
r
a
m
s
传:
route.query.xxx 接收 params传:
route.query.xxx接收params传:route.params.xxx 接收
区别:
params传参:是在内存中传参,刷新会丢失
query传参:是在地址栏传参,刷新还在
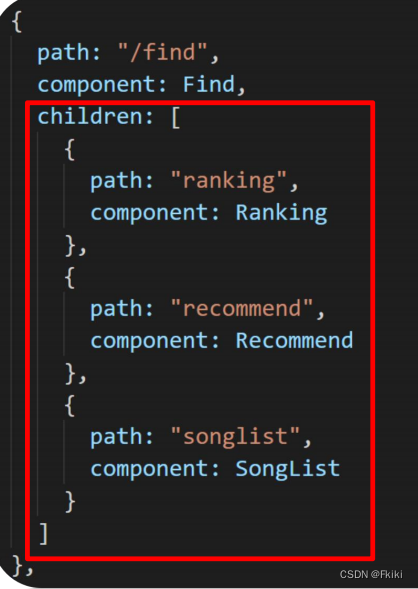
六、路由嵌套
main.js– 继续配置2级路由
一级路由path从/开始定义
二级路由往后path直接写名字, 无需/开头 (会自动拼接)
嵌套路由在上级路由的children数组里编写路由信息对象


 347
347


 被折叠的 条评论
为什么被折叠?
被折叠的 条评论
为什么被折叠?
 到【灌水乐园】发言


