


前言
关于 mqtt 相关文章分类:https://blog.csdn.net/freewebsys/article/category/8677221
本文的原文连接是: https://blog.csdn.net/freewebsys/article/details/87957795
未经博主允许不得转载。
博主地址是:http://blog.csdn.net/freewebsys
0,配置用户名密码
测试启动配置匿名,可以不用用户名密码进行登录。
mqtt.allow_anonymous = true
认证插件有很多:
认证插件 配置文件 说明
emqx_auth_clientid ClientId认证/鉴权插件
emqx_auth_username 用户名密码认证/鉴权插件
emqx_auth_ldap LDAP认证/鉴权插件
emqx_auth_http HTTP认证/鉴权插件
emqx_auth_mysql MySQL认证/鉴权插件
emqx_auth_pgsql Postgre认证/鉴权插件
emqx_auth_redis Redis认证/鉴权插件
emqx_auth_mongo MongoDB认证/鉴权插件
emqx_auth_jwt JWT认证/鉴权插件
比如用户密码的 配置:
auth.user.1.username = user001
auth.user.1.password = 123456
然后在加载插件:
./bin/emqx_ctl plugins load emqx_auth_username
同样的道理可以配置mysql 的数据库 连接,然后创建一个 表:
CREATE TABLE `mqtt_user` (
  `id` int(11) unsigned NOT NULL AUTO_INCREMENT,
  `username` varchar(100) DEFAULT NULL,
  `password` varchar(100) DEFAULT NULL,
  `salt` varchar(100) DEFAULT NULL,
  `is_superuser` tinyint(1) DEFAULT 0,
  `created` datetime DEFAULT NULL,
  PRIMARY KEY (`id`),
  UNIQUE KEY `mqtt_username` (`username`)
) ENGINE=MyISAM DEFAULT CHARSET=utf8;
1,关于配置 redis 用户登录
mqtt 中文文档:
https://mcxiaoke.gitbooks.io/mqtt-cn/content/
emqtt 文档:
https://emqplus-enterprise-documenation.readthedocs.io/zh/latest/auth.html
配置auth:
比如使用 redis 进行配置:
auth.redis.server = 127.0.0.1:6379

auth.redis.password_hash = plain
配置 redis server 服务器,设置密码是个明文加密。
然后往 redis 配置
设置super 权限,可以订阅任何 topic。
HSET mqtt_user:user001 is_superuser 1
HSET mqtt_user:user001 password "123456"
设置非管理员,只可以订阅 test 的topic。
HSET mqtt_user:user001 is_superuser 0
HSET mqtt_acl:user001 test 3
加载插件:
./bin/emqx_ctl plugins load emqx_auth_redis
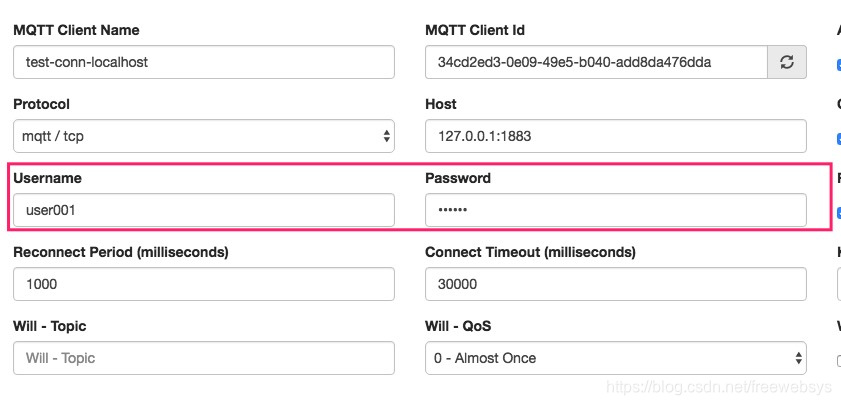
然后就可以使用 用户名,密码进行登录了:
2,使用java client
使用标准的java client 进行登录。设置连接用户名,密码进行登录。
客户端使用:参考git代码:
https://github.com/CloudMQTT/java-mqtt-example
<?xml version="1.0" encoding="UTF-8"?>
<project xmlns="http://maven.apache.org/POM/4.0.0"
         xmlns:xsi="http://www.w3.org/2001/XMLSchema-instance"
         xsi:schemaLocation="http://maven.apache.org/POM/4.0.0 http://maven.apache.org/maven-v4_0_0.xsd">
    <modelVersion>4.0.0</modelVersion>
    <groupId>com.cloudmqtt</groupId>
    <version>1.0-SNAPSHOT</version>
    <artifactId>com.cloudmqtt.example</artifactId>
    <dependencies>
        <dependency>
            <groupId>org.eclipse.paho</groupId>
            <artifactId>org.eclipse.paho.client.mqttv3</artifactId>
            <version>1.2.0</version>
        </dependency>
    </dependencies>
    <build>
        <plugins>
            <plugin>
                <groupId>org.apache.maven.plugins</groupId>
                <artifactId>maven-dependency-plugin</artifactId>
                <version>2.4</version>
                <executions>
                    <execution>
                        <id>copy-dependencies</id>
                        <phase>package</phase>
                        <goals>
                            <goal>copy-dependencies</goal>
                        </goals>
                    </execution>
                </executions>
            </plugin>
            <plugin>
                <groupId>org.apache.maven.plugins</groupId>
                <artifactId>maven-compiler-plugin</artifactId>
                <configuration>
                    <source>1.8</source>
                    <target>1.8</target>
                </configuration>
            </plugin>
       </plugins>
    </build>
</project>
java 代码:
import org.eclipse.paho.client.mqttv3.*;
import org.eclipse.paho.client.mqttv3.persist.MemoryPersistence;
import java.net.URI;
import java.net.URISyntaxException;

/**
 * A sample application that demonstrates how to use the Paho MQTT v3.1 Client blocking API.
 */
public class Subscriber implements MqttCallback {

    private final int qos = 1;
    private String topic = "test";
    private MqttClient client;

    public Subscriber(String uri) throws MqttException, URISyntaxException {
        this(new URI(uri));
    }

    public Subscriber(URI uri) throws MqttException {
        String host = String.format("tcp://%s:%d", uri.getHost(), uri.getPort());
        String[] auth = this.getAuth(uri);
        String username = auth[0];
        String password = auth[1];
        String clientId = "MQTT-Java-Example";
        if (!uri.getPath().isEmpty()) {
            this.topic = uri.getPath().substring(1);
        }

        MqttConnectOptions conOpt = new MqttConnectOptions();
        conOpt.setCleanSession(true);
        conOpt.setUserName(username);
        conOpt.setPassword(password.toCharArray());

        this.client = new MqttClient(host, clientId, new MemoryPersistence());
        this.client.setCallback(this);
        this.client.connect(conOpt);

        this.client.subscribe(this.topic, qos);
    }

    private String[] getAuth(URI uri) {
        System.out.println(uri);
        String a = uri.getAuthority();
        String[] first = a.split("@");
        String[] aa = first[0].split(":");
        System.out.println(aa[0]);
        return aa;
    }

    public void sendMessage(String payload) throws MqttException {
        MqttMessage message = new MqttMessage(payload.getBytes());
        message.setQos(qos);
        this.client.publish(this.topic, message); // Blocking publish
    }

    /**
     * @see MqttCallback#connectionLost(Throwable)
     */
    public void connectionLost(Throwable cause) {
        System.out.println("Connection lost because: " + cause);
        System.exit(1);
    }

    /**
     * @see MqttCallback#deliveryComplete(IMqttDeliveryToken)
     */
    public void deliveryComplete(IMqttDeliveryToken token) {
    }

    /**
     * @see MqttCallback#messageArrived(String, MqttMessage)
     */
    public void messageArrived(String topic, MqttMessage message) throws MqttException {
        System.out.println(String.format("[%s] %s", topic, new String(message.getPayload())));
    }

    public static void main(String[] args) throws MqttException, URISyntaxException {
        //mqtt[s]://[username][:password]@host.domain[:port]
        Subscriber s = new Subscriber("tcp://user001:123456@127.0.0.1:1883");
        s.sendMessage("Hello");
        s.sendMessage("Hello 2");
    }
}
3,总结
emqx 支持好多种认证的方式,有写死配置文件的。有写redis的。
有些在 mysql 数据库的。还有支持 ldap http jwt 等多种方式,直接配置下,然后加载模块就行。
在连接的时候使用 用户名,密码登录就行了。
非常方便。果然是产品支持的非常好。
本文的原文连接是:
https://blog.csdn.net/freewebsys/article/details/87957795
博主地址是:http://blog.csdn.net/freewebsys


 1377
1377

 被折叠的 条评论
为什么被折叠?
被折叠的 条评论
为什么被折叠?
 到【灌水乐园】发言


