


本文介绍了如何从零开始编译ffmpeg成wasm,并使用编译好的库成功在浏览器解码H264为YUV420P的图像。YUV420P在浏览器播放可以参考前一篇博文:webgl渲染Yuv420P图像
本文主要从以下几个方面介绍:
1、emcc简介
2、docker安装emcc
3、编译ffmpeg
4、web示例代码
emcc简介
Emscripten是一个完全开源的编译工具链,能够用LLVM将C或者C++代码编译成WebAssembly,然后使其可以运行在web或者nodejs环境中。其最主要的工具链简称emcc(Emscripten Compiler Frontend)。该工具链采用Clang和LLVM来编译成WebAssembly。
Docker安装emcc
我这里采用docker方式安装emcc。Docker环境的emcc是完全隔离的,对宿主机环境不会造成任何的影响,而且docker相比虚拟机来说极其轻量简洁。
centos安装docker命令记录如下:
//切换管理员
su
//安装docker
yum install -y docker
//检查是否安装成功
yum list installed | grep docker
//启动docker
service docker start
//查看docker状态
service docker status
//查看docker版本
docker -v
//查看docker镜像
docker images
docker安装emcc,这里我们采用官方提供的docker镜像emscripten/emsdk
//安装emsdk
docker pull emscripten/emsdk
//创建容器 -v表示目录映射 privileged表示文件读写
docker create -i -t -v /home/emcc:/home/emcc --name emsdk --privileged=true  emscripten/emsdk
//启动容器
docker start emsdk
//附加到容器
docker attach id
//查看emsdk版本
emcc -v
//编译
emcc hello.cc -o hello.js
//ssh提权 u代表所有者user;x代表执行权限;+ 表示增加权限
chmod u+x file.sh
几点说明:
docker create -i -t -v
这里的 -i 和-t 一定要加,目的是给容器分配一个伪输入终端并允许交互。不加的话,容器无法正常运行(启动之后马上停止),查了我好久原因。docker太菜了。
-v是给容器做一个文件目录镜像,这样容器里面可以直接访问宿主机器的目录。
这里写了一个hello的测试代码,试验是否安装成功:
hello.c代码如下:
//hello.cc
#include <stdio.h>
int main()
{
  printf("hello !\n");
  return 0;
}
编译之后:生成两个文件
hello.js
hello.wasm
我们写一个index.html文件
<!DOCTYPE html>
<html lang="en">
<head>
  <meta charset="UTF-8">
  <meta http-equiv="X-UA-Compatible" content="IE=edge">
  <meta name="viewport" content="width=device-width, initial-scale=1.0">
  <title>Document</title>
</head>
<body>
  <script src="hello.js"></script>
</body>
</html>
然后控制台输出了我们C程序输出:
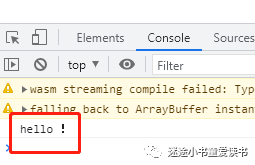
控制台输出
至此我们完成了docker的安装和emcc工具链的安装,并成功的编译hello并在web中调用。
编译ffmpeg
我们直接用ffmpeg的github的代码并将其复制到宿主机的/home/emcc目录下面,这个目录的作用看前面-v字段的介绍。
emcc对大工程的支持非常好。其提供非常简单的脚本来配置makefiles,以使用emcc来替代gcc,而且其他配置基本保持不变。
通常我们编译项目如下:
./configure
make
在emcc中,我们只需要修改如下:几乎没有修改
# Run emconfigure with the normal configure command as an argument.
emconfigure ./configure
# Run emmake with the normal make to generate wasm object files.
emmake make
我们这里编译ffmpeg,由于只用到了H264的解码,所以要禁用其他模块。
那么这个配置有点长,如下:
emconfigure ./configure --cc="emcc" --cxx="em++" --ar="emar" --prefix=$(pwd)/../decoder_wasm/ffmpeg --enable-cross-compile --target-os=none --arch=x86_32 --cpu=generic \
    --enable-gpl --enable-version3 --disable-avdevice --disable-avformat --disable-swresample --disable-postproc --disable-avfilter \
    --disable-programs --disable-logging --disable-everything \
    --disable-ffplay --disable-ffprobe --disable-asm --disable-doc --disable-devices --disable-network \
    --disable-hwaccels --disable-parsers --disable-bsfs --disable-debug --disable-protocols --disable-indevs --disable-outdevs \
    --enable-decoder=h264  --enable-parser=h264
make
make install
这里我们采用的是make命令,因为我们修改了编译的环境,所以不需要再使用emmake了。对修改了的几个命令的说明:
--cxx=             :C++编译器
–cc=               :C编译器
prefix=            :指定安装目录
--ar               :生成静态链接库
编译好之后,我们会在prefix指定的目录下生成头文件和库文件


不过这些生成的库其实已经具备了能帮我们生成webassembley的信息。
接下来,我们封装几个简单的函数来实现将H264解码成YUV420P。
#include <stdio.h>
#include <stdlib.h>
#include <string.h>


typedef void (*VideoCallback)(unsigned char *data_y, unsigned char *data_u, unsigned char *data_v, int line1, int line2, int line3, int width, int height);


#include <libavcodec/avcodec.h>


#define INBUF_SIZE 4096


typedef enum ErrorCode
{
  kErrorCode_Success = 0,
  kErrorCode_Invalid_Param,
  kErrorCode_Invalid_State,
  kErrorCode_Invalid_Data,
  kErrorCode_Invalid_Format,
  kErrorCode_NULL_Pointer,
  kErrorCode_Open_File_Error,
  kErrorCode_Eof,
  kErrorCode_FFmpeg_Error
} ErrorCode;


typedef enum LogLevel
{
  kLogLevel_None, //Not logging.
  kLogLevel_Core, //Only logging core module(without ffmpeg).
  kLogLevel_All   //Logging all, with ffmpeg.
} LogLevel;


typedef enum DecoderType
{
  kDecoderType_H264,
  kDecoderType_H265
} DecoderType;


LogLevel logLevel = kLogLevel_None;
DecoderType decoderType = kDecoderType_H265;


void simpleLog(const char *format, ...)
{
  if (logLevel == kLogLevel_None)
  {
    return;
  }


  char szBuffer[1024] = {0};
  char szTime[32] = {0};
  char *p = NULL;
  int prefixLength = 0;
  const char *tag = "Core";


  prefixLength = sprintf(szBuffer, "[%s][%s][DT] ", szTime, tag);
  p = szBuffer + prefixLength;


  if (1)
  {
    va_list ap;
    va_start(ap, format);
    vsnprintf(p, 1024 - prefixLength, format, ap);
    va_end(ap);
  }


  printf("%s\n", szBuffer);
}


void ffmpegLogCallback(void *ptr, int level, const char *fmt, va_list vl)
{
  static int printPrefix = 1;
  static int count = 0;
  static char prev[1024] = {0};
  char line[1024] = {0};
  static int is_atty;
  AVClass *avc = ptr ? *(AVClass **)ptr : NULL;
  if (level > AV_LOG_DEBUG)
  {
    return;
  }


  line[0] = 0;


  if (printPrefix && avc)
  {
    if (avc->parent_log_context_offset)
    {
      AVClass **parent = *(AVClass ***)(((uint8_t *)ptr) + avc->parent_log_context_offset);
      if (parent && *parent)
      {
        snprintf(line, sizeof(line), "[%s @ %p] ", (*parent)->item_name(parent), parent);
      }
    }
    snprintf(line + strlen(line), sizeof(line) - strlen(line), "[%s @ %p] ", avc->item_name(ptr), ptr);
  }


  vsnprintf(line + strlen(line), sizeof(line) - strlen(line), fmt, vl);
  line[strlen(line) + 1] = 0;
  simpleLog("%s", line);
}


VideoCallback videoCallback = NULL;


ErrorCode copyFrameData(AVFrame *src, AVFrame *dst)
{
  ErrorCode ret = kErrorCode_Success;
  memcpy(dst->data, src->data, sizeof(src->data));
  dst->linesize[0] = src->linesize[0];
  dst->linesize[1] = src->linesize[1];
  dst->linesize[2] = src->linesize[2];
  dst->width = src->width;
  dst->height = src->height;
  return ret;
}


unsigned char *yuvBuffer;
int videoSize = 0;
int initBuffer(width, height)
{
  videoSize = avpicture_get_size(AV_PIX_FMT_YUV420P, width, height);
  int bufferSize = 3 * videoSize;
  yuvBuffer = (unsigned char *)av_mallocz(bufferSize);
}


static ErrorCode decode(AVCodecContext *dec_ctx, AVFrame *frame, AVPacket *pkt, AVFrame *outFrame)
{
  ErrorCode res = kErrorCode_Success;
  char buf[1024];
  int ret;


  ret = avcodec_send_packet(dec_ctx, pkt);
  if (ret < 0)
  {
    simpleLog("Error sending a packet for decoding\n");
    res = kErrorCode_FFmpeg_Error;
  }
  else
  {
    while (ret >= 0)
    {
      ret = avcodec_receive_frame(dec_ctx, frame);
      if (ret == AVERROR(EAGAIN) || ret == AVERROR_EOF)
      {
        break;
      }
      else if (ret < 0)
      {
        simpleLog("Error during decoding\n");
        res = kErrorCode_FFmpeg_Error;
        break;
      }


      res = copyFrameData(frame, outFrame);
      if (res != kErrorCode_Success)
      {
        break;
      }


      videoCallback(outFrame->data[0], outFrame->data[1], outFrame->data[2], outFrame->linesize[0], outFrame->linesize[1], outFrame->linesize[2], outFrame->width, outFrame->height);
    }
  }
  return res;
}


int isInit = 0;
const AVCodec *codec;
AVCodecParserContext *parser;
AVCodecContext *c = NULL;
AVPacket *pkt;
AVFrame *frame;
AVFrame *outFrame;


ErrorCode openDecoder(int codecType, long callback, int logLv)
{
  ErrorCode ret = kErrorCode_Success;
  do
  {
    logLevel = logLv;


    simpleLog("Initialize decoder.");


    if (isInit != 0)
    {
      break;
    }


    decoderType = codecType;


    if (logLevel == kLogLevel_All)
    {
      av_log_set_callback(ffmpegLogCallback);
    }


    /* find the video decoder */
    if (decoderType == kDecoderType_H264)
    {
      codec = avcodec_find_decoder(AV_CODEC_ID_H264);
    }
    else
    {
      codec = avcodec_find_decoder(AV_CODEC_ID_H265);
    }


    if (!codec)
    {
      simpleLog("Codec not found\n");
      ret = kErrorCode_FFmpeg_Error;
      break;
    }


    parser = av_parser_init(codec->id);
    if (!parser)
    {
      simpleLog("parser not found\n");
      ret = kErrorCode_FFmpeg_Error;
      break;
    }


    c = avcodec_alloc_context3(codec);
    if (!c)
    {
      simpleLog("Could not allocate video codec context\n");
      ret = kErrorCode_FFmpeg_Error;
      break;
    }


    if (avcodec_open2(c, codec, NULL) < 0)
    {
      simpleLog("Could not open codec\n");
      ret = kErrorCode_FFmpeg_Error;
      break;
    }


    frame = av_frame_alloc();
    if (!frame)
    {
      simpleLog("Could not allocate video frame\n");
      ret = kErrorCode_FFmpeg_Error;
      break;
    }


    outFrame = av_frame_alloc();
    if (!outFrame)
    {
      simpleLog("Could not allocate video frame\n");
      ret = kErrorCode_FFmpeg_Error;
      break;
    }


    pkt = av_packet_alloc();
    if (!pkt)
    {
      simpleLog("Could not allocate video packet\n");
      ret = kErrorCode_FFmpeg_Error;
      break;
    }


    videoCallback = (VideoCallback)callback;


  } while (0);
  simpleLog("Decoder initialized %d.", ret);
  return ret;
}


ErrorCode decodeData(unsigned char *data, size_t data_size)
{
  ErrorCode ret = kErrorCode_Success;


  while (data_size > 0)
  {
    int size = av_parser_parse2(parser, c, &pkt->data, &pkt->size,
                                data, data_size, AV_NOPTS_VALUE, AV_NOPTS_VALUE, 0);
    if (size < 0)
    {
      simpleLog("Error while parsing\n");
      ret = kErrorCode_FFmpeg_Error;
      break;
    }
    data += size;
    data_size -= size;


    if (pkt->size)
    {
      ret = decode(c, frame, pkt, outFrame);
      if (ret != kErrorCode_Success)
      {
        break;
      }
    }
  }
  return ret;
}


ErrorCode flushDecoder()
{
  /* flush the decoder */
  return decode(c, frame, NULL, outFrame);
}


ErrorCode closeDecoder()
{
  ErrorCode ret = kErrorCode_Success;


  do
  {
    if (parser != NULL)
    {
      av_parser_close(parser);
      simpleLog("Video codec context closed.");
    }
    if (c != NULL)
    {
      avcodec_free_context(&c);
      simpleLog("Video codec context closed.");
    }
    if (frame != NULL)
    {
      av_frame_free(&frame);
    }
    if (pkt != NULL)
    {
      av_packet_free(&pkt);
    }
    if (yuvBuffer != NULL)
    {
      av_freep(&yuvBuffer);
    }
    if (outFrame != NULL)
    {
      av_frame_free(&outFrame);
    }
    simpleLog("All buffer released.");
  } while (0);


  return ret;
}
外部调用的核心函数有3个:
openDecoder
closeDecoder
decodeData
还有一个回调函数
VideoCallback
通过openDecoder创建对象,closeDecoder释放对象,decodeData不断的push数据,然后通过VideoCallback回调出来。
这里的重点还是将如何编译这段代码:我们将上述代码保存为decode_video.c文件
export TOTAL_MEMORY=67108864
export EXPORTED_FUNCTIONS="[ \
    '_openDecoder', \
    '_closeDecoder', \
    '_decodeData',
]"


echo "Running Emscripten..."
emcc decode_video.c ffmpeg/lib/libavutil.a ffmpeg/lib/libavcodec.a  \
    -O2 \
    -I "ffmpeg/include" \
    -s WASM=1 \
    -s TOTAL_MEMORY=${TOTAL_MEMORY} \
     -s EXPORTED_FUNCTIONS="${EXPORTED_FUNCTIONS}" \
    -s EXPORTED_RUNTIME_METHODS="['addFunction']" \
    -s RESERVED_FUNCTION_POINTERS=14 \
    -o dist/libffmpeg_$1.js


echo "Finished Build"
emcc :编译命令
ffmpeg/lib/libavutil.a ffmpeg/lib/libavcodec.a :是我们需要依赖的库
-O2:JavaScript级别的优化以及一些llvm -O3的优化项 发布项目的时候,推荐使用本级别优化
-I:包含头文件目录
-s WASM=1 :编程成wasm ,如果是=0表示编译成arm.js(性能差不少)
-s TOTAL_MEMORY 设置总内存大小
-s EXPORTED_FUNCTIONS 设置输出的函数,即我们提供给js调用的函数
-s EXPORTED_RUNTIME_METHODS:这里也研究了好一会,我们在js中需要设置一个回调函数,所以需要用到addFunction
-s RESERVED_FUNCTION_POINTERS=14 :这个参数和上面的addFunction息息相关。我们在js代码中通过Module.addFunction增加回调指针的时候,其保存在一个table中,这里是设置这个table的最大个数。
运行上述命令,我们会生成下面的文件:
libffmpeg_264.js
libffmpeg_264.wasm
接下来我们在浏览器中就可以调用了。
web示例代码
整个解码过程其实就是先设置一个回调函数,然后不停的push数据,然后不停的回调。那么我们的示例代码也肯定是围绕着这个逻辑展开的。
创建回调函数:这里就用到了上面的Module.addFunction
let videoCallback = Module.addFunction(function (
addr_y,
addr_u,
addr_v,
stride_y,
stride_u,
stride_v,
width,
height
) {
let out_y = HEAPU8.subarray(addr_y, addr_y + stride_y * height)
let out_u = HEAPU8.subarray(addr_u, addr_u + (stride_u * height) / 2)
let out_v = HEAPU8.subarray(addr_v, addr_v + (stride_v * height) / 2)
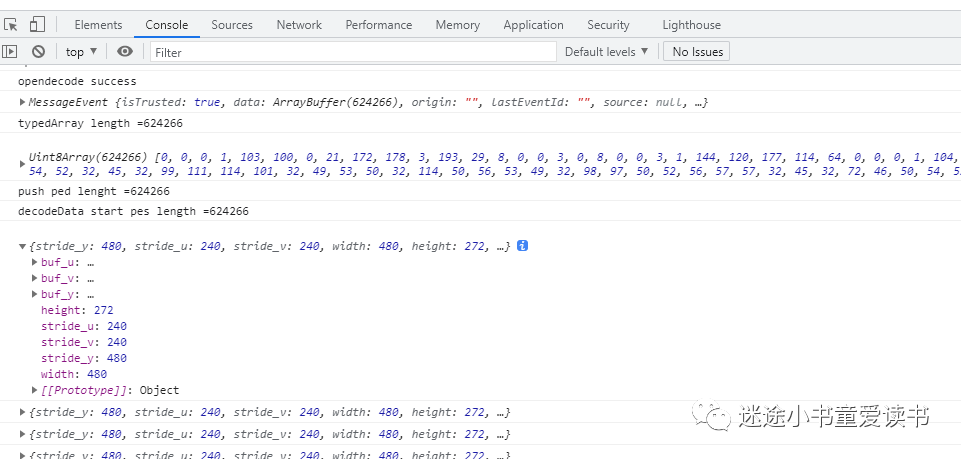
let obj = {
stride_y,
stride_u,
stride_v,
width,
height,
buf_y: new Uint8Array(out_y),
buf_u: new Uint8Array(out_u),
buf_v: new Uint8Array(out_v),
}
that.result.push(obj)
}, 'viiiiiiii')
这里有一个非常的注意事项就是最后的viiiiiiii,这玩意儿我也是折腾了好久好久。这里先给出v和i的函数定义。
'v': void type
'i': 32-bit integer type
'j': 64-bit integer type (currently does not exist in JavaScript)
'f': 32-bit float type
'd': 64-bit float type
这里第一个直接代表函数的返回值,我们是void 所以是v
后面的参数代表回调函数的输入参数,由于我们都有4字节的整数(要么是指针要么是int),一共8个参数,所以我们这里是8个i。
然后创建解码
let ret = Module._openDecoder(0, videoCallback, 1)
push数据如下:
    let fileSize = pes.length
    let cacheBuffer = Module._malloc(fileSize)
    Module.HEAPU8.set(pes, cacheBuffer)
    Module._decodeData(cacheBuffer, fileSize)
    Module._free(cacheBuffer)
释放数据如下:
Module._closeDecoder()
通过这几个函数的配合,我们就实现了web解码H264的关键过程。成果解码出了数据:
写在最后:
可以关注本人公众号:
迷途小书童爱读书
或者扫描如下二维码:

回复libffmpeg_264
即可获得
1、上述解码的示例


 518
518


 被折叠的 条评论
为什么被折叠?
被折叠的 条评论
为什么被折叠?
 到【灌水乐园】发言


