


Part1前言
最近有一个需求,需要将GeoServer切出来的wtms的瓦片,合并成一张图。期间尝试了QGis等工具,可能不太会用,都没有成功。最后决定自己写代码来实现。

Part2瓦片格式
切片出来的瓦片格式示例如下:
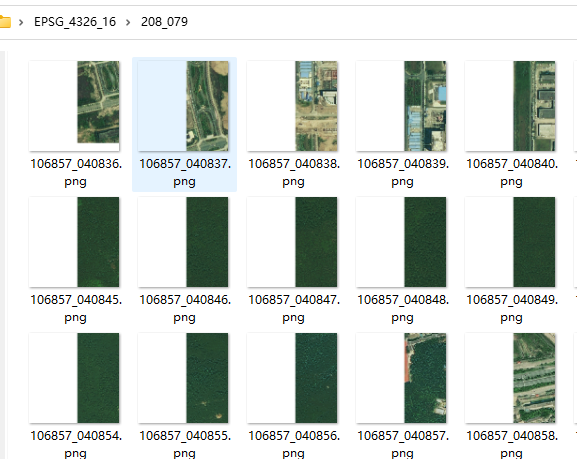
每个瓦片都有一个名称106857_040836.png其中前面X轴对应第一个参数106857 Y轴对应第二个参数040836。我们画一幅图来表示切片的规则。
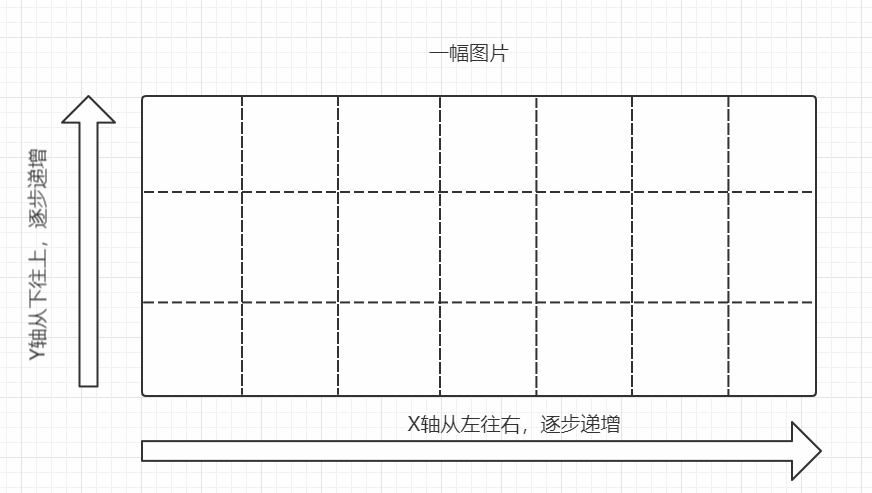
图片的原点在左下角,X轴从左往右边逐步递增、Y轴从下往上逐步递增。
Part3代码合并
这里我们采用python代码来实现,通过python遍历所有的文件,将X轴相同的归类,再逐步展示。图片合并采用Image库的Paste函数来实现。这里python库的Image函数的坐标系和瓦片有点区别,如下图

Image图像的原点在左上角,在逐步进行x和y轴的递增。通过和上面的图片的比较,我们发现x轴的递增是一致的,y轴的递增是反向的,我们做好这个处理即可。
代码实现如下,也可以参考github地址https://github.com/inveta/ModelProcess/tree/main/WtmsMerge
import os
from PIL import Image

# 指定目录路径
directory = r'C:\Users\41132\Desktop\EPSG_4326_16'
width = 256
height = 256
xCount = 0
yCount = 0

picxy = {}
picPathDic = {}
# 遍历目录中的所有文件
for root, dirs, files in os.walk(directory):
    for file in files:
        # 打印文件名称和路径
        # print(os.path.join(root, file))
        x, y = file.split('_')
        if False == (x in picxy):
            picxy[x] = set()
        ySet = picxy[x]
        ySet.add(y)
        picPathDic[file] = os.path.join(root, file)

sorted_keys = sorted(picxy.keys())
print("xCount的数量")
print(len(sorted_keys))
xCount = len(sorted_keys)

for x in sorted_keys:
    ySet = picxy[x]
    ySet = sorted(ySet)
    print("yCount的数量")
    print(len(ySet))
    yCount = len(ySet)
    break

IMG_OUT = Image.new("RGB", (xCount*width, yCount*height))
indexX = 0
for x in sorted_keys:
    indexY = 0
    ySet = picxy[x]
    ySet = sorted(ySet, reverse=True)
    for y in ySet:
        img_path = picPathDic[x+"_"+y]
        with Image.open(img_path) as img:
            IMG_OUT.paste(img, (indexX*width, indexY*height))
        indexY = indexY+1
    indexX = indexX+1

IMG_OUT.save(os.path.join(directory, "imageMerge.png"))
Part4总结
本文主要介绍了如何通过python代码实现wtms协议瓦片的合并,并分享了代码实现。
Part5Inveta团队
Inveta团队由研发、美术设计、建模等组成。团队介绍:
https://www.inveta.cn/about.html
团队开源项目:
https://github.com/inveta


 1140
1140


 被折叠的 条评论
为什么被折叠?
被折叠的 条评论
为什么被折叠?
 到【灌水乐园】发言


