


import cv2 as cv
import numpy as np


def threshold_demo(image): #全局阈值
	gray = cv.cvtColor(image, cv.COLOR_BGR2GRAY)#变为灰度
	ret, binary = cv.threshold(gray, 127, 255, cv.THRESH_BINARY | cv.THRESH_OTSU)
	#THRESH_TRUNC截断大于127的值都为127,127以下的数字保持不变
	print("threshold value %s" % ret) #打印阈值,前面先进行了灰度处理0-255,我们使用该阈值进行处理,低于该阈值的图像变黑色,高于该阈值则为白色
#全局阈值不能调整,数值是固定的
	cv.imshow("hreshold_demo", binary)

def THRESH_TOZERO(image):
	gray = cv.cvtColor(image, cv.COLOR_BGR2GRAY)#变为灰度
	ret, binary = cv.threshold(gray, 127, 255, cv.THRESH_TOZERO)#THRESH_TOZERO小于阈值的都为0和(1)相反
	print('threshold_demo_Ret:',ret)
	cv.imshow('THRESH_TOZERO',binary)

def local_threshold(image): #局部阈值
	gray = cv.cvtColor(image, cv.COLOR_BGR2GRAY)#变为灰度
	binary = cv.adaptiveThreshold(gray, 255, cv.ADAPTIVE_THRESH_GAUSSIAN_C, cv.THRESH_BINARY, 25, 10) 	#大于阈值的都为0

	cv.imshow("local_threshold", binary)


def custom_threshold(image): #自定义
	gray = cv.cvtColor(image, cv.COLOR_BGR2GRAY)#变为灰度
	h, w = gray.shape[:2]
	m = np.reshape(gray, [1, w * h])
	mean = m.sum() / (w * h)
	print("mean : ", mean)
	ret, binary = cv.threshold(gray, mean, 255, cv.THRESH_BINARY)#自定义,把平均值高于的都截断,(mean=127,127的值都变成255,127以下保持不变)
	print(' custom_threshold Ret', ret)
	cv.imshow("custom_threshold", binary)
"""
①OpenC的threshold函数进行全局阈值。其函数原型为:threshold(src, thresh, maxval, type[, dst]) -> retval, dst
src参数表示输入图像(多通道,8位或32位浮点)。
thresh参数表示阈值。
maxval参数表示与THRESH_BINARY和THRESH_BINARY_INV阈值类型一起使用设置的最大值。
type参数表示阈值类型。
retval参数表示返回的阈值。若是全局固定阈值算法,则返回thresh参数值。若是全局自适应阈值算法,则返回自适应计算得出的合适阈值。
dst参数表示输出与src相同大小和类型以及相同通道数的图像。
②type参数阈值类型这部分参考博客:https://blog.csdn.net/iracer/article/details/49232703  ,写的很不错。
"""
print("--------- Python OpenCV Tutorial ---------")
src = cv.imread(r"D:\example\1.jpg")
cv.namedWindow("input image", cv.WINDOW_AUTOSIZE)
cv.imshow("input image", src)
threshold_demo(src)
THRESH_TOZERO(src)
local_threshold(src)
custom_threshold(src)
cv.waitKey(0)

cv.destroyAllWindows()
原图效果

全局阈值效果
灰度效果:
局部阈值效果
自定义效果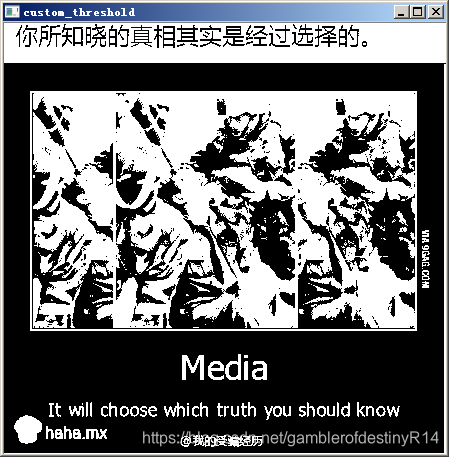


 548
548


 被折叠的 条评论
为什么被折叠?
被折叠的 条评论
为什么被折叠?
 到【灌水乐园】发言


