


1.利用android studio生成so文件
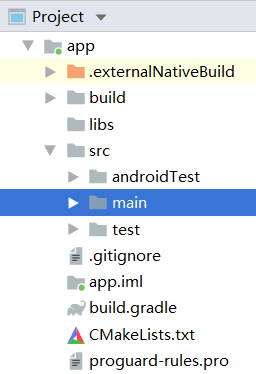
1.0创建项目

1.1.0 添加 CMakeLists.txt
内容:
# For more information about using CMake with Android Studio, read the
# documentation: https://d.android.com/studio/projects/add-native-code.html

# Sets the minimum version of CMake required to build the native library.

cmake_minimum_required(VERSION 3.4.1)

# Creates and names a library, sets it as either STATIC
# or SHARED, and provides the relative paths to its source code.
# You can define multiple libraries, and CMake builds them for you.
# Gradle automatically packages shared libraries with your APK.


aux_source_directory(src/main/cpp MainCPP)

add_library( # Sets the name of the library.
             test_lib #.so库名 可自定义

             # Sets the library as a shared library.
             SHARED

             # Provides a relative path to your source file(s).
            ${MainCPP} ) #源文件所在目录
# Searches for a specified prebuilt library and stores the path as a
# variable. Because CMake includes system libraries in the search path by
# default, you only need to specify the name of the public NDK library
# you want to add. CMake verifies that the library exists before
# completing its build.
find_library( # Sets the name of the path variable.
              log-lib
              # Specifies the name of the NDK library that
              # you want CMake to locate.
              log )
# Specifies libraries CMake should link to your target library. You
# can link multiple libraries, such as libraries you define in this
# build script, prebuilt third-party libraries, or system libraries.
target_link_libraries( # Specifies the target library.
                       test_lib #.so库名 可自定义
                       # Links the target library to the log library
                       # included in the NDK.
                       ${log-lib} )
1.1.1 修改build.gradle

内容:
 externalNativeBuild {
        cmake {
            path file('CMakeLists.txt')
        }
    }
1.2添加 .h 与 .cpp
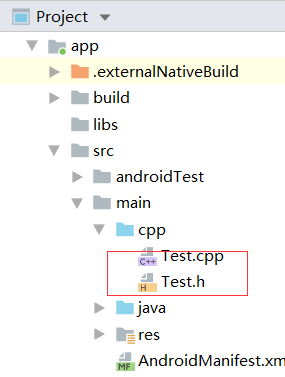
内容
Test.h

//
// Created by fly on 2019/5/31.
//

#ifndef MYAPPLICATION_TEST_H
#define MYAPPLICATION_TEST_H

#include <jni.h>

#ifdef __cplusplus
extern "C" {
#endif
/*
 * Class:     com_sunxy_jnitest_jni_SunxyNDk
 * Method:    getStringFromNative
 * Signature: (I)I
 */

JNIEXPORT jstring JNICALL Java_com_example_myapplication_Test_1lib_getStr(JNIEnv *env, jclass type, jstring str_);

JNIEXPORT jstring JNICALL Java_com_example_myapplication_Test_1lib_getStringFromNative
        (JNIEnv *env, jobject jObj);
#ifdef __cplusplus
}
#endif


#endif //MYAPPLICATION_TEST_H


------

test.cpp

//
// Created by fly on 2019/5/31.
//

#include "Test.h"


JNIEXPORT jstring JNICALL
Java_com_example_myapplication_Test_1lib_getStr(JNIEnv *env, jclass type, jstring str_) {
    // TODO
    //std::string helloWord =     "Welcome into Jni";

    return str_;
}

JNIEXPORT jstring JNICALL
Java_com_example_myapplication_Test_1lib_getStringFromNative
        (JNIEnv *env, jobject jObj){
//    return (*env)->NewStringUTF(env,"Hello From JNI!");

    jstring strRet = env->NewStringUTF("HelloWorld from Sunxy JNI !");
    return strRet;
}
1.3 build生成 .so

结果 ---注: 目录不一定马上显示,可以到windows 目录下查看

2. 使用与测试测试
2.1 .1 在刚刚的项目上测试--超级简单---添加个 java 类来测试

内容:
test_lib

package com.example.myapplication;

public class Test_lib {
    static {
        try {
            System.loadLibrary("test_lib");
            System.out.println("加载了:");

        } catch (Throwable e) {
            System.out.println("加载xx库异常 :"+e.toString());
        }
    }
    public static  native String getStr(String str);
    public static  native String getStringFromNative();
}


-------

MainActivity

package com.example.myapplication;

import android.support.v7.app.AppCompatActivity;
import android.os.Bundle;

public class MainActivity extends AppCompatActivity {

    @Override
    protected void onCreate(Bundle savedInstanceState) {
        super.onCreate(savedInstanceState);
        setContentView(R.layout.activity_main);
        String path = Test_lib.getStr("sdfsdfsdf");
        String str = Test_lib.getStringFromNative();
        // view.setText(str);
        System.out.println(path);
        System.out.println(str);
    }
}
2.1.2 编译断点,查看结果

2.2 在其他项目上引用so
2.2.1 代码准备 使用 2.1
差异的MainActivity :
package com.example.myapplication;

import android.support.v7.app.AppCompatActivity;
import android.os.Bundle;
import android.view.View;
import android.widget.TextView;


public class MainActivity extends AppCompatActivity {

    @Override
    protected void onCreate(Bundle savedInstanceState) {
        super.onCreate(savedInstanceState);
        setContentView(R.layout.activity_main);

       TextView view = findViewById(R.id.id_hello);  //helloworld 的 id
        String path = Test_lib.getStr("sdfsdfsdf");
        String str = Test_lib.getStringFromNative();

        view.setText(path + str);  //改变 默认helloworld 控件的内容
        System.out.println(path);
        System.out.println(str);
    }
}
2.2.2 修改build.gradle

内容
  android {
        sourceSets {
            main {
                jniLibs.srcDirs = ['libs']
            }
        }
    }
2.2.3 复制so文件到新项目的libs目录下
参考命令:
cmd.bat

robocopy .\obj\  ..\android-pro\MyApplication2\app\libs  /E /MT:30
pause
2.2.4 编译运行 --- 注:使用第三方安装虚拟机MuMu: adb connect 127.0.0.1:7555

最后附上参考资料:
在Android studio 3.2 版项目中使用cmake调用C/C++ https://blog.csdn.net/qq_38315190/article/details/83583317
Android Studio工程引用第三方so文件 https://www.cnblogs.com/ghimtim/p/6440422.html
https://blog.csdn.net/q9104422999/article/details/70650748
android获取控件的几种方法 https://www.colabug.com/5345436.html
CMake 使用方法 https://www.cnblogs.com/lidabo/p/7359422.html
CMD批处理复制目录下所有文件 https://www.cnblogs.com/biaoge140/p/9315786.html
使用第三方模拟器 --https://blog.csdn.net/title71/article/details/80230797


 5087
5087


 被折叠的 条评论
为什么被折叠?
被折叠的 条评论
为什么被折叠?
 到【灌水乐园】发言


