


小球的实现思路比较简单,就是填充一个带正弦路径的区域,然后 clip 截取出圆球部分。
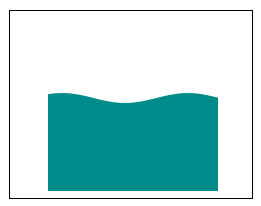
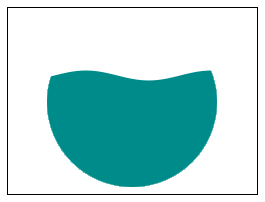
最终效果图:
遇到的问题:
绘制圆后对该圆路径 clip 会有一圈虚线,绘制前后加上 save、restore 解决了;
阴影等特效很占资源不建议使用;
clip 对抗锯齿有一点影响,可以计算下水球圆弧的起止角度直接绘制圆弧;
要对文本差异性着色在有多个波浪时比较麻烦,待完成。
代码地址:https://github.com/gongjianbo/MyTestCode/tree/master/Qml/TestQml_20210310_Wave
完整代码:
import QtQuick 2.12
import QtQuick.Controls 2.12

//波浪小球
//参照:https://blog.csdn.net/zhengtianzuo06/article/details/78687838
//参照:https://blog.csdn.net/lecepin/article/details/53536445
//参照:https://blog.csdn.net/yyy269954107/article/details/43449087
Canvas {
    id: control

    implicitWidth: 200
    implicitHeight: 200

    //数值范围
    property real maxValue: 100
    property real minValue: 0
    property real curValue: 0

    //显示进度
    property real curProgress: (curValue-minValue)/(maxValue-minValue)*100
    property string curText: (curProgress<0?0:curProgress).toFixed(1)+" %"

    //画布
    //取最短边定义正方形区域进行绘制,一般组件已经是设置为正方形的
    property int canvasWidth: width < height ? width : height
    property int canvasMargin: 5
    property int waveRadius: canvasWidth/2-canvasMargin //水球半径

    property int fontPx: 34
    property color textColor: Qt.lighter(waveColor) //文本颜色
    property color waveColor: "#0486FF" //波浪颜色
    //波浪参数
    property real waveWidth: 0.05   //波浪宽度,数越小越宽
    property real waveHeight: 5     //波浪高度,数越大越高
    property real speed: 0.1        //波浪速度,数越大速度越快
    property real offset: 0         //波浪x偏移量,用于动画

    onPaint: {
        var ctx = getContext("2d");
        ctx.clearRect(0, 0, canvasWidth, canvasWidth);
        //保存默认设置
        ctx.save();

        //【1】截取波浪圆形区域
        //截取圆圈范围进行绘制
        ctx.lineWidth = 1;
        ctx.beginPath();
        ctx.arc(canvasWidth/2, canvasWidth/2, waveRadius, 0, 2*Math.PI);
        ctx.closePath();
        ctx.clip();

        //【2】画波浪
        //画波浪,可以导出波浪个数属性
        drawWave(ctx, Qt.darker(waveColor), 1.5, -1, true);
        drawWave(ctx, waveColor, 0, 0, false);

        //【3】文本
        ctx.font = fontPx + 'px Arial';
        ctx.textAlign = 'center';
        ctx.fillStyle = textColor;
        ctx.fillText(curText, canvasWidth/2, canvasWidth/2+fontPx/2);

        //恢复默认设置,防止污染下一次刷新
        ctx.restore();

        //【4】画外圈,restore之后再画,避免被clip
        ctx.lineWidth = 1;
        ctx.strokeStyle = waveColor;
        ctx.beginPath();
        ctx.arc(canvasWidth/2, canvasWidth/2, waveRadius, 0, 2*Math.PI);
        ctx.stroke();
    }

    //画笔,颜色,x偏移,y偏移,角度值取反
    function drawWave(ctx,w_color,x_offset,y_offset,reverse=false)
    {
        //sin曲线
        ctx.beginPath();
        var x_base = canvasWidth/2-waveRadius;
        var y_base = canvasWidth/2+waveRadius-waveRadius*2*(curProgress/100);
        //波浪曲线部分,横坐标步进为5px
        for(var x_value = 0; x_value <= waveRadius*2 + 5; x_value += 5){
            var y_value = waveHeight*Math.sin((reverse?-1:1)*(x_value)*waveWidth+offset+x_offset)+y_offset;
            ctx.lineTo(x_base+x_value, y_base+y_value);
        }
        //底部两端围成实心
        ctx.lineTo(canvasWidth/2+waveRadius, canvasWidth/2+waveRadius);
        ctx.lineTo(canvasWidth/2-waveRadius, canvasWidth/2+waveRadius);
        ctx.closePath();
        ctx.fillStyle = w_color;
        ctx.fill();
    }

    //用定时器刷新,动画的刷新率更高CPU占用率也高了
    Timer {
        running: visible
        repeat: true
        interval: 30
        onTriggered:{
            //波浪移动
            offset += speed;
            offset %= Math.PI*2;
            control.requestPaint();
        }
    }
}
import QtQuick 2.12
import QtQuick.Window 2.12
import QtQuick.Controls 2.12

Window {
    visible: true
    width: 640
    height: 480
    title: qsTr("Qml Wave")

    Row {
        spacing: 20

        //勾选递增后定时器增加数值
        CheckBox {
            id: auto_increment
            text: "递增"
            checked: true
        }
    }

    CanvasWave {
        id: wave
        anchors.centerIn: parent
        //waveColor: "darkCyan"

        //用来测试边界
        Rectangle {
            anchors.fill: parent
            color: "transparent"
            border.color: "black"
        }
    }

    Timer {
        id: timer
        running: auto_increment.checked
        repeat: true
        interval: 30
        onTriggered:{
            //测试用逻辑,递增进度值
            if(wave.curValue <= wave.maxValue){
                wave.curValue += 0.5;
            }

            if(wave.curValue > wave.maxValue){
                wave.curValue = wave.minValue;
            }
        }
    }
}


 603
603


 被折叠的 条评论
为什么被折叠?
被折叠的 条评论
为什么被折叠?
 到【灌水乐园】发言


