


如何使用
前置条件:该插件需要使用maven 3.1或更高版本
原始地址https://jeremylong.github.io/DependencyCheck/index.html dependency-check – About (jeremylong.github.io)
1、在项目pom引入dependency-check-maven插件
<build>
<plugins>
<plugin>
<groupId>org.owasp</groupId>
<artifactId>dependency-check-maven</artifactId>
<version>7.0.0</version>
<configuration>
<autoUpdate>true</autoUpdate>
</configuration>
<executions>
<execution>
<goals>
<goal>check</goal>
</goals>
</execution>
</executions>
</plugin>
</plugins>
</build>
切换到项目的target目录,执行mvn dependency-check:check
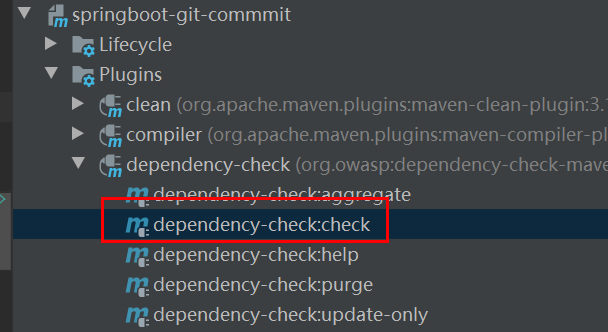
idea,可以直接如下,右键运行
第一次执行的话,他的速度会挺慢的,因为他需要从NIST托管的国家漏洞数据库下载漏洞数据到本地备份库。
在执行的过程中,可能会出现
Failed to initialize the RetireJS repo
One or more exceptions occurred during analysis:
UpdateException: Failed to initialize the RetireJS repo
caused by DownloadFailedException: Download failed, unable to copy 'https://raw.githubusercontent.com/Retirejs/retire.js/master/repository/jsrepository.json' to 'd:\m2\repository\org\owasp\dependency-check-utils\7.0.0\..\..\dependency-check-data\7.0\jsrepository.json'; Error downloading file https://raw.githubusercontent.com/Retirejs/retire.js/master/repository/jsrepository.json; unable to connect.
caused by DownloadFailedException: Error downloading file https://raw.githubusercontent.com/Retirejs/retire.js/master/repository/jsrepository.json; unable to connect.
caused by SocketTimeoutException: Read timed out
NoDataException: No documents exist
解决的办法
下载jsrepository.json并将该文件放到maven私仓地址\org\owasp\dependency-check-data\7.0目录下
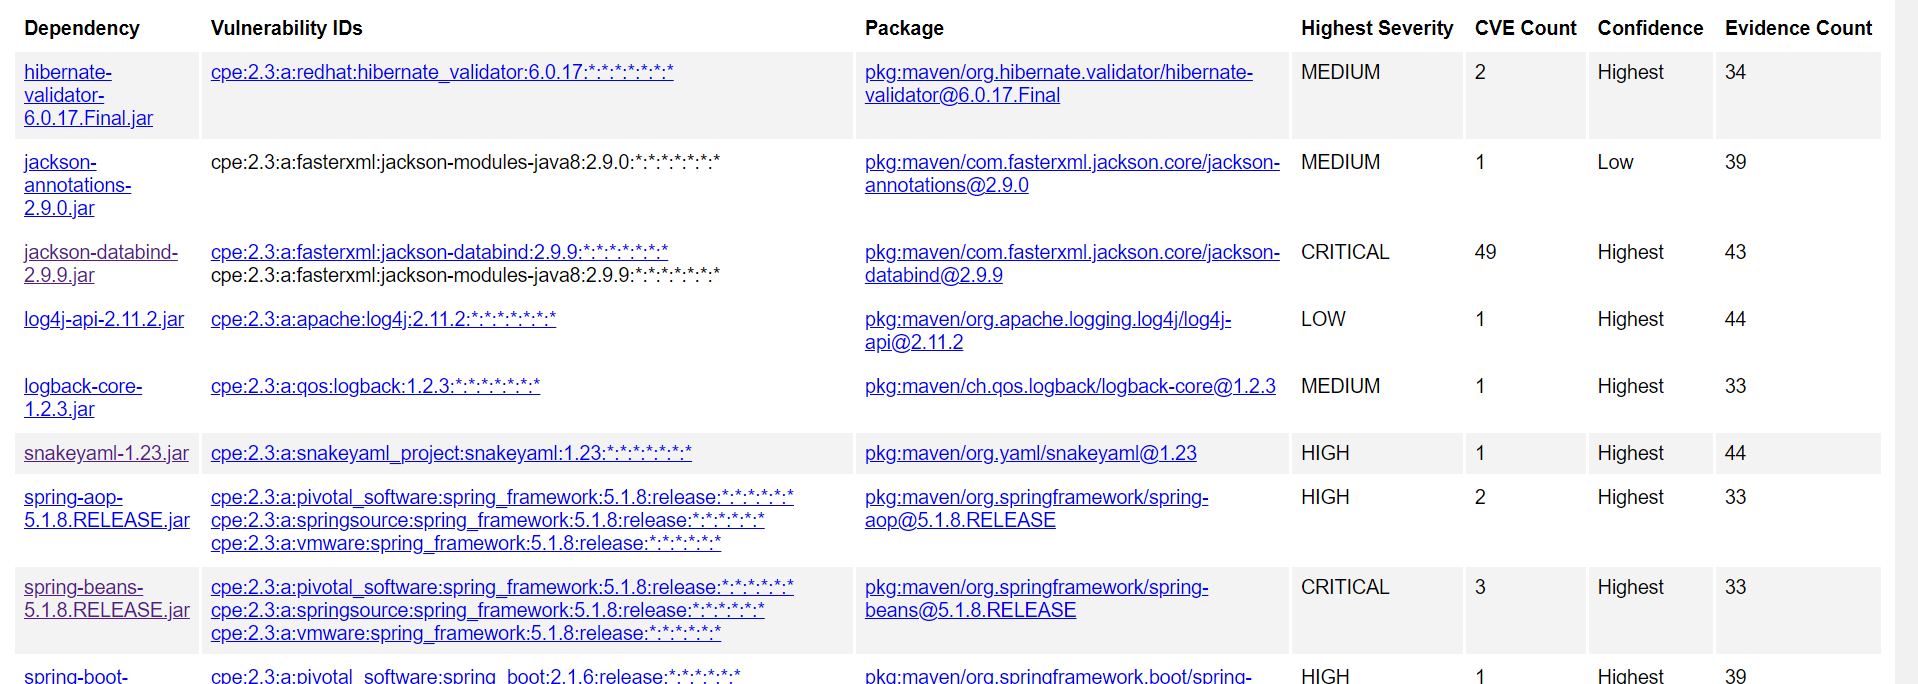
执行完毕后,会在target目录下产生dependency-check-report.html文件
3、通过浏览器打开dependency-check-report.html


 756
756


 被折叠的 条评论
为什么被折叠?
被折叠的 条评论
为什么被折叠?
 到【灌水乐园】发言


