


一、之前做了cas的单点登录,也做了shiro的权限角色管理,但是没有将两者集成起来,现在做个集成供参考交流。
二、shiro是个比较简单的权限框架,可以阅读官方文档,一步步来,在此只是提示下shiro核心配置就是realm,realm是个父接口,关键在项目中如何实现其子接口,建议继承
Authorizingrealm这个类,实现其中的doGetAuthenticationInfo(用户认证)和doGetAuthorizationInfo(用户授权)来控制自己的业务和权限角色分配。所以shiro集成cas也是自定义realm来继承哪个realm,在这里当然是继承CasRealm,同样是那两个方法。要明白的是原来单做shiro的时候,用户认证登录是在realm里通过拿到主体信息通过用户名,密码,盐判断,而集成cas这些都不用管,因为在cas服务端会帮你认证,只需要把cas认证通过返回的token结合起来,同样在继承casRealm里加入自己的角色权限就可以了
三、代码步骤:
1.有一套自己搭建的shiro环境,在上面添加修改即可,其实只需要spring-shiro.xml、web.xml、customerRealm,index.jsp
2.在shiro基础上导入jar包,我用的是maven控制
<dependency>
    <groupId>org.apache.shiro</groupId>
    <artifactId>shiro-cas</artifactId>
    <version>1.3.0</version>
</dependency>
<!-- https://mvnrepository.com/artifact/org.jasig.cas.client/cas-client-core -->
<dependency>
    <groupId>org.jasig.cas.client</groupId>
    <artifactId>cas-client-core</artifactId>
    <version>3.2.1</version>
</dependency>
3.先写web.xml,完整的如下,
<filter>
    <filter-name>shiroFilter</filter-name>
    <filter-class>org.springframework.web.filter.DelegatingFilterProxy</filter-class>

    <init-param>
      <param-name>targetFilterLifecycle</param-name>
      <param-value>true</param-value>
    </init-param>

    <init-param>
      <param-name>targetBeanName</param-name>
      <param-value>shiroFilter</param-value>
    </init-param>
  </filter>
  <filter-mapping>
    <filter-name>shiroFilter</filter-name>
    <url-pattern>/*</url-pattern>
  </filter-mapping>
<!--单点登录开始监听-->
  <listener>
    <listener-class>org.jasig.cas.client.session.SingleSignOutHttpSessionListener</listener-class>
  </listener>

<!--拦截单点登录的filter-->
  <filter>
    <filter-name>CAS Single Sign Out Filter</filter-name>
    <filter-class>org.jasig.cas.client.session.SingleSignOutFilter</filter-class>
    <init-param>
      <param-name>casServerUrlPrefix</param-name>
      <param-value>http://127.0.0.1:8080/cas/</param-value>
    </init-param>
  </filter>
  <filter-mapping>
    <filter-name>CAS Single Sign Out Filter</filter-name>
    <url-pattern>/*</url-pattern>
  </filter-mapping>


  <!-- 该过滤器对HttpServletRequest请求包装,
  可通过HttpServletRequest的getRemoteUser()方法获得登录用户的登录名,可选 -->

  <filter>
    <filter-name>CAS HttpServletRequest Wrapper Filter</filter-name>
    <filter-class>
      org.jasig.cas.client.util.HttpServletRequestWrapperFilter
    </filter-class>
  </filter>
  <filter-mapping>
    <filter-name>CAS HttpServletRequest Wrapper Filter</filter-name>
    <url-pattern>/*</url-pattern>
  </filter-mapping>

  <!-- 该过滤器使得可以通过org.jasig.cas.client.util.AssertionHolder来获取用户的登录名。
         比如AssertionHolder.getAssertion().getPrincipal().getName()。
         这个类把Assertion信息放在ThreadLocal变量中,这样应用程序不在web层也能够获取到当前登录信息 -->
  <filter>
    <filter-name>CAS Assertion Thread Local Filter</filter-name>
    <filter-class>org.jasig.cas.client.util.AssertionThreadLocalFilter</filter-class>
  </filter>
  <filter-mapping>
    <filter-name>CAS Assertion Thread Local Filter</filter-name>
    <url-pattern>/*</url-pattern>
  </filter-mapping>


  <filter>
    <filter-name>characterEncodingFilter</filter-name>
    <filter-class>org.springframework.web.filter.CharacterEncodingFilter</filter-class>
    <init-param>
      <param-name>encoding</param-name>
      <param-value>UTF-8</param-value>
    </init-param>
    <init-param>
      <param-name>forceEncoding</param-name>
      <param-value>true</param-value>
    </init-param>
  </filter>

  <filter-mapping>
    <filter-name>characterEncodingFilter</filter-name>
    <url-pattern>/*</url-pattern>
  </filter-mapping>

  <listener>
    <listener-class>org.springframework.web.context.ContextLoaderListener</listener-class>
  </listener>

  <context-param>
    <param-name>contextConfigLocation</param-name>
    <param-value>classpath*:spring-config/applicationContext*.xml</param-value>
  </context-param>

  <servlet>
    <servlet-name>springmvc</servlet-name>
    <servlet-class>org.springframework.web.servlet.DispatcherServlet</servlet-class>
    <init-param>
      <param-name>contextConfigLocation</param-name>
      <param-value>classpath*:spring-config/spring-mvc.xml</param-value>
    </init-param>
    <load-on-startup>1</load-on-startup>
  </servlet>


  <servlet-mapping>
    <servlet-name>springmvc</servlet-name>
    <url-pattern>/</url-pattern>
  </servlet-mapping>
4.写spring-shiro.xml,注释掉的是没有集成cas之前的shiro配置,包括自定义realm,记住我等等。shiroFilter里的loginUrl是重定向的,service后边带的是自己项目部署的服务器的端口,filters里的key要和过滤器连的对应,自定义casRealm里的前缀和casDSevice一定要写
<bean id="shiroFilter" class="org.apache.shiro.spring.web.ShiroFilterFactoryBean">
     <property name="securityManager" ref="securityManager"/>
     <!--集成cas要改变loginUrl-->
     <property name="loginUrl" value="https://localhost:8453/cas/login?service=http://localhost:9997/cas"/>
     <property name="successUrl" value="/adminjsps/admin/top.jsp"/>
     <property name="filters" >
         <map>
             <entry key="cas" value-ref="casFilter"/>
         </map>

     </property>
     <property name="filterChainDefinitions">
         <value>

    /casFailure.jsp = anon
   /cas = cas

   <!--/login.jsp = anon
   /user/loginFuser = anon-->
            /logout = logout
             /jsps/body.jsp = user
             /** =authc

         </value>

     </property>
 </bean>

 <bean id="securityManager" class="org.apache.shiro.web.mgt.DefaultWebSecurityManager">

     <property name="realm" ref="customCasRealm"/>
    <!-- <property name="rememberMeManager" ref="CookieRememberMeManager"/>-->
 </bean>

 <bean id="customCasRealm" class="com.ccue.shiro.customCasRealm">

     <property name="casServerUrlPrefix" value="https://localhost:8453/cas"/>
      <property name="casService" value="http://localhost:9997/cas"/>

  </bean>
<!-- <bean id="customrealm" class="com.ccue.shiro.customRealm">
     <property name="credentialsMatcher" ref="credentialsMatcher"/>

 </bean>

 <bean id="credentialsMatcher" class="org.apache.shiro.authc.credential.HashedCredentialsMatcher">
     <property name="hashAlgorithmName" value="MD5"/>
     <property name="hashIterations" value="2"/>

 </bean>
 <bean id="CookieRememberMeManager" class="org.apache.shiro.web.mgt.CookieRememberMeManager">
         <property name="cookie" ref="remebermeCookie"/>
         <property name="cipherKey" value="#{T(org.apache.shiro.codec.Base64).decode('4AvVhmFLUs0KTA3Kprsdag==')}"/>

 </bean>

 <bean id="remebermeCookie" class="org.apache.shiro.web.servlet.SimpleCookie">
     <constructor-arg value="rememberMe"/>
     <property name="httpOnly" value="true"/>
     <property name="maxAge" value="2592000"/>
 </bean>-->

 <bean id="casFilter" class="org.apache.shiro.cas.CasFilter">
     <property name="failureUrl" value="/casFailure.jsp"/>
 </bean>
5.自定义CasRealm,用户认证返回从cas服务端认证通过的token,角色授权应该从数据库根据业务查询,这里我写死,没有角色授权,只是给当前用户增加两个权限
create:user 和 update:user 以供在页面测试用
·
public class customCasRealm extends CasRealm {

    private Logger logger = Logger.getLogger(customCasRealm.class);
    public customCasRealm() {
        super();
    }

    @Override
    /**
     * cas端进行认证,此处没有进行用户认证,是因为在cas服务配置文件进行MD5密码验证
     */
    protected AuthenticationInfo doGetAuthenticationInfo(AuthenticationToken token) throws AuthenticationException {
      System.out.println("进入用户认证--------");
        CasToken casToken = (CasToken)token;
        if (token == null)
            return  null;
        String ticket = (String)casToken.getCredentials();//拿到票据
        if (!StringUtils.hasText(ticket))
            return  null;
        TicketValidator ticketValidator = ensureTicketValidator();
       try {
           Assertion casAssertion = ticketValidator.validate(ticket, getCasService());
           AttributePrincipal casPrincipal = casAssertion.getPrincipal();
           String userId = casPrincipal.getName();
            logger.debug(new Object[] { ticket, getCasServerUrlPrefix(), userId });
           Map<String, Object> attributes = casPrincipal.getAttributes();
           casToken.setUserId(userId);

           String rememberMeAttributeName = getRememberMeAttributeName();//是否记住我
           String rememberMeStringValue = (String) attributes.get(rememberMeAttributeName);
           boolean isRemembered = rememberMeStringValue != null && Boolean.parseBoolean(rememberMeStringValue);
           if (isRemembered)
               casToken.setRememberMe(true);
           List principals = CollectionUtils.asList(new Object[] { userId, attributes });
           PrincipalCollection  principalCollection = new SimplePrincipalCollection(principals, getName());

           return new SimpleAuthenticationInfo(principalCollection, ticket);

       }catch (TicketValidationException e){
            throw new CasAuthenticationException((new StringBuilder()).append("Unable to validate ticket [")
                               .append(ticket).append("]").toString(), e);

       }

    }

    @Override
    /**
     * cas端进行授权
     *
     */
    protected AuthorizationInfo doGetAuthorizationInfo(PrincipalCollection principals) {

        System.out.println("----进入用户授权和角色分配");
         SimplePrincipalCollection principalCollection = (SimplePrincipalCollection) principals;
         List listPrincipals = principalCollection.asList();
         Map attributes = (Map) listPrincipals.get(1);
         SimpleAuthorizationInfo simpleAuthorizationInfo = new SimpleAuthorizationInfo();
        List<String> permission = new ArrayList<String>();
        permission.add("create:user");
        permission.add("update:user");
        /*addRoles(simpleAuthorizationInfo,split(getDefaultRoles()) );
        addPermission(simpleAuthorizationInfo,permission);*/
        simpleAuthorizationInfo.addStringPermissions(permission);
        return simpleAuthorizationInfo;
    }
6.index.jsp,为了测试单点思登录,两个项目里index.jsp写上对方的index页面,改下端口即可我用的9997和8989连个客户端,服务端9995已经起来。
<html>

    <body>

    <p><b>Authenticated User Id:</b>
        <a href="logout.jsp" title="Click here to log out">
                    <span> <shiro:principal/>登录</span>

                    您拥有权限:<shiro:hasPermission name="create:user">创建用户</shiro:hasPermission>
                    <a href="http://localhost:9997/index.jsp">9997index</a>
    </body>
</html
<html>

    <body>

    <p><b>Authenticated User Id:</b>
        <a href="logout.jsp" title="Click here to log out">
                    <span> <shiro:principal/>登录</span>

                    您拥有权限:<shiro:hasPermission name="create:user">创建用户</shiro:hasPermission>
                    <a href="http://localhost:8988/index.jsp">8988index</a>
    </body
7.项目启动:访问一个客户端网址:localhost:8988/index.jsp,然后地址栏重定向下面这张页面,输入用户名密码,记着是数据库的
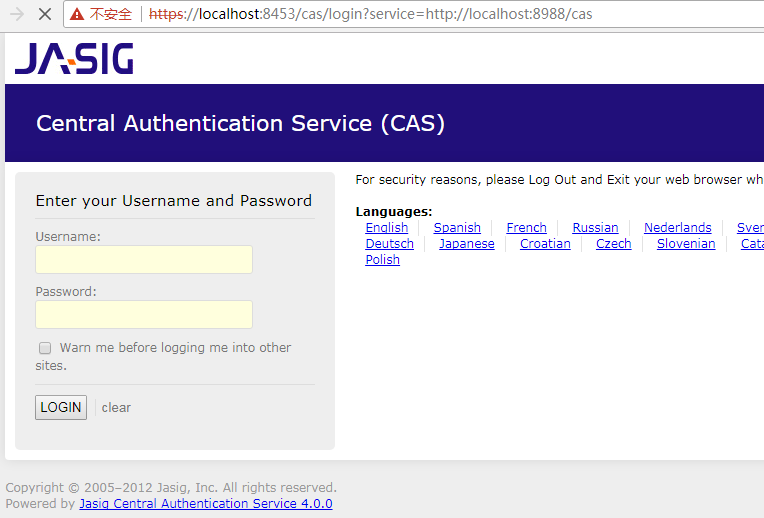
cas服务端验证完成进入8989的index页面如下:因为有create:user权限
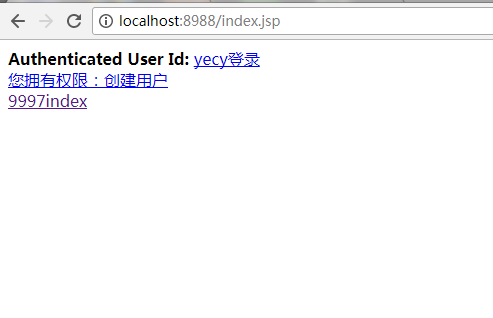
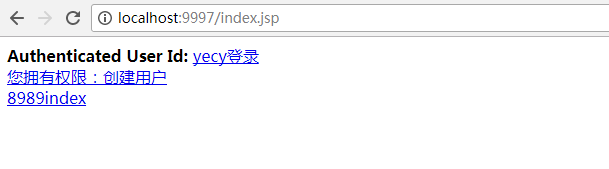
得到了当前用户,以及我们给他增加的权限,当然权限应该是数据库查询单,同时点击另一个9997的index页面,你会发现不用再去cas登录页面了,直接
跳到9997index页面,从而实现了登入一个系统再去跳转另一个系统的单点登录
总结:这些所有的操作,其实有条件应该是在Linux上操作,但是道理都是一样的
下一步就是自己写个认证云系统,等于是仿写cas服务端相当于是RPC框架,现在的趋势都是把认证系统单独放在云系统上,大家共勉!


 6577
6577


 被折叠的 条评论
为什么被折叠?
被折叠的 条评论
为什么被折叠?
 到【灌水乐园】发言


