


Android的程序交互方法非常独特,因为它非常以用户为中心。它为用户提供了很多权力,可以选择如何操作和创建数据。
我们来看一个Android设备的常见使用场景。 用户打开“联系人”例如,应用并选择John Doe的联系方式。例如,有一个电子邮件地址,一部手机和一个Twitter名称。 用户可以点击John的每一个联系点,每次Android都会启动一个不同的应用程序,默认的电子邮件客户端,拨号器和下载的Twitter应用程序。该用户可能并不关心启动了哪个应用程序或者有多少应用程序目前开放; 他只是想发一条消息。 如果此用户不喜欢电子邮件应用程序或默认的Twitter应用程序,他可以删除这些应用程序并用其他东西替换它们,他应该重新开始工作。
为了实现这种程序交互,Android需要构建平台重点关注松耦合和可插拔性。 一个组件(如联系人应用程序)不应该知道在点击电子邮件地址或手机号码时应该使用哪个应用程序的任何具体细节。
隐式intents并不声明要启动组件的具体类名,而是声明一个需要执行的action。这个action指定了我们想做的事情,例如查看,编辑,发送或者是获取一些东西。Intents通常会在发送action的同时附带一些数据,例如你想要查看的地址或者是你想要发送的邮件信息。数据的具体类型取决于我们想要创建的Intent,比如Uri或其他规定的数据类型,或者甚至也可能根本不需要数据。
下面是一些其他intent的例子:
打电话:
Uri number = Uri.parse("tel:5551234");
Intent callIntent = new Intent(Intent.ACTION_DIAL, number);
显示地图:
// Map point based on address
Uri location = Uri.parse("geo:0,0?q=1600+Amphitheatre+Parkway,+Mountain+View,+California");
// Or map point based on latitude/longitude
// Uri location = Uri.parse("geo:37.422219,-122.08364?z=14"); // z param is zoom level
Intent mapIntent = new Intent(Intent.ACTION_VIEW, location);
浏览网页:
Uri webpage = Uri.parse("http://www.android.com");
Intent webIntent = new Intent(Intent.ACTION_VIEW, webpage);于另外一些需要extra数据的隐式intent,我们可以使用putExtra()方法来添加那些数据。 默认的,系统会根据Uri数据类型来决定需要哪些合适的MIME type。如果我们没有在intent中包含一个Uri, 则通常需要使用setType()方法来指定intent附带的数据类型。设置MIME type 是为了指定应该接受这个intent的activity。例如:
发送一个带附件的email:
Intent emailIntent = new Intent(Intent.ACTION_SEND);
// The intent does not have a URI, so declare the "text/plain" MIME type
emailIntent.setType(HTTP.PLAIN_TEXT_TYPE);
emailIntent.putExtra(Intent.EXTRA_EMAIL, new String[] {"jon@example.com"}); // recipients
emailIntent.putExtra(Intent.EXTRA_SUBJECT, "Email subject");
emailIntent.putExtra(Intent.EXTRA_TEXT, "Email message text");
emailIntent.putExtra(Intent.EXTRA_STREAM, Uri.parse("content://path/to/email/attachment"));
// You can also attach multiple items by passing an ArrayList of Uris
创建一个日历事件:
Intent calendarIntent = new Intent(Intent.ACTION_INSERT, Events.CONTENT_URI);
Calendar beginTime = Calendar.getInstance().set(2012, 0, 19, 7, 30);
Calendar endTime = Calendar.getInstance().set(2012, 0, 19, 10, 30);
calendarIntent.putExtra(CalendarContract.EXTRA_EVENT_BEGIN_TIME, beginTime.getTimeInMillis());
calendarIntent.putExtra(CalendarContract.EXTRA_EVENT_END_TIME, endTime.getTimeInMillis());
calendarIntent.putExtra(Events.TITLE, "Ninja class");
calendarIntent.putExtra(Events.EVENT_LOCATION, "Secret dojo");注意:这个intent for Calendar的例子只使用于>=API Level 14。请尽可能的将Intent定义的更加确切。例如,如果想要使用ACTION_VIEW 的intent来显示一张图片,则还应该指定 MIME type 为image/*.这样能够阻止其他能够 "查看" 其他数据类型的app(比如一个地图app) 被这个intent叫起。
验证是否有App去接收这个Intent
尽管Android系统会确保每一个确定的intent会被系统内置的app(such as the Phone, Email, or Calendar app)之一接收,但是我们还是应该在触发一个intent之前做验证是否有App接受这个intent的步骤。
Caution: 如果触发了一个intent,而且没有任何一个app会去接收这个intent,则app会crash。
为了验证是否有合适的activity会响应这个intent,需要执行queryIntentActivities()来获取到能够接收这个intent的所有activity的list。若返回的List非空,那么我们才可以安全的使用这个intent。例如:
PackageManager packageManager = getPackageManager();
List<ResolveInfo> activities = packageManager.queryIntentActivities(intent, 0);
boolean isIntentSafe = activities.size() > 0;
如果返回的activities集合长度不为0,即不为空时,isIntentSafe为true, 那么至少有一个app可以响应这个intent。false则说明没有app可以handle这个intent。
当创建好了intent并且设置好了extra数据后,通过执行startActivity() 将intent发送到系统。若系统确定了多个activity可以handle这个intent,它会显示出一个dialog,让用户选择启动哪个app。如果系统发现只有一个app可以handle这个intent,则系统将直接启动该app。
startActivity(intent);
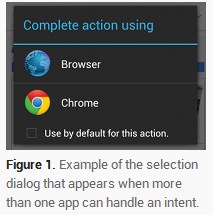
请注意,当以startActivity()的形式传递一个intent,并且有多个app可以handle时,用户可以在弹出dialog的时候选择默认启动的app(通过勾选dialog下面的选择框,如上图所示)。该功能对于用户有特殊偏好的时候非常有用(例如用户总是喜欢启动某个app来查看网页,总是喜欢启动某个camera来拍照)。
然而,如果用户希望每次都弹出选择界面,而且每次都不确定会选择哪个app启动,例如分享功能,用户选择分享到哪个app都是不确定的,这个时候,需要强制弹出选择的对话框。(这种情况下用户不能选择默认启动的app)。
一、隐式Intent的一般语法
//Create the intent object
Intent intent = new Intent();
//Specify the action. These actions are constants of the Intent class: for example, //Intent.ACTION_VIEW
intent.setAction(ACTION);
//Specify the data, if there’s any
intent.setData(DATA);
//Launch the activity
startActivity(intent); 二、建立演示的工程和UI
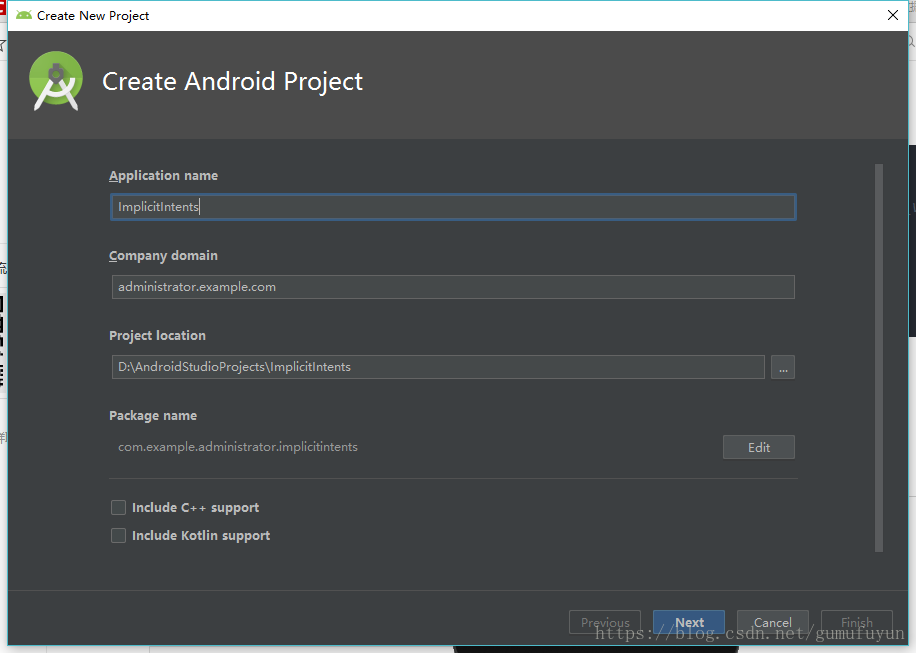
1、创建新项目
名称为ImplicitIntents
2、添加相应控件

<?xml version="1.0" encoding="utf-8"?>
<android.support.constraint.ConstraintLayout xmlns:android="http://schemas.android.com/apk/res/android"
    xmlns:app="http://schemas.android.com/apk/res-auto"
    xmlns:tools="http://schemas.android.com/tools"
    android:layout_width="match_parent"
    android:layout_height="match_parent"
    tools:context=".MainActivity">


    <Button
        android:id="@+id/btnwebaddress"
        android:layout_width="wrap_content"
        android:layout_height="wrap_content"
        android:layout_marginStart="16dp"
        android:layout_marginTop="69dp"
        android:layout_marginEnd="16dp"
        android:text="Web address"
        app:layout_constraintEnd_toEndOf="parent"
        app:layout_constraintStart_toStartOf="parent"
        app:layout_constraintTop_toTopOf="parent" />

    <Button
        android:id="@+id/btnmap"
        android:layout_width="wrap_content"
        android:layout_height="wrap_content"
        android:layout_marginStart="16dp"
        android:layout_marginTop="16dp"
        android:layout_marginEnd="16dp"
        android:text="Map"
        app:layout_constraintEnd_toEndOf="parent"
        app:layout_constraintStart_toStartOf="parent"
        app:layout_constraintTop_toBottomOf="@+id/btnwebaddress" />

    <Button
        android:id="@+id/btnphonenumber"
        android:layout_width="wrap_content"
        android:layout_height="wrap_content"
        android:layout_marginStart="16dp"
        android:layout_marginTop="16dp"
        android:layout_marginEnd="16dp"
        android:text="Phone Number"
        app:layout_constraintEnd_toEndOf="parent"
        app:layout_constraintStart_toStartOf="parent"
        app:layout_constraintTop_toBottomOf="@+id/btnmap" />
</android.support.constraint.ConstraintLayout>
运行ok

二、代码实现
package com.example.administrator.implicitintents;
import android.content.Intent;
import android.net.Uri;
import android.support.v7.app.AppCompatActivity;
import android.os.Bundle;
import android.util.Log;
import android.view.View;
/*
This is a very basic structure for the main program. We will use MainActivity as the listener
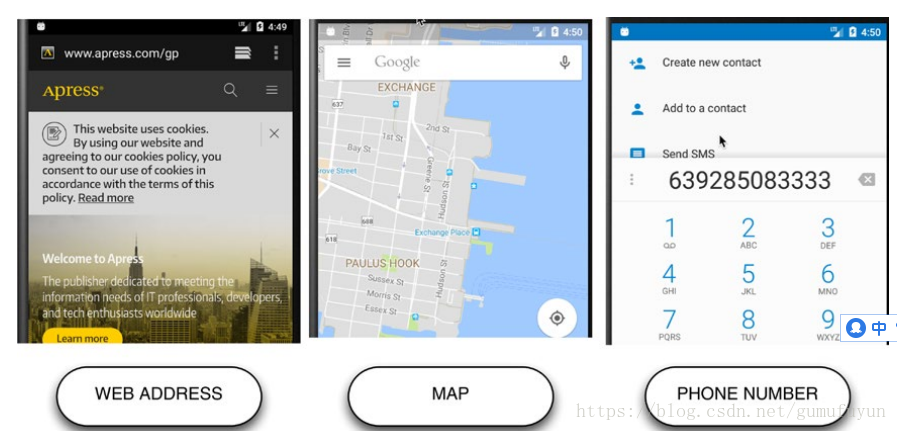
object and then we’ll implement onClick as an overridden member method. There are three
buttons in the application. The “web address” button tries to resolve an http request, the
“map” button tries to resolve a geo code, and the “phone number” button tries to resolve a
telephone number.
*/
public class MainActivity extends AppCompatActivity
implements View.OnClickListener{
@Override
protected void onCreate(Bundle savedInstanceState) {
super.onCreate(savedInstanceState);
setContentView(R.layout.activity_main);
findViewById(R.id.btnwebaddress).setOnClickListener(this);
findViewById(R.id.btnmap).setOnClickListener(this);
findViewById(R.id.btnphonenumber).setOnClickListener(this);
}
@Override
public void onClick(View v) {
Uri uri = null;
Intent intent = null;
switch(v.getId()) {
case R.id.btnwebaddress:
//The parse method of the Uri object should be able to take a String object specifying a web
//URL and return a proper URI object to us
//Launches a browser and grabs the web site www.apress.com
uri = Uri.parse("http://www.apress.com");
/*
create an intent. We can use the no-arg constructor of the Intent to do this
Intent intent = new Intent();
After the intent is created, we can now set its action using the following code.
intent.setAction(Intent.ACTION_VIEW);
After setting the action of the Intent, we should now set its data, so it knows where to go
when it launches the browser. This can be done with the following code.
intent.setData(uri);
We can shorten the code by passing the Uri and the action to the Intent constructor.
Intent intent = new Intent(Intent.ACTION_VIEW, uri);
Lastly, we need to launch the intent object.
startActivity(intent);
*/
intent = new Intent(Intent.ACTION_VIEW,uri);
startActivity(intent);
break;
case R.id.btnmap:
//Opens Google Maps and shows the location of the specified geo code
uri = Uri.parse("geo:40.7113399,-74.0263469");
//uri= Uri.parse("geo:0,0?q=1600+Amphitheatre+Parkway,+Mountain+View,+California");
intent = new Intent(Intent.ACTION_VIEW, uri);
startActivity(intent);
break;
case R.id.btnphonenumber:
//Launches the dialer app
uri = Uri.parse("tel:639285083333");
intent = new Intent(Intent.ACTION_DIAL, uri);
startActivity(intent);
break;
default:
Log.i(getClass().getName(), "Cannot resolve button click");
}
}
}运行ok


 107
107


 被折叠的 条评论
为什么被折叠?
被折叠的 条评论
为什么被折叠?
 到【灌水乐园】发言


