


写在前面
出于学习目的,简单搭建了一个关于 electron + react 的项目,记录下搭建过程中的学习过程,还望各位大佬们多多指教~
相关资料:
electron 官方文档
React 官网地址
初始化项目
创建 react + typescript 项目
npx create-react-app my-app --typescript
安装 electron 环境
npm i -D electron
创建 electron 入口文件
main.js 文件
// Modules to control application life and create native browser window
const {app, BrowserWindow} = require('electron')
const path = require('path')

function createWindow () {
  // Create the browser window.
  const mainWindow = new BrowserWindow({
    width: 800,
    height: 600,
    webPreferences: {
      preload: path.join(__dirname, 'preload.js'),
      nodeIntegration: true
    }
  })

  /**
   * loadURL 分为两种情况
   *  1.开发环境,指向 react 的开发环境地址
   *  2.生产环境,指向 react build 后的 index.html
   */
  const startUrl =
    process.env.NODE_ENV === 'development'
      ? 'http://localhost:3000'
      :  path.join(__dirname, "/build/index.html");
  mainWindow.loadURL(startUrl);

  // Open the DevTools.
  // mainWindow.webContents.openDevTools()
}

// This method will be called when Electron has finished
// initialization and is ready to create browser windows.
// Some APIs can only be used after this event occurs.
app.whenReady().then(() => {
  const interfaces = require('os').networkInterfaces();

  console.log("Mac================" + JSON.stringify(interfaces));
  createWindow()

  app.on('activate', function () {
    // On macOS it's common to re-create a window in the app when the
    // dock icon is clicked and there are no other windows open.
    if (BrowserWindow.getAllWindows().length === 0) createWindow()
  })
})

// Quit when all windows are closed.
app.on('window-all-closed', function () {
  // On macOS it is common for applications and their menu bar
  // to stay active until the user quits explicitly with Cmd + Q
  if (process.platform !== 'darwin') app.quit()
})

// In this file you can include the rest of your app's specific main process
// code. You can also put them in separate files and require them here.
添加相关脚本
package.json 文件
"scripts": {
    "start": "react-scripts start",
    "build": "react-scripts build",
    "test": "react-scripts test",
    "eject": "react-scripts eject",
    "start-electron": "cross-env NODE_ENV=development electron .",
    "start-electron-prod": "electron .",
    "build-electron": "electron-packager . myTestApp"
  },
  "main": "main.js",
  "homepage": ".",
项目启动
启动 react 项目
npm run start
启动electron项目
npm run start-electron
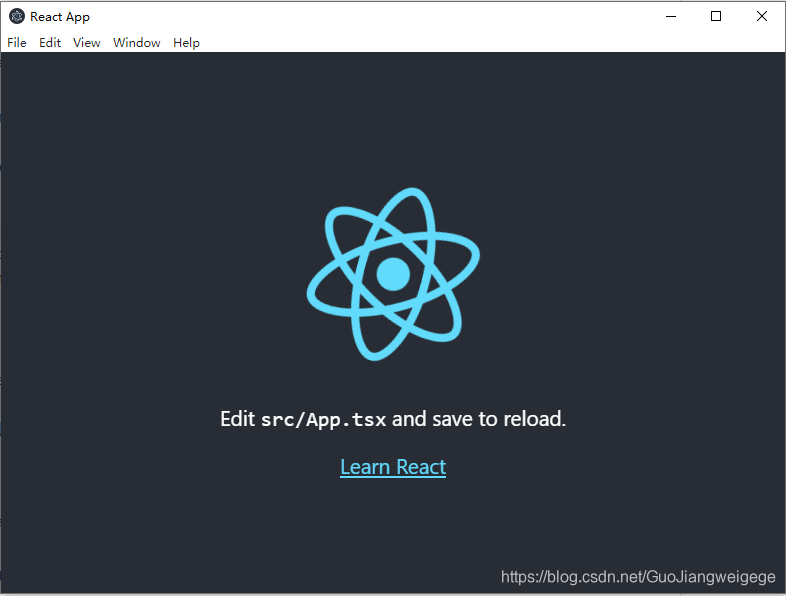
而后会自动打开窗口:
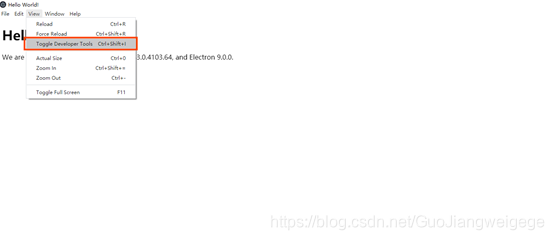
如果想在窗口中打开页面调试工具,可通过:
项目打包
添加 electron-packager 工具
npm i -D electron-packager
打包 react
npm run build
测试是否正常运行:
npm run start-electron-prod
打包 electron 项目
npm run build-electron
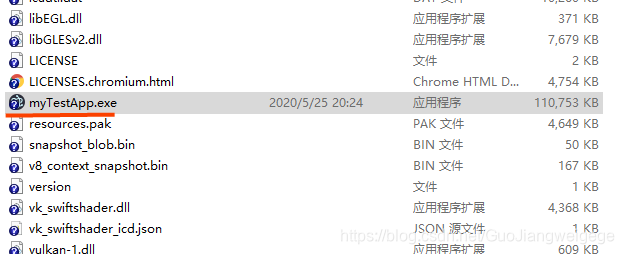
而后会生成一个文件夹,便是桌面应用程序的包了,可通过打开 .exe 文件打开程序:
其他问题
Require 报错找不到 node 模块时,可尝试:
main.js页面创建浏览器窗口时,添加参数:
nodeIntegration: true
如下:
const mainWindow = new BrowserWindow({
    width: 800,
    height: 600,
    webPreferences: {
      preload: path.join(__dirname, 'preload.js'),
      nodeIntegration: true
    }
  })
结束
只是简单创建个项目,后续有继续学习的话,会进行补充,将内容丰富起来,敬请期待~


 1968
1968


 被折叠的 条评论
为什么被折叠?
被折叠的 条评论
为什么被折叠?
 到【灌水乐园】发言


