


摘要:对 mysql 8.0.21 免安装版本在win10 上进行记录一下,或对遇到的问题进行记录
一、mysql 安装配置
目前自己了解的有两种方式
- 通过免安装直接进行配置
- 通过安装程序进行安装
1.1 下载地址
Mysql 官网
https://www.mysql.com/
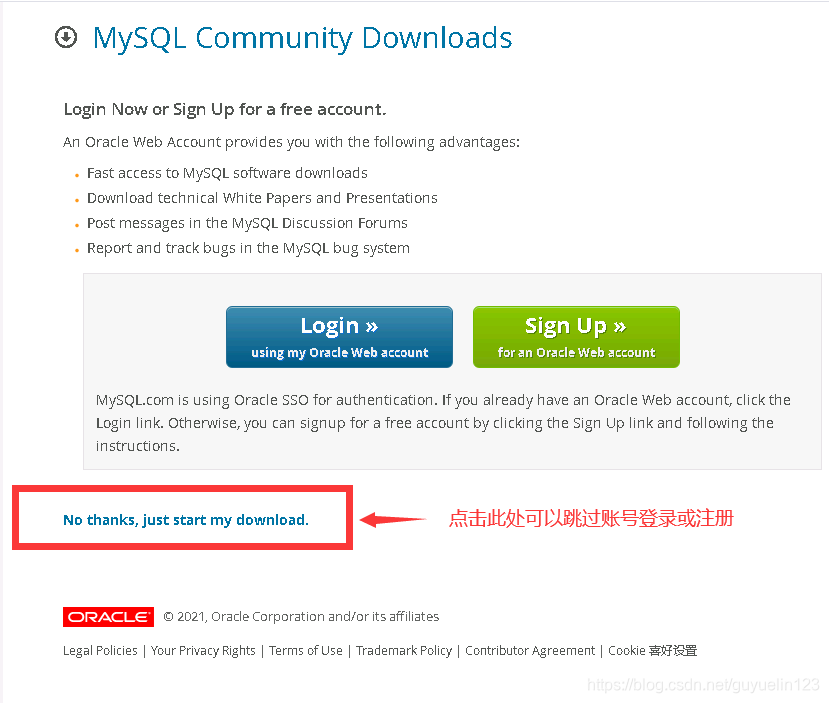
在下载的时候,点击 No thanks, just start my download. 即可不登录账号进行下载
1.2 方式一:免安装配置mysql
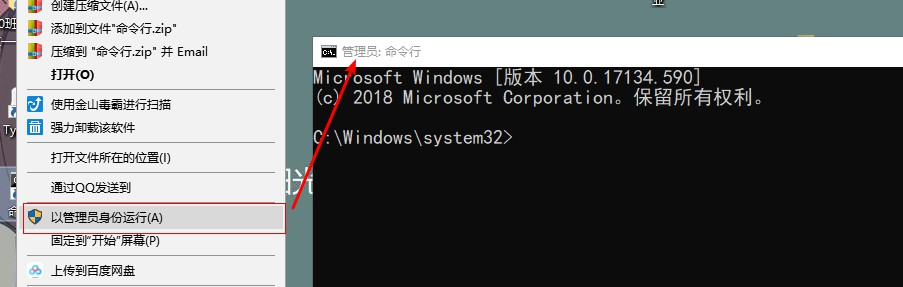
01、运行cmd
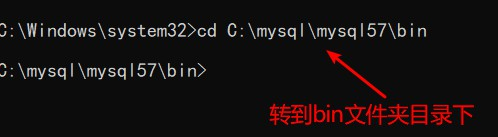
02、转到mysql的bin目录下
03、安装mysql的服务:mysqld --install
mysqld --install

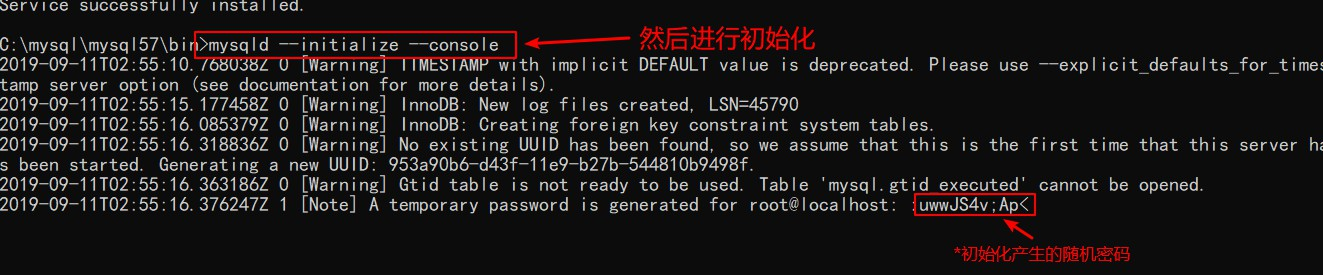
04、初始化mysql
mysqld --initialize --console
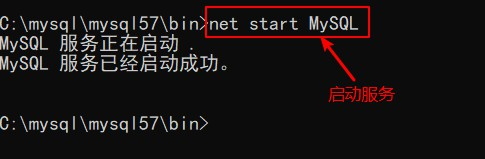
05、开启mysql的服务
net start mysql
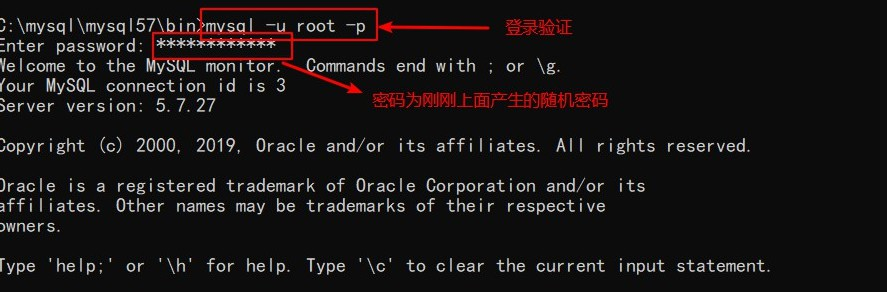
06、登录验证
mysql -u root -p
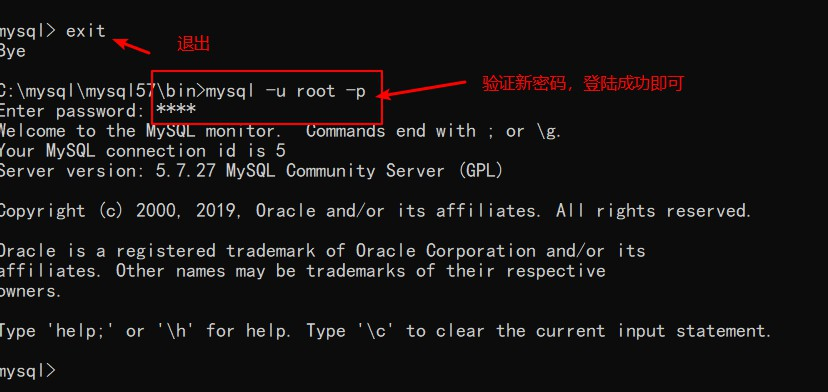
07、修改密码

再次登录验证新密码:
08、设置系统的全局变量:
为了方便登录操作mysql,在这里我们设置一个全局变量:
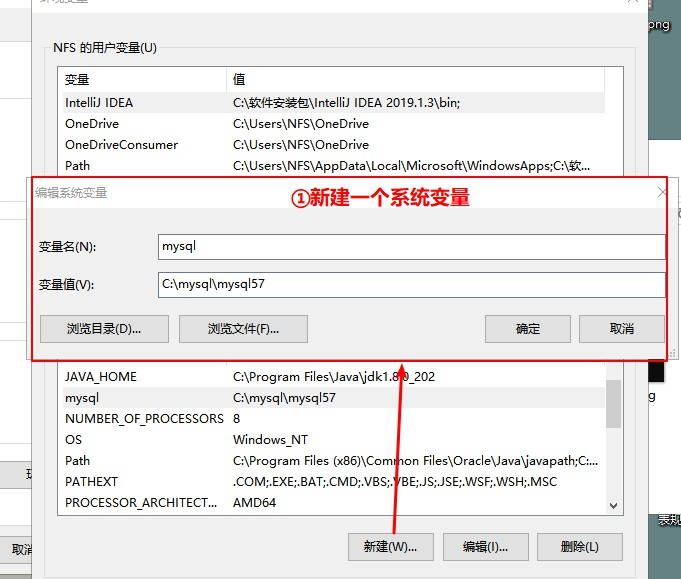
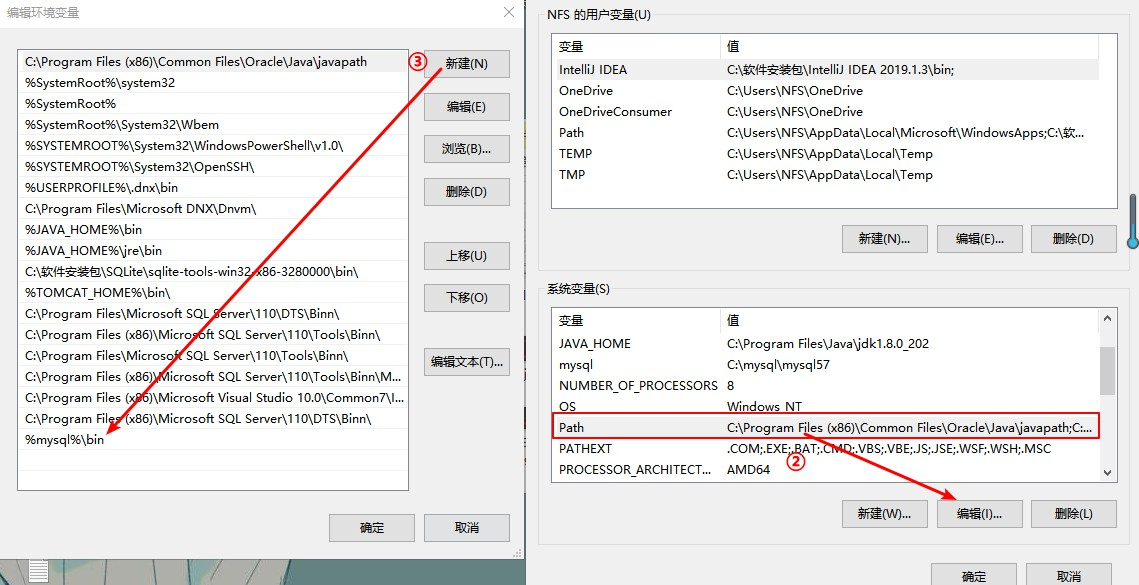
配置完成之后,每当我们想要用命令行使用mysql时,只需要win+R,-->输入"cmd"打开命令行,之后输入登录sql语句即可。
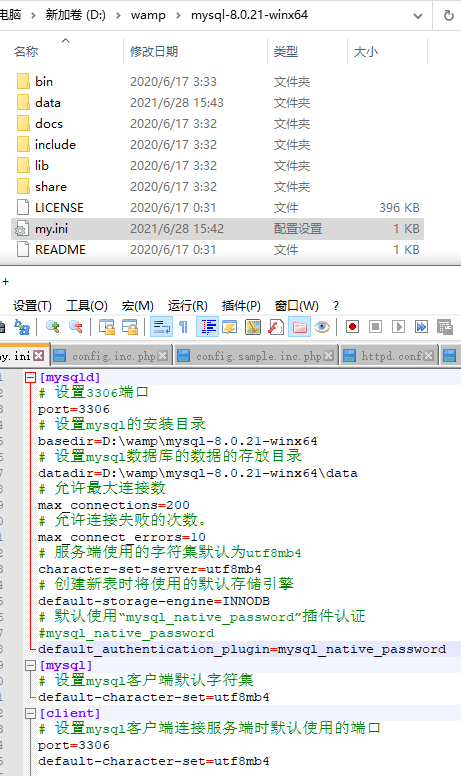
09、创建一个my.ini
[mysqld]
# 设置3306端口
port=3306
# 设置mysql的安装目录
basedir=D:\wamp\mysql-8.0.21-winx64
# 设置mysql数据库的数据的存放目录
datadir=D:\wamp\mysql-8.0.21-winx64\data
# 允许最大连接数
max_connections=200
# 允许连接失败的次数。
max_connect_errors=10
# 服务端使用的字符集默认为utf8mb4
character-set-server=utf8mb4
# 创建新表时将使用的默认存储引擎
default-storage-engine=INNODB
# 默认使用“mysql_native_password”插件认证
#mysql_native_password
default_authentication_plugin=mysql_native_password
[mysql]
# 设置mysql客户端默认字符集
default-character-set=utf8mb4
[client]
# 设置mysql客户端连接服务端时默认使用的端口
port=3306
default-character-set=utf8mb4
1.3 方式二:执行安装程序
mysql安装以及2059 - Authentication plugin ‘caching_sha2_password’ cannot be loaded:报错的解决办法
1.4 参考命令
①安装服务:mysqld --install
②初始化: mysqld --initialize --console
③开启服务:net start mysql
④关闭服务:net stop mysql
⑤登录mysql:mysql -u root -p
Enter PassWord:(密码)
⑥修改密码:alter user 'root'@'localhost' identified by 'root';(by 接着的是密码)
⑦标记删除mysql服务:sc delete mysql
二、遇到的问题
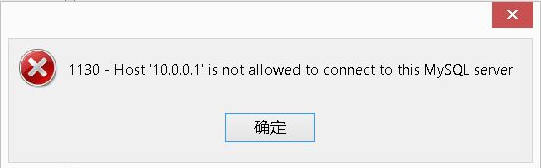
2.1 1130, "Host 'xxxx' is not allowed to connect to this MySQL server
在使用 Navicat Premium 12 进行连接的时候,遇到如下图所示错误:
01、连接数据库
D:\wamp\mysql-8.0.21-winx64\bin>mysql -u root -p
Enter password: ****
Welcome to the MySQL monitor.  Commands end with ; or \g.
Your MySQL connection id is 9
Server version: 8.0.21 MySQL Community Server - GPL

Copyright (c) 2000, 2020, Oracle and/or its affiliates. All rights reserved.

Oracle is a registered trademark of Oracle Corporation and/or its
affiliates. Other names may be trademarks of their respective
owners.

Type 'help;' or '\h' for help. Type '\c' to clear the current input statement.
02、看原先数据库的权限
use mysql;
select host,user from user;
这里我自己事先没有查看,下图为其他资源图片

03、修改mysql权限表
mysql> update user set host='%' where user='root';
Query OK, 1 row affected (0.05 sec)
Rows matched: 1  Changed: 1  Warnings: 0
04、直接在当前状态下 重新远程连接OK
mysql> flush privileges;
Query OK, 0 rows affected (0.03 sec)
05、 再次查看mysql数据库的user表信息
mysql> select host,user from user;
+-----------+------------------+
| host      | user             |
+-----------+------------------+
| %         | root             |
| localhost | mysql.infoschema |
| localhost | mysql.session    |
| localhost | mysql.sys        |
+-----------+------------------+
4 rows in set (0.00 sec)
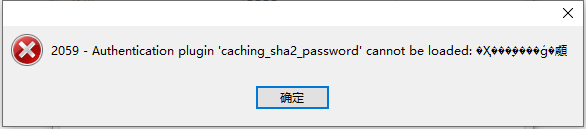
2.2 2059 - Authentication plugin 'caching_sha2_password' cannot be loaded
再处理2.1问题后,再次使用 Navicat Premium 12 进行连接的时候,遇到如下图所示错误:
01、连接数据库
D:\wamp\mysql-8.0.21-winx64\bin>mysql -u root -p
Enter password: ****
Welcome to the MySQL monitor.  Commands end with ; or \g.
Your MySQL connection id is 9
Server version: 8.0.21 MySQL Community Server - GPL

Copyright (c) 2000, 2020, Oracle and/or its affiliates. All rights reserved.

Oracle is a registered trademark of Oracle Corporation and/or its
affiliates. Other names may be trademarks of their respective
owners.

Type 'help;' or '\h' for help. Type '\c' to clear the current input statement.
02、看数据库加密方式
mysql> use mysql;
Database changed
mysql> select user,plugin from user where user='root';
+------+-----------------------+
| user | plugin                |
+------+-----------------------+
| root | caching_sha2_password |
+------+-----------------------+
1 row in set (0.00 sec)
上面连接时用的用户为root,所以我们登录root用户。可以看到当前用户的加密方式为caching_sha2_password
03、修改加密方式
mysql> alter user 'root'@'%' identified with mysql_native_password by 'root';
Query OK, 0 rows affected (0.06 sec)
或者也可以执行
alter user 'root'@‘localhost' identified with mysql_native_password by 'root';
通过以上,将用户的加密方式改为mysql_native_password。
04、直接在当前状态下 重新远程连接OK
mysql> flush privileges;
Query OK, 0 rows affected (0.03 sec)
05、再次查看用户加密方式
mysql> use mysql;
Database changed
mysql> select user,plugin from user where user='root';
+------+-----------------------+
| user | plugin                |
+------+-----------------------+
| root | mysql_native_password |
+------+-----------------------+
1 row in set (0.00 sec)
发现其加密方式已经修改为以前的加密方式了
三、参考链接
免安装版的Mysql
mysql安装以及2059 - Authentication plugin 'caching_sha2_password' cannot be loaded:报错的解决办法
报错:1130-host ... is not allowed to connect to this MySql server 解决方法
1130, "Host 'xxxx' is not allowed to connect to this MySQL server"


 135
135

 被折叠的 条评论
为什么被折叠?
被折叠的 条评论
为什么被折叠?
 到【灌水乐园】发言


