


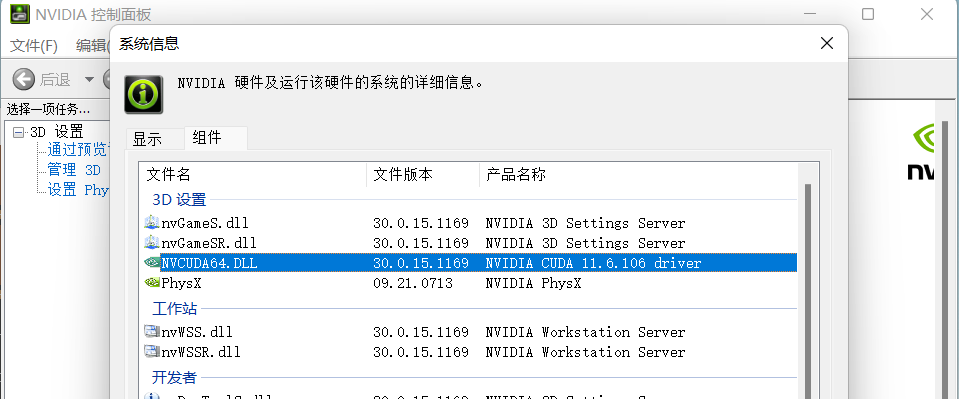
NVIDIA版本:CUDA 11.6
之前卸载anaconda3后,出现了cmd和anaconda prompt打不开的现象,这里借鉴了
https://blog.csdn.net/weixin_53142585/article/details/127289637,解决了问题
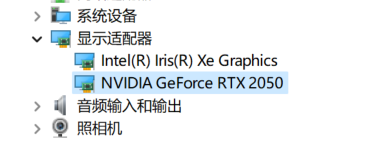
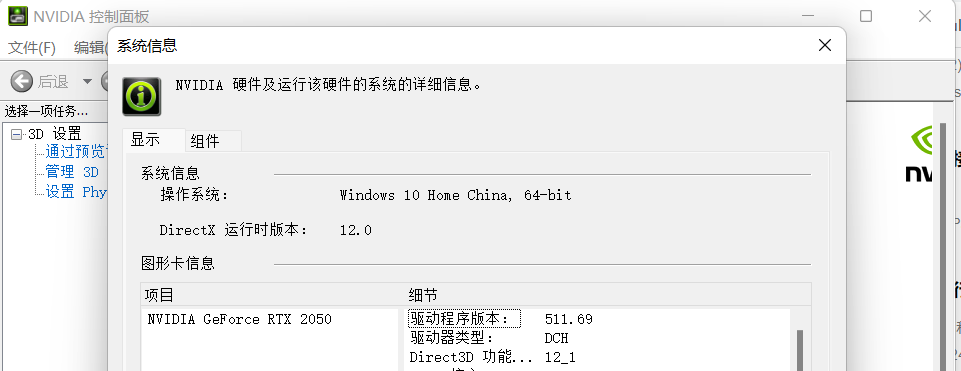
显卡:驱动【任务管理器中查看GPU】+CUDA Toolkit
GPU型号:
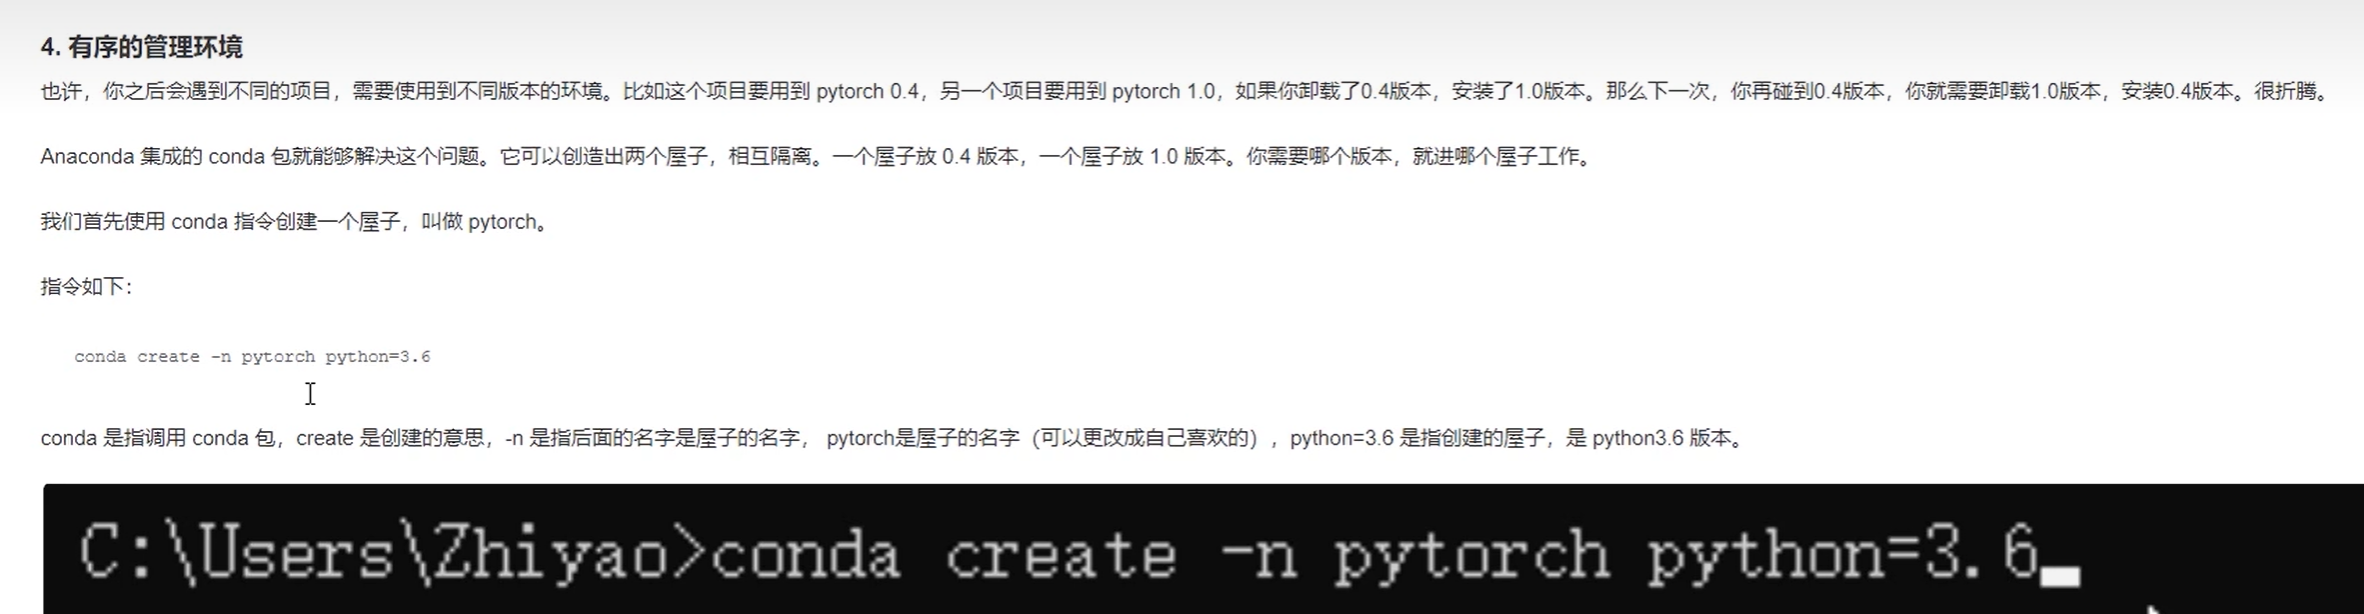
创建虚拟环境:
如何安装pytorch?
查看conda版本:

查看虚拟环境:conda env list
创建虚拟环境:conda create -n your_env_name python=x.x(版本号)
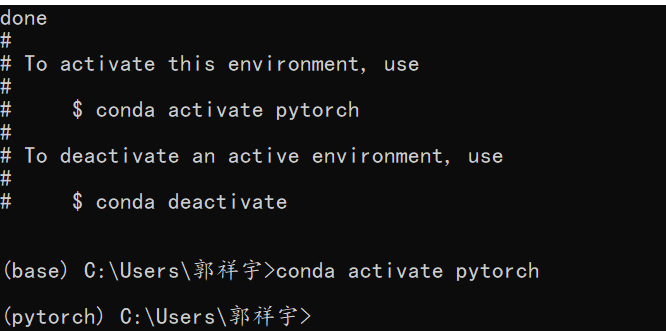
激活虚拟环境:conda activate pytorch
退出虚拟环境:conda activate pytorch
删除虚拟环境:conda env remove -p 要删除的虚拟环境路径
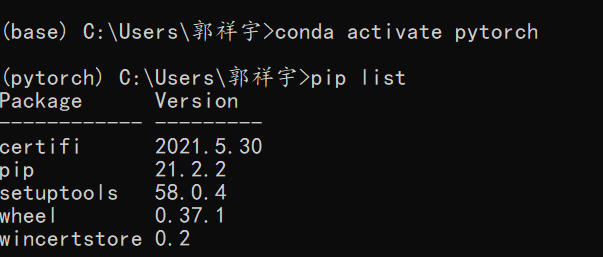
查看虚拟环境中的包:pip list
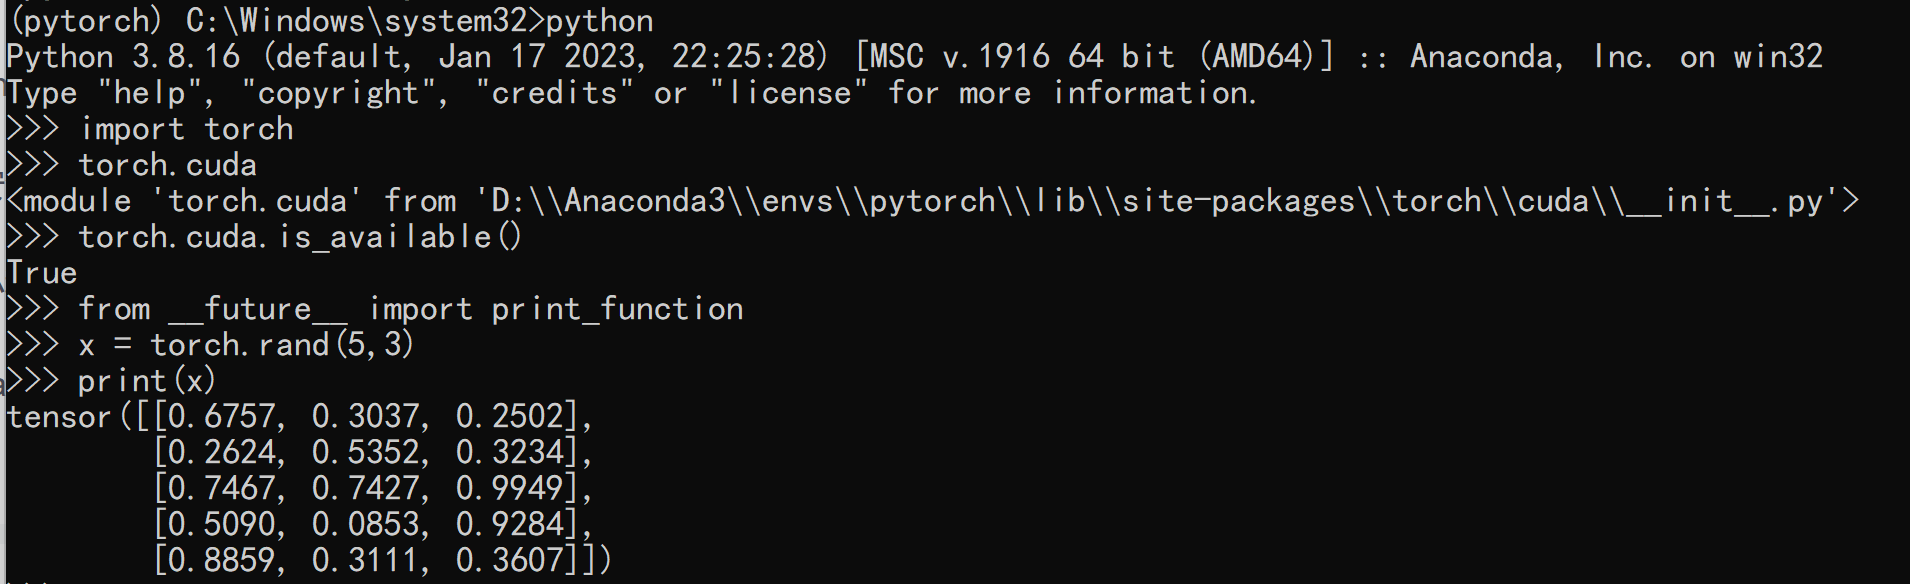
查看虚拟环境中的python版本:python -V 【3.8.16】
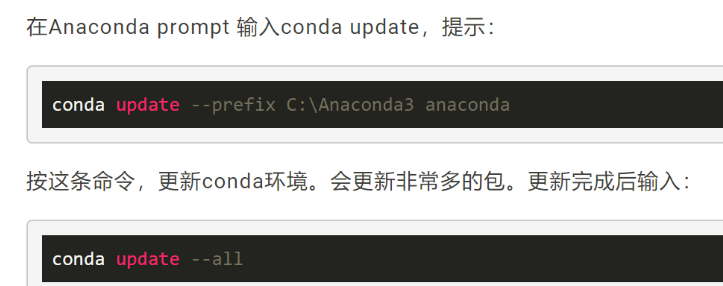
更新conda:
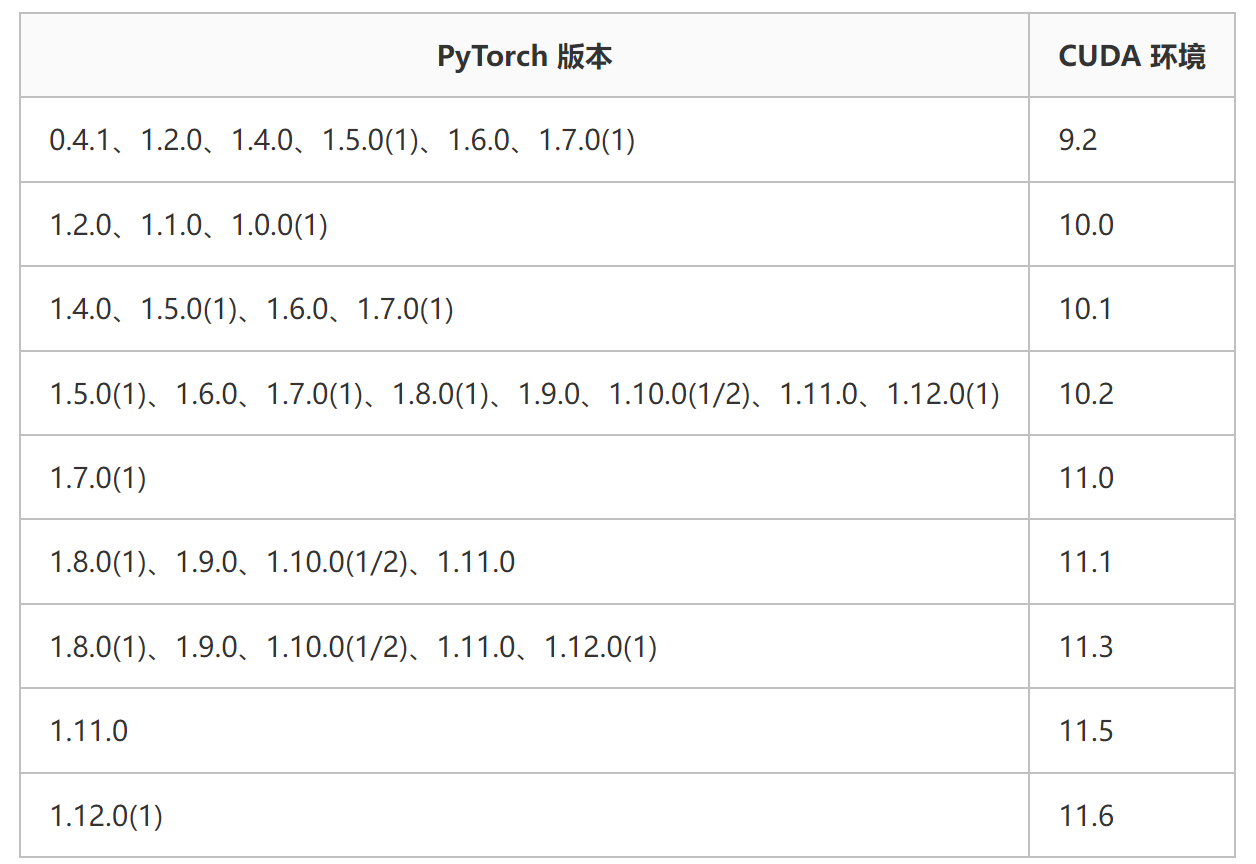
Pytorch和CUDA版本的对应关系
https://pytorch.org/get-started/previous-versions/
截至2022.8.19
结论:10.2和11.3能兼容大部分版本的pytorch
注意:注意低版本的 pytorch 是否支持更高版本的 cuda。(高版本的pytorch一般能兼容低版本cuda)
例如:你需要 1.7.0 的 pytorch,那么 cuda 只能 11.0 及以下。官方推荐的cuda版本为10.2和11.3,这两种 cuda 支持大多数的 pytorch 版本。

下载CUDA
环境【python3.8+pytorch1.13.0+cuda11.6.0+cudnn11.x】
https://developer.nvidia.com/cuda-toolkit-archive 11.6.0
下载cuddn
https://developer.nvidia.cn/rdp/cudnn-archive
配置CUDA
https://blog.csdn.net/u014541881/article/details/127698178
配置好CUDA后就可以在虚拟环境中安装pytorch了
这里出现了一个问题:使用conda安装pytorch失败

那么可以离线安装,但一定要切换目录到你要离线安装的文件夹下:

这里可以参考https://www.bilibili.com/video/BV14E411P7xz/?spm_id_from=333.999.0.0&vd_source=c61baf708af300d4af7bbd345d015960 直接切换到D即可

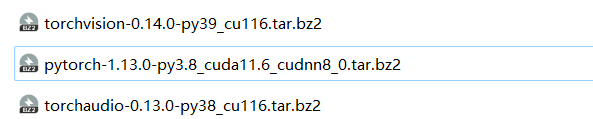
首先通过镜像网站分别下载如下安装包:
按照离线的方式进行安装,安装好之后
进入 Anaconda 环境,安装剩余的包——

https://blog.csdn.net/m0_51755720/article/details/128037149【参考这篇文章】
再说一下jupyter
我们在安装anaconda的时候,其实默认已经安装了jupyter book,不过它是默认安装在base环境中的。
打开base环境,发现有这样一个包:

进入pytorch环境中
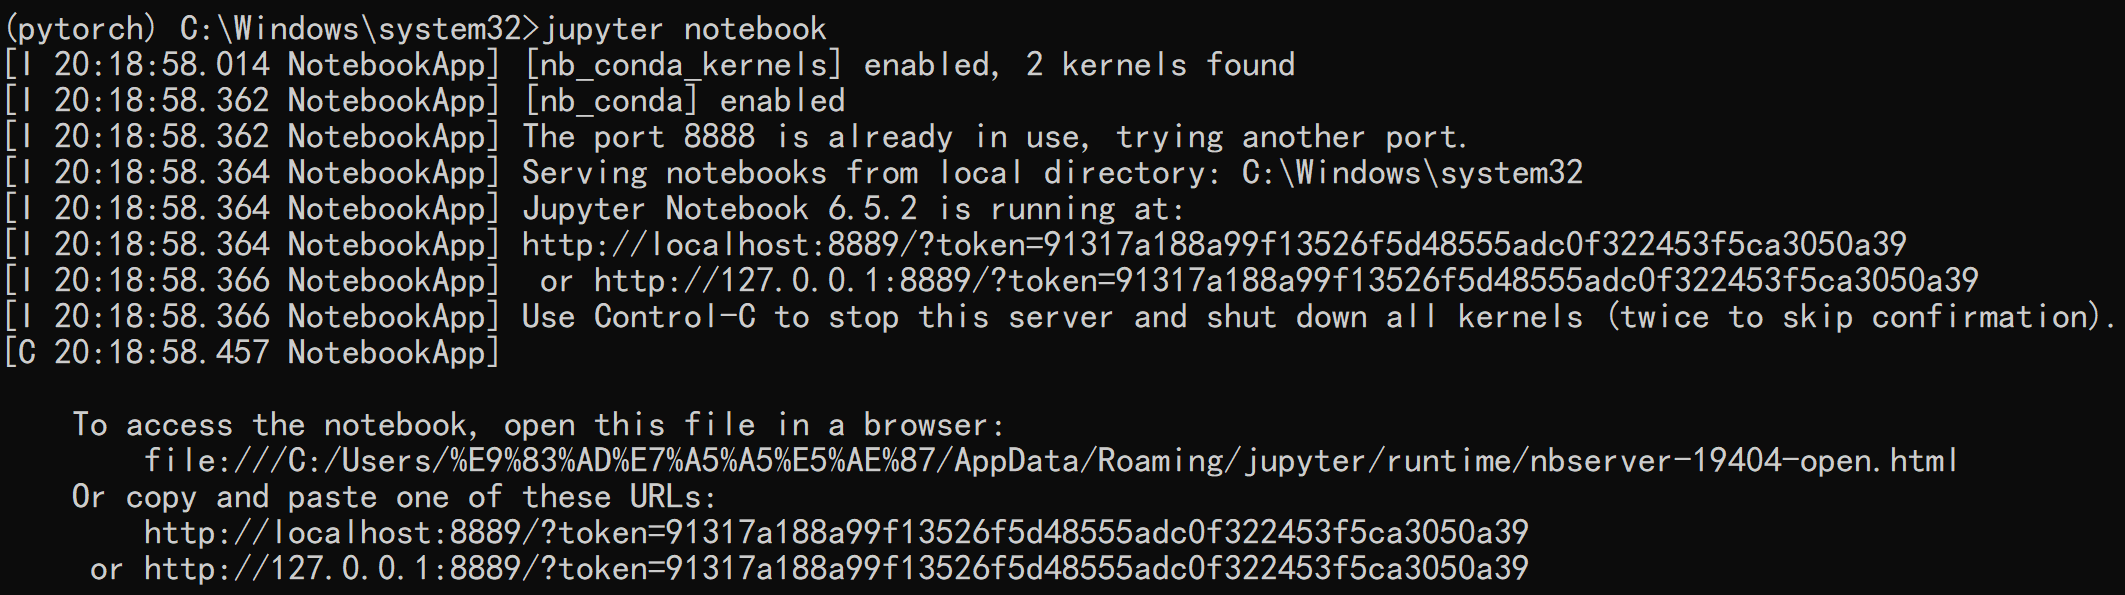
输入命令:conda install nb_conda即安装jupyter ,然后即可进入该虚拟环境下的jupyter notebook
但是在运行jupyter book中,出现了这样的问题
这里是由于pyzmq版本与jupyter-client版本不对应所致的,这里参考了这篇博客
https://blog.csdn.net/m0_72899048/article/details/126851616
pip uninstall pyzmq
pip install pyzmq==22.1.0
pip uninstall jupyter-client
pip install jupyter-client==7.2.0
【Anaconda创建虚拟环境并使用Jupyter-notebook打开虚拟环境】


 3235
3235


 被折叠的 条评论
为什么被折叠?
被折叠的 条评论
为什么被折叠?
 到【灌水乐园】发言


