


一:创建一个SpringBoot项目
1:在此前的项目的位置新建Module(也可以重新创建一个项目)
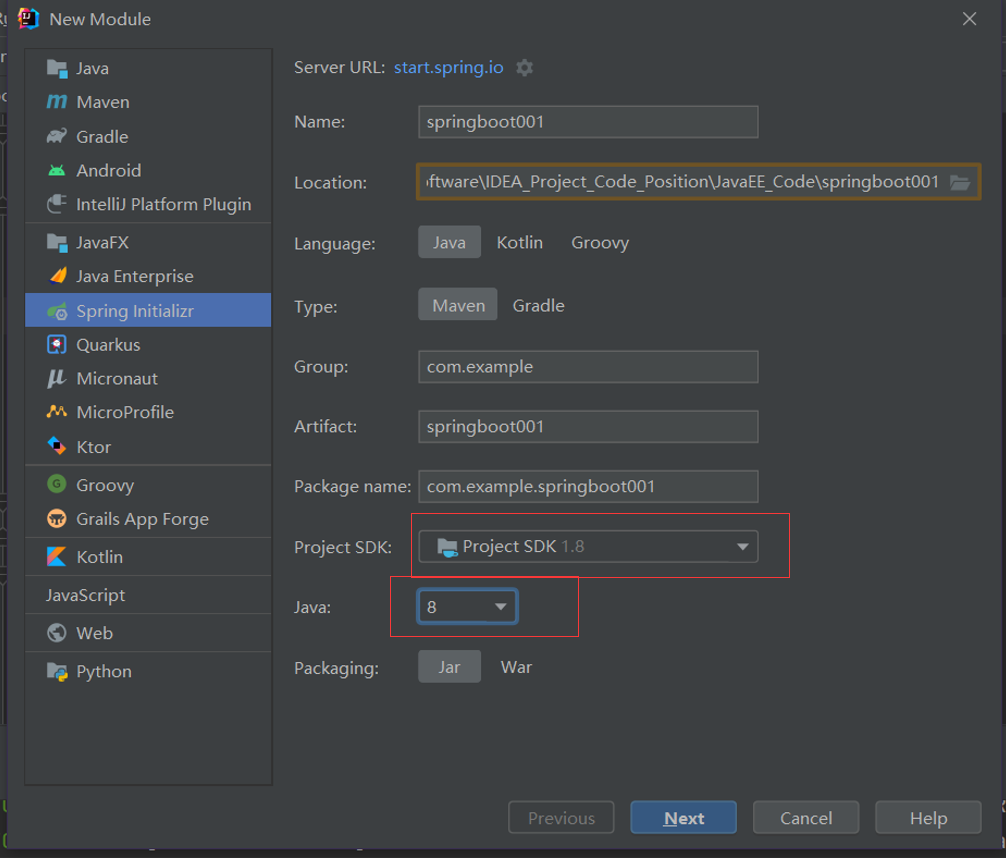
点击Next
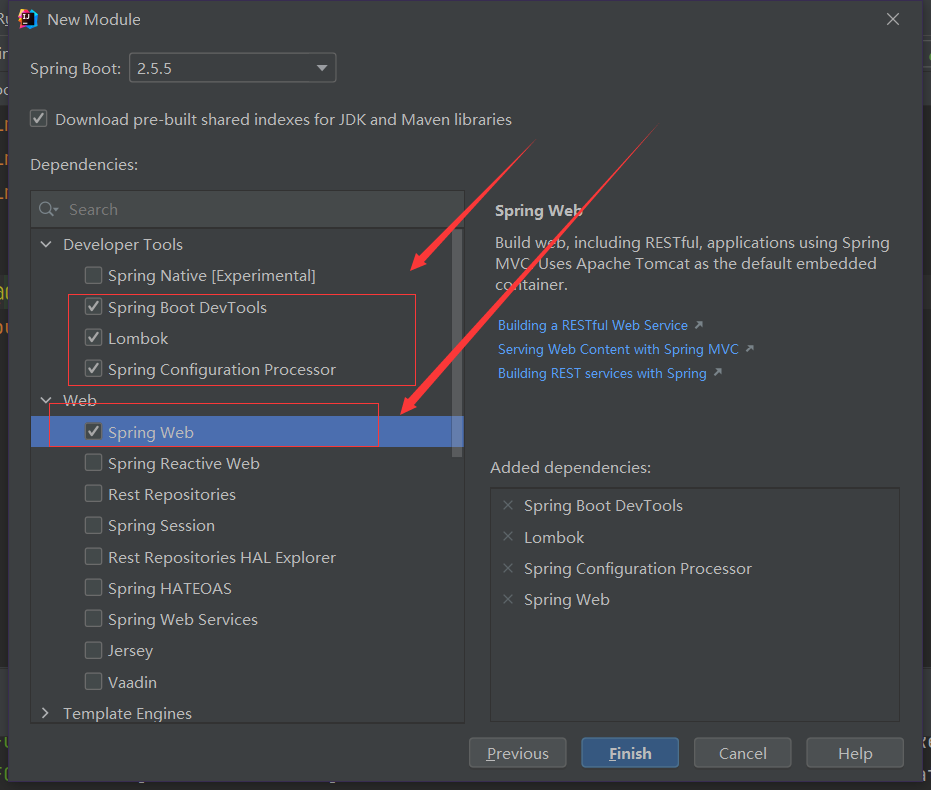
勾选如图所示的部件,点击Finish
二:启动测试SpringBoot项目
1:新建两个测试类TestController和User

(1):TestController
package com.example.springboot001;

import org.springframework.stereotype.Controller;
import org.springframework.web.bind.annotation.RequestMapping;
import org.springframework.web.bind.annotation.ResponseBody;

@Controller
public class TestController {

    //作用1:  返回json数据
    //作用2:  返回html页面

    @RequestMapping("getuser")
    @ResponseBody
    public User getuser(){
        User user = new User();
        user.setAge(18);
        user.setName("test123123");

        return user;
    }
}
(2):User
package com.example.springboot001;


import lombok.Data;

@Data
public class User {
    private int age;
    private String name;
}
对注解的解释
TestController类里
@RequestMapping(“getuser”) 这个注释的作用的是访问的路径名称。在浏览器测试的时候访问http://localhost:8080/getuser即可访问
@ResponseBody 这个注释的作用是返回文本类型的值。比如上述的getuser()方法,应该是返回的User的实例化对象, 但加了这个注解之后就会返回json(将类转为了json)(后续还有更多解释)
User类里
@Data 添加了这个注释相当于写了getter,setter方法以及构造方法
这之后可以运行Springboot001Application类进行测试了。
运行后等待启动成功,在浏览器输入http://localhost:8080/getuser 就可以测试了。
三:实现热更新
之前勾选的devtools插件实现热更新(不需要重新启动就可以实现更新代码)
第一步:File->Setting->Compiler
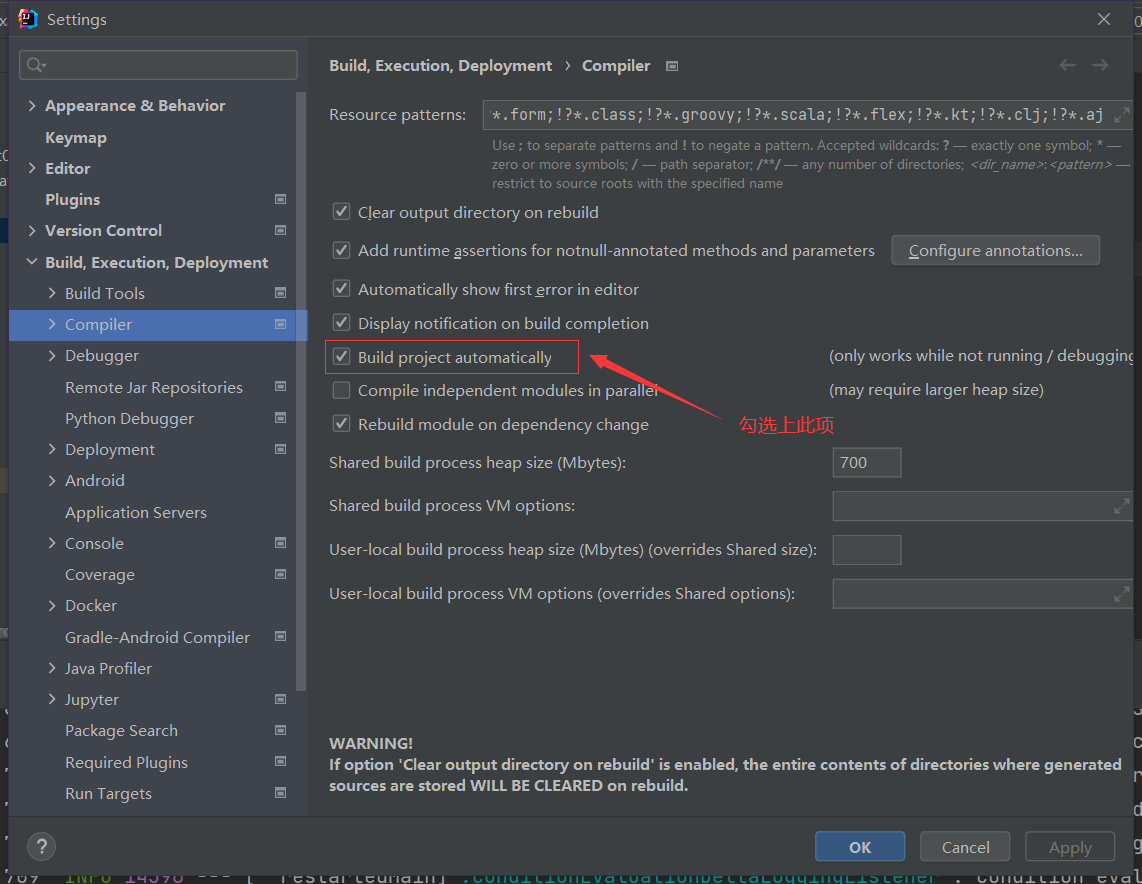
第二步

第三步 修改如图两项为图中选项
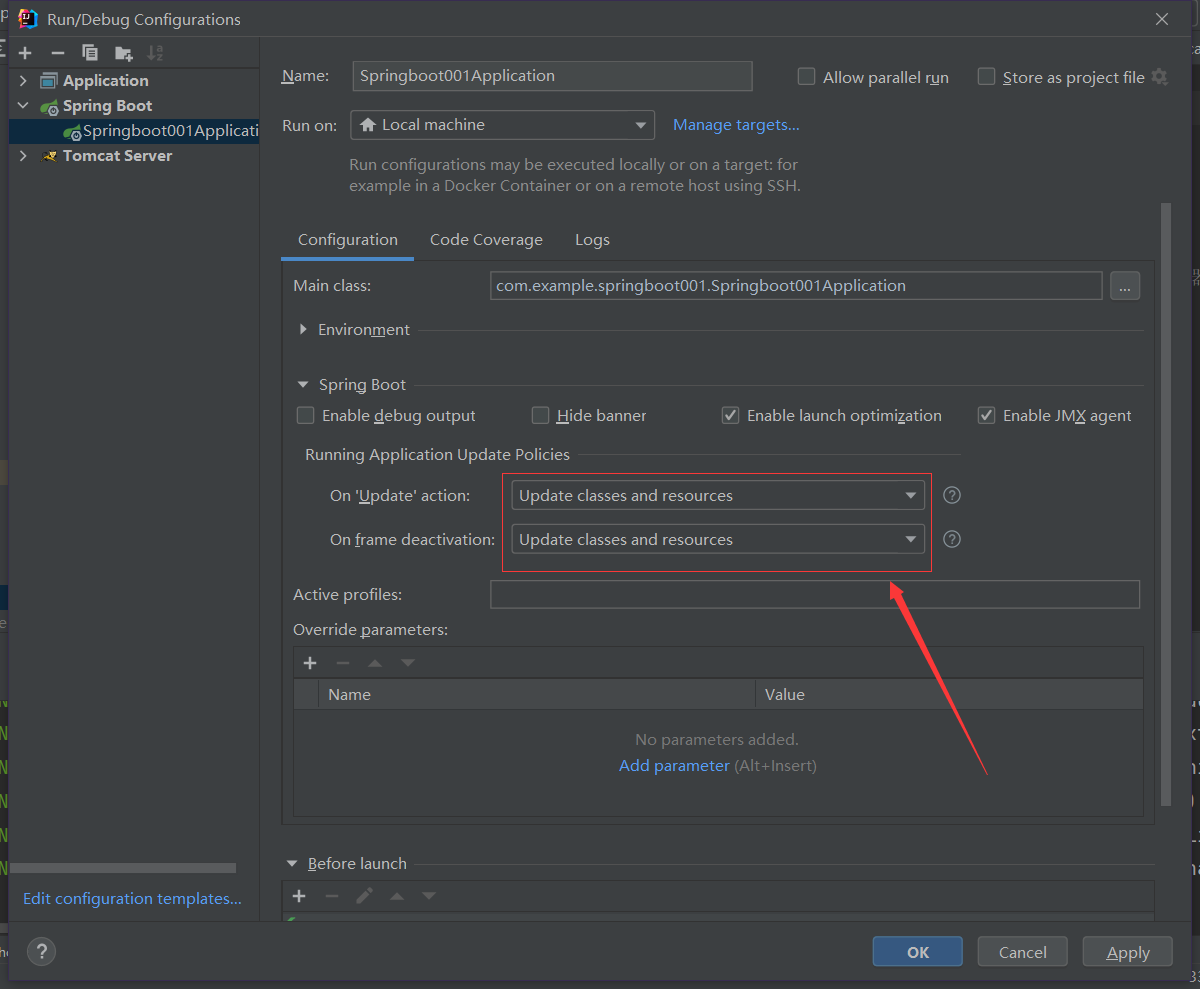
应用,确认。
四:配置文件
1:配置文件application.properties
(1):修改默认端口
添加语句 server.port=8088
即可将默认设置的8080端口修改为8088
(2):修改访问的前置路径
添加语句 server.servlet.context-path=/springboot
即可设置在访问的时候需要添加/springboot路径项目
http://localhost:8080//springboot/gethtml 这就是添加之后的访问路径。
(3):访问静态资源
添加语句 spring.web.resources.static-locations=classpath:/templates
classpath参数后会定位向resources文件夹,后续的templates文件夹就是用来存放静态资源的文件夹。
在该文件夹下放静态资源后即可直接访问。
(4):访问本地资源
添加语句 spring.web.resources.static-locations=file:D:/Test
即可访问本地 D:/Test 该目录下的文件资源,直接调用该目录下的文件名字即可访问
*第(3)(4)点的语句可以写在一起,节省代码量
spring.web.resources.static-locations=classpath:/templates,file:D:/Test
2:不同的配置文件yml
通常的配置文件都是命名为application的,springboot扫描时也会扫描名字为application的配置文件。
application.yml与application.properties的区别主要是格式不同,yml修改端口和修改前置路径的语句能写成如下格式
server:
  port: 8080
  servlet:
    context-path: /springboot
相较于properties配置文件的格式少了一个 server (程序员必备的偷懒技术)
五:SpringBoot访问html文件
1:通过静态资源访问html文件
直接将html文件放在静态资源下直接访问,显示的结果就是html文件在浏览器上显示的结果。(需要添加访问本地资源语句)
2:通过Controller层访问html文件
这种方式不需要添加访问本地资源语句即可访问。
@RequestMapping("gethtml")
public String gethtml(){
    //访问静态html资源   vs   jsp有什么区别
    //相同点:放回给浏览器的都是html文件
    //不同点:jsp比起静态  多一个功能,里面可以放变量
    return "test.html";
}
六:模板引擎技术Thymeleaf
1:准备工作
引入依赖包
<dependency>
    <groupId>org.springframework.boot</groupId>
    <artifactId>spring-boot-starter-thymeleaf</artifactId>
</dependency>
在html文件中修改
<html lang="en" xmlns:th="http://www.thymeleaf.org">
2:测试
从Controller层传数据
    @RequestMapping("gethtml")
    public String gethtml(Model model){

        //不用jsp   使用模板引擎(thymeleaf) ,因为其后缀是html,兼容性更强,能跑在更多的web容器中
        //jsp需要跑在tomcat等少数容器之中   使用模板引擎能支持更多web容器  appache ngix

        //以后使用thymeleaf更多于jsp,更方便,兼容更强

        model.addAttribute("message","hahahaha");
        return "test.html";
<h1 th:text="${message}">hello world</h1>
3:数组数据测试
Controller层
@RequestMapping("gethtml")
public String gethtml(Model model){
    model.addAttribute("message","tasdas");
    List<News> newsList = new ArrayList<>();
    for(int i=0;i<10;i++){
        News news = new News();
        news.setTitle("新闻标题"+i);
        news.setContent("新闻内容"+i);
        newsList.add(news);
    }
    model.addAttribute("newsList",newsList);
    return "test.html";
}
html页面修改
<div th:each="news:${newsList}">
<!--    取别名 给newsList取名为news-->
    <div th:text="${news.title}"></div>
    <div th:text="${news.content}"></div>
</div>
访问静态资源,需要rebuild(重构)
常常使用的是访问本地的文件,而且路径不能带中文(但访问的文件可以带中文)
<div th:each="news:${newsList}">
<!--    取别名 给newsList取名为news-->
    <div th:text="${news.title}"></div>
    <div th:text="${news.content}"></div>
</div>
访问静态资源,需要rebuild(重构)
常常使用的是访问本地的文件,而且路径不能带中文(但访问的文件可以带中文)


 598
598

 被折叠的 条评论
为什么被折叠?
被折叠的 条评论
为什么被折叠?
 到【灌水乐园】发言


