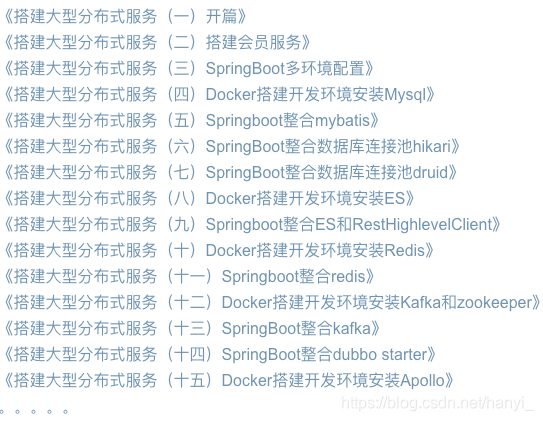
系列文章目录

前言
在日常开发当中,为了提高接口性能,本地缓存必不可少,因为在JVM进程内读取数据肯定比Redis、Memcached快,它没有网络消耗,所以你还在用Guava cache吗?SpringBoot2.0后默认就使用Caffeine作为本地缓存,用起来更加丝滑。网上讲解SringBoot整合Caffeine的教程比较多,但很少结合业务实战的。本文将从业务角度出发,比如A、B接口需要配置不同的缓存失效时间,那该怎样去配置Caffeine呢?
一、本文要点
接前文,我们已经在项目里集成了redis。本文将介绍如何优雅地整合Caffeine,解决业务问题。
系列文章完整目录
- SpringBoot如何优雅地整合Caffeine
- SpringBoot打印Caffeine缓存置入置出日志
- Caffeine根据不同缓存设置不同的失效时间
- 根据Key删除Caffeine缓存
- Caffeine缓存配置隔离
二、开发环境
- jdk 1.8
- maven 3.6.2
- springboot 2.4.3
- Caffeine 2.8.8
- idea 2020
三、创建项目
1、使用早期文章快速创建项目。
(https://blog.csdn.net/hanyi_/article/details/115050732)
《搭建大型分布式服务(十八)Maven自定义项目脚手架》
2、创建Caffeine项目
mvn archetype:generate -DgroupId="com.mmc.lesson" -DartifactId="caffeine" -Dversion=1.0-SNAPSHOT -Dpackage="com.mmc.lesson.caffeine" -DarchetypeArtifactId=member-archetype -DarchetypeGroupId=com.mmc.lesson -DarchetypeVersion=1.0.0-SNAPSHOT -B
四、修改项目
1、编写CacheProperties.java为,用来接收多个缓存配置。
@Component("cacheConfig")
@ConfigurationProperties(prefix = "spring.mmc")
@Data
public class CacheProperties {
    /**
     * 根据不同名称配置缓存失效时间和容量.
     */
    private Map<String, Config> caches = new HashMap<>();

    /**
     * 配置.
     */
    @Data
    public static class Config {

        /**
         * 是否启用.
         */
        private boolean enabled;

        /**
         * 过期时间(单位秒).
         */
        private int expire = 300;

        /**
         * 初始容量.
         */
        private int initialCapacity = 100;

        /**
         * 最大容量.
         */
        private int maximumSize = 1000;
    }

}
2、编写CacheConfiguration.java,用来定义Caffeine,原脚手架中RedisConfiguration.java可以删掉或者整合到CacheConfiguration.java。
@Slf4j
@Configuration
@EnableCaching
@AutoConfigureAfter(RedisAutoConfiguration.class)
public class CacheConfiguration extends CachingConfigurerSupport {

    @Resource
    private CacheProperties cacheProperties;

    private Jackson2JsonRedisSerializer<?> createJacksonRedisSerializer() {
        Jackson2JsonRedisSerializer<?> jackson2JsonRedisSerializer = new Jackson2JsonRedisSerializer<>(Object.class);
        ObjectMapper om = new ObjectMapper();
        om.setVisibility(PropertyAccessor.ALL, JsonAutoDetect.Visibility.ANY);
        om.activateDefaultTyping(LaissezFaireSubTypeValidator.instance, DefaultTyping.NON_FINAL);
        jackson2JsonRedisSerializer.setObjectMapper(om);
        return jackson2JsonRedisSerializer;
    }

    @Bean("doeRedisTemplate")
    public RedisTemplate<?, ?> getRedisTemplate(RedisConnectionFactory connectionFactory) {
        RedisTemplate<?, ?> template = new StringRedisTemplate(connectionFactory);
        StringRedisSerializer keySerializer = new StringRedisSerializer();
        template.setKeySerializer(keySerializer);
        template.setValueSerializer(createJacksonRedisSerializer());
        template.setHashKeySerializer(keySerializer);
        template.setHashValueSerializer(createJacksonRedisSerializer());
        return template;
    }

//	  方式一:直接定义Caffeine的Bean,项目里直接使用,这里我们使用CacheManager,所以注释掉这种方式
//    @Bean
//    public Caffeine<Object, Object> caffeineConfig() {
//        return Caffeine.newBuilder()
//                .expireAfterWrite(cacheConfig.getExpire(), TimeUnit.MINUTES)
//                .initialCapacity(cacheConfig.getInitialCapacity())
//                .recordStats()
//                .maximumSize(cacheConfig.getMaximumSize());
//    }

    @Bean("caffeineCacheManager")
    public CacheManager cacheManager() {
        CaffeineCacheManager caffeineCacheManager = new CustomCaffeineCacheManager(cacheProperties);
        // caffeineCacheManager.setCaffeine(caffeine);
        caffeineCacheManager.setAllowNullValues(true); // 空值缓存
        return caffeineCacheManager;
    }

    /**
     * keyGenerator.
     */
    @Bean("keyGenerator")
    public KeyGenerator keyGenerator() {
        return (target, method, params) -> {
            String[] value = new String[1];
            Cacheable cacheable = method.getAnnotation(Cacheable.class);
            if (cacheable != null) {
                value = cacheable.value();
            }
            CachePut cachePut = method.getAnnotation(CachePut.class);
            if (cachePut != null) {
                value = cachePut.value();
            }
            CacheEvict cacheEvict = method.getAnnotation(CacheEvict.class);
            if (cacheEvict != null) {
                value = cacheEvict.value();
            }
            StringBuilder sb = new StringBuilder();
            sb.append(value[0]);
            for (Object obj : params) {
                sb.append(":")
                        .append(MD5Util.encrypt(com.mmc.lesson.util.GsonUtil.toJson(obj)));
            }
            log.info("keyGenerator:{}", sb.toString());
            return sb.toString();
        };
    }

    /**
     * fixKeyGenerator.
     */
    @Bean("fixKeyGenerator")
    public KeyGenerator fixKeyGenerator() {
        return (target, method, params) -> {
            String[] value = new String[1];
            Cacheable cacheable = method.getAnnotation(Cacheable.class);
            if (cacheable != null) {
                value = cacheable.value();
            }
            CachePut cachePut = method.getAnnotation(CachePut.class);
            if (cachePut != null) {
                value = cachePut.value();
            }
            CacheEvict cacheEvict = method.getAnnotation(CacheEvict.class);
            if (cacheEvict != null) {
                value = cacheEvict.value();
            }
            return value[0] + "";
        };
    }
}
3、编写CustomCaffeineCacheManager.java,方便我们通过不同的配置来生成自定义CaffeineCache。编写CustomCaffeineCache.java,主要用来打印缓存置入置出日志,当然可以增加更多自定义操作。
public class CustomCaffeineCacheManager extends CaffeineCacheManager {

    private CacheProperties cacheProperties;

    /**
     * init.
     */
    public CustomCaffeineCacheManager(CacheProperties cacheProperties) {

        this.cacheProperties = cacheProperties;
    }

    /**
     * Adapt the given new native Caffeine Cache instance to Spring's {@link Cache}
     * abstraction for the specified cache name.
     *
     * @param name the name of the cache
     * @param cache the native Caffeine Cache instance
     * @return the Spring CaffeineCache adapter (or a decorator thereof)
     * @see CustomCaffeineCache
     * @see #isAllowNullValues()
     * @since 5.2.8
     */
    @Override
    protected Cache adaptCaffeineCache(String name, com.github.benmanes.caffeine.cache.Cache<Object, Object> cache) {

        return new CustomCaffeineCache(cacheProperties, name, cache, isAllowNullValues());

    }

    /**
     * Build a common Caffeine Cache instance for the specified cache name,
     * using the common Caffeine configuration specified on this cache manager.
     *
     * @param name the name of the cache
     * @return the native Caffeine Cache instance
     * @see #createCaffeineCache
     */
    @Override
    protected com.github.benmanes.caffeine.cache.Cache<Object, Object> createNativeCaffeineCache(String name) {

        Config cfg = cacheProperties.getCaches().get(name);

        return buildCache(cfg).build();
    }

    /**
     * 根据自定义配置生成缓存.
     */
    private Caffeine<Object, Object> buildCache(Config config) {
        return Caffeine.newBuilder()
                .expireAfterWrite(config.getExpire(), TimeUnit.SECONDS)
                .initialCapacity(config.getInitialCapacity())
                .recordStats()
                .maximumSize(config.getMaximumSize());
    }

}

@Slf4j
public class CustomCaffeineCache extends CaffeineCache {

    private Config cacheProperties;
    private String name;

    /**
     * Create a {@link CaffeineCache} instance with the specified name and the
     * given internal {@link Cache} to use.
     *
     * @param name the name of the cache
     * @param cache the backing Caffeine Cache instance
     */
    public CustomCaffeineCache(String name, Cache<Object, Object> cache) {
        super(name, cache);
    }

    /**
     * Create a {@link CaffeineCache} instance with the specified name and the
     * given internal {@link Cache} to use.
     *
     * @param name the name of the cache
     * @param cache the backing Caffeine Cache instance
     * @param allowNullValues whether to accept and convert {@code null}
     */
    public CustomCaffeineCache(CacheProperties cacheProperties, String name, Cache<Object, Object> cache,
            boolean allowNullValues) {
        super(name, cache, allowNullValues);
        this.name = name;
        this.cacheProperties = cacheProperties.getCaches().get(name);
        log.info("CustomCaffeineCache {} cacheConfig: {}", name, com.mmc.lesson.util.GsonUtil.toJson(cacheProperties));
    }

    @Override
    public ValueWrapper get(Object key) {

        if (!cacheProperties.isEnabled()) {
            return null;
        }
        ValueWrapper data = super.get(key);
        show(key, data);
        return data;
    }

    @Override
    public <T> T get(Object key, Class<T> type) {

        if (!cacheProperties.isEnabled()) {
            return null;
        }
        T data = super.get(key, type);
        show(key, data);
        return data;
    }

    @Override
    public <T> T get(Object key, Callable<T> valueLoader) {

        if (!cacheProperties.isEnabled()) {
            return null;
        }
        T data = super.get(key, valueLoader);
        show(key, data);
        return data;
    }

    private void show(Object key, Object value) {

        log.info("CustomCaffeineCache|get|{}|{}|{}", name, key, null == value ? "miss" : "hit");

    }

    @Override
    public void put(Object key, Object value) {
        if (!cacheProperties.isEnabled()) {
            return;
        }
        log.info("CustomCaffeineCache|put|{}|{}", name, key);
        super.put(key, value);
    }
}
4、编写BookService.java、StoreService.java,用来模拟先查缓存、缓存没有查DB的常规业务,这里简单用一行日志证明缓存失效。
@Slf4j
@Service
public class BookService {
	// 这里的cachNames需要跟application-dev.properties中spring.mmc.caches配置保持一致
    @Cacheable(cacheNames = "book", key = "#id")
    public void get(int id) {

        log.info("load book from db.");
    }
}

@Slf4j
@Service
public class StoreService {
	// 这里的cachNames需要跟application-dev.properties中spring.mmc.caches配置保持一致
    @Cacheable(cacheNames = "store", key = "#id")
    public void get(int id) {

        log.info("load store from db.");
    }
}
4、修改application-dev.properties 增加book
、store接口本地缓存配置,其它环境同理(可以放到Apollo托管)。
## 为了验证缓存配置隔离,这里book接口缓存5s
spring.mmc.caches.book.enabled=true
spring.mmc.caches.book.expire=5
spring.mmc.caches.book.initial-capacity=100
spring.mmc.caches.book.maximum-size=1000
## 为了验证缓存配置隔离,这里store接口缓存10s
spring.mmc.caches.store.enabled=true
spring.mmc.caches.store.expire=10
spring.mmc.caches.store.initial-capacity=100
spring.mmc.caches.store.maximum-size=1000
五、测试一下
1、修改并运行单元测试
@Slf4j
@ActiveProfiles("dev")
@ExtendWith(SpringExtension.class)
@SpringBootTest
class SuiteTest {

    @Resource
    private BookService bookService;

    @Resource
    private StoreService storeService;

    @Test
    void testGet() throws InterruptedException {

        // book 失效时间5s
        // store 失效时间10s
        // 20秒,预计从db加载book 4次,加载store 2次
        for (int i = 0; i < 20; i++) {

            bookService.get(888);
            storeService.get(888);
            Thread.sleep(1000);
        }
    }

}
2、运行20s,book接口打印了四次、store接口打印了2次,测试通过。
[2021-12-25 20:55:40.129] [main] [INFO] [com.mmc.lesson.caffeine.cache.CustomCaffeineCache:?] - CustomCaffeineCache book cacheConfig: {"caches":{"book":{"enabled":true,"expire":5,"initialCapacity":100,"maximumSize":1000},"store":{"enabled":true,"expire":10,"initialCapacity":100,"maximumSize":1000}}}
[2021-12-25 20:55:40.163] [main] [INFO] [com.mmc.lesson.caffeine.service.BookService:?] - load book from db.
[2021-12-25 20:55:40.165] [main] [INFO] [com.mmc.lesson.caffeine.cache.CustomCaffeineCache:?] - CustomCaffeineCache store cacheConfig: {"caches":{"book":{"enabled":true,"expire":5,"initialCapacity":100,"maximumSize":1000},"store":{"enabled":true,"expire":10,"initialCapacity":100,"maximumSize":1000}}}
[2021-12-25 20:55:40.169] [main] [INFO] [com.mmc.lesson.caffeine.service.StoreService:?] - load store from db.
[2021-12-25 20:55:45.194] [main] [INFO] [com.mmc.lesson.caffeine.service.BookService:?] - load book from db.
[2021-12-25 20:55:50.209] [main] [INFO] [com.mmc.lesson.caffeine.service.BookService:?] - load book from db.
[2021-12-25 20:55:50.210] [main] [INFO] [com.mmc.lesson.caffeine.service.StoreService:?] - load store from db.
[2021-12-25 20:55:55.224] [main] [INFO] [com.mmc.lesson.caffeine.service.BookService:?] - load book from db.
六、小结
至此,我们就优雅地整合Caffeine并使用不同的缓存配置,小伙伴们可以发挥自己的动手能力,根据key动态删除Caffeine缓存哦。下一篇《搭建大型分布式服务(二十四)如何创建一个TKE容器集群?》
加我加群一起交流学习!更多干货下载、项目源码和大厂内推等着你


 本文介绍了如何在SpringBoot项目中优雅地整合Caffeine作为本地缓存,并实现不同接口的缓存配置隔离。通过自定义CacheProperties和CacheConfiguration,可以根据业务需求设置每个接口的缓存失效时间、初始容量和最大容量。在测试中,验证了不同接口的缓存配置能够按预期工作。


 被折叠的 条评论
为什么被折叠?


