


catmaid 5d在Ubuntu14.04上的安装
1. 下载catmaid 5d代码
Installing CATMAID for data visualization and cell-lineage editing
Download the latest version of the CATMAID branch for cell lineaging at https://github.com/catmaid/CATMAID/tree/5d_cell_tracking or clone it with the following Git command: git clone -b 5Dvisualization
--single-branch https://fernandoamat@bitbucket.org/fernandoamat/catmaid_5d_visualization_annotation.git
上面两个地址的代码是相同的,我选择第二个地址git下载下来
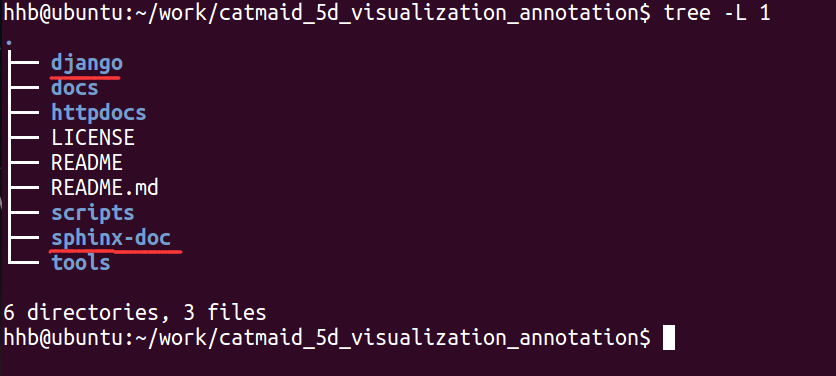
2. 代码结构:
项目代码都在django目录下,sphinx-doc里有个文件installation.rst在安装的时候有用
3. 开始配置安装
参考内容:
catmaid_5d_visualization_annotation/django/INSTALL 文件和
https://catmaid.readthedocs.io/en/stable/installation.html
执行:
sudo apt-get install python-virtualenv libpq-dev python-dev \
libxml2-dev libxslt1-dev

sudo apt-get build-dep python-numpy python-h5py \
libimage-exiftool-perl python-pgmagick

virtualenv --no-site-packages env

source env/bin/activate
安装PostgreSQL和PostGIS:
1添加PostgreSQL源:
PG_URL="http://apt.postgresql.org/pub/repos/apt/"
APT_LINE="deb ${PG_URL} $(lsb_release -cs)-pgdg main"
echo "${APT_LINE}" | sudo tee "/etc/apt/sources.list.d/pgdg.list"
sudo apt-get install wget ca-certificates
PG_KEY_URL="https://www.postgresql.org/media/keys/ACCC4CF8.asc"
wget --quiet -O - ${PG_KEY_URL} | sudo apt-key add -
sudo apt-get update
2安装PostgreSQL和PostGIS:
sudo apt-get install postgresql-9.5 postgresql-9.5-postgis-2.2进入目录
catmaid_5d_visualization_annotation/django
安装python包
pip install -r pip-frozen这个命令会批量安装pip-frozen文件的python包,会存在有包安装不上,所以在这里安装pip-frozen文件的内容,在命令行单个安装,可以确保每个包都能正确安装
依次执行:
pip install 包名称下面是包名称列表和一些注释说明
  1 Django==1.4
  2 distribute==0.6.25
  3 django-devserver==0.3.1
  4 numpy
  5 h5py==2.2.1
  6 psycopg2==2.4.1
  7 sqlparse==0.1.3
  8 wsgiref==0.1.2
  9 networkx==1.7
 10
 11 # do: sudo apt-get install graphicsmagick
 12 # first
 13 pgmagick==0.5.5
 14 #
 16 celery==2.4.6
 17 django-celery==2.4.2
 18 kombu==2.0.0
 19 django-kombu==0.9.4
 20 PyYAML==3.10
 21 python-dateutil==2.1
 22 django-guardian==1.0.4
 23 django-taggit==0.9.3
 24 django-adminplus==0.1.7
 25
 26 # You need to install a development/header package. In Ubuntu, this package is called uuid-dev.
 Do the commend: sudo apt-get install uuid-dev
 27 python-libuuid==0.9.0
 28 #
 32 # do : sudo ln -s /usr/include/freetype2             /usr/local/include/freetype
 33 # first
 34 pillow==1.7.8
 35 #
 37 south==0.7.6
补充:关于什么是uuid
参考资料:How to install uuid-dev on Ubuntu 14.04 (Trusty Tahr)
配置PostgreSQL
在/etc/postgresql/9.5/main/pg_hba.conf文件中,添加
local catmaid catmaid_user md5然后,重启PostgreSQL
sudo service postgresql restart创建数据库catmaid 和 数据库用户名 catmaid_user:
进入catmaid_5d_visualization_annotation目录
首先修改catmaid_5d_visualization_annotation/scripts/createuser.sh,在末尾添加
CREATE EXTENSION postgis;
EOSQL
其中
\connect $CATMAID_DATABASE
\c $CATMAID_DATABASE
意思一样,都是连接到数据库
执行下面命令
scripts/createuser.sh catmaid catmaid_user p4ssw0rd | sudo -u postgres psql其中p4ssw0rd就是密码,可以改成你想输的密码
接下来用用户名catmaid_user登录的数据库catmaid:结果显示如下
psql -U catmaid_user catmaid
Password:
psql (9.5.3)
Type "help" for help.

catmaid=> \d
         List of relations
 Schema |       Name        | Type  |  Owner
--------+-------------------+-------+----------
 public | geography_columns | view  | postgres
 public | geometry_columns  | view  | postgres
 public | raster_columns    | view  | postgres
 public | raster_overviews  | view  | postgres
 public | spatial_ref_sys   | table | postgres
创建Django配置文件
切换到catmaid_5d_visualization_annotation/django目录,执行
cp configuration.py.example configuration.py修改configuration.py文件
修改后的configuration.py为:
# Absolute path to the root folder of your CATMAID fork without trailing slash
# e.g. /home/alice/dev/CATMAID

abs_catmaid_path = '/home/hhb/work/catmaid_5d_visualization_annotation'

# Absolute path to the site-packages folder of your virtual Python environment without trailing slash
# e.g. /home/alice/dev/CATMAID/django/env/lib/PYTHON_VERSION/site-packages

abs_virtualenv_python_library_path = '/home/hhb/work/catmaid_5d_visualization_annotation/django/env/lib/python2.7/site-packages'

# CATMAID database configuration
catmaid_database_name = 'catmaid'
catmaid_database_username = 'catmaid_user'
catmaid_database_password = '123'

# Writable folder to store automatically generated files that are publicly
# visible, e.g. used by by the NeuroHDF export script and the cropping tool.

catmaid_writable_path = ''

# The HDF5 and the cropping tools write files into a subrirectory of
# the writable path above. Make sure these folders exist there (or
# adjust them to existing folders you like):

catmaid_hdf5_subdir = 'hdf5'
catmaid_crop_subdir = 'cropping'

# Local time zone for this installation. Choices can be found here:
# http://en.wikipedia.org/wiki/List_of_tz_zones_by_name
# although not all choices may be available on all operating systems.
# If running in a Windows environment this must be set to the same as your
# system time zone.
# e.g.: Europe/Zurich

catmaid_timezone = 'Europe/Zurich'

# The domain name (server name) which hosts the CATMAID installation
# without http:// and without a trailing slash, e.g.: localhost

catmaid_servername = 'localhost'

# The name of the catmaid subdirectory as seen from the outside
# e.g. for http://localhost/catmaid/ the variable catmaid_subdirectory
# would be 'catmaid'. It should not have a leading or trailing slash.

catmaid_subdirectory = ''
然后执行
./create_configuration.py进入
catmaid_5d_visualization_annotation/django/projects/mysite
进行数据库迁移
./manage.py migrate准备static文件
执行
./manage.py collectstatic -l
./manage.py collectstatic –l创建管理员
./manage.py createsuperuser启动Django development server
./manage.py runserver
执行migrate或者runserver可能会报错
解决方法:我写在了另一篇博客中
catmaid 5d笔记
最后还需要改一些东西:
具体做法:
1. Activate my virtualenv
2. Go into the django/projects/mysite/ folder
3. Call ./manage.py schemamigration catmaid --auto
4. Call ./manage.py migrate catmaid
参照下面链接里的步骤:
https://groups.google.com/forum/#!topic/catmaid/SHHfzdL_AoY
导入样例数据
./manage.py catmaid_insert_example_projects --user=1导入样例数据的时候,会报错
作如下修改
http://blog.csdn.net/haohaibo031113/article/details/53043978
teambition的SIMC ICT成员可以访问使用教程
使用操作教程:
https://www.teambition.com/project/5733291165d41ead4859f886/works/573accd75978c227337576b8


 1097
1097

 被折叠的 条评论
为什么被折叠?
被折叠的 条评论
为什么被折叠?
 到【灌水乐园】发言


