


Alibaba Cloud Linux (Aliyun Linux) release 2.1903 LTS (Hunting Beagle)按centos7系统操作命令操作
源码包编译安装方式
1、下载最新稳定版本:https://download.redis.io/redis-stable.tar.gz,当前版本是7.2
# mkdir /data
# cd /data
# curl -OL https://download.redis.io/redis-stable.tar.gz
2、解压后编译安装
# tar -zxvf redis-stable.tar.gz
# cd redis-stable
# make
# make install
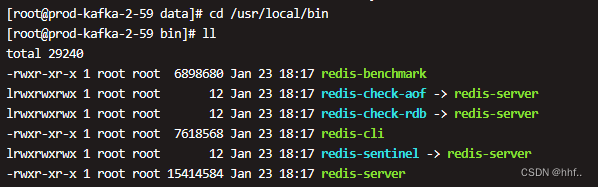
redis会被默认安装在 /usr/local/bin/目录下
3、修改配置文件
配置文件redis.conf在源码包下,通常需要修改或开启以下配置
- daemonize yes # redis守护进程启动
- requirepass foobared # 设置访问密码
- port 6379 # 访问端口
- bind 127.0.0.1 -::1 # 地址绑定
4、启动redis
以下是pwd在/data/redis-stable目录下的启动、以及验证启动运行正常的命令
#  /usr/local/bin/redis-server  redis.conf
# /usr/local/bin/redis-cli
如果端口号修改为1234则:# /usr/local/bin/redis-cli -h 127.0.0.1 -p 1234
127.0.0.1:6379> auth foobared
127.0.0.1:6379> ping

当看到redis命令行客户端返回PONG。证明配置没问题,redis顺利运行。
后面的开机自启动按需设置即可。
执行启动命令可能会有以下警告。执行echo 1 > /proc/sys/vm/overcommit_memory 或者按警告提示操作消除警告
WARNING Memory overcommit must be enabled! Without it, a background save or replication may fail under low memory condition. Being disabled, it can also cause failures without low memory condition, see https://github.com/jemalloc/jemalloc/issues/1328. To fix this issue add 'vm.overcommit_memory = 1' to /etc/sysctl.conf and then reboot or run the command 'sysctl vm.overcommit_memory=1' for this to take effect.
5、开机自启动配置
先把redis进程kill掉,创建一个systemd管理文件
# vim /etc/systemd/system/redis.service
redis.service文件内容如下:
[Unit]
Description=redis-server
After=network.target

[Service]
Type=forking

ExecStart=/usr/local/bin/redis-server /data/redis-stable/redis.conf
PrivateTmp=true

[Install]
WantedBy=multi-user.target
接下来运行以下命令
systemd配置文件生效命令
# systemctl daemon-reload
设置redis开机自启:
# systemctl enable redis
启动redis服务
# systemctl start redis
查看redis服务状态
# systemctl status redis
停止服务
# systemctl stop redis
取消开机自动启动
# systemctl disabled redis
参考资料
https://redis.io/docs/install/install-redis/install-redis-from-source/
https://redis.io/docs/connect/cli/


 1091
1091


 被折叠的 条评论
为什么被折叠?
被折叠的 条评论
为什么被折叠?
 到【灌水乐园】发言


