


title: SpringBoot
date: 2022-09-13
permalink: /SpringBoot/
tags:
  - JAVA
  - SpringBoot
category: 笔记

<!-- more -->
注释复习
Spring Boot 本身就 Spring MVC 的简化版本。是在 Spring MVC 的基础上实现了自动配置,简化了开发人员开发过程。
Spring MVC 是通过一个叫 DispatcherServlet 前端控制器的来拦截请求的。而在 Spring Boot 中 使用自动配置把 DispatcherServlet 前端控制器自动配置到框架中。
例如,我们来解析 /users 这个请求
-
DispatcherServlet前端控制器拦截请求 /users -
servlet决定使用哪个handler处理 -
Spring 检测哪个控制器匹配
/users,Spring 从 @RquestMapping 中查找出需要的信息 -
Spring 找到正确的 Controller 方法后,开始执行 Controller 方法
-
返回 users 对象列表
-
根据与客户端交互需要返回 Json 或者 Xml 格式
| 应用场景 | 注解 | 注解说明 |
|---|---|---|
| 处理请求 | @Controller | 处理 Http 请求 |
| 处理请求 | @RestController | @Controller 的衍生注解 |
| 路由请求 | @RequestMapping | 路由请求 可以设置各种操作方法 |
| 路由请求 | @GetMapping | GET 方法的路由 |
| 路由请求 | @PostMapping | POST 方法的路由 |
| 路由请求 | @PutMapping | PUT 方法的路由 |
| 路由请求 | @DeleteMapping | DELETE 方法的路由 |
| 请求参数 | @PathVariable | 处理请求 url 路径中的参数 /user/{id}(post) |
| 请求参数 | @RequestParam | 处理问号后面的参数(get、post) |
| 请求参数 | @RequestBody | 处理JSON格式提交的from表单(post) |
| 请求参数 | @RequestPart | 处理其他类型表单 例如from-data (post) |
| 返回参数 | @ResponseBody | 返回 json 格式 |
| 请求参数 | @RequesrHeader | 获取请求头内的参数 |
@GetMapping、@PostMapping、@PutMapping、@DeleteMapping 是 @RequestMapping 的子集。所以实际上我们只需要掌握 @Controller 和 @RequestMapping 就可以了。
@Controller 包括了 @RestController。@RestController 是 Spring4 后新加的注解,从 RestController 类源码可以看出 @RestController 是 @Controller 和 @ResponseBody 两个注解的结合体。
@RequestPart 用于将 multipart/form-data 类型数据映射到控制器处理方法的参数中。 除了 @RequestPart 注解外, @RequestParam 同样可以用于此类操作。
Spring Bean的生命周期和钩子函数
1) Bean 的创建阶段
-
Instantiation(实例化):这是一个Bean一切开始的地方。 Spring 实例化 bean 对象,就像我们手动创建 Java 对象实例一样。
-
Populating Properties(填充属性):在实例化对象后,Spring 会扫描实现 其
Aware接口,回调Aware的回调方法, 并开始为其相关属性进行设值。 -
Pre-Initialization (预初始化):Spring Bean后处理器
BeanPostProcessor在这个阶段开始工作,spring回调初始化前处理方法postProcessBeforeInitialization()。 此外,@PostConstruct注解的方法在其之后被调用。 -
AfterPropertiesSet (标准初始化): Spring 执行实现 InitializingBean 接口 的 afterPropertiesSet() 方法。这是正式的初始化。
-
Custom Initialization(自定义初始化):Spring 调用我们用
@Bean注解的initMethod属性指定的初始化方法。 -
Post-Initialization (后初始化):Spring Bean后处理器
BeanPostProcessor在这个阶段再次工作。 此阶段触发其初始化后处理方法postProcessAfterInitialization()。
2) Bean 的销毁阶段
-
Pre-Destroy(预销毁): Spring 在此阶段触发
@PreDestroy注解标记的方法。 -
Destroy(标准销毁):Spring 执行bean实现
DisposableBean接口的destroy()方法。 -
Custom Destruction(自定义销毁): Spring 在此阶段触发
@Bean注解的destroyMethod属性指定的方法。Spring将 在最后一个阶段运行它们。
实现1:Springboot提供的接口
//若是销毁的的,继承DisposableBean 接口
@Component
public class BeanLifeTest implements InitializingBean {
    @Override
    public void afterPropertiesSet() throws Exception {
        System.out.println("Springboot启动了");
    }
}
实现2:使用JSR-250注解
@Component
public class BeanLifeTest {
    @Autowired
    UserMapper userMapper;
    @PostConstruct
    public void PostConstruct() {
        User user = userMapper.selectById("20201313013");
        System.out.println(user);
        System.out.println("Springboot启动");
    }
    @PreDestroy
    public void PreDestroy() {
        System.out.println("Springboot关闭");
    }
}
Springboot面向切面编程
<!--     面向切面   -->
<dependency>
    <groupId>org.springframework</groupId>
    <artifactId>spring-aspects</artifactId>
    <version>5.1.0.RELEASE</version>
</dependency>
<dependency>
    <groupId>org.aspectj</groupId>
    <artifactId>aspectjweaver</artifactId>
    <version>1.9.5</version>
</dependency>
<dependency>
    <groupId>aopalliance</groupId>
    <artifactId>aopalliance</artifactId>
    <version>1.0</version>
</dependency>
<dependency>
    <groupId>net.sourceforge.cglib</groupId>
    <artifactId>com.springsource.net.sf.cglib</artifactId>
    <version>2.2.0</version>
</dependency>
exuction(权限修饰符 返回类型 类全路径 方法名称 (参数列表))
.代表了运行当前包下所有的方法,.. 代表运行当前包和子包的方法
//切面方法
@Component
@Aspect
public class VisitedCountHandler {
    @After(value = "execution(*  com.syes.syes_springboot.controller.ItemController.itemById(..)) )")
    public void before(JoinPoint joinPoint) throws Throwable {
        Object[] args = joinPoint.getArgs();
        Object itemid = args[0].toString();
        System.out.println(itemid);
        System.out.println("调用了");
    }
}
//被切类
@GetMapping("/id")
public Result itemById(@RequestParam("itemid") int itemid, HttpServletRequest request) {
    Item item = itemMapper.selectItemByid(itemid);
    return Result.success(item);
}
//输出结果
JDBC Connection [com.mysql.cj.jdbc.ConnectionImpl@7d8b1be5] will not be managed by Spring
==>  Preparing: SELECT id,userid,itemid,price,time FROM auction WHERE (userid = ? AND itemid = ?)
==> Parameters: 77(Integer)
==> Parameters: 20201313013(String), 77(Integer)
77
调用了
获取Request
@Component
@Aspect
public class VisitedCountHandler {

    @After(value = "execution(*  com.syes.syes_springboot.controller.ItemController.itemById(..)) )")
    public void before(JoinPoint joinPoint) throws Throwable {
        RequestAttributes ra = RequestContextHolder.getRequestAttributes();
        ServletRequestAttributes sra = (ServletRequestAttributes) ra;
        HttpServletRequest request = sra.getRequest();
        String id = IdUtil.getId(request);
        System.out.println("userid=" + id);
        Object[] args = joinPoint.getArgs();
        Object itemid = args[0].toString();
        Object header = args[0];
        System.out.println(itemid);
        System.out.println("调用了");
    }
}
将获取的obj转换成指定类
Object[] args = joinPoint.getArgs();
ChatDto chatDto = ChatDto.class.cast(args[0]);
定时任务
@Configuration      //1.主要用于标记配置类,兼备Component的效果。
@EnableScheduling   // 2.开启定时任务
public class SaticScheduleTask {
    //3.添加定时任务
    @Scheduled(cron = "*/5 * * * * ?")//秒(0-59) 分(0-59) 时(0-23) 第几号(0-31) 第几个月(0-11) 周几(1-7)
    //或直接指定时间间隔,例如:5秒
    //@Scheduled(fixedRate=5000)
    private void configureTasks() {
        System.err.println("执行静态定时任务时间: " + LocalDateTime.now());
    }
}
每隔5秒执行一次:*/5 * * * * ?
每隔1分钟执行一次:0 */1 * * * ?
每天23点执行一次:0 0 23 * * ?
每天凌晨1点执行一次:0 0 1 * * ?
每月1号凌晨1点执行一次:0 0 1 1 * ?
每月最后一天23点执行一次:0 0 23 L * ?
每周星期天凌晨1点实行一次:0 0 1 ? * L
在26分、29分、33分执行一次:0 26,29,33 * * * ?
每天的0点、13点、18点、21点都执行一次:0 0 0,13,18,21 * * ?
前端发送数组后端接收
  api.post('/student/CompBList', {ids: correctSelect.value}).then(res => {
    res.data.forEach((data: { color: string; }) => {
      data.color = 'primary'
    })
    nextData.value = res.data
  })
//获取数组,返回信息
@PostMapping("/CompBList")
public List<Student> CompBlist(@RequestBody Map<String, Object> map) {
    ArrayList<Integer> list = ArrayList.class.cast(map.get("ids"));
    ArrayList<Student> students = new ArrayList<>();
    for (Integer integer : list) {
        students.add(studentMapper.selectYi(integer.toString()));
    }
    return students;
}
SpringBoot
Spring生态圈
-
微服务开发
-
响应式编程
-
分布式云开发
-
web开发
-
Serverless无服务开发
-
事件驱动
-
批处理
SpringBoot的优点
-
独立Spring应用
-
内置web应用
-
自动配置Spring
-
提供监控、检查、外部化配置
-
没有任何代码生成
SpringBoot缺点
-
迭代快
-
基于Spring,封装深
分布式困难
-
远程调用
-
服务发现
-
负载均衡
-
配置管理
-
服务监控
-
链路追踪
-
日志管理
-
任务调度
上云的困难
-
服务自愈
-
弹性伸缩
-
服务隔离
-
自动化部署
-
灰度发布
-
流量治理
SpringBoot2入门
系统要求
-
java8
-
maven 3.3+
maven记得修改配置
HelloWorld
通过Maven创建Springboot
springboot配置列表Application.properties
配置Maven
<!-- pom.xml   导入父工程,使用SpringBoot-->
<parent>
    <artifactId>spring-boot-starter-parent</artifactId>
    <groupId>org.springframework.boot</groupId>
    <version>2.3.4.RELEASE</version>
</parent>
    <dependencies>
        <dependency>
            <groupId>org.springframework.boot</groupId>
            <artifactId>spring-boot-starter-web</artifactId>
            <version>2.6.6</version>
        </dependency>
    </dependencies>
写代码
//main.java,主程序代码一般为固定
package com.auguigu.boot;
import org.springframework.boot.SpringApplication;
import org.springframework.boot.autoconfigure.SpringBootApplication;

//注册程序类,这是一个Springboot应用
@SpringBootApplication
public class Main {
    public static void main(String[] args) {
        SpringApplication.run(Main.class,args);
    }
}
//helloController.java
package com.auguigu.boot.controller;

import org.springframework.stereotype.Controller;
import org.springframework.web.bind.annotation.RequestMapping;
import org.springframework.web.bind.annotation.ResponseBody;
import org.springframework.web.bind.annotation.RestController;

@RestController
public class HelloController {

    @ResponseBody
    @RequestMapping("/hello")
    public String handle(){
        return "hello,SpringBoot2";
    }
}
构建jar包
添加到pom.xml
<build>
    <plugins>
        <plugin>
            <groupId>org.springframework.boot</groupId>
            <artifactId>spring-boot-maven-plugin</artifactId>
        </plugin>
    </plugins>
</build>
<!-- 报错的加版本号 -->
clean package

注意:
Maven相关
由于父级的存在,大部分包是不用写版本的,当然也能手动改
包提示不存在的,写上版本,刷新重启
Starter启动器
springboot中关于spring-boot-strater-*,会自动引入相关的包
支持场景官网可查,也可以用第三方的启动器
自动配置
    <dependencies>
        <dependency>
            <groupId>org.springframework.boot</groupId>
            <artifactId>spring-boot-starter-web</artifactId>
            <version>2.6.6</version>
        </dependency>
    </dependencies>
-
自动添加SpringMVC
-
比如tomcat
-
-
自动配好Web常见功能
-
比如中文编码
-
-
默认包结构,自动包扫描
-
需要与主程序在同一目录,子包
-
改变包扫描
@SpringBootApplication(scanBasePackages='com.auguigu')
-
-
配好了一堆默认值
-
按需加载
-
用了什么
stater加载了什么
-
底层注解
父级关系
public class MyConfig {
    @Bean("zhangsan")
    public User user  (){
        User zhangsan = new User("zhangsan",18);
        zhangsan.setPet(pet());
        return zhangsan;
    }
//    @Bean("tomcat")
    public Pet pet(){
        return new Pet("tomcat",8);
    }
}
//需要在构造器中添加Pet pet;
@Configratuon配置类
创建一个配置类MyConfig.java
@Configuration(proxyBeanMethods = false) //告诉springBoot这是一个配置类,Spring5也有的,设置为false以提高性能
public class MyConfig {

    @Bean("user")   //给容器中添加组件,方法名做为ID,返回类型为组件类型,返回的值是 容器中的实例
    public User user (){
        return new User("zhangsan",18);
    }
    @Bean("tom")
    public Pet pet (){
        return  new Pet("tomcat",10);
    }
}
关于@Configuration(proxyBeanMethods = false)
-
配置类Bean标记注册的组件,默认是单实例,创建多少个,都是在容器中调用的同一个实例
-
配置类本身也是组件,可以输出
-
proxyBeanMethods代理Bean的方法,如果为true,那么获取到的是代理对象的调用方法 -
SpringBoot检测
proxyBeanMethods=ture实例是否被创建,创建就返回旧的,没有创建就用车创建新的,从而始终保持创建对象的单例 -
默认为
false,当为ture时,用来处理比如user类里有pet等情况,此时user.pet与pet保持了一致
主函数
//注册程序类,这是一个Springboot应用
@SpringBootApplication
public class Main {
    public static void main(String[] args) {
        //SpringApplication.run(Main.class,args);
        //1.返回IOC容器
        ConfigurableApplicationContext run = SpringApplication.run(Main.class, args);
        //2.查看并打印容器内的组件
        String [] names  =  run.getBeanDefinitionNames();
        for (String name:names){
            System.out.println(name);
        }
        //3.从容器中获取组件
        Pet tom01  = run.getBean("tom",Pet.class);
        Pet tom02  = run.getBean("tom",Pet.class);
        System.out.println("组件");
        System.out.println(tom01==tom02);
        //如果proxyBeanMethods=true那么上面返回true,确实是一个东西

        //4.Springboot甚至可以获取Myconfig作为组件
        MyConfig bean = run.getBean(MyConfig.class);
        System.out.println(bean);
        //com.auguigu.boot.config.MyConfig$$EnhancerBySpringCGLIB$$f94dd108@109f5dd8
        //输出的这个东西就是代理对象

        User user1 = run.getBean("user",User.class);
        User user2 = run.getBean("user",User.class);
        System.out.println(user1==user2);
    }
}
类
public class Pet {
    private  String name;
    private  int age;
}
public class User {
    private String name;
    private int age;
}
@import导入组件
@Import({User.class, Driver.class})
写在任何一个配置类或者组件中
可以引入自己创建的或者外部库
@Import({User.class, DBHelper.class})
@Configuration(proxyBeanMethods = false)
public class MyConfig {
    @Bean("user")
    public User user (){
        return new User("zhangsan",18);
    }
    @Bean("tom")
    public Pet pet (){
        return  new Pet("tomcat",10);
    }
}
//注册程序类,这是一个Springboot应用
@SpringBootApplication
public class Main {
    public static void main(String[] args) {
       //获取组件
        String[] beanNamesForType = run.getBeanNamesForType(User.class);
        System.out.println("==========");
        for (String s : beanNamesForType) {
            System.out.println(s);
        }
        DBHelper bean1 = run.getBean(DBHelper.class);
        System.out.println(bean1);
    }
}
==========
com.auguigu.boot.Bean.User
user
ch.qos.logback.core.db.DBHelper@6bfdb014
@Conditional条件装配
判断容器中是否存在组件
boolean tomcat = run.containsBean("tomcat");
System.out.println("容器中tomcat组件:");
System.out.println(tomcat);
//    @Bean("tomcat")
    public Pet pet(){
        return new Pet("tomcat",8);
    }
//注释掉即可消失
容器中tomcat组件:
false
常用实例
-
ConditionalOnBean():当容器中存在Bean时执行 -
ConditionalOnMissingBean():当容器中不存在Bean时执行 -
ConditionalOnClass():当容器中有某一类时执行 -
ConditonalOnMissingClass()当容器中没有某一类时执行 -
ConditionalOnResource():路径中存在某一资源执行 -
ConfitonalOnJava():Java是某一版本号时执行 -
ConditionalOnWeb():此应用是Web应用后执行 -
ConditionalOnNotWeb():此应用不是Web应用后执行
举例
boolean tomcat = run.containsBean("tomcat");
System.out.println("容器中tomcat组件:"+tomcat);
boolean zhangsan = run.containsBean("zhangsan");
System.out.println("容器中的zhangsan组件"+zhangsan);
@Configuration
public class MyConfig {

    @Bean("tomcat")
    public Pet pet(){
        return new Pet("tomcat",8);
    }
    @ConditionalOnBean(name = "tomcat")
    @Bean("zhangsan")
    public User user  (){
        User zhangsan = new User("zhangsan",18);
        zhangsan.setPet(pet());
        return zhangsan;
    }
}
容器中tomcat组件:true
容器中的zhangsan组件true
如果两个Bean颠倒位置,则为false
注释掉@Bean("tomcat"),两个全为false
@ImportResource导入资源
导入的是Bean.xml
@Configuration
@ImportResource("classpath:bean.xml")
public class MyConfig {}
毕竟有的代码不是自己写的,但是得用,就需要这种方法
配置绑定
使用java读取properties文件中的内容, 封装到JavaBean中,以供随时使用
applicatioon.properties注意没有大写
案例
创建了一个汽车
public class Car {
    private String brand;
    private int price;}
创建了一个application.properties
@Configrationproperties配置绑定
创建了一个car
@Component//必须需要这个下面才能运行
@ConfigurationProperties(prefix = "mycar")
//跟application.properties进行绑定
public Car(String brand, int price) {
        this.brand = brand;
        this.price = price;
    }
配置自动装载与链接
//helloController.java
@RestController
public class HelloController {
    @Autowired
    Car car;

    @RequestMapping("/car")
    public Car car (){
        return car;
        //注意这个car没有括号,不然无限递归了
    }
}
#这是最终的值
server.port=8080
mycar.brand=YD
mycar.price=100000
现在可以访问到值了
-
创建类car
-
car中使用
ConfigurationProperties(prefix="mycar")绑定,还有@Component -
在
helloController中设置自动装载,添加@RequestMapping("/car") -
在
application.properties中设置值
还有一种方法,使用Bean.xml和第三方包
@ImportResource("classpath:bean.xml")
@EnableAutoConfiguration(Car.class)
//开启属性配置功能,这样才能生效
自动配置原理
@SpringBootApplication
//这个里面包含了三个注解
//@SpringBootConfiguration
//@EnableAutoConfiguration
//@ComponentScan(com.auguigu.boot)
他这个一顶仨
@SpringBootConfiguration
包含@Configuration,也就是代表当前的一个配置类
@componentScan()
就是指定扫描包
@EnableAutoConfig
//这个里面包含两个注解
@AutoConfigurationPackage
@Import({AutoConfigurationImportSelector.class})
public @interface EnableAutoConfiguration {
@AutoConfigurationPackage
//这个里面的函数,包含一个Register
@Import({Registrar.class})
public @interface AutoConfigurationPackage {
    String[] basePackages() default {};
利用Registerar给容器导入一系列组件
//Registrar里面的函数
public void registerBeanDefinitions(AnnotationMetadata metadata, BeanDefinitionRegistry registry) {
            AutoConfigurationPackages.register(registry, (String[])(new AutoConfigurationPackages.PackageImports(metadata)).getPackageNames().toArray(new String[0]));
        }
//总之,将MainApplication包下组件全部导入进来
@Import({AutoConfigurationImportSelector.class})
//AutoConfigrationImportSelectot
protected AutoConfigurationImportSelector.AutoConfigurationEntry getAutoConfigurationEntry(AnnotationMetadata annotationMetadata) {
        if (!this.isEnabled(annotationMetadata)) {//这里设置断点
            return EMPTY_ENTRY;
        } else {

对configrations做了一些列操作,最后返回一个新的configrations
里面有127个包,其实这个已经写死了

//总体步骤
//给容器批量导入组件
AutoConfigurationImportSelector.AutoConfigurationEntry autoConfigurationEntry = this.getAutoConfigurationEntry(annotationMetadata);
//获取所有需要导入到容器中的配置类
protected List<String> getCandidateConfigurations(AnnotationMetadata metadata, AnnotationAttributes attributes) {
//利用工厂加载
protected Class<?> getSpringFactoriesLoaderFactoryClass() {
        return EnableAutoConfiguration.class;
    }
//springboot加载会加载所有127个,但是最终按需装配
别念了别念了蚌埠住了
在包里找

首先是AOP

那你还问什么啊

这个在cache文件夹的第一个

这个也没有生效

听不懂,不听了
DispacherServeletAutoConfigration.java
    @Bean
    @ConditionalOnMissingBean({MultipartConfigElement.class, CommonsMultipartResolver.class})
    public MultipartConfigElement multipartConfigElement() {
        return this.multipartProperties.createMultipartConfig();
    }

    @Bean(
        name = {"multipartResolver"}
    )
    @ConditionalOnMissingBean({MultipartResolver.class})
	//给@Bean标注的方法传入了对象参数,这个参数的值就会从容器里找
	//防止有用户配置的文件上传解析器不符合规范,会再给你返回回去,就能用了
    public StandardServletMultipartResolver multipartResolver() {
        StandardServletMultipartResolver multipartResolver = new StandardServletMultipartResolver();

        multipartResolver.setResolveLazily(this.multipartProperties.isResolveLazily());
        return multipartResolver;
    }
HttpEncodingAutoConfigration
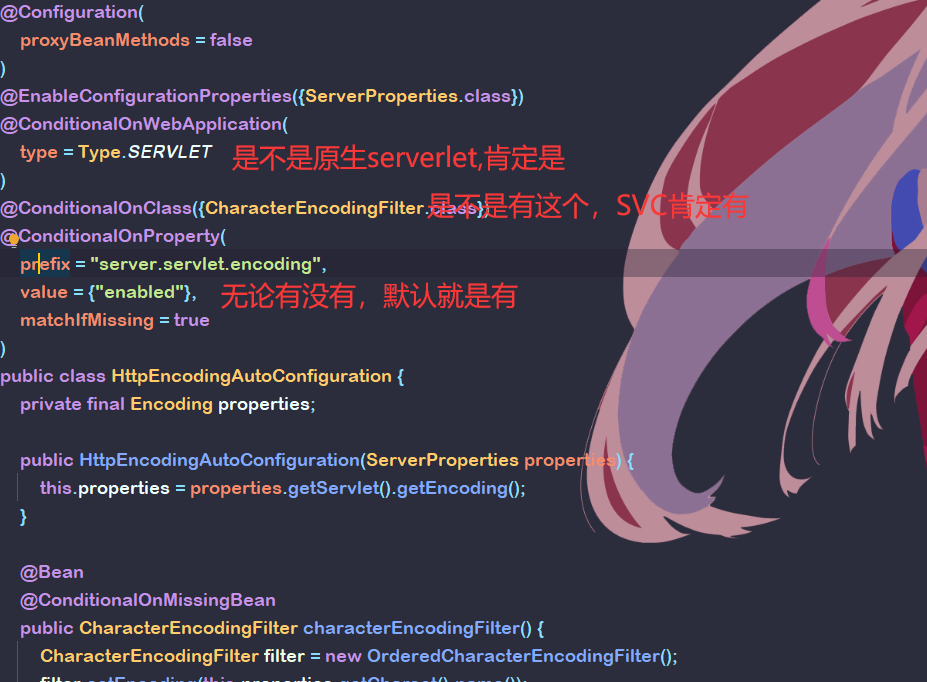
这个是用来解决请求编码问题的
    @Bean
    @ConditionalOnMissingBean
	//如果你配了,Springboot就不配了,如果你没配,就帮你配好
    public CharacterEncodingFilter characterEncodingFilter() {
        CharacterEncodingFilter filter = new OrderedCharacterEncodingFilter();
        filter.setEncoding(this.properties.getCharset().name());
        filter.setForceRequestEncoding(this.properties.shouldForce(org.springframework.boot.web.servlet.server.Encoding.Type.REQUEST));
        filter.setForceResponseEncoding(this.properties.shouldForce(org.springframework.boot.web.servlet.server.Encoding.Type.RESPONSE));
        return filter;
Springboot会在底层配好所有组件,但是如果用户配了,用户优先
她真的好温柔我哭死
总结
-
springboot默认加载所有配置类
-
每个自动配置类按照条件部分生效,都会有默认值,这些默认值储存在
xxx.properties,并且和这些文件绑定,用户也能直接修改自己的application.properties并直接生效,可以说Springboot和用户一同编辑配置文件了 -
生效的配置类就会给容器中装配组件
-
只要容器中有这些组件,相当于这些功能就可以使用了
-
只有用户有配置,就以用户优先
关于开发的建议1
-
引入场景依赖,引入官方或第三方的straters
-
查看配置了那些依赖
-
自己看包,引入对应的配置一般都会生效
-
app.properties添加debug=true,包有没有启用,运行时自动打印
-
-
修改配置
-
自己分析
xxx.properties
换一个启动图
spring.banner.image.location=classpath:delisha.jpg
注意要在reserorces文件夹
或者直接添加图片修改为banner.jpg
*o#@8&:****:::::::o8@#&.
*&8: ... . .. . .*o@#&.
*o* .... *8@:
o#* .*. .#o
88. . .*. .8#.
.@: o. . .. &&
o@: oo * *#.
*o8@@&: .:8* &* .#o
.8 .*oo&88 &: .#*
*@. . .. .:#&o@. .##::8###&. . *#
*# .: . .o@&..:#. *#.o& .@o .. . 8:
#* .8::*o@@88&:. 8o .. :#*..@: . . *.*#
*8 @@8. .8##* ...#&.. *#@####@: . * :o 8&
o& 8*.#&#@& *@#* *:#:. :@: &@#..&. *8 :#
o8. .. *8.o#@@@@8 &.oo. :#: *&:#@@* *@**8* *# :@.
#o.** #*oo&@@@. *& 8o&* o8@@@@@. 88o8. :8 .#&.
*#:::. 8&.@: .8. . . :8:@@@: #.:& 8o &@#8o
##8@#*.88 *@#o..*&#: :#* *#* &o :#. o8
o8*&#@#@o&@* . :#8&ooo8#* :8 ..*#* :8
#8::::&&.*::* .@. *..@:.. :8
#8*o:&8 .8:. o#. :@ .:8.&@. . o& ..
&8:ooo#. *::. ..&@&*&@@@#8* * .#. **o8
88*&::&: *:88. :: :. .#o .8 #:
:@o:oo:8o. :#. oo . &o .#*:o
.&@o:::8@8. &#. . o8* :#:
.o##o::&##8:. .....&@8. ...:#8 ..o@o
:@@@@@8.*o#@@#8&ooooo&8#@@#&@@@@@@@#&::::8@&
笑死
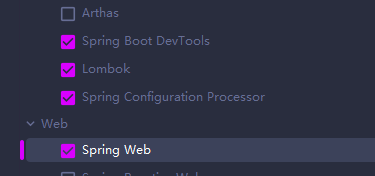
关于开发的建议2
Lombok
简化JavaBean开发
引入依赖
<dependency>
    <groupId>org.projectlombok</groupId>
    <artifactId>lombok</artifactId>
    <version>1.18.22</version>
    <scope>provided</scope>
</dependency>
IDEA安装插件lombok,没找到就是内置了
@NoArgsConstructor  	 //全参构造器
@AllArgsConstructor    	 //无参构造器
@EqualsAndHashCode		//比较
@Data		//getter setter
@ToString	//toString
public class Pet {
    private  String name;
    private  int age;
}
然后你就不用写getter() setter() toString()方法了
sl4j
        <dependency>
            <groupId>org.slf4j</groupId>
            <artifactId>slf4j-api</artifactId>
        </dependency>
然后就能用log.info()输出值
Dev-Tools
        <dependency>
            <groupId>org.springframework.boot</groupId>
            <artifactId>spring-boot-loader-tools</artifactId>
            <version>2.3.4.RELEASE</version>
        </dependency>
使用ctrl+F9自动重启,而不是重新加载,那个需要付费
Spring Initaliza
https://start.aliyun.com/

-
项目结构
-
maven依赖
-
创建了主程序
妈的什么都写好了草
下面都是Springboot的核心了
配置文件
文件类型
properties
就是以前那个properties
yaml
Yet Another Markup Language
跟XML一样,是标记语言,适合做配置文件
yaml配置语法
-
key : value,注意有空格 -
大小写敏感
-
缩进表示层级关系
-
不允许使用tab,用空格
-
缩进不重要,同级元素左对齐即可(其实可以用tab)
-
#表示注释
-
"" ''单双引号一般不用
数据类型:date,boolean,string,number,null
面量,单个,不可再分的
k:v
对象:键值的集合
行内写法
k:{k1: v1,k2: v2}
或者
k:
	k1: v1
	k2: v2
数组
行内写法
k:[v1,v2,v3]
或者
k:
	-v1
	-v2
	-v3
application.properties 和 application.yaml都可以作为配置文件,就算两个都有也都会生效,application.properties优先
测试
//yamlTet.java
@RestController
public class yamlTest {
    @Autowired
    Person person;
    @RequestMapping("/yaml")
    public Person person(){
        return person;
    }
}
//Person.java
@Component
@ConfigurationProperties(prefix = "person")
@ToString
@Data
public class Person {
    private String userName;
    private Boolean boss;
    private Date birth;
    private Pet pet;
    private  Integer age;
    private  String[] interests;
    private List<String> animal;
    private Map<String,Object> score;
    private Map<String, List<Pet>> allpets;
}
#properties.yaml
person:
  userName: hello
  boss: true
  birth: 2020/1/1
  age: 20
#  interests: [唱,跳,rap]
  interests:
    -唱
    -跳
    -rap
#  score:
#    english: 80
#    math: 90
#    chinese: 100
  score: {english: 80,math: 90,chinese: 100}
  salays: 99
  pet:
    name: doge
    weight: 80

太NB啦
关于UserName:"zhangsan \n lisi"
-
单引号将
\n作为字符串输出 -
双引号将
\n作为换行符
SpringBoot配置注释处理器
        <dependency>
            <groupId>org.springframework.boot</groupId>
            <artifactId>spring-boot-configuration-processor</artifactId>
            <optional>true</optional>
        </dependency>

配置完成后写yaml文件会有提示
Web场景-静态资源
他说我得学SpringMVC
学完了
新建项目

对于图片的访问
对于目录/static /public /resources /META=INF/resources等放置静态目录,都会被SpringBoot认定为静态资源储存目录
随后,就可以直接访问localhost:8080/001.jpg获得
多层路径需要填写文件夹名http://localhost:8080/img/001.jpg
如果存在与图片名相同的请求,那么优先处理请求,我认为这种事情是不存在的
静态资源访问前缀
spring:
  mvc:
    static-path-pattern: /res/**
添加后,访问地址成为 http://localhost:8080/res/img/001.jpg
注意:添加后,影响控制器访问bug.jpg请求,会影响自动加载首页和图标
指定文件夹
限定只有这个文件夹内静态资源才能访问
  resources:
    static-locations: [ classpath :  /public/]
他翻车了
对于JavaScript的访问webjars
WebJars - Web Libraries in Jars
导入以后自动映射,啥也不用管
<dependency>
    <groupId>org.webjars.npm</groupId>
    <artifactId>jquery</artifactId>
    <version>3.6.0</version>
</dependency>
欢迎页,静态图标
使用静态资源目录
两种方法,第一种扔到静态资源目录,index.html自己就认出来了,第二种使用controller相应请求
注意:刚刚上面配置的会对首页有影响,需要删掉资源前缀
图标不加载强制刷新一下
静态资源配置原理源码分析
看不懂的,别看了
-
SpringBoot启动默认加载 xxxAutoConfiguration 类(自动配置类)
-
SpringMVC功能的自动配置类 WebMvcAutoConfiguration,生效
@Configuration(proxyBeanMethods = false)
@ConditionalOnWebApplication(type = Type.SERVLET)
@ConditionalOnClass({ Servlet.class, DispatcherServlet.class, WebMvcConfigurer.class })
@ConditionalOnMissingBean(WebMvcConfigurationSupport.class)
@AutoConfigureOrder(Ordered.HIGHEST_PRECEDENCE + 10)
@AutoConfigureAfter({ DispatcherServletAutoConfiguration.class, TaskExecutionAutoConfiguration.class,
		ValidationAutoConfiguration.class })
public class WebMvcAutoConfiguration {}
-
给容器中配了什么。
	@Configuration(proxyBeanMethods = false)
	@Import(EnableWebMvcConfiguration.class)
	@EnableConfigurationProperties({ WebMvcProperties.class, ResourceProperties.class })
	@Order(0)
	public static class WebMvcAutoConfigurationAdapter implements WebMvcConfigurer {}
-
配置文件的相关属性和xxx进行了绑定。WebMvcProperties==spring.mvc、ResourceProperties==spring.resources
配置类只有一个有参构造器
	//有参构造器所有参数的值都会从容器中确定
//ResourceProperties resourceProperties;获取和spring.resources绑定的所有的值的对象
//WebMvcProperties mvcProperties 获取和spring.mvc绑定的所有的值的对象
//ListableBeanFactory beanFactory Spring的beanFactory
//HttpMessageConverters 找到所有的HttpMessageConverters
//ResourceHandlerRegistrationCustomizer 找到 资源处理器的自定义器。=========
//DispatcherServletPath
//ServletRegistrationBean   给应用注册Servlet、Filter....
	public WebMvcAutoConfigurationAdapter(ResourceProperties resourceProperties, WebMvcProperties mvcProperties,
				ListableBeanFactory beanFactory, ObjectProvider<HttpMessageConverters> messageConvertersProvider,
				ObjectProvider<ResourceHandlerRegistrationCustomizer> resourceHandlerRegistrationCustomizerProvider,
				ObjectProvider<DispatcherServletPath> dispatcherServletPath,
				ObjectProvider<ServletRegistrationBean<?>> servletRegistrations) {
			this.resourceProperties = resourceProperties;
			this.mvcProperties = mvcProperties;
			this.beanFactory = beanFactory;
			this.messageConvertersProvider = messageConvertersProvider;
			this.resourceHandlerRegistrationCustomizer = resourceHandlerRegistrationCustomizerProvider.getIfAvailable();
			this.dispatcherServletPath = dispatcherServletPath;
			this.servletRegistrations = servletRegistrations;
		}
2、资源处理的默认规则
@Override
		public void addResourceHandlers(ResourceHandlerRegistry registry) {
			if (!this.resourceProperties.isAddMappings()) {
				logger.debug("Default resource handling disabled");
				return;
			}
			Duration cachePeriod = this.resourceProperties.getCache().getPeriod();
			CacheControl cacheControl = this.resourceProperties.getCache().getCachecontrol().toHttpCacheControl();
			//webjars的规则
            if (!registry.hasMappingForPattern("/webjars/**")) {
				customizeResourceHandlerRegistration(registry.addResourceHandler("/webjars/**")
						.addResourceLocations("classpath:/META-INF/resources/webjars/")
						.setCachePeriod(getSeconds(cachePeriod)).setCacheControl(cacheControl));
			}

            //
			String staticPathPattern = this.mvcProperties.getStaticPathPattern();
			if (!registry.hasMappingForPattern(staticPathPattern)) {
				customizeResourceHandlerRegistration(registry.addResourceHandler(staticPathPattern)
						.addResourceLocations(getResourceLocations(this.resourceProperties.getStaticLocations()))
						.setCachePeriod(getSeconds(cachePeriod)).setCacheControl(cacheControl));
			}
		}
spring:
#  mvc:
#    static-path-pattern: /res/**

  resources:
    add-mappings: false   禁用所有静态资源规则
    禁用后所有静态资源不能访问
@ConfigurationProperties(prefix = "spring.resources", ignoreUnknownFields = false)
public class ResourceProperties {

	private static final String[] CLASSPATH_RESOURCE_LOCATIONS = { "classpath:/META-INF/resources/",
			"classpath:/resources/", "classpath:/static/", "classpath:/public/" };

	/**
	 * Locations of static resources. Defaults to classpath:[/META-INF/resources/,
	 * /resources/, /static/, /public/].
	 */
	private String[] staticLocations = CLASSPATH_RESOURCE_LOCATIONS;
3、欢迎页的处理规则
	HandlerMapping:处理器映射。保存了每一个Handler能处理哪些请求。

	@Bean
//谁来处理欢迎页
public WelcomePageHandlerMapping welcomePageHandlerMapping(ApplicationContext applicationContext,
				FormattingConversionService mvcConversionService, ResourceUrlProvider mvcResourceUrlProvider) {
			WelcomePageHandlerMapping welcomePageHandlerMapping = new WelcomePageHandlerMapping(
					new TemplateAvailabilityProviders(applicationContext), applicationContext, getWelcomePage(),
					this.mvcProperties.getStaticPathPattern());
			welcomePageHandlerMapping.setInterceptors(getInterceptors(mvcConversionService, mvcResourceUrlProvider));
			welcomePageHandlerMapping.setCorsConfigurations(getCorsConfigurations());
			return welcomePageHandlerMapping;
		}

	WelcomePageHandlerMapping(TemplateAvailabilityProviders templateAvailabilityProviders,
			ApplicationContext applicationContext, Optional<Resource> welcomePage, String staticPathPattern) {
		if (welcomePage.isPresent() && "/**".equals(staticPathPattern)) {
            //要用欢迎页功能,必须是/**,这里明显是写死了
			logger.info("Adding welcome page: " + welcomePage.get());
			setRootViewName("forward:index.html");
		}
		else if (welcomeTemplateExists(templateAvailabilityProviders, applicationContext)) {
            // 调用Controller  /index
			logger.info("Adding welcome page template: index");
			setRootViewName("index");
		}
	}
Web场景-HTTP请求
rest使用与原理
-
@xxxMapping;
-
Rest风格支持(使用HTTP请求方式动词来表示对资源的操作)
-
以前:**/getUser 获取用户 /deleteUser 删除用户 /editUser 修改用户 /saveUser 保存用户
-
现在: /user GET-**获取用户 DELETE-**删除用户 PUT-**修改用户 POST-**保存用户
-
核心Filter;HiddenHttpMethodFilter
-
-
用法: 表单method=post,隐藏域 _method=put
-
SpringBoot中手动开启
-
-
扩展:如何把_method 这个名字换成我们自己喜欢的。
    @RequestMapping(value = "/user",method = RequestMethod.GET)
    public String getUser(){
        return "GET-张三";
    }

    @RequestMapping(value = "/user",method = RequestMethod.POST)
    public String saveUser(){
        return "POST-张三";
    }


    @RequestMapping(value = "/user",method = RequestMethod.PUT)
    public String putUser(){
        return "PUT-张三";
    }

    @RequestMapping(value = "/user",method = RequestMethod.DELETE)
    public String deleteUser(){
        return "DELETE-张三";
    }
	@Bean
	@ConditionalOnMissingBean(HiddenHttpMethodFilter.class)
	@ConditionalOnProperty(prefix = "spring.mvc.hiddenmethod.filter", name = "enabled", matchIfMissing = false)
	public OrderedHiddenHttpMethodFilter hiddenHttpMethodFilter() {
		return new OrderedHiddenHttpMethodFilter();
	}
//自定义filter
    @Bean
    public HiddenHttpMethodFilter hiddenHttpMethodFilter(){
        HiddenHttpMethodFilter methodFilter = new HiddenHttpMethodFilter();
        methodFilter.setMethodParam("_m");
        return methodFilter;
    }
但是浏览器本身不能发送其他请求
在SpringMVCAutoConfig里已经配置过,直接使用即可
条件1,不管真实方法,标签里必须是post方法
条件二,开启HiddenHttpMethodFilter,这玩意默认关闭
spring:
  mvc:
    hiddenmethod:
      filter:
        enabled: true   #开启页面表单的Rest功能
<form action="/user" method="post">
    <input type="hidden" name="_method" value="PUT">
    <input value="put提交" type="submit" >
</form>
Rest原理(表单提交要使用REST的时候)
-
表单提交会带上_method=PUT
-
请求过来被HiddenHttpMethodFilter拦截
-
-
请求是否正常,并且是POST
-
-
-
-
获取到_method的值。
-
兼容以下请求;PUT.DELETE.PATCH
-
原生request(post),包装模式requesWrapper重写了getMethod方法,返回的是传入的值。
-
过滤器链放行的时候用wrapper。以后的方法调用getMethod是调用requesWrapper的
-
-
Rest使用客户端工具,
-
如PostMan直接发送Put、delete等方式请求,无需Filter。
-
好像ajax也可以?
spring:
  mvc:
    hiddenmethod:
      filter:
        enabled: true   #开启页面表单的Rest功能
因为这玩意默认关闭

简化拼写
    @RequestMapping(value = "/user",method = RequestMethod.GET)
    public String getUser(){
        return "GET-张三";
    }
@GetMapping(value = "/user")
public String getUser(){
    return "GET-张三";
}
源码分析阶段

SpringMVC功能分析都从 org.springframework.web.servlet.DispatcherServlet-》doDispatch()
	protected void doDispatch(HttpServletRequest request, HttpServletResponse response) throws Exception {
		HttpServletRequest processedRequest = request;
		HandlerExecutionChain mappedHandler = null;
		boolean multipartRequestParsed = false;
	WebAsyncManager asyncManager = WebAsyncUtils.getAsyncManager(request);
	try {
		ModelAndView mv = null;
		Exception dispatchException = null;
		try {
			processedRequest = checkMultipart(request);
			multipartRequestParsed = (processedRequest != request);
			// 找到当前请求使用哪个Handler(Controller的方法)处理
			mappedHandler = getHandler(processedRequest);
            //HandlerMapping:处理器映射。/xxx->>xxxx

RequestMappingHandlerMapping:保存了所有@RequestMapping 和handler的映射规则。

所有的请求映射都在HandlerMapping中。
-
SpringBoot自动配置欢迎页的 WelcomePageHandlerMapping 。访问 /能访问到index.html;
-
SpringBoot自动配置了默认 的 RequestMappingHandlerMapping
-
请求进来,挨个尝试所有的HandlerMapping看是否有请求信息。
-
-
如果有就找到这个请求对应的handler
-
如果没有就是下一个 HandlerMapping
-
-
我们需要一些自定义的映射处理,我们也可以自己给容器中放HandlerMapping。自定义 HandlerMapping
protected HandlerExecutionChain getHandler(HttpServletRequest request) throws Exception {
	if (this.handlerMappings != null) {
		for (HandlerMapping mapping : this.handlerMappings) {
			HandlerExecutionChain handler = mapping.getHandler(request);
			if (handler != null) {
				return handler;
			}
		}
	}
	return null;
}
扩展,重写过滤器
@Configuration(proxyBeanMethods = false)//声明这是一个配置类,设置为false用来提高性能
public class WebConfig {
    @Bean //这个用来替代spring中的Bean
    public HiddenHttpMethodFilter hiddenHttpMethodFilter(){
        HiddenHttpMethodFilter hiddenHttpMethodFilter  = new HiddenHttpMethodFilter();
        hiddenHttpMethodFilter.setMethodParam("_m");
        return hiddenHttpMethodFilter;
    }
}
请求映射源码分析
Springboot底层基于springMVC,所有请求会有DispacherServelet处理,这个类也是所有请求的开始,最最最底层也是HttpServelet
DispachServelet -> doDispatch
所有的请求映射都保存在handlerMapping中,自动配置的首页也是
WebMvcAutoConfiguration.class欢迎页

也可以自定义HandlerMapping
常用参数注解使用
<a href="/car/1/owner/haha">测试路径变量/car/1/owner/haha</a>
@RestController
public class PermitRestController {
    @GetMapping("/car/{id}/owner/{username}")
    public Map<String,Object> getCar(
            @PathVariable("id")Integer id,
            @PathVariable("username")  String username,
            @RequestHeader("User-Agent") String UserAgent,
            @RequestParam("age") Integer age,
            @RequestParam("interest") List<String> interest,
            //@CookieValue("_ga")String ga
//            @PathVariable Map<String, String> pv  获取全部参数
//            @RequestHeader Map<String, String> Header 获取全部标头
//            @RequestParam Map<String, String> allparams    获取全部参数
    ){
        Map map = new HashMap();
        map.put("id",id);
        map.put("username",username);
//        map.put("pv",pv);
        map.put("UserAgent",UserAgent);
        map.put("age",age);
        map.put("interest",interest);
        return map;
    }
}
注意:只有路径可变时,才会在路径上加{}
{
"interest": [
"sing",
"dance",
"rap"
],
"pv": {
"id": "1",
"username": "haha"
},
"UserAgent": "Mozilla/5.0 (Windows NT 10.0; Win64; x64) AppleWebKit/537.36 (KHTML, like Gecko) Chrome/102.0.0.0 Safari/537.36",
"id": 1,
"age": 18,
"username": "haha"
}
获取post表单数据
    @PostMapping("/save")
    public  Map mapMethod(
           @RequestBody String content){
        Map<String, Object> map = new HashMap<>();
        map.put("content",content);
        return map;
    }
<form action="/save" method="post">
    <input type="text" name="username">
    <button>提交</button>
</form>
不常用参数注解使用
@RequestAttribute,传值用的
@Controller
public class RequesrController {
    @GetMapping("/goto")
    public String gotoPage(HttpServletRequest httpServletRequest){
        httpServletRequest.setAttribute("msg","成功了");
        httpServletRequest.setAttribute("code",200);
        return "/success";
        //加上forward报错
    }

    @GetMapping("/success")
    @ResponseBody
    public Map successPage(
            @RequestAttribute("msg") String msg,
            @RequestAttribute("code") Integer code
    ){
        Map<String, Object> map = new HashMap();
        map.put("msg",msg);
        map.put("code",code);
        return  map;
    }
}
@MatrixVariable,矩阵变量,获取带分号的请求参数
矩阵变量举例
/boss/1/2 找到boss1下的第二个员工
/boss/1;age=20/2;age=20 找到boss1下的第二个员工且boss和员工年龄都为20
    @GetMapping("/car/cell")
    public  Map carsell(
            @MatrixVariable("low") Integer low,
            @MatrixVariable("brand") List<String> list
    ){
        Map<String, Object> map = new HashMap();
        map.put("low",low);
        map.put("brand",list);
        return map;
    }
<a href="/car/cell;low=20;brand=byd,yd,audi">测试矩阵变量</a>
此时会报错
Missing matrix variable 'low' for method parameter of type Integer
因为MVC的矩阵变量默认关闭,在源代码里移除了分后的内容
解决办法一:继承并重写
@Configuration(proxyBeanMethods = false)//声明这是一个配置类,设置为false用来提高性能
public class WebConfig  implements WebMvcConfigurer {
    @Override
    public void configurePathMatch(PathMatchConfigurer configurer) {
        UrlPathHelper urlPathHelper = new UrlPathHelper();
        urlPathHelper.setRemoveSemicolonContent(false);
        configurer.setUrlPathHelper(urlPathHelper);
    }
}
//把移除分号改成不移除
解决办法二
    @Bean
    public WebMvcConfigurer webMvcConfigurer(){
        return  new WebMvcConfigurer() {
            @Override
            public void configurePathMatch(PathMatchConfigurer configurer) {
                UrlPathHelper urlPathHelper  = new UrlPathHelper();
                urlPathHelper.setRemoveSemicolonContent(false);
                configurer.setUrlPathHelper(urlPathHelper);

            }
        };
    }
注意:需要对路径进行修改,加上大括号,因为系统不会自动识别参数和路径
    @GetMapping("/car/{path}")
    public  Map carsell(
            @MatrixVariable("low") Integer low,
            @MatrixVariable("brand") List<String> list,
            @PathVariable("path") String path
    ){
        Map<String, Object> map = new HashMap();
        map.put("low",low);
        map.put("brand",list);
        map.put("path",path);
        return map;
    }
{
    "path": "cell",
    "low": 20,
    "brand": [
        "byd",
        "yd",
        "audi"
    ]
}
复杂的矩阵变量
// boss/1;age=20/2;age=30
    @GetMapping("/boss/{bossid}/{empid}")
    public Map getBossandemp(
            @PathVariable("bossid") String bossid,
            @PathVariable("empid") String empid,
            @MatrixVariable(value = "age",pathVar = "bossid") Integer bossage,
            @MatrixVariable(value = "age",pathVar = "empid") Integer empage
    ){
        Map<String, Object> map = new HashMap();
        Map<String, Object> boss = new HashMap();
        Map<String, Object> emp = new HashMap();
        boss.put("bossid",bossid);
        boss.put("bossage",bossage);
        emp.put("empid",empid);
        emp.put("empage",empage);
        map.put("boss",boss);
        map.put("emp",emp);
        return map;
    }
{
    "boss": {
        "bossage": 20,
        "bossid": "1"
    },
    "emp": {
        "empid": "2",
        "empage": 30
    }
}
Model Map源码分析
Map、Model(map、model里面的数据会被放在request的请求域 request.setAttribute)、Errors/BindingResult、RedirectAttributes( 重定向携带数据)、ServletResponse(response)、SessionStatus、UriComponentsBuilder、ServletUriComponentsBuilder
Map<String,Object> map,  Model model, HttpServletRequest request 都是可以给request域中放数据,
request.getAttribute();
举例
@GetMapping("params")
public String getParam(
        Map<String, Object> map,
        Model model,
        HttpServletRequest request,
        HttpServletResponse response
){
    map.put("hello","world666");
    model.addAttribute("world","hello666");
    request.setAttribute("message","helloworld666");
    Cookie cookie = new Cookie("c1","V1");
    response.addCookie(cookie);
    return "/success";
}
@ResponseBody
@GetMapping("/success")
public Map successful(
        @RequestAttribute(value = "msg",required = false) String msg,
        @RequestAttribute(value = "code",required = false) Integer code,
        HttpServletRequest request
){
    Map<String, Object> map = new HashMap();
    Object msg1 = request.getAttribute("msg");
    map.put("msg",msg);
    Object hello = request.getAttribute("hello");
    Object world1 = request.getAttribute("world");
    Object message = request.getAttribute("message");
    map.put("hello",hello);
    map.put("world1",world1);
    map.put("message",message);
    return map;
}
{
"msg": null,
"hello": "world666",
"message": "helloworld666",
"world1": "hello666"
}
自动写入类
<form action="/saveuser" method="post">
   用户名<input type="text" name="name" ><br>
   年龄<input type="text" name="age" ><br>
   密码<input type="text" name="password"><br>
    <button>提交</button>
</form>
@RestController
public class PersonController {

    @PostMapping("/saveuser")
    public Person saveUser(Person person){
        return person;
    }
}
@Data
public class Person {
    private String name;
    private Integer age;
    private String password;
}
数据响应
自动返回了一个对象,json数据
    @ResponseBody
    @GetMapping("/testPerson")
    public Person getPerson(){
        Person person = new Person();
        person.setAge(24);
        person.setPassword("114514");
        person.setName("田所浩二");
        return  person;
    }
内容协商
根据客户端接受能录不同,返回不同类型媒体的数据
浏览器网络里标明了能有接受的文件,其中*/*即可接受所有文件,但凡只是写了一个,那么写什么服务器发送什么,使用第三方软件可以模拟这个情况,归功于Springboot
Accept: text/html,application/xhtml+xml,application/xml;q=0.9,image/avif,image/webp,*/*;q=0.8
例子
        <dependency>
            <groupId>com.fasterxml.jackson.dataformat</groupId>
            <artifactId>jackson-dataformat-xml</artifactId>
        </dependency>
仅仅是添加了一个依赖,就从json变成Xml了
<Person>
<name>田所浩二</name>
<age>24</age>
<password>114514</password>
</Person>

开启浏览器参数方式内容协商功能
为了方便内容协商,开启基于请求参数的内容协商功能。
只支持xml和json
spring:
	mvc:
        contentnegotiation:
          favor-parameter: true  #开启请求参数内容协商模式
开启后的效果

内容协商原理

两个For循环,一个是服务端能提供的,一个是客户端需求的,两个能对上,就能执行
-
1、判断当前响应头中是否已经有确定的媒体类型。MediaType
-
2、获取客户端(PostMan、浏览器)支持接收的内容类型。(获取客户端Accept请求头字段)【application/xml】
-
-
contentNegotiationManager 内容协商管理器 默认使用基于请求头的策略
-

-
HeaderContentNegotiationStrategy 确定客户端可以接收的内容类型
-

-
-
3、遍历循环所有当前系统的 MessageConverter,看谁支持操作这个对象(Person)
-
4、找到支持操作Person的converter,把converter支持的媒体类型统计出来。
-
5、客户端需要【application/xml】。服务端能力【10种、json、xml】
-

-
6、进行内容协商的最佳匹配媒体类型
-
7、用 支持 将对象转为 最佳匹配媒体类型 的converter。调用它进行转化 。

可以自定义conventor,自定义数据类型
规定除了xml json之外的类型,我感觉没啥必要啊
public class GuiguconventerMessage implements HttpMessageConverter<Person> {
    @Override
    public boolean canRead(Class<?> aClass, MediaType mediaType) {
        return false;//不让被注释识别
    }

    @Override
    public boolean canWrite(Class<?> aClass, MediaType mediaType) {
        return true;
    }

    @Override
    public List<MediaType> getSupportedMediaTypes() {
        return MediaType.parseMediaTypes("application/x-guigu");
    }

    @Override
    public Person read(Class<? extends Person> aClass, HttpInputMessage httpInputMessage) throws IOException, HttpMessageNotReadableException {
        return null;
    }

    @Override
    public void write(Person person, MediaType mediaType, HttpOutputMessage httpOutputMessage) throws IOException, HttpMessageNotWritableException {
        //规定数据类型
        String data  =  person.getName()+";"+person.getPassword()+";"+person.getAge();
        OutputStream body = httpOutputMessage.getBody();
        //将类型保存
        body.write(data.getBytes());
    }
}
    //矩阵变量生效用
    @Bean
    public WebMvcConfigurer webMvcConfigurer(){
        return  new WebMvcConfigurer() {
            @Override
            public void configurePathMatch(PathMatchConfigurer configurer) {
                UrlPathHelper urlPathHelper  = new UrlPathHelper();
                urlPathHelper.setRemoveSemicolonContent(false);
                configurer.setUrlPathHelper(urlPathHelper);
            }
            //重写这个extend方法,在数据类型中额外添加自己定义的数据
            @Override
            public void extendMessageConverters(List<HttpMessageConverter<?>> converters) {
               converters.add(new GuiguconventerMessage());
            }
        };
    }
Web场景-视图解析器thymeleaf
模板引擎
视图处理方式一般有转发与重定向,也可以自定义视图
springboot默认打包jar包,不支持jsp,所以需要引入第三方模板引擎例如
-
freemarker -
groovy -
thymeleaf推荐,简单好用,功能不多
文档 Tutorial: Thymeleaf + Spring
读作 time leaf 尚硅谷给我带偏了
自动配置
        <dependency>
            <groupId>org.springframework.boot</groupId>
            <artifactId>spring-boot-starter-thymeleaf</artifactId>
        </dependency>
thymeleafAutoConfig.java
@Configuration(
    proxyBeanMethods = false
)
@EnableConfigurationProperties({ThymeleafProperties.class})
@ConditionalOnClass({TemplateMode.class, SpringTemplateEngine.class})
@AutoConfigureAfter({WebMvcAutoConfiguration.class, WebFluxAutoConfiguration.class})
public class ThymeleafAutoConfiguration {
    public ThymeleafAutoConfiguration() {
    }
自动配置templateEngine模板引擎,thymeleafViewResolver视图解析器
Thymeleafproperties为默认配置

后缀
<html lang="en" xmlns:th="http://www.thymeleaf.org">
请求,添加后,所有请求必须加上/world/xxx,thymeleaf会自动添加
server:
  servlet:
    context-path: /world
基本语法
| 语法 | 表达式名字 | 用途 |
|---|---|---|
| ${...} | 变量 | 获取request,session等 |
| *{...} | 选择变量 | 获取上下文对象的值 |
| #{...} | 消息 | 获取国际化等值 |
| @{...} | 链接 | 生成链接 |
| ~{...} | 片段表达式 | 引入公共片段 |
例子
<h1 th:text="$\{msg}"></h1>
<a th:href="$\{link}">baidu</a>
<a th:href="@{link}">baidu</a>
@GetMapping("/hello")
public String hello(HttpServletRequest request){
    request.setAttribute("msg","helloworlds");
    request.setAttribute("link","https://www.hasdsd.cn");
    return "success";
}

Web实验 后台管理系统模板
准备
先新建一个项目

删除一些东西

登录页
将静态页面引入,设置登录页
//    登录页
    @GetMapping({"/","login"})
    public String loginPage(){
        return "login";
    }
修改表单提交
   <form class="form-signin" action="main.html" method="post" th:action="@{/login}">
        <div class="form-signin-heading text-center">
            <h1 class="sign-title">Sign In</h1>
            <img src="images/login-logo.png" alt=""/>
        </div>
        <div class="login-wrap">
            <label style="color: red" th:text="$\{msg}"></label>
问题,一旦登陆成功,访问/login应该到登录页,但是会重新提交表单

此时改成重定向即可,在中间加一个中间商作为重定向,直接写回报错
@Controller
public class IndexController {
//    登录页
    @GetMapping({"/","login"})
    public String loginPage(){
        return "login";
    }

    @PostMapping("/login")
    public String mainPage(){
        return "redirect:mainPages";
    }

    @GetMapping("/mainPages")
    public String mainPages(){
        return "main";
    }
}
原因
之前浏览器网址为/login就需要提交表单
现在浏览器网址为/mianpages,跟login没关系,这就需要过滤器拦截了
登录验证
@Controller
public class IndexController {
//    登录页
    @GetMapping({"/","login"})
    public String loginPage(){
        return "login";
    }
 //用户第一次登录
    @PostMapping("/login")
    public String mainPage(User user, HttpSession session, HttpServletRequest request){
        if (!StringUtils.isEmpty(user.getUserName())&&!StringUtils.isEmpty(user.getPassword())){
			//直接把用户这个类放进去了
            session.setAttribute("loginuser",user );
            return "redirect:mainPages";
        }else {
            request.setAttribute("msg","账号密码错误");
            return "/login";
        }
    }
//跳转主页和登录判断
    @GetMapping("/mainPages")
    public String mainPages(HttpSession session){
        Object loginuser = session.getAttribute("loginuser");
        if(loginuser != null){
            return "main";
        }else {
            return "/login";
        }
    }
}
<!-- 错误显示 -->
<label style="color: red" th:text="$\{msg}"></label>
            <input type="text" name="userName" class="form-control" placeholder="User ID" autofocus>
            <input type="password" name="password" class="form-control" placeholder="Password">
            <button class="btn btn-lg btn-login btn-block" type="submit">
<!-- 不带标签的thymeleaf写法 -->
[[$\{session.loginuser.userName}]]
后台页面

浏览器的后台页面原来就是一个个分开的,每个页面上有公共内容和独立内容
这不引入Vue?
他把所有公共部分移动到一个新建的common.html里面,用thymeleaf变量代替了css js的内容,方便之后修改
thymeleaf作为模板引擎
<!-- 声明方式 -->
<!-- footer.html -->
<div th:fragment="copy">
...
</div>
<!-- 其他文件使用该模板 -->
<div th:insert="~{footer :: copy}"></div>
<!-- 选择器方式 -->
<div id="copy-selection"></div>
<!-- 使用 -->
<div th:insert="~footer :: #copy-section"></div>
为了针对一些<link><script>等不能加标签的属性,有下面集中方法

拦截器
登录放行拦截器
package com.atguigu.springboot.demo2.interceptor;
//登录拦截器

import org.springframework.web.servlet.HandlerInterceptor;
import org.springframework.web.servlet.ModelAndView;

import javax.servlet.http.HttpServletRequest;
import javax.servlet.http.HttpServletResponse;
import javax.servlet.http.HttpSession;

public class LoginInterceptor implements HandlerInterceptor {
//    执行之前
    @Override
    public boolean preHandle(HttpServletRequest request, HttpServletResponse response, Object handler) throws Exception {
        HttpSession session = request.getSession();
        Object loginuser = session.getAttribute("loginuser");
        if(loginuser != null){
            return  true;
        }else {
            session.setAttribute("msg","请先登录");
//            response.sendRedirect("/login");
            request.getRequestDispatcher("/").forward(request,response);
            //弹幕:因为前端页面是获取request域中数据,而重定向只能放session数据,为了不改变前端代码,所以这里改为请求转发
            return  false;

        }
    }
//执行之后
    @Override
    public void postHandle(HttpServletRequest request, HttpServletResponse response, Object handler, ModelAndView modelAndView) throws Exception {
        HandlerInterceptor.super.postHandle(request, response, handler, modelAndView);
    }
//页面渲染
    @Override
    public void afterCompletion(HttpServletRequest request, HttpServletResponse response, Object handler, Exception ex) throws Exception {
        HandlerInterceptor.super.afterCompletion(request, response, handler, ex);
    }
}
@Configuration
public class adminWebConfig implements WebMvcConfigurer {
    @Override
    public void addInterceptors(InterceptorRegistry registry) {
        registry.addInterceptor(new LoginInterceptor())
                .addPathPatterns("/**")
//                此时静态资源也被拦截,网站访问静态资源也会出现登录
                .excludePathPatterns("/","/login","/css/**","/fonts/**","/images/**","/js/**");

    }
}
存在问题
.excludePathPatterns("/","/login","/css/**","/fonts/**","/images/**","/js/**");

明明都在static文件夹下,放行这个文件夹不行,在network下没有这个文件夹
拦截器原理
1、根据当前请求,找到HandlerExecutionChain【可以处理请求的handler以及handler的所有 拦截器】
2、先来顺序执行 所有拦截器的 preHandle方法
-
1、如果当前拦截器prehandler返回为true。则执行下一个拦截器的preHandle
-
2、如果当前拦截器返回为false。直接 倒序执行所有已经执行了的拦截器的 afterCompletion;
3、如果任何一个拦截器返回false。直接跳出不执行目标方法
4、所有拦截器都返回True。执行目标方法
5、倒序执行所有拦截器的postHandle方法。
6、前面的步骤有任何异常都会直接倒序触发 afterCompletion
7、页面成功渲染完成以后,也会倒序触发 afterCompletion

文件上传
Controller
//跳转请求
@Controller
public class FormTestController {
    @GetMapping("/form_layouts")
    public String formLayout(){
        return "form/form_layouts";
    }
HTML
<form role="form" th:action="@{/upload}" method="post" enctype="multipart/form-data">
上面请求是固定的,不能变
<form role="form" th:action="@{/upload}" method="post" enctype="multipart/form-data">
    <div class="form-group">
        <label for="exampleInputEmail1">邮箱</label>
        <input type="email" name="email" class="form-control" id="exampleInputEmail1" placeholder="Enter email">
    </div>
    <div class="form-group">
        <label for="exampleInputPassword1">名字</label>
        <input type="text" name="username" class="form-control" id="exampleInputPassword1" placeholder="Password">
    </div>
    <div class="form-group">
        <label for="exampleInputFile">头像</label>
        <input type="file" name="headerImg" id="exampleInputFile">
<!--                                单文件上传-->
    </div>
    <div class="form-group">
        <label for="exampleInputFile">生活照</label>
<!--                                多文件上传-->
        <input type="file" name="photos" multiple>
    </div>
    <div class="checkbox">
        <label>
            <input type="checkbox"> Check me out
        </label>
    </div>
    <button type="submit" class="btn btn-primary">提交</button>
</form>
文件上传控制
@Controller
public class FormTestController {
    @GetMapping("/form_layouts")
    public String formLayout(){
        return "form/form_layouts";
    }


    @PostMapping("/upload")
    public String uploadForm(
            @RequestParam("email") String email,
            @RequestParam("username") String username,
            @RequestParam("headerImg")MultipartFile headerImg,
            @RequestParam("photos") MultipartFile [] photos
//            自动封装
            ){
//        获取文件测试
        System.out.println("email:"+email+"username:"+username+"headering:"+headerImg.getSize()+"photos:"+photos.length);
//      保存文件
        if(!headerImg.isEmpty()){
            try {
//                获取文件名
                String originalFilename = headerImg.getOriginalFilename();
                headerImg.transferTo(new File("D:/cache/"+originalFilename));
            } catch (IOException e) {
                throw new RuntimeException(e);
            }
        }
//        保存一组图片
        if (photos.length>0){
            for (MultipartFile photo : photos) {
                if(!photo.isEmpty()){
                    String originalFilename = photo.getOriginalFilename();
                    try {
                        photo.transferTo(new File("D:/cache/"+originalFilename));
                    } catch (IOException e) {
                        throw new RuntimeException(e);
                    }
                }
            }
        }

        return "main";
    }
}
设置单个文件上传和总体文件上传大小
spring:
  servlet:
    multipart:
      max-file-size: 10MB
      max-request-size: 100MB
异常处理
默认规则
-
默认情况下,Spring Boot提供
/error处理所有错误的映射 -
对于机器客户端,它将生成JSON响应,其中包含错误,HTTP状态和异常消息的详细信息。对于浏览器客户端,响应一个“ whitelabel”错误视图,以HTML格式呈现相同的数据

浏览器端,相应页面,其他服务端,相应JSON
-
要对其进行自定义,添加
View解析为error -
要完全替换默认行为,可以实现
ErrorController并注册该类型的Bean定义,或添加ErrorAttributes类型的组件以使用现有机制但替换其内容。 -
error/下的4xx,5xx页面会被自动解析;
命名时,可以命名为404.html,会会相应404,4xx.html则会相应所有4开头的状态
错误页面代码
取出错误信息,看上面那张图
<section class="error-wrapper text-center">
    <h1><img alt="" src="images/404-error.png"></h1>
    <h2 th:text="$\{status}">page not found</h2>
    <!-- status为错误状态码 -->
    <h3 th:text="$\{message}">We Couldn’t Find This Page</h3>
    <a class="back-btn" th:href="@{/mainPages}"> Back To Home</a>
</section>
源码分析
自动配置位于ErrorMVCAutoConfigration
源码分析还是跳过吧
错误处理方式:@ControllerAdvice
@Slf4j
@ControllerAdvice
public class GlobalExceptionHandler {
    //异常处理器
  @ExceptionHandler({ArithmeticException.class,NullPointerException.class}) //处理数学运算异常、空指针异常
    public String HandleMathExceptions(Exception e){ //这个异常是自动捕获,自动进来
        log.error("异常是",e);
        return "";  //错误处理返回值为ModelAndView
    }
}
错误处理方式:@ResponseStatus
@ResponseStatus(value = HttpStatus.FORBIDDEN,reason = "用户数量太多") //返回一个状态码信息
public class UserTooManyException extends RuntimeException{
    public UserTooManyException(String message){
        super(message);
    }
}
原生组件注入(Servlet,Filters,Listeners)
原生ServletAPI
HTTP请求
//注解与以往不同
@WebServlet(urlPatterns = "/myservlet")
public class MyServlet  extends HttpServlet {
    @Override
    protected void doGet(HttpServletRequest req, HttpServletResponse resp) throws ServletException, IOException {
        resp.getWriter().write("666666");
    }
}
//需要添加下面这个注解
@ServletComponentScan(basePackages = "com.atguigu")
@SpringBootApplication
public class Demo2Application {
    public static void main(String[] args) {
        SpringApplication.run(Demo2Application.class, args);
    }
}
拦截器
@Slf4j
@WebFilter(urlPatterns = {"/css/*","/images/*"}) //单个*是servelet写法,**是springboot的写法
public class MyFilter implements Filter {
    @Override
    public void doFilter(ServletRequest servletRequest, ServletResponse servletResponse, FilterChain filterChain) throws IOException, ServletException {
        log.info("MyFilter初始化");
    }
    @Override
    public void init(FilterConfig filterConfig) throws ServletException {
        log.info("MyFilter工作");

    }

    @Override
    public void destroy() {
        log.info("MyFilter销毁");
    }
}
监听器
@Slf4j
@WebListener
public class MyServeltListener implements ServletContextListener {
    @Override
    public void contextInitialized(ServletContextEvent sce) {
        log.info("检测到项目初始化完成");
    }

    @Override
    public void contextDestroyed(ServletContextEvent sce) {
        log.info("检测到项目销毁");
    }
}
Spring提供的RegistrationBean
//Servlet
@Configuration
public class MyRegistration {
    @Bean
    public ServletRegistrationBean MyServletRegistrationBean(){
        MyServlet myServlet = new MyServlet();
        return new  ServletRegistrationBean(myServlet,"my","my02");
    }
//Filter
    @Bean
    public FilterRegistrationBean MyFilterRegistrationBean(){
        MyFilter myFilter = new MyFilter();
        FilterRegistrationBean filterRegistrationBean = new FilterRegistrationBean(myFilter);
        filterRegistrationBean.setUrlPatterns(Arrays.asList("/my","/css/*"));
        return filterRegistrationBean;
    }
//Listener
    @Bean
    public ServletListenerRegistrationBean myListener(){
        MyServeltListener myServeltListener = new MyServeltListener();
        return new ServletListenerRegistrationBean(myServeltListener);
    }
}
其中,有些地方是可以点开的,对应了创建的具体类

//MyFilter
@Slf4j
@WebFilter(urlPatterns = {"/css/*","/images/*"}) //单个*是servelet写法,**是springboot的写法
public class MyFilter implements Filter {
    @Override
    public void doFilter(ServletRequest servletRequest, ServletResponse servletResponse, FilterChain filterChain) throws IOException, ServletException {
        log.info("MyFilter初始化");
    }
    @Override
    public void init(FilterConfig filterConfig) throws ServletException {
        log.info("MyFilter工作");

    }

    @Override
    public void destroy() {
        log.info("MyFilter销毁");
    }
}
//MyListener
@Slf4j
@WebListener
public class MyServeltListener implements ServletContextListener {
    @Override
    public void contextInitialized(ServletContextEvent sce) {
        log.info("检测到项目初始化完成");
    }

    @Override
    public void contextDestroyed(ServletContextEvent sce) {
        log.info("检测到项目销毁");
    }
}
修改
  mvc:
    servlet:
      path: /mvc/
#以后所有处理请求都是以这个开始
定制化原理
修改配置的集中方式
-
修改配置文件,
xxxproperties -
自己写配置类,xxxConifig+@Bean添加组件,视图解析器等,可修改可添加
-
定制化器,xxxCustomers
全是源码,听不懂啊
数据库访问
Druid数据库场景导入
引入依赖
<dependency>
    <groupId>org.springframework.boot</groupId>
    <artifactId>spring-boot-starter-jdbc</artifactId>
</dependency>
<!-- 必须导入驱动,不比写版本 -->
<dependency>
    <groupId>mysql</groupId>
    <artifactId>mysql-connector-java</artifactId>
</dependency>
配置链接
spring:
  datasource:
    url: jdbc://hasdsd.cn:3307/test
    username: root
    password: 12345
    driver-class-name: com.mysql.cj.jdbc.Driver
使用Druid数据源
<dependency>
    <groupId>com.alibaba</groupId>
    <artifactId>druid</artifactId>
    <version>1.1.10</version>
</dependency>
配置设置
@Configuration
public class MydataSourceConfig {

    @ConfigurationProperties("spring.datasource")//与里面的配置进行绑定
    @Bean
    public DataSource dataSource(){
        DruidDataSource druidDataSource = new DruidDataSource();
        try {
            //添加监控功能
            druidDataSource.setFilters("stat");
        } catch (SQLException e) {
            throw new RuntimeException(e);
        }
//        druidDataSource.setUrl("");
//        @ConfigurationProperties("spring.datasource")
//        有了这一句,不用写什么乱七八糟的配置了

        return druidDataSource;
    }

    @Bean
    public ServletRegistrationBean staticViewServlet(){
        StatViewServlet statViewServlet = new StatViewServlet();
        ServletRegistrationBean<StatViewServlet> statViewServletServletRegistrationBean = new ServletRegistrationBean<>(statViewServlet, "/druid/");

        return  statViewServletServletRegistrationBean;
    }


//    配置监控页
//    @return
    @Bean
    public ServletRegistrationBean  stateViewServlet(){
        StatViewServlet statViewServlet = new StatViewServlet();
        ServletRegistrationBean<StatViewServlet> statViewServletServletRegistrationBean = new ServletRegistrationBean<>(statViewServlet, "/druid");
        return  statViewServletServletRegistrationBean;
    }
}
Druid的Starter整合
还好没看上面的
<dependency>
    <groupId>com.alibaba</groupId>
    <artifactId>druid-spring-boot-starter</artifactId>
    <version>1.2.11</version>
</dependency>
在DruifFilterConfigration.class已经配好的配置
    private static final String FILTER_STAT_PREFIX = "spring.datasource.druid.filter.stat";
    private static final String FILTER_CONFIG_PREFIX = "spring.datasource.druid.filter.config";
    private static final String FILTER_ENCODING_PREFIX = "spring.datasource.druid.filter.encoding";
    private static final String FILTER_SLF4J_PREFIX = "spring.datasource.druid.filter.slf4j";
    private static final String FILTER_LOG4J_PREFIX = "spring.datasource.druid.filter.log4j";
    private static final String FILTER_LOG4J2_PREFIX = "spring.datasource.druid.filter.log4j2";
    private static final String FILTER_COMMONS_LOG_PREFIX = "spring.datasource.druid.filter.commons-log";
    private static final String FILTER_WALL_PREFIX = "spring.datasource.druid.filter.wall";
    private static final String FILTER_WALL_CONFIG_PREFIX = "spring.datasource.druid.filter.wall.config";
详细配置项
spring:
  datasource:
    url: jdbc:mysql://hasdsd.cn:3307/test
    username: root
    password: 123456
    driver-class-name: com.mysql.cj.jdbc.Driver
    druid:
      stat-view-servlet: #设置数据库监控页面
        enabled: true
        login-username: admin
        login-password: 123456
        reset-enable: false #网页中的 重置按钮
      web-stat-filter: #web监控
        enabled: true
        url-pattern: /*
        exclusions: '*.js,*gif,*css,*jpg,*.ico' #这个有默认值,默认值比这个还多,可以不写这个
      aop-patterns: com.atguigu #对这个包下面内容进行监控
      filters: stat,walls,slf4j #开启监控,防火墙功能组件
      filter:
        stat:
          slow-sql-millis: 1000 #标记为慢查询
          log-slow-sql: true #将标记的慢查询记录到日志
          enabled: true #开启功能
        wall:
          enabled: true
          config:
            update-allow: false #不允许调用任何update
整合Mybatis
引入
<dependency>
    <groupId>org.mybatis.spring.boot</groupId>
    <artifactId>mybatis-spring-boot-starter</artifactId>
    <version>2.1.3</version>
</dependency>
配置文件方式
除了指定配置方式,没别的不同
mybatis:
  config-location: mybatis-config.xml
  mapper-locations: mapper/*.xml
  configuration:
    map-underscore-to-camel-case: true
Mapper.xml接口需要注释
@Mapper
public interface UserMapper {
    public User getUserById(int id);
}
纯注解方式
create table city(
    id int primary key auto_increment,
    name varchar(255),
    state varchar(255),
    country varchar(255)
);
//Mapper.java
@Mapper
public interface CityMapper {
    @Select("select * from city where id  = #{id}")
    public City getCityByid(Long id);
}
//Controller.java
@Controller
public class CityController {
    @Autowired
    CityService cityService;
    @ResponseBody
    @GetMapping("/city")
    public City getCityByid(@RequestParam("id") Long id){
        return cityService.getCityById(id);
    }
}
//Service.java
@Service
public class CityService {
    @Autowired
    CityMapper cityMapper;

    public City getCityById(Long id){
     return cityMapper.getCityByid( id);
    }
}
MapperScan不用注释所有mapper
整合Mybatis-Plus
<dependency>
    <groupId>com.baomidou</groupId>
    <artifactId>mybatis-plus-boot-starter</artifactId>
    <version>3.4.1</version>
</dependency>
<!-- 这里面自带Jdbc mysql Mybatis Mybatis-Spring,总之什么也不需要引入了 -->
自动配置
-
SqlSessionFactory已经配置好
-
mapperLocations配置好
classpath: */mapper/*.xml -
SqlTemplate配置好
-
@MapperScan 自动扫描
挺好用,就是不会啊
Redis
不会
单元测试
简介
Junit5 = Junit Platform + Junitpter + Junit Vintage
-
Junit Planform : 在JVM上启动测试框架的基础,有自制的测试引擎,也可以引入第三方测试引擎
-
Junit Jupiter :Junit5核心,包含了一个测试引擎
-
Junit Vintage: 兼容旧版引擎
目前的使用方式@SpringBootTest
在Springboot 2.4后,就不能使用Junit4
使用
-
编写测试方法: @Test,注意分辨注解来自那个包
-
Junit类仍可使用Springboot注解
常用注解
@DiaplayName("")
运行测试时候会显示名字
@DisplayName("Junit5单元测试")
public class Junit5Test {

    @DisplayName("测试注解")
    @Test
    void TestDisplayName(){
    }
}

@BeforeEach、@AfterEach
每个测试开始之前、之后就要运行
@BeforeEach
public void PrintTest(){
    System.out.println("测试就要开始力!");
}
@AfterEach
public void PrintTests(){
    System.out.println("测试已经结束咧!");
}
@BeforeAll、@AfterAll
所有单元测试开始之前、之后执行一次
比如在测试类上点击测试
必须使用static
@BeforeAll
static void beforeAll(){
    System.out.println("测试都要开始力!");
}
@AfterAll
static void AfterAll(){
    System.out.println("测试都要结束咧!");
}
@Timeout
多少时间内就认为任务超时,然后超时报错
@Timeout(value = 500,unit = TimeUnit.MILLISECONDS)
@DisplayName("测试注解")
@Test
void TestDisplayNames(){
    try {
        Thread.sleep(600);
        System.out.println("01s");
    } catch (InterruptedException e) {
        throw new RuntimeException(e);
    }
}

@Extendwith
拿不到容器中的springboot组件,比如带有@Autowared的注解
添加这个好就好了
@RepeatedTest(5)
执行五次
断言
断言:说的一定是对的,用来检测返回数据是否合理,会给出详细原因
简单断言
| 方法 | 说明 |
|---|---|
| assertEquals | 判断两个对象或两个原始类型是否相等 |
| assertNotEquals | 判断两个对象或两个原始类型是否不相等 |
| assertNotEquals | 判断两个对象引用是否指向同一个对象 |
| assertNotEquals | 判断两个对象引用是否指向不同的对象 |
| assertTrue | 判断给定的布尔值是否为 true |
| assertFalse | 判断给定的布尔值是否为 false |
| assertNull | 判断给定的对象引用是否为 null |
| assertNotNull | 判断给定的对象引用是否不为 null |
@DisplayName("断言测试")
@Test
public void TestDuanyan(){
    int c = cal(1,2);
    assertEquals(5, c,"计算错误热");
}
static int cal(int a,int b){
    return a+b;
}

注意:前面断言失败,后面代码不会执行
组合断言
都成功才算成功
@Test
@DisplayName("组合断言")
void all(){
    assertAll("test",
            ()-> assertTrue(true && true),
            ()->assertEquals(2,1));
}

异常断言
他应该抛出异常,抛不出来就是有问题
@DisplayName("异常断言")
@Test
void testException() {
    //断定业务逻辑一定出现异 常
    assertThrows(ArithmeticException.class, () -> {
        int i = 10 / 2;
    }, "业务逻辑居然正常运行? ");
}

快速失败
直接失败,后面不运行了
@DisplayName("快速失败")
@Test
void fastfail(){
    if(2 == 2){
        fail("测试失败");
    }
}

前置条件
不满足条件的断言不会执行
@Test
void qianzhi(){
    Assumptions.assumeTrue(false,"前置条件满足了");
    System.out.println("1111");
}

嵌套测试
JUnit 5 可以通过 Java 中的内部类和@Nested 注解实现嵌套测试,从而可以更好的把相关的测试方法组织在一起。在内部类中可以使用@BeforeEach 和@AfterEach 注解,而且嵌套的层次没有限制。
内层TEST可以驱动外层的after before Each
@DisplayName("A stack")
class TestingAStackDemo {
Stack<Object> stack;

@Test
@DisplayName("is instantiated with new Stack()")
void isInstantiatedWithNew() {
    new Stack<>();
}

@Nested
@DisplayName("when new")
class WhenNew {

    @BeforeEach
    void createNewStack() {
        stack = new Stack<>();
    }

    @Test
    @DisplayName("is empty")
    void isEmpty() {
        assertTrue(stack.isEmpty());
    }

    @Test
    @DisplayName("throws EmptyStackException when popped")
    void throwsExceptionWhenPopped() {
        assertThrows(EmptyStackException.class, stack::pop);
    }

    @Test
    @DisplayName("throws EmptyStackException when peeked")
    void throwsExceptionWhenPeeked() {
        assertThrows(EmptyStackException.class, stack::peek);
    }

    @Nested
    @DisplayName("after pushing an element")
    class AfterPushing {

        String anElement = "an element";

        @BeforeEach
        void pushAnElement() {
            stack.push(anElement);
        }

        @Test
        @DisplayName("it is no longer empty")
        void isNotEmpty() {
            assertFalse(stack.isEmpty());
        }

        @Test
        @DisplayName("returns the element when popped and is empty")
        void returnElementWhenPopped() {
            assertEquals(anElement, stack.pop());
            assertTrue(stack.isEmpty());
        }

        @Test
        @DisplayName("returns the element when peeked but remains not empty")
        void returnElementWhenPeeked() {
            assertEquals(anElement, stack.peek());
            assertFalse(stack.isEmpty());
        }
    }
}
参数化测试
@ParameterizedTest
//传入类型
@ParameterizedTest
@ValueSource(ints = {1, 2, 3, 4, 5})
void parameters(int i) {
    System.out.println(i);
}
//传入方法
@ParameterizedTest
@MethodSource("printStack")
void parameterss(String i) {
    System.out.println(i);
}
static Stream<String> printStack(){
    return Stream.of("pen","apple","pinapple");
}
4到5迁移
-
导入迁入引擎
-
重新导包
-
@before @after等替换
指标监控
SpringBoot Actuator
监控CPU内存指标
引入
<dependency>
    <groupId>org.springframework.boot</groupId>
    <artifactId>spring-boot-starter-actuator</artifactId>
</dependency>
如何使用
-
引入场景
-
暴露所有监控信息为HTTP
management:
  endpoints:
    enabled-by-default: true #暴露所有端点信息,只能开启关闭全部
    web:
      exposure:
        include: '*'  #以web方式暴露
默认开启/health /info监控,称为端点Endpoint,Springboot有很多端点,剩下是默认关闭的
Actuator Endpoint常用端点
| ID | 描述 |
|---|---|
| auditevents | 暴露当前应用程序的审核事件信息。需要一个AuditEventRepository组件。 |
| beans | 显示应用程序中所有Spring Bean的完整列表。 |
| caches | 暴露可用的缓存。 |
| conditions | 显示自动配置的所有条件信息,包括匹配或不匹配的原因。 |
| configprops | 显示所有@ConfigurationProperties。 |
| env | 暴露Spring的属性ConfigurableEnvironment |
| flyway | 显示已应用的所有Flyway数据库迁移。 需要一个或多个Flyway组件。 |
| health | 显示应用程序运行状况信息。 |
| httptrace | 显示HTTP跟踪信息(默认情况下,最近100个HTTP请求-响应)。需要一个HttpTraceRepository组件。 |
| info | 显示应用程序信息。 |
| integrationgraph | 显示Spring integrationgraph 。需要依赖spring-integration-core。 |
| loggers | 显示和修改应用程序中日志的配置。 |
| liquibase | 显示已应用的所有Liquibase数据库迁移。需要一个或多个Liquibase组件。 |
| metrics | 显示当前应用程序的“指标”信息。 |
| mappings | 显示所有@RequestMapping路径列表。 |
| scheduledtasks | 显示应用程序中的计划任务。 |
| sessions | 允许从Spring Session支持的会话存储中检索和删除用户会话。需要使用Spring Session的基于Servlet的Web应用程序。 |
| shutdown | 使应用程序正常关闭。默认禁用。 |
| startup | 显示由ApplicationStartup收集的启动步骤数据。需要使用SpringApplication进行配置BufferingApplicationStartup。 |
| threaddump | 执行线程转储。 |
测试页面
-
http://localhost:8080/actuator/endpointName/detailPath
健康检查Health Endpoint
但凡报错都会变成down
#显示当前健康详细信息
management:
    health:
      show-details: always
内存指标Metrics Endpoint
提供详细的、层级的、空间指标信息,这些信息可以被pull(主动推送)或者push(被动获取)方式得到;
-
通过Metrics对接多种监控系统
-
简化核心Metrics开发
-
添加自定义Metrics或者扩展已有Metrics
EndPoint管理
management:
  endpoint:
  enabled-by-default: true #关闭所有节点,再打开部分节点
    health:
      show-details: always
      enabled: true
    metrics:
      enabled: true
    beans:
      enabled: true
    info:
      enabled: true
定制化健康组件

定制health信息
这个类名MyComHealthIndicator不能乱改,否则不生效
management:
    health:
      enabled: true
      show-details: always #总是显示详细信息。可显示每个模块的状态信息
//继承接口实现
@Component
public class MyComHealthIndicator extends AbstractHealthIndicator {

    /**
     * 真实的检查方法
     * @param builder
     * @throws Exception
     */
    @Override
    protected void doHealthCheck(Health.Builder builder) throws Exception {
        //mongodb。  获取连接进行测试
        Map<String,Object> map = new HashMap<>();
        // 检查完成
        if(1 == 2){
//            builder.up(); //健康
            builder.status(Status.UP);
            map.put("count",1);
            map.put("ms",100);
        }else {s
//            builder.down();
            builder.status(Status.OUT_OF_SERVICE);
            map.put("err","连接超时");
            map.put("ms",3000);
        }


        builder.withDetail("code",100)
                .withDetails(map);

    }
}

定制info信息
info:
  appName: boot-admin
  appVersion : 1.0.0
  mavenProjectName:  @Project.artifactId@
  mavenProjectVersion: @Project.version@

//通过代码输出info
@Component
public class Appinfo implements InfoContributor {
    @Override
    public void contribute(Info.Builder builder) {
        builder.withDetail("msg","hello").withDetail("hello","你好");
    }
}

定制Metrics信息
@Service
class MyService{
    Counter counter;
    public MyService(MeterRegistry meterRegistry){
         counter = meterRegistry.counter("myservice.method.running.counter");
    }

    public void hello() {
        counter.increment();//计数器++
    }
}


//也可以使用下面的方式
@Bean
MeterBinder queueSize(Queue queue) {
    return (registry) -> Gauge.builder("queueSize", queue::size).register(registry);
}
定制Endpoint
自己写了一个端点
@Component
@Endpoint(id = "container")
public class DockerEndpoint {

    @ReadOperation
    public Map getDockerInfo(){
        return Collections.singletonMap("info","docker started...");
    }

    @WriteOperation
    private void restartDocker(){
        System.out.println("docker restarted....");
    }

}
第三方
使用第三方将信息展示出来


 3370
3370


 被折叠的 条评论
为什么被折叠?
被折叠的 条评论
为什么被折叠?
 到【灌水乐园】发言


