


编译AWS WebRTC是一个比较繁琐、艰难的任务,这个过程中涉及很多开源库都下载不成功,要移植重复性下载,同时需要注意AWS WebRTC跟google里的
WebRTC不一样,这里不能混淆了这两个开源库,如果你有条件可以翻墙,这样的话下载源码就方便一点,接下来开始时介绍Ubuntu平台下编译君正T31的AWS
WebRTC。
1、第一步下载AWS WebRTC的源码
git clone https://github.com/awslabs/amazon-kinesis-video-streams-webrtc-sdk-c
2、配置编译环境
这里下载完这个源码之后,编译过程中需要依赖其他的源码,其中有openssl websocket kvs srtp等,下载完成之后不要急着编译,应该去
官网上看一下如何编译这个webrtc。下面是从官网拷贝过来的如何编译的信息,以及如何配置。
Build Download To download run the following command: git clone --recursive https://github.com/awslabs/amazon-kinesis-video-streams-webrtc-sdk-c.git You will also need to install pkg-config and CMake and a build enviroment Configure Create a build directory in the newly checked out repository, and execute CMake from it. mkdir -p amazon-kinesis-video-streams-webrtc-sdk-c/build; cd amazon-kinesis-video-streams-webrtc-sdk-c/build; cmake .. We have provided an example of using GStreamer to capture/encode video, and then send via this library. This is only build if pkg-config finds GStreamer is installed on your system. On Ubuntu and Raspberry Pi OS you can get the libraries by running $ sudo apt-get install libssl-dev libcurl4-openssl-dev liblog4cplus-dev libgstreamer1.0-dev libgstreamer-plugins-base1.0-dev gstreamer1.0-plugins-base-apps gstreamer1.0-plugins-bad gstreamer1.0-plugins-good gstreamer1.0-plugins-ugly gstreamer1.0-tools By default we download all the libraries from GitHub and build them locally, so should require nothing to be installed ahead of time. If you do wish to link to existing libraries you can use the following flags to customize your build. Cross-Compilation If you wish to cross-compile CC and CXX are respected when building the library and all its dependencies. You will also need to set BUILD_OPENSSL_PLATFORM, BUILD_LIBSRTP_HOST_PLATFORM and BUILD_LIBSRTP_DESTINATION_PLATFORM. See our codecov.io for an example of this. Every commit is cross compiled to ensure that it continues to work. Static Builds If -DBUILD_STATIC_LIBS=TRUE then all dependencies and KVS WebRTC libraries will be built as static libraries. CMake Arguments You can pass the following options to cmake ... -DBUILD_STATIC_LIBS -- Build all KVS WebRTC and third-party libraries as static libraries. -DADD_MUCLIBC -- Add -muclibc c flag -DBUILD_DEPENDENCIES -- Whether or not to build depending libraries from source -DBUILD_OPENSSL_PLATFORM -- If buildng OpenSSL what is the target platform -DBUILD_LIBSRTP_HOST_PLATFORM -- If buildng LibSRTP what is the current platform -DBUILD_LIBSRTP_DESTINATION_PLATFORM -- If buildng LibSRTP what is the destination platform -DBUILD_TEST=TRUE -- Build unit/integration tests, may be useful for confirm support for your device. ./tst/webrtc_client_test -DCODE_COVERAGE -- Enable coverage reporting -DCOMPILER_WARNINGS -- Enable all compiler warnings -DADDRESS_SANITIZER -- Build with AddressSanitizer -DMEMORY_SANITIZER -- Build with MemorySanitizer -DTHREAD_SANITIZER -- Build with ThreadSanitizer -DUNDEFINED_BEHAVIOR_SANITIZER -- Build with UndefinedBehaviorSanitizer -DLINK_PROFILER -- Link with gperftools (available profiler options are listed here) To clean up the open-source and build folders from previous build, use cmake --build . --target clean from the build folder For windows builds, you will have to include additional flags for libwebsockets CMake. Add the following flags to your cmake command, or edit the CMake file in ./CMake/Dependencies/libwebsockets-CMakeLists.txt with the following: cmake .. -DLWS_HAVE_PTHREAD_H=1 -DLWS_EXT_PTHREAD_INCLUDE_DIR="C:\Program Files (x86)\pthreads\include" -DLWS_EXT_PTHREAD_LIBRARIES="C:\Program Files (x86)\pthreads\lib\x64\libpthreadGC2.a" -DLWS_WITH_MINIMAL_EXAMPLES=1 Be sure to edit the path to whatever pthread library you are using, and the proper path for your environment. Build To build the library and the provided samples run make in the build directory you executed CMake. make
简单的描述一下就是,我们需要安装pkg-config and CMake,这个是编译需要的环境,因为webrtc它用CMake的方式生成Makefile,通过pkg去自动找到对应的依赖库文件的路径
,在开源库的目录下创建一个build目录,把编译的东西都存放到这个目录下,需要进入到这个目录下CMake ..,这里不能直接CMake ..,我们需要先配置一下编译环境,以及CMake的相关参数,上面也有介绍,首先配置交叉编译信息,在Ubuntu终端上export CXX=配置编译路径,举个例子export CXX=/home/sean/share/ISVP-T31-1.1.6-20221013/software/sdk/Ingenic-SDK-T31-1.1.6-20221013/resource/toolchain/gcc_472/mips-gcc472-glibc216-64bit/bin/mips-linux-gnu-g++,还有配置export CC=xxxx,
以及配置export CFLAGS=xxx,这个参数看自己编译器去配置,这些配置完成之后,继续进行下一步。
3、配置CMake参数
aws webrtc一般的CMake 配置是这样子的-DBUILD_STATIC_LIBS -- Build all KVS WebRTC and third-party libraries as static libraries.
编译的库编译成静态库的形式如果-DBUILD_STATIC_LIBS=True,FALSE的话编译出来的是动态库
-DBUILD_OPENSSL=TRUE,是否依赖Openssl
-DBUILD_OPENSSL_PLATFORM=linux-generic32,编译openssl的平台,这个填这个就好,实际上都是调用配置的编译器
-DBUILD_LIBSRTP_HOST_PLATFORM=x86_64-unknown-linux-gnu,这个也是填上去就行,影响不大只是,不填这个的话编译srtp的时候,会报错--host没有配置
写x86_64也行,这个代表的是当前平台是什么。
-DBUILD_LIBSRTP_DESTINATION_PLATFORM=arm-unknown-linux-uclibcgnueabi,编译的目标平台,这个填这个就好,问题不大,也是调用我们配置的编译器
整合之后就这样的Cmake命令
-DBUILD_SAMPLE=true ,是否编译webrtc的例子
cmake . -DBUILD_SAMPLE=true \ -DBUILD_STATIC_LIBS=TRUE \ -DBUILD_OPENSSL=TRUE \ -DBUILD_OPENSSL_PLATFORM=linux-generic32 \ -DBUILD_LIBSRTP_HOST_PLATFORM=x86_64-unknown-linux-gnu \ -DBUILD_LIBSRTP_DESTINATION_PLATFORM=arm-unknown-linux-uclibcgnueabi
配置成这样已经成功百分之50了,剩下的基本上是全自动,下载自动编译,这个过程中,openssl会一直编译不通过,我的建议是自己手动去上面的git hub下载下来,但是千万
不要随便下载一个openssl的版本,因为随便下载可能会导致你的websocket编译不通过的,它对openssl的版本是有要求的。
4、下载openssl并编译
当下载不下来的时候,进入到webrtc源码目录下的opensource目录,然后进入libopenssl目录,然后查看一下CMakeLists.txt,里面会告诉你,他需要下载那个版本的openssl,
这里下载完成,指定版本的openssl之后,编译openssl,这里以君正的SDK为例
./Configure linux-mips32 --cross-compile-prefix=/opt/mips-gcc472-glibc216-64bit/bin/mips-linux-uclibc-gnu- no-async no-shared --prefix=$(pwd)/output
执行这条语句需要进入对应openssl的源码目录,里面参数自己百度搜索一下。
执行make和make install
编译完成之后,会生成一个文件夹里面有lib include bin等
![]()
这个时候需要把,bin,inclue,lib,拷贝到,aws webrtc源码下的opensource目录里,是把三个目录拷贝过去,准确为什么的话,你需要了解一下源码目录下的CMakeLists.txt
它会给我们创建这个三个目录,只是现在我们手动给他创建了这个,三个目录。
之后还有一步比较重要的就是,我们需要去修改CMakeLists.txt里面的内容,去吧Openssl的

注释掉build_dependency,就可以了,剩下的话,就靠网络,然后它自动编译。
5、可能出现的错误
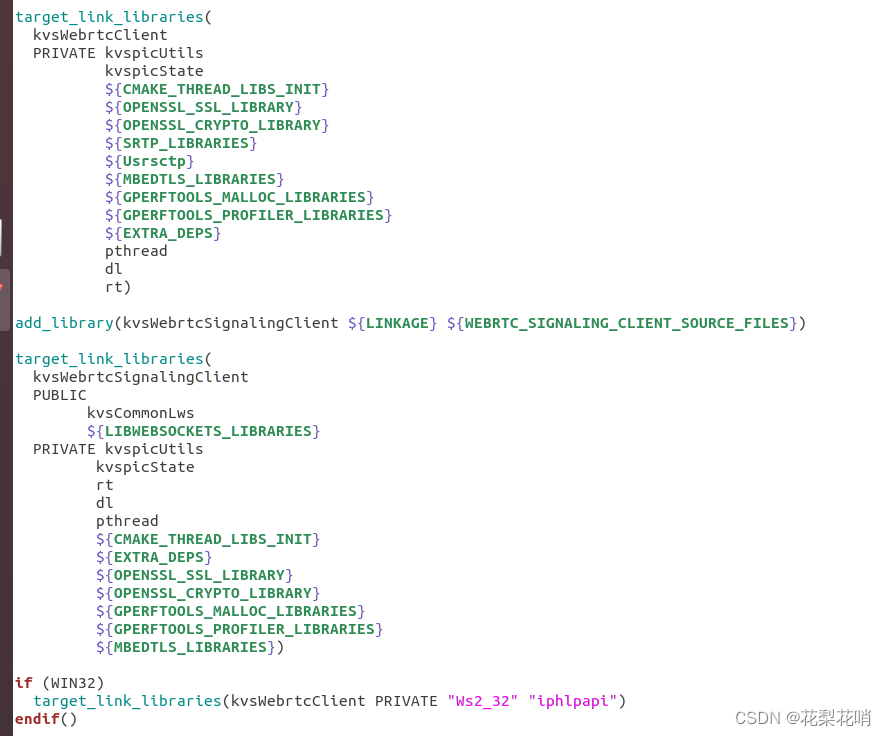
开源库都下载完成之后,make话,可能会出现的错误,就是有一些库依赖不上来,这个时候我们自己需要在cmake里面加,lrt lpthread ldl
像这样,库的顺序最好不要乱放,如果乱放的话,编译不通过的。
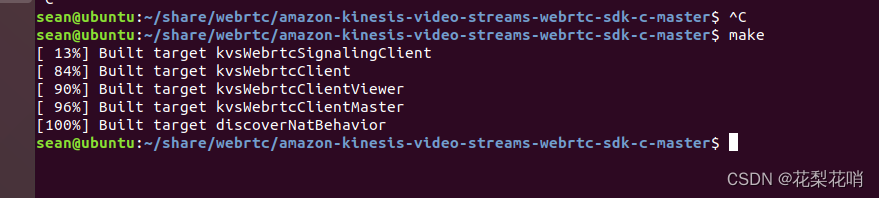
大致就是这样了,完成上述操作之后基本上就可以编译成功了
6、websocket单独编译
单独编译websocket,其实我不是很建议,不过就当是感兴趣,编译一下,像前面编译openssl一样,如果一直拉不下来,直接驱动opensource目录
进去里面看里面的CMakeLists.txt,手动下载我们需要的websocket的版本4.2.2,不过这个需要打补丁,里面CMakeLists.txt也有打补丁,需要自己拷贝到
下载的源码目录下进行打补丁,然后进入我们的websocket源码目录进行Cmake操作,还是一样创建build目录,然后在build目录下cmake
cmake .. \ -DCMAKE_INSTALL_PREFIX=/home/sean/share/libwebsockets-4.2.2/mips \ -DCMAKE_C_COMPILER=mips-linux-gnu-gcc \ -DCMAKE_CXX_COMPILER=mips-linux-gnu-g++ \ -DLWS_OPENSSL_LIBRARIES="/home/sean/share/openssl/lib/libssl.a;/home/sean/share/openssl/lib/libcrypto.a" \ -DLWS_OPENSSL_INCLUDE_DIRS=/home/sean/share/openssl/include
第一个是配置make install的目录,第二个配置CC编译器,配置CXX编译器,cmake之后make,make install,然后也是把对应的lib文件,include文件拷贝进去,
也要把*.pc的类型文件拷贝到aws_webrtc里的opensource里的lib下的pkgxxx目录里去,因为它是通过这个东西去找到对应的头文件路径的,以及lib库的,这个
需要比较重视这个东西。
可能会出现一个.rnd创建不成功

这里只是这个例子,自己找到自己报错的对应目录去执行下面那条语句生成.rnd文件,然后就能编译通过了。


 6656
6656


 被折叠的 条评论
为什么被折叠?
被折叠的 条评论
为什么被折叠?
 到【灌水乐园】发言


