


spring cloud netflix zuul、spring cloud gateway是最常见的微服务网关,通过网关,我们可以在请求到达后端指定服务之前/后端服务处理完业务响应数据之后对响应进行对请求/响应进行处理。
比如常见的参数校验、接口鉴权等等,在后端服务的拦截器和过滤器能做的事在网关都可以做。
网关的主要功能是请求的转发以及负载均衡,和nginx的功能类似,只是底层实现不同。
这篇文章就详细介绍一下spring cloud gateway的使用,包括了各种断言及过滤器的相关配置,帮助初学者更好的了解gateway的使用。
目录
一、创建项目
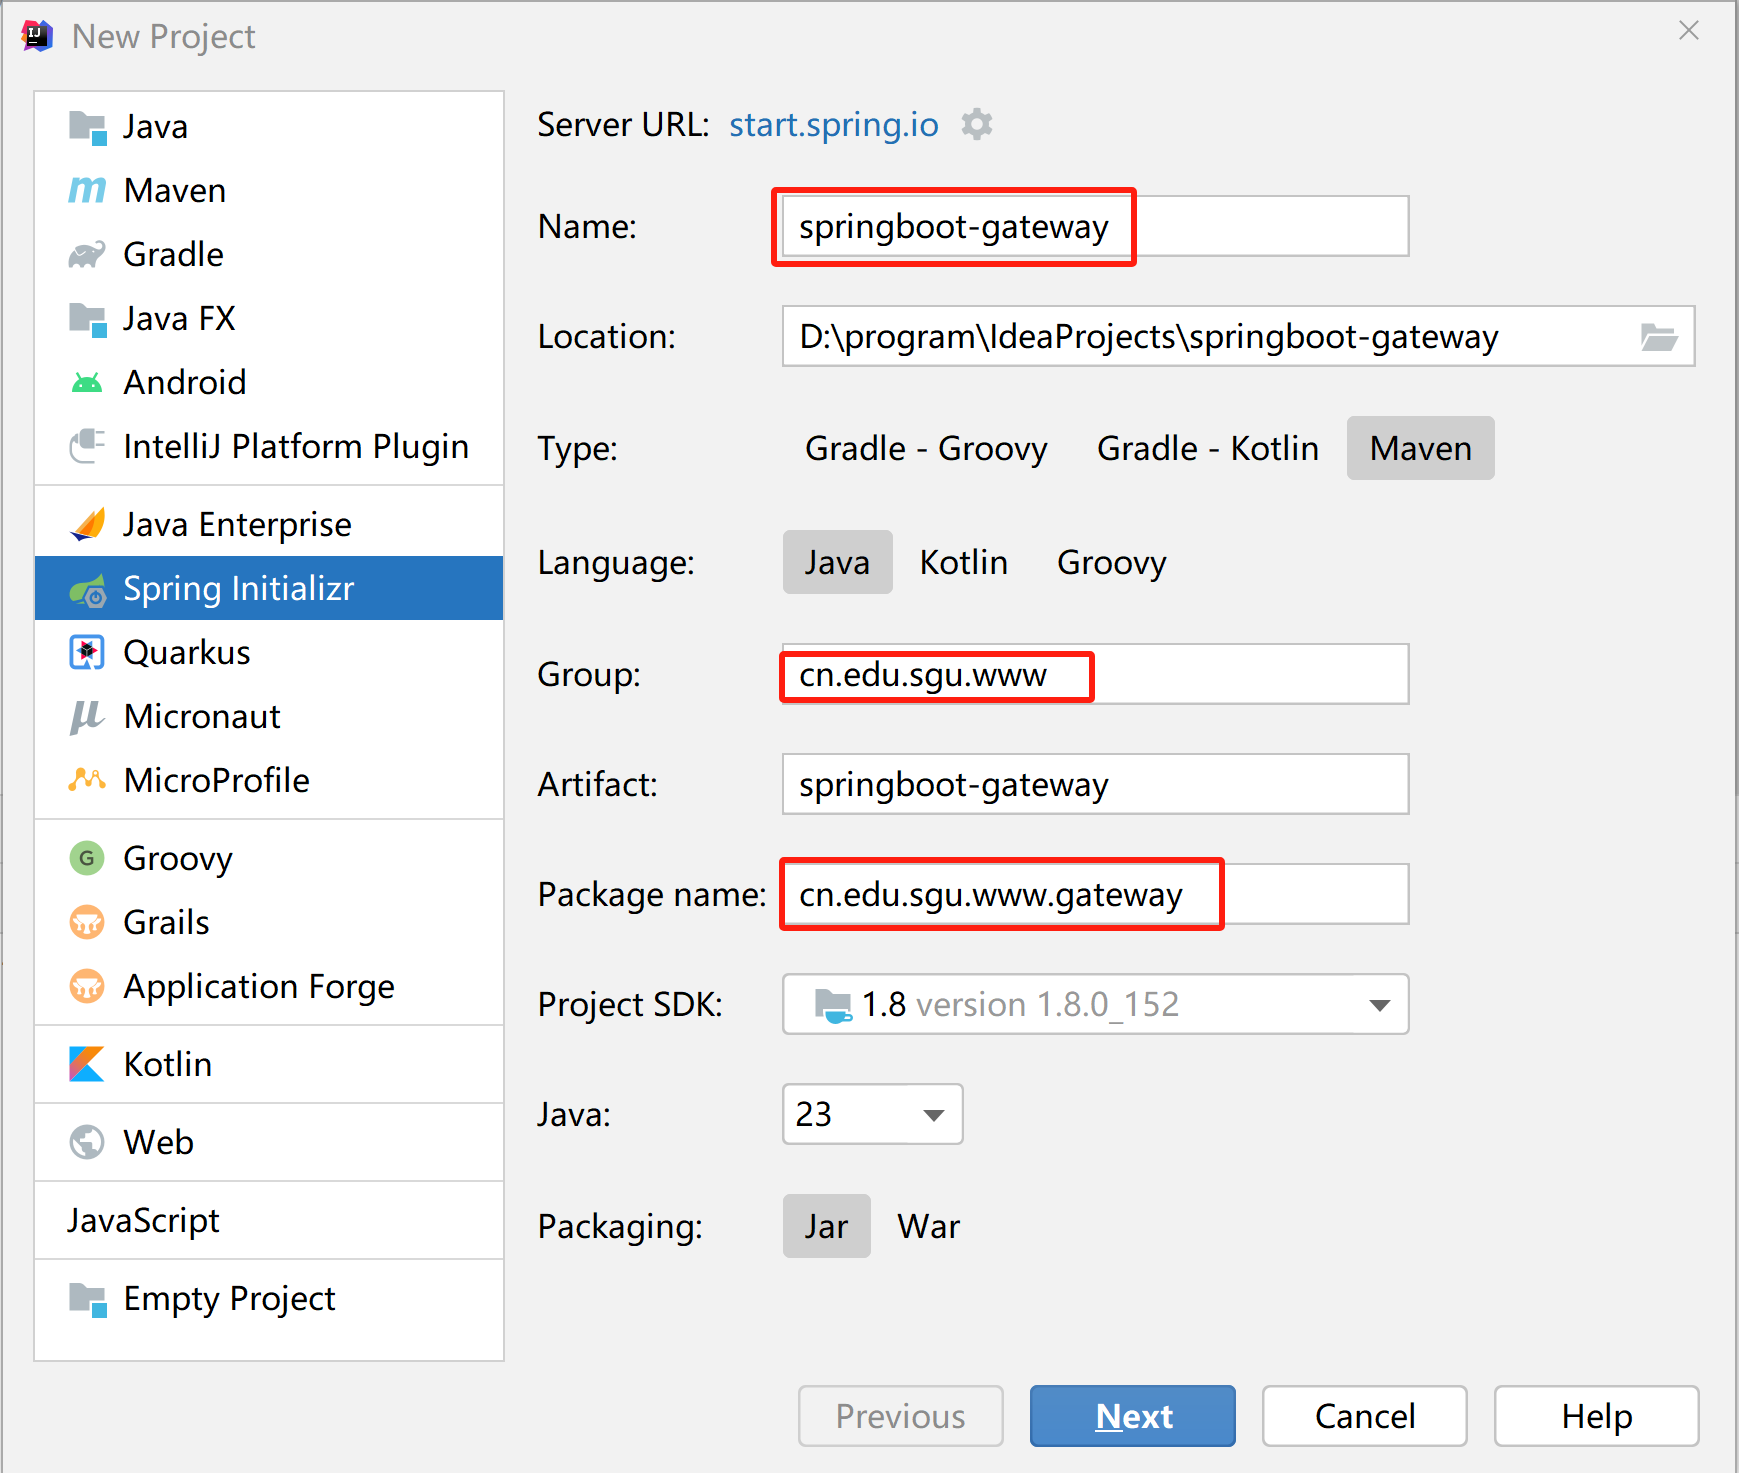
在IntelliJ IDEA中创建一个springboot项目springboot-gateway
二、添加依赖
修改pom.xml,添加spring cloud gateway的依赖。
<?xml version="1.0" encoding="UTF-8"?>
<project xmlns="http://maven.apache.org/POM/4.0.0" xmlns:xsi="http://www.w3.org/2001/XMLSchema-instance"
         xsi:schemaLocation="http://maven.apache.org/POM/4.0.0 https://maven.apache.org/xsd/maven-4.0.0.xsd">
    <modelVersion>4.0.0</modelVersion>

    <parent>
        <groupId>org.springframework.boot</groupId>
        <artifactId>spring-boot-starter-parent</artifactId>
        <version>2.2.6.RELEASE</version>
        <relativePath />
    </parent>

    <groupId>cn.edu.sgu.www</groupId>
    <artifactId>springboot-gateway</artifactId>
    <version>0.0.1-SNAPSHOT</version>
    <name>springboot-gateway</name>
    <description>Spring Boot整合Spring Cloud Gateway案例项目</description>

    <properties>
        <java.version>1.8</java.version>
    </properties>

    <dependencies>
        <dependency>
            <groupId>org.springframework.cloud</groupId>
            <artifactId>spring-cloud-starter-gateway</artifactId>
            <version>2.2.6.RELEASE</version>
        </dependency>
    </dependencies>

    <build>
        <plugins>
            <plugin>
                <groupId>org.springframework.boot</groupId>
                <artifactId>spring-boot-maven-plugin</artifactId>
            </plugin>
        </plugins>
    </build>
</project>
三、修改配置
将配置文件application.properties重命名为application.yml,修改配置文件的内容。
server:
  port: 9091

spring:
  application:
    name: gateway
  cloud:
    gateway:
      enabled: true
      routes:
        - id: provider
          uri: http://localhost:8088
          predicates:
            - Path=/api/provider/**
          filters:
            - StripPrefix=2

logging:
  file:
    name: D:/log/gateway.log # 保存日志文件到D盘
  level:
    springfox: error
    cn.edu.sgu.www.gateway: debug
参数说明:- StripPrefix=2表示删除前两级路径(/api/provider),比如http://localhost:9091/api/provider/对应的转发地址为服务器端的地址为
http://localhost:8088本篇文章使用之前的服务提供者项目provider来测试网关配置。
相关文章:
springboot整合feign实现RPC调用,并通过Hystrix实现服务降级![]() https://blog.csdn.net/heyl163_/article/details/131778985项目地址:
https://blog.csdn.net/heyl163_/article/details/131778985项目地址:
Spring Boot整合Feign服务提供者项目![]() https://gitee.com/muyu-chengfeng/provider
https://gitee.com/muyu-chengfeng/provider
在IntelliJ IDEA中拉取provider项目到本地,先后启动nacos服务器和provider项目。
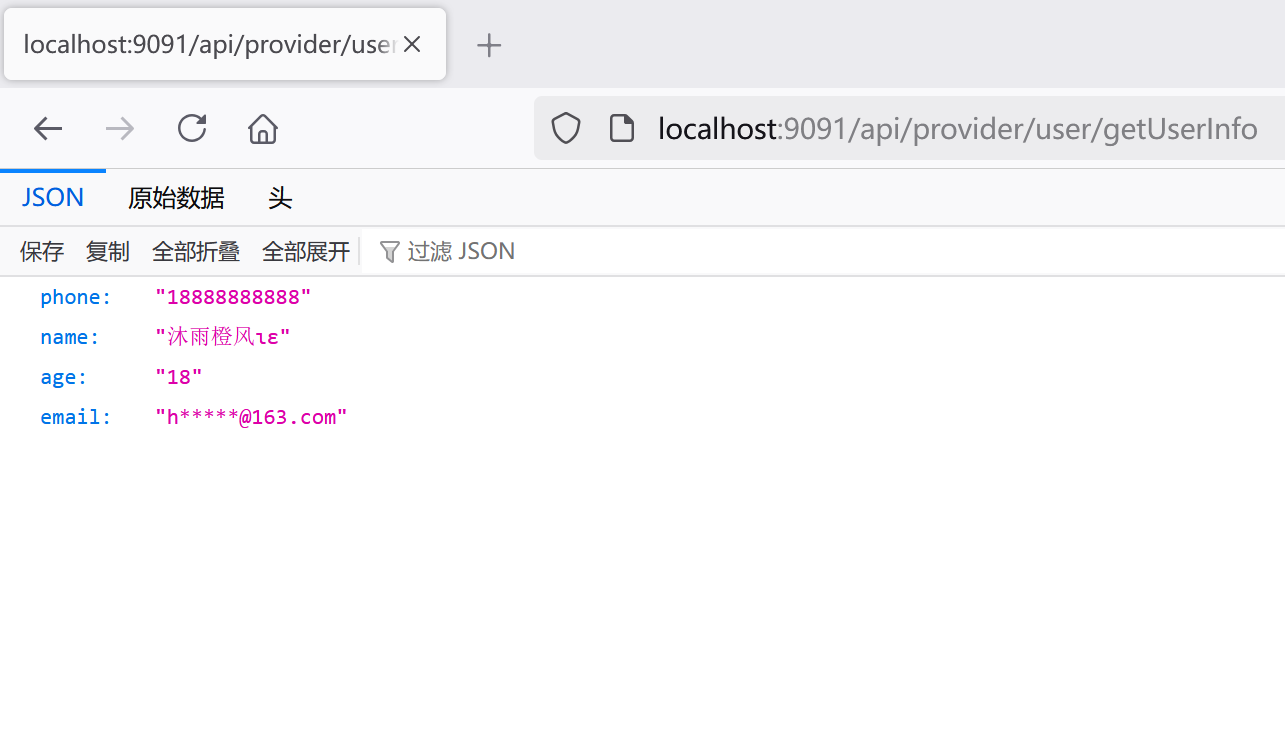
启动当前网关项目,在浏览器地址栏输入以下网址访问服务提供者项目的接口。
http://localhost:9091/api/provider/user/getUserInfo如图,成功返回了接口数据~
四、配置说明
在学习gateway的配置之前,需要了解gateway中的路由这个概念,路由一般由以下几个部分组成组成。
- id:路由ID
- uri:目标URL
- filters:一组过滤器,可以对请求和响应进行额外的处理
- predicates:一组断言,只有符合断言里的条件的请求才会被转发
比如前面我们配置的路由,里面就包含了上述的四个部分。
spring:
  cloud:
    gateway:
      enabled: true
      routes:
        - id: provider
          uri: http://localhost:8088
          predicates:
            - Path=/api/provider/**
          filters:
- StripPrefix=2其中uri称为目标地址,也就是我们需要转发请求到uri后面配置的路径,当我们访问ip地址:端口号/api/producer/**时,请求将会被转发到http://localhost:8088/**
predicates断言工厂
断言,其实就是一组条件,熟悉java.util.function.Predicate的应该对这个概念有一定的了解,其实就是设置了一些条件,通过matches()方法的返回值来判断是否满足设置的条件。
gateway里的断言predicates指的是路由断言工厂,在predicates里可以配置各种条件,只有全部条件都满足,请求才能被正确转发。
接下来介绍gateway里都有哪些断言工厂。
指定以下时间为参考时间:
2024-12-17T19:46:35.523+08:00[Asia/Shanghai]
After
配置在指定时间之后才能转发请求,后面指定的值的格式和LocalDateTime很像,只是多了毫秒和时区信息。
2024-12-17T19:46:35.523+08:00[Asia/Shanghai]
1、前半部分:2024-12-17T19:46:35.523这是一个LocalDateTime的字符串格式。
2、后半部分:+08:00[Asia/Shanghai]表示时区:东八区-亚洲/上海
- 东时区用+表示,如+6:00表示东6区
- 西时区用-表示,如-5:00表示西5区
server:
  port: 9091

spring:
  application:
    name: gateway
  cloud:
    gateway:
      enabled: true
      routes:
        - id: provider
          uri: http://localhost:8088
          predicates:
            - Path=/api/provider/**
            - After=2024-12-17T19:46:35.523+08:00[Asia/Shanghai]
          filters:
            - StripPrefix=2

logging:
  file:
    name: D:/log/gateway.log # 保存日志文件到D盘
  level:
    springfox: error
    cn.edu.sgu.www.gateway: debug
Before
限制在指定时间之前才能访问,比如上面配置的After改成Before就访问不到了,因为已经过了那个时间点。
server:
  port: 9091

spring:
  application:
    name: gateway
  cloud:
    gateway:
      enabled: true
      routes:
        - id: provider
          uri: http://localhost:8088
          predicates:
            - Path=/api/provider/**
            - Before=2024-12-17T19:46:35.523+08:00[Asia/Shanghai]
          filters:
            - StripPrefix=2

logging:
  file:
    name: D:/log/gateway.log # 保存日志文件到D盘
  level:
    springfox: error
    cn.edu.sgu.www.gateway: debug
Between
配置只能在指定时间段访问,上面的时间配置后移一天,依旧能得到返回结果。
server:
  port: 9091

spring:
  application:
    name: gateway
  cloud:
    gateway:
      enabled: true
      routes:
        - id: provider
          uri: http://localhost:8088
          predicates:
            - Path=/api/provider/**
            - Between=2024-12-17T19:46:35.523+08:00[Asia/Shanghai],2024-12-18T19:46:35.523+08:00[Asia/Shanghai]
          filters:
            - StripPrefix=2

logging:
  file:
    name: D:/log/gateway.log # 保存日志文件到D盘
  level:
    springfox: error
    cn.edu.sgu.www.gateway: debug
Cookile
限制只有请求中携带了指定的cookie才能访问。
server:
  port: 9091

spring:
  application:
    name: gateway
  cloud:
    gateway:
      enabled: true
      routes:
        - id: provider
          uri: http://localhost:8088
          predicates:
            - Path=/api/provider/**
            - Cookie=JSESSIONID,831B175D25150131A3F3017116369CAE
          filters:
            - StripPrefix=2

logging:
  file:
    name: D:/log/gateway.log # 保存日志文件到D盘
  level:
    springfox: error
    cn.edu.sgu.www.gateway: debug
上面配置只有携带了JSESSIONID的cookie,并且值为831B175D25150131A3F3017116369CAE
的请求才会被转发。
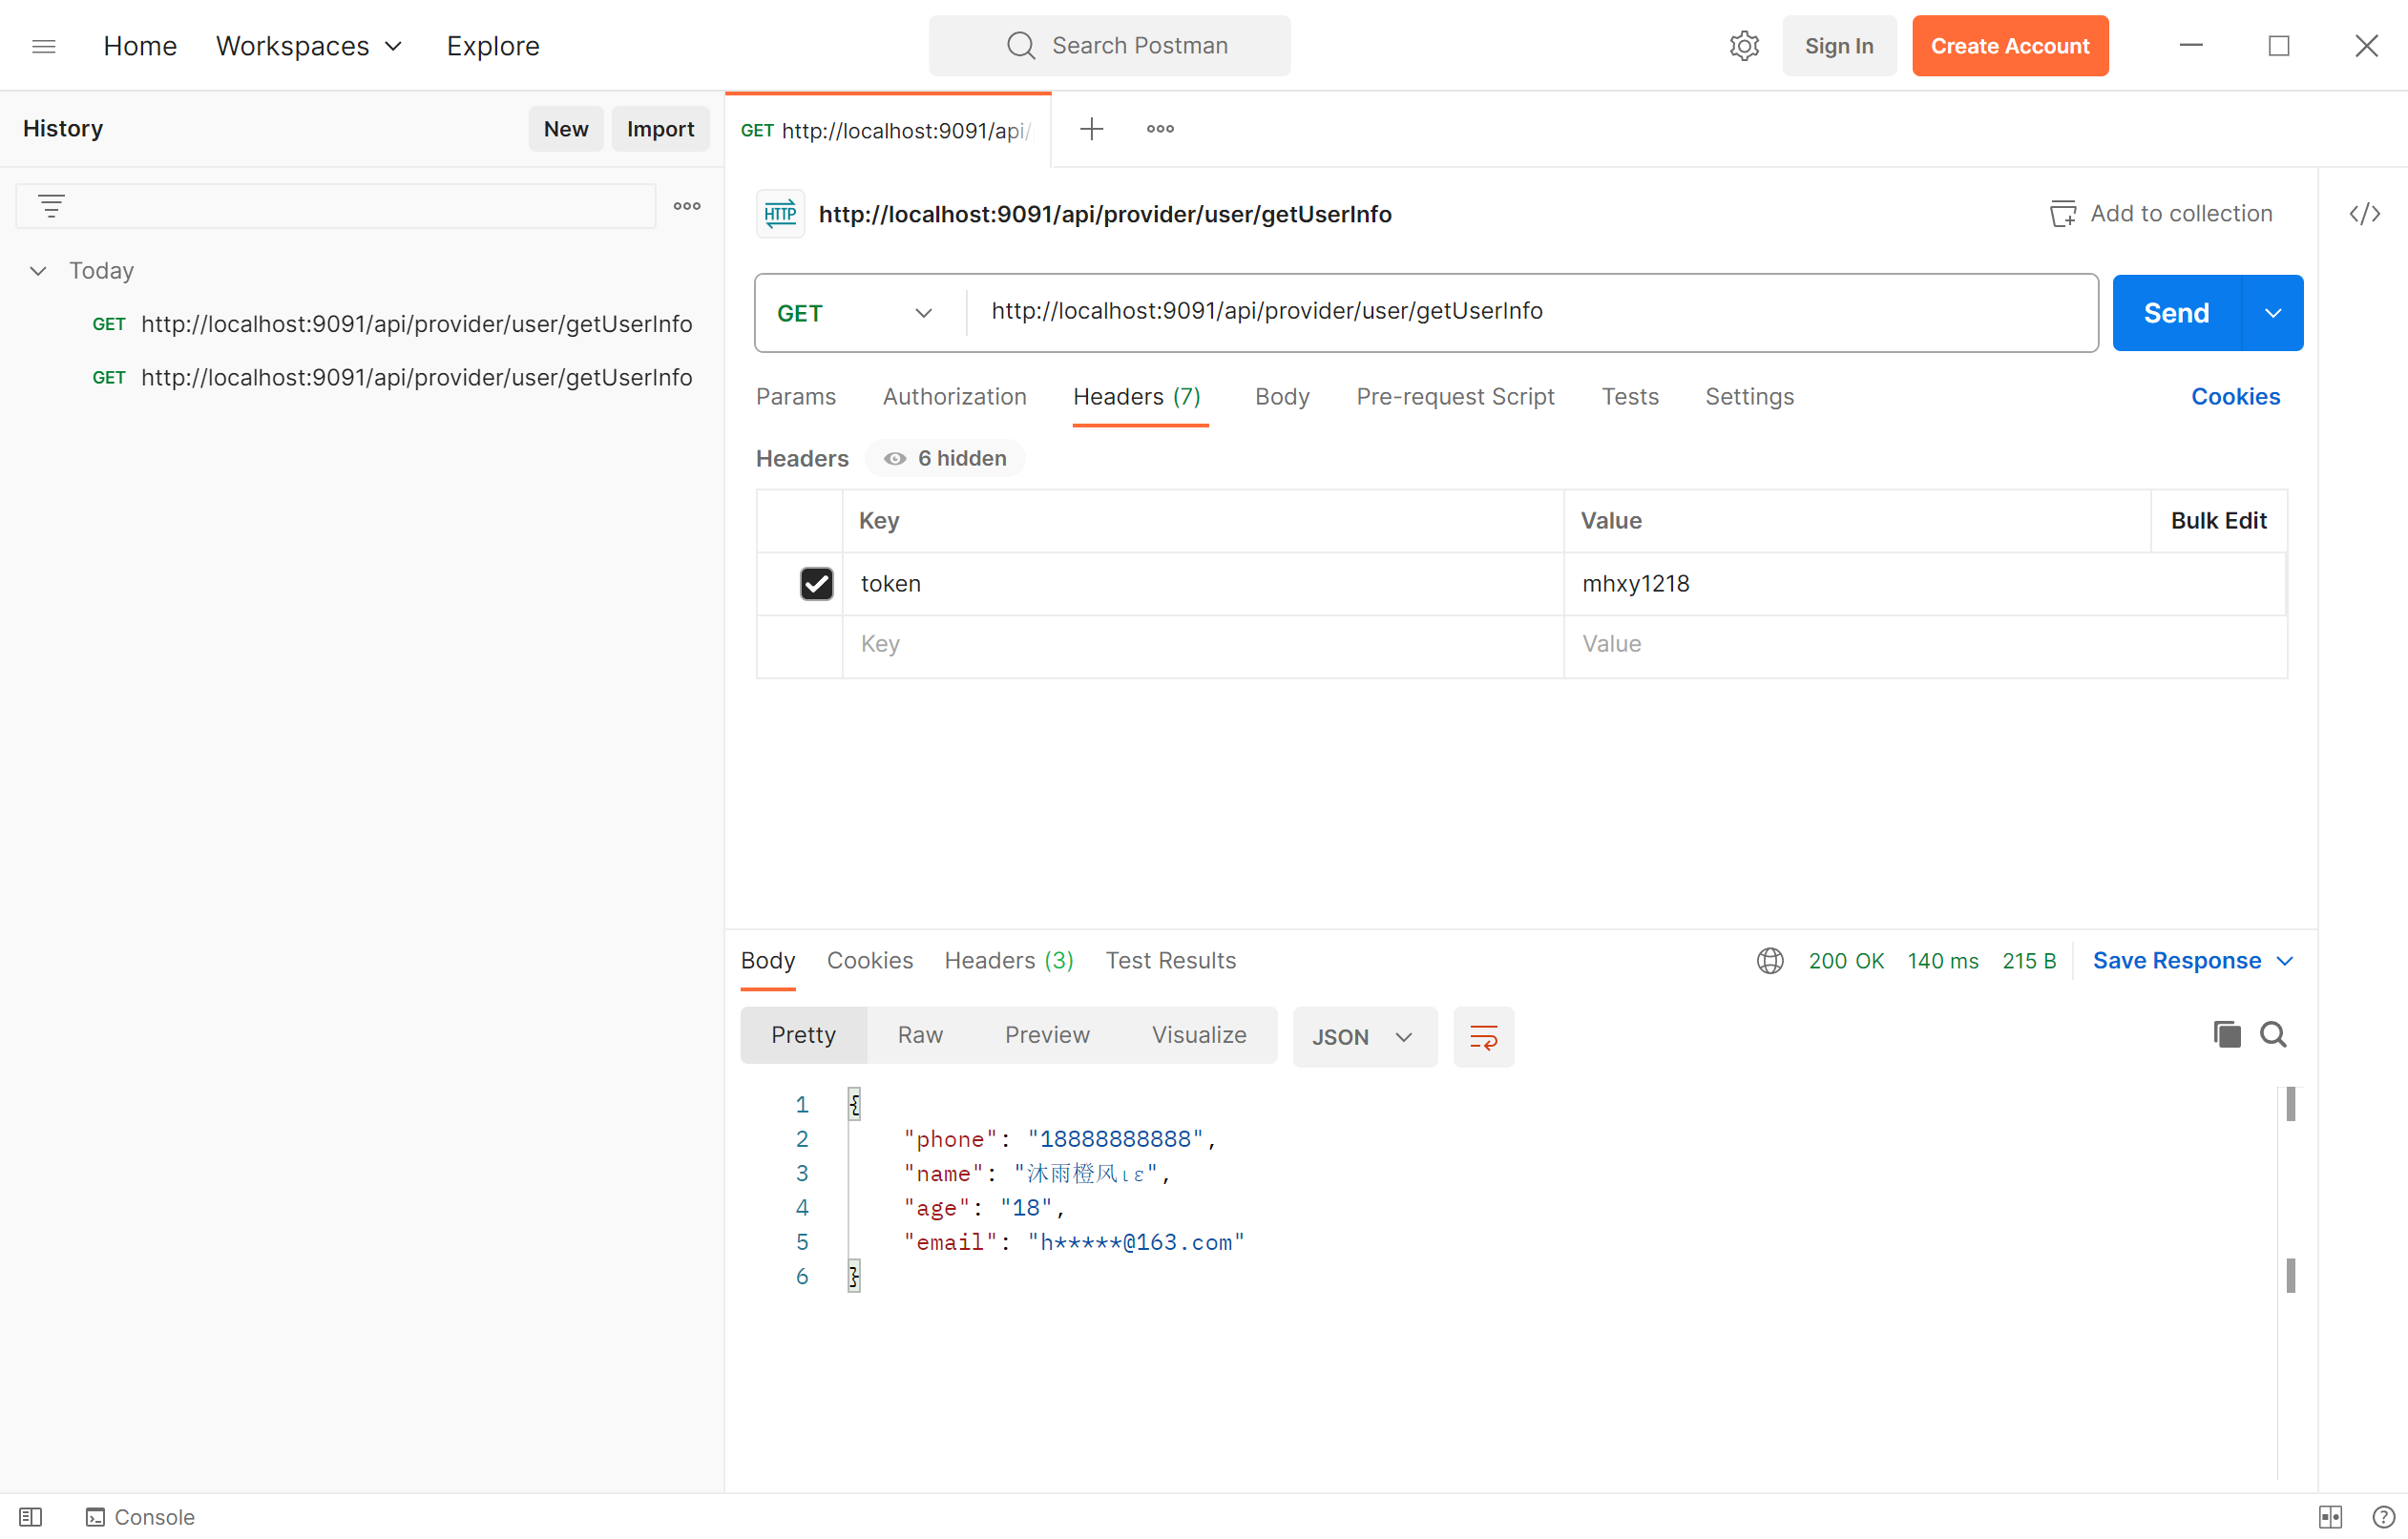
Header
只有携带指定请求头的请求会被转发,在这里配置需要携带token的请求头。
server:
  port: 9091

spring:
  application:
    name: gateway
  cloud:
    gateway:
      enabled: true
      routes:
        - id: provider
          uri: http://localhost:8088
          predicates:
            - Path=/api/provider/**
            - Header=token,mhxy1218
          filters:
            - StripPrefix=2

logging:
  file:
    name: D:/log/gateway.log # 保存日志文件到D盘
  level:
    springfox: error
    cn.edu.sgu.www.gateway: debug
为了方便测试,使用postman来测试效果
不携带请求头时,404

携带请求头,正常响应。
Host
这个是指定域名访问,如果不是指定的域名,将访问失败,这个不好测试,就跳过了。
server:
  port: 9091

spring:
  application:
    name: gateway
  cloud:
    gateway:
      enabled: true
      routes:
        - id: provider
          uri: http://localhost:8088
          predicates:
            - Path=/api/provider/**
            - Host=taobao.com
          filters:
            - StripPrefix=2

logging:
  file:
    name: D:/log/gateway.log # 保存日志文件到D盘
  level:
    springfox: error
    cn.edu.sgu.www.gateway: debug
Method
配置请求方式,只有规定的请求方式才会被转发。
由于测试的接口的请求方式为get,所以接口访问失败,返回404状态码。
server:
  port: 9091

spring:
  application:
    name: gateway
  cloud:
    gateway:
      enabled: true
      routes:
        - id: provider
          uri: http://localhost:8088
          predicates:
            - Path=/api/provider/**
            - Method=POST
          filters:
            - StripPrefix=2

logging:
  file:
    name: D:/log/gateway.log # 保存日志文件到D盘
  level:
    springfox: error
    cn.edu.sgu.www.gateway: debug
Path
这是基础的断言,将指定的路径转发到目标URL,本篇文章的localhost:9091/api/provider/user/getUserInfo会被转发到localhost:8088/user/getUserInfo
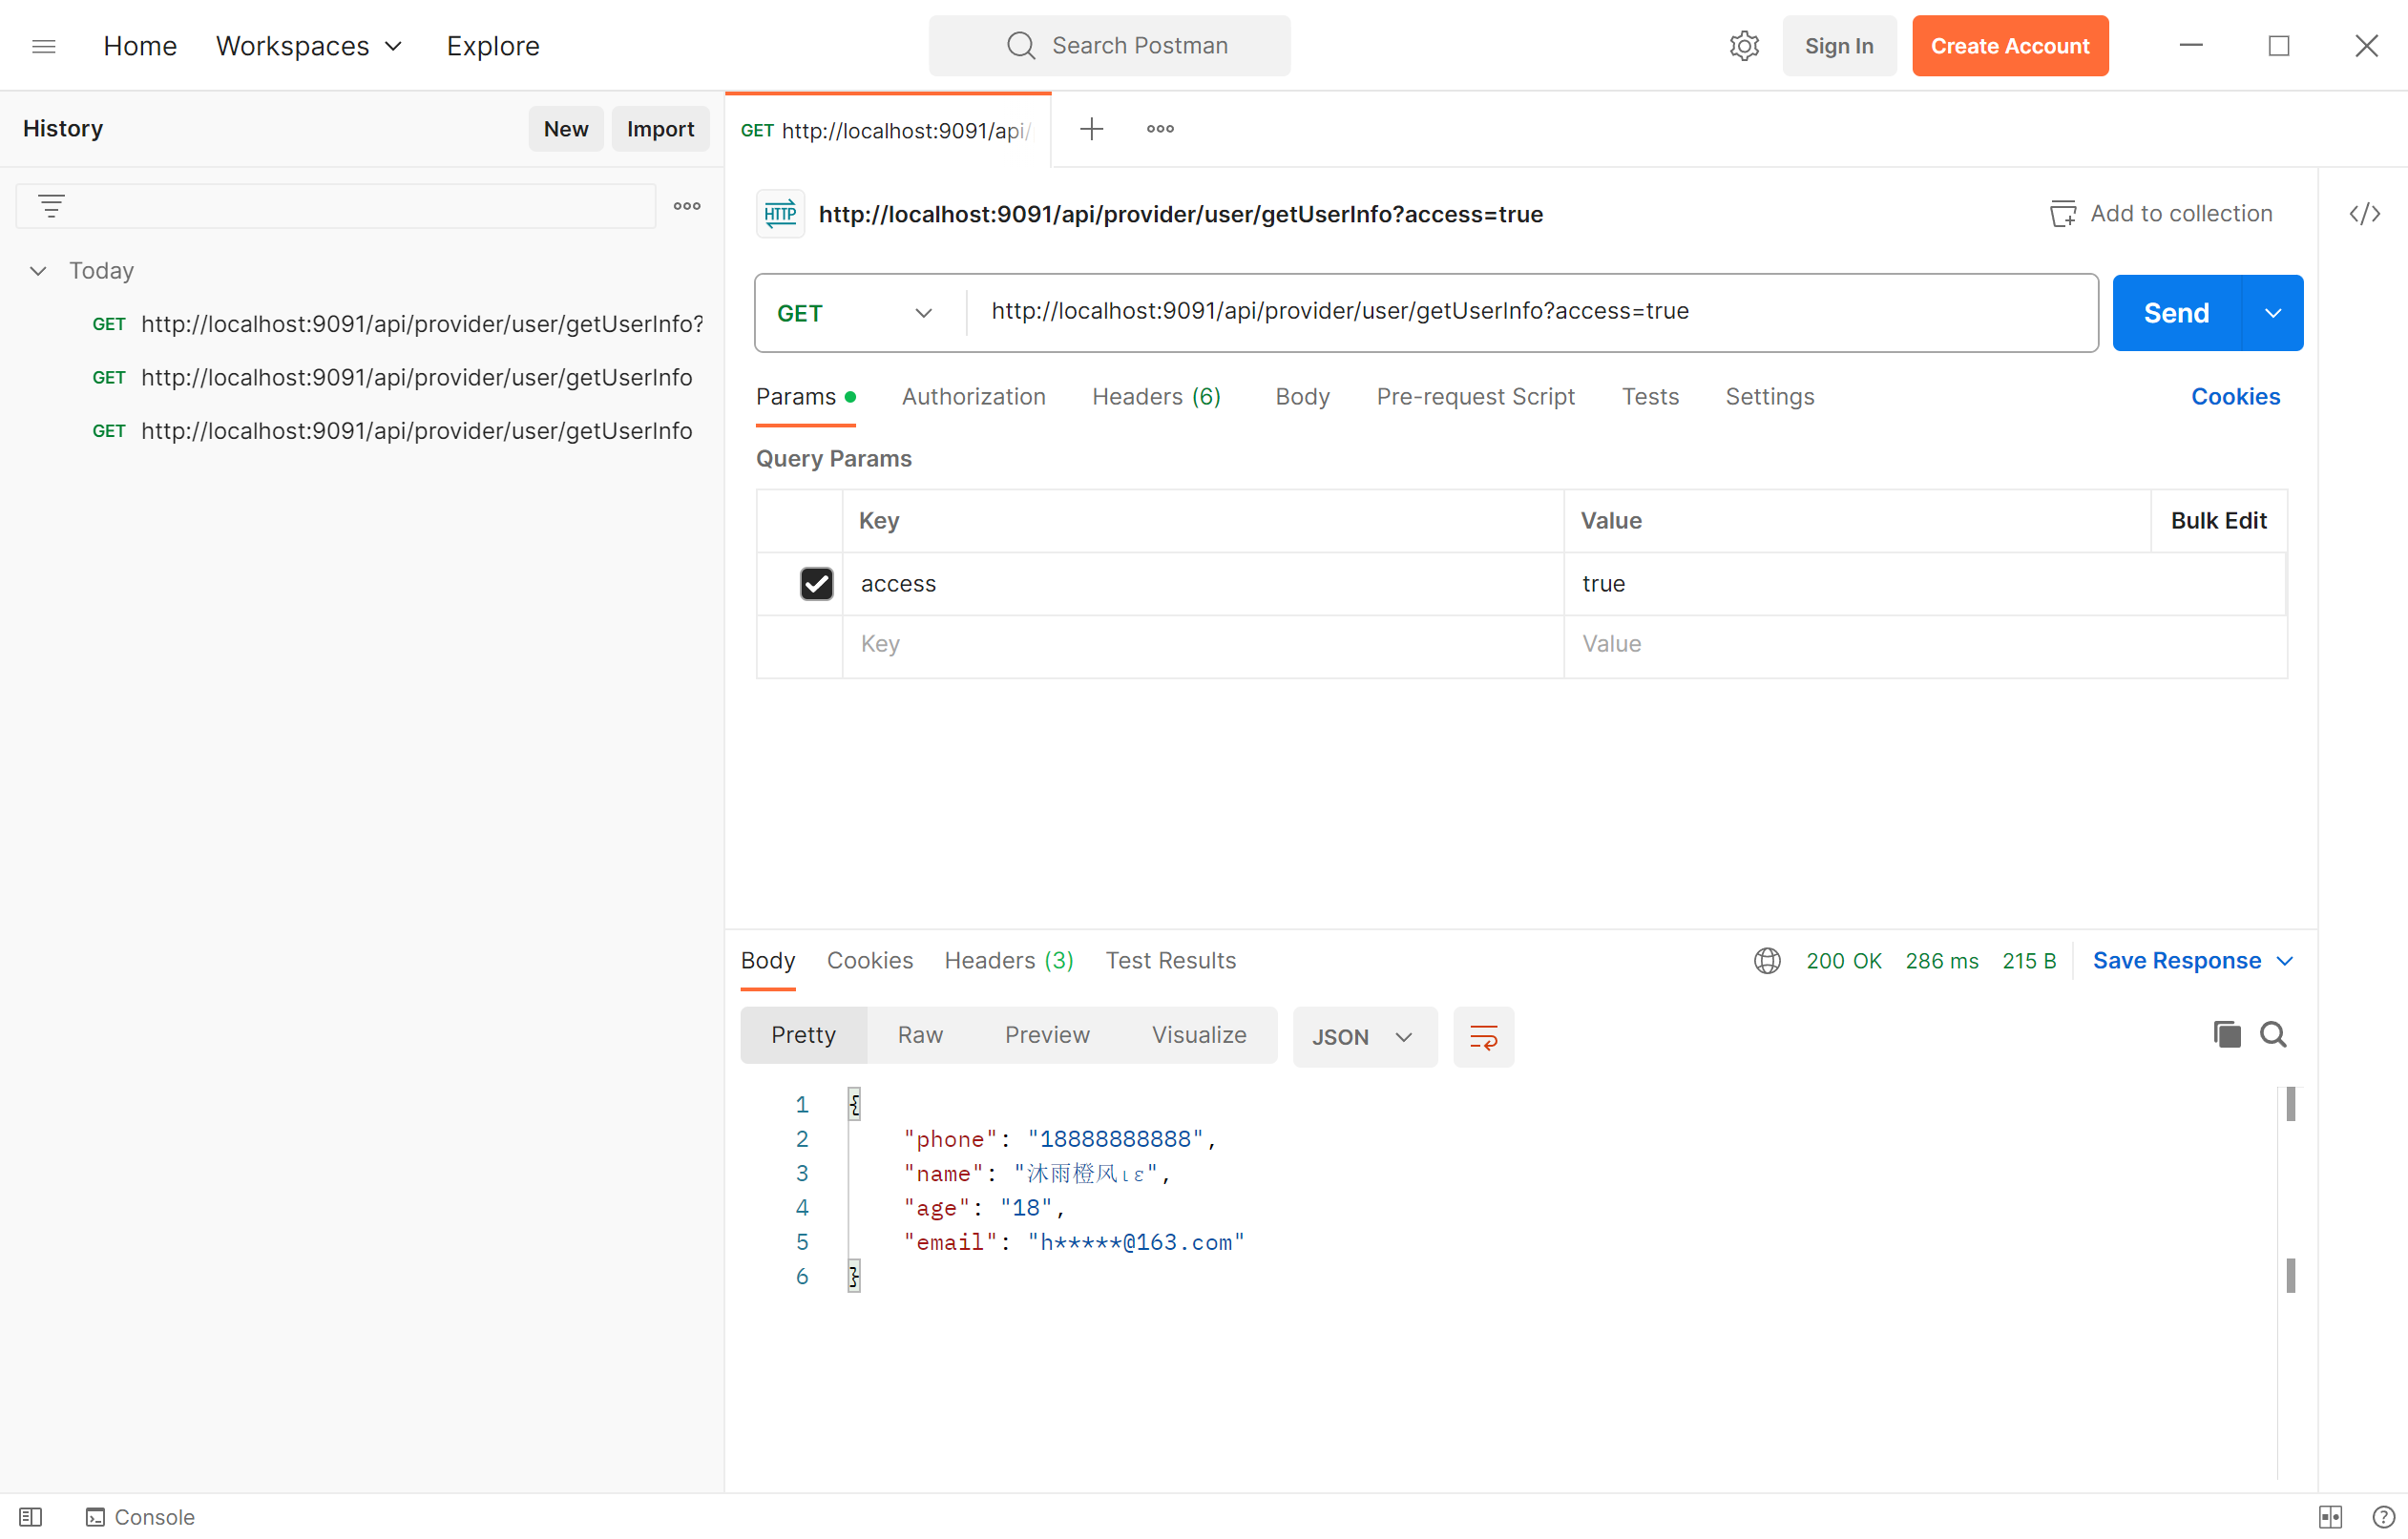
Query
限制需要携带指定参数的请求才能正常转发
server:
  port: 9091

spring:
  application:
    name: gateway
  cloud:
    gateway:
      enabled: true
      routes:
        - id: provider
          uri: http://localhost:8088
          predicates:
            - Path=/api/provider/**
            - Query=access,true
          filters:
            - StripPrefix=2

logging:
  file:
    name: D:/log/gateway.log # 保存日志文件到D盘
  level:
    springfox: error
    cn.edu.sgu.www.gateway: debug
未携带参数:返回404状态码

携带参数:正常响应
RemoteAddr
RemoteAddr用于指定IP地址,只有配置的IP地址才能访问。
server:
  port: 9091

spring:
  application:
    name: gateway
  cloud:
    gateway:
      enabled: true
      routes:
        - id: provider
          uri: http://localhost:8088
          predicates:
            - Path=/api/provider/**
            - RemoteAddr=176.176.4.127
          filters:
            - StripPrefix=2

logging:
  file:
    name: D:/log/gateway.log # 保存日志文件到D盘
  level:
    springfox: error
    cn.edu.sgu.www.gateway: debug
Weight
这个用于配置权重,同一个分组中,权重配置的越大,请求时被选择访问的概率越高。这个不方便演示,跳过。
filters过滤器工厂
网关的过滤器,网关的处理流程由一组过滤器组成的过滤器链组成,是责任链设计模式的典型应用。
为了演示过滤器效果,在mhxysy的服务添加一个切面类,通过日志在控制台打印请求信息。
接下来介绍gateway里的几种常用的过滤器,因为过滤器实在是太多了,只讲解4种,其他的过滤器使用类似,感兴趣的可以通过文章末尾的spring cloud gateway链接进一步学习。
AddRequestHeader
这个过滤器的作用是在请求转发之前为当前请求添加请求头。
然后给请求添加一个请求头
server:
  port: 9091

spring:
  application:
    name: gateway
  cloud:
    gateway:
      enabled: true
      routes:
        - id: provider
          uri: http://localhost:8088
          predicates:
            - Path=/api/provider/**
          filters:
            - StripPrefix=2
            - AddRequestHeader=header,mhxy1218

logging:
  file:
    name: D:/log/gateway.log # 保存日志文件到D盘
  level:
    springfox: error
    cn.edu.sgu.www.gateway: debug
AddRequestParameter
这个过滤器的作用是给请求添加参数,相当于在请求后面添加“?参数名=参数值”
server:
  port: 9091

spring:
  application:
    name: gateway
  cloud:
    gateway:
      enabled: true
      routes:
        - id: provider
          uri: http://localhost:8088
          predicates:
            - Path=/api/provider/**
          filters:
            - StripPrefix=2
            - AddRequestParameter=access,true

logging:
  file:
    name: D:/log/gateway.log # 保存日志文件到D盘
  level:
    springfox: error
    cn.edu.sgu.www.gateway: debug
AddResponseHeader
这个过滤器的作用是,服务端返回请求之后,在网关返回数据给客户端之前为响应添加响应头。
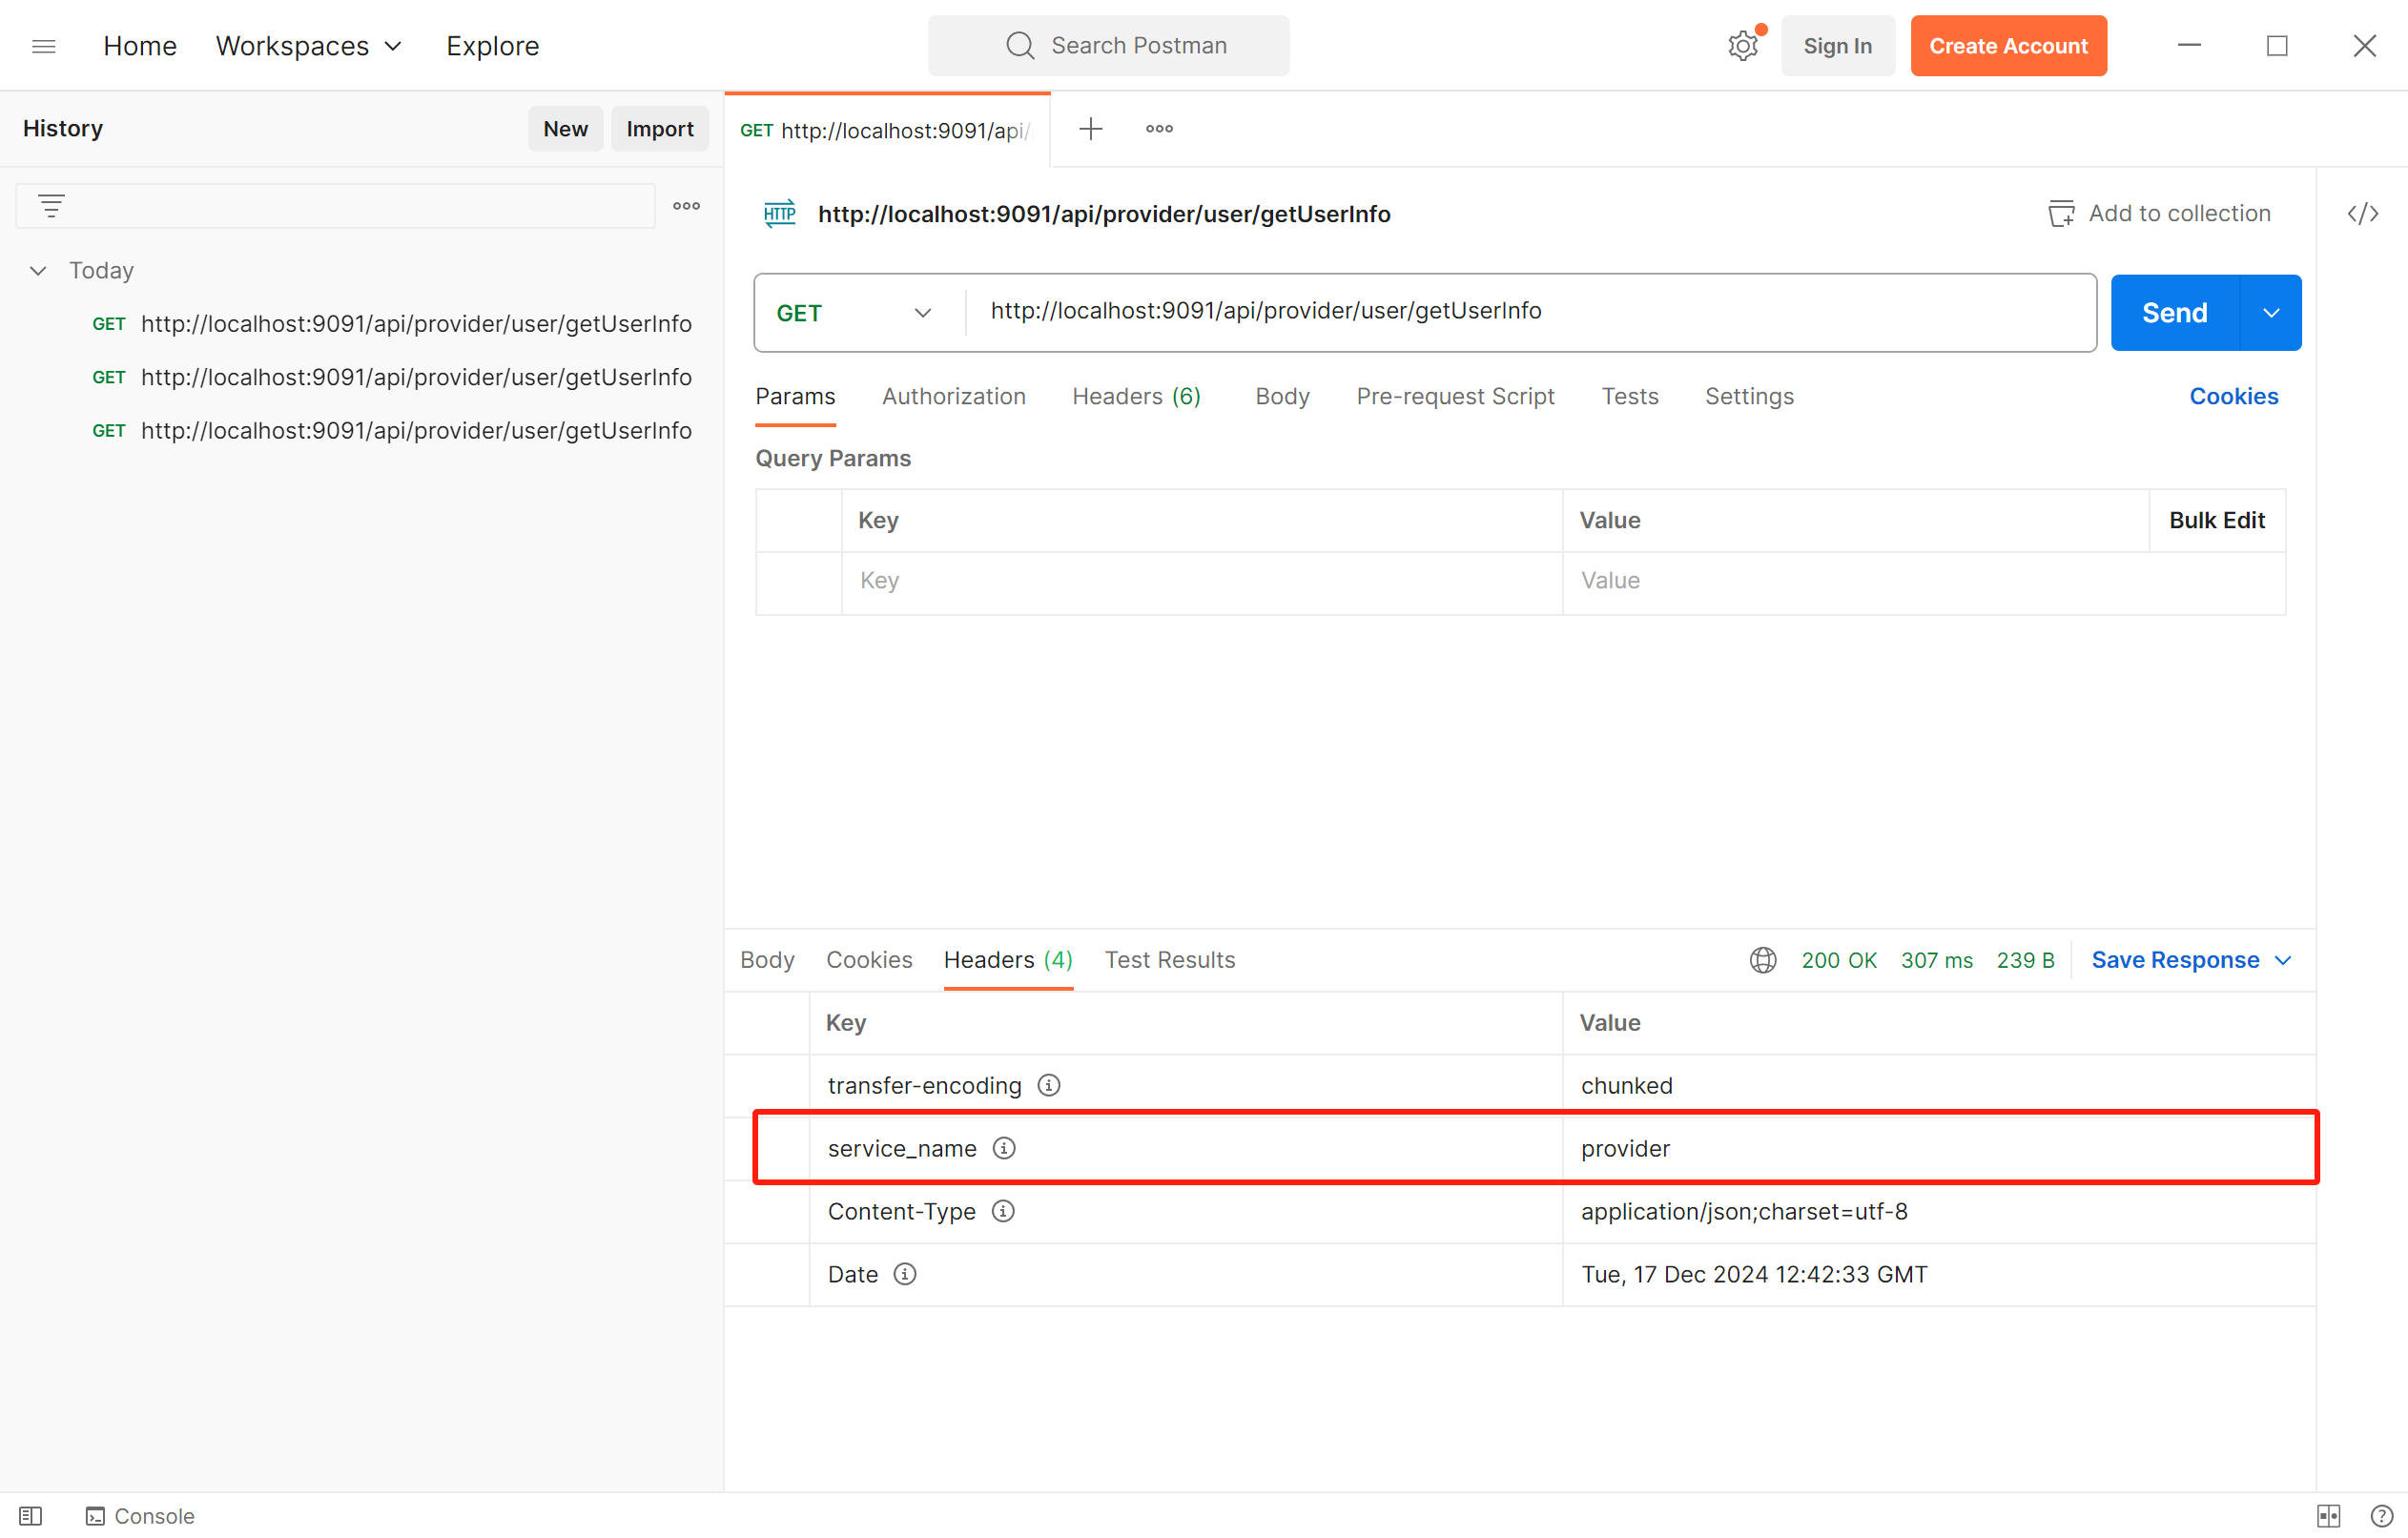
在这里添加一个响应头service_name,值为provider
server:
  port: 9091

spring:
  application:
    name: gateway
  cloud:
    gateway:
      enabled: true
      routes:
        - id: provider
          uri: http://localhost:8088
          predicates:
            - Path=/api/provider/**
          filters:
            - StripPrefix=2
            - AddResponseHeader=service_name,provider

logging:
  file:
    name: D:/log/gateway.log # 保存日志文件到D盘
  level:
    springfox: error
    cn.edu.sgu.www.gateway: debug
然后我们观察一下效果,返回的响应中确实有一个自定义的响应头service_name
RemoveResponseHeader
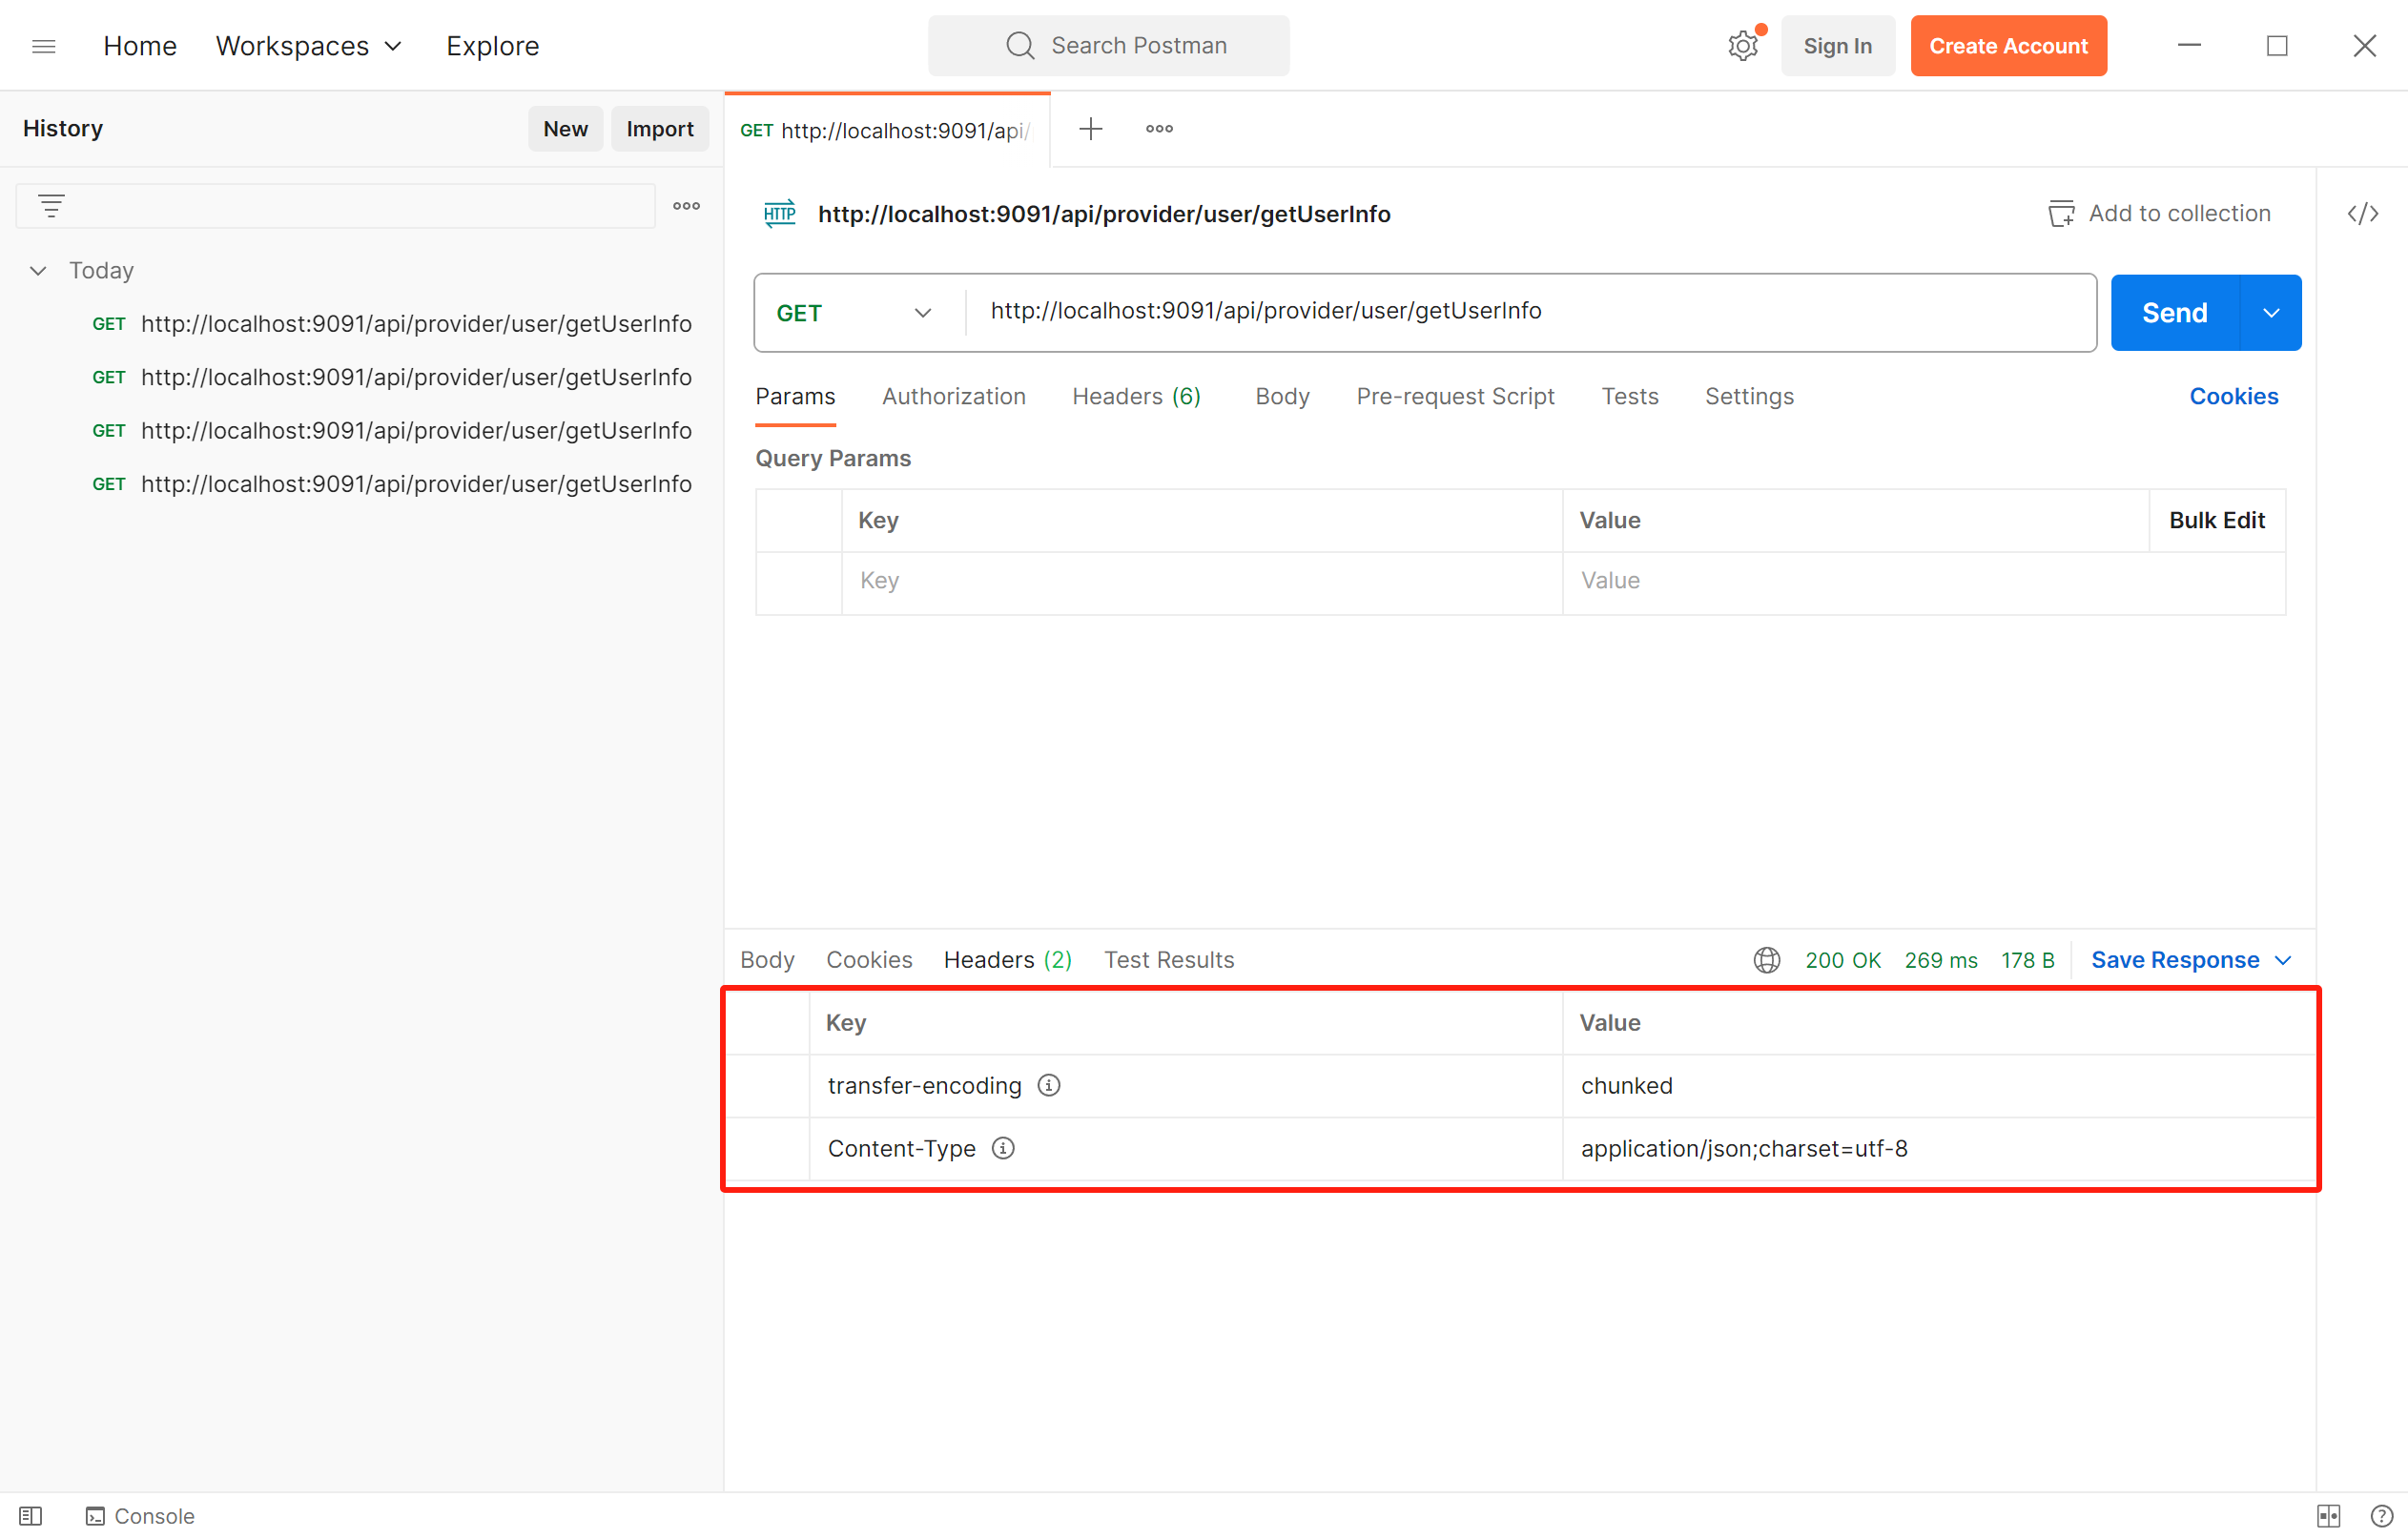
这个过滤器的作用是删除响应头,例如上面的请求中,总是会返回一个响应头Date,在这里配置移除这个响应头。
server:
  port: 9091

spring:
  application:
    name: gateway
  cloud:
    gateway:
      enabled: true
      routes:
        - id: provider
          uri: http://localhost:8088
          predicates:
            - Path=/api/provider/**
          filters:
            - StripPrefix=2
            - RemoveResponseHeader=Date

logging:
  file:
    name: D:/log/gateway.log # 保存日志文件到D盘
  level:
    springfox: error
    cn.edu.sgu.www.gateway: debug
在postman里查看响应信息,确实已经没有了Date这个响应头。
五、动态路由
1、添加依赖
添加网关负载均衡和nacos注册中心的依赖。
<?xml version="1.0" encoding="UTF-8"?>
<project xmlns="http://maven.apache.org/POM/4.0.0" xmlns:xsi="http://www.w3.org/2001/XMLSchema-instance"
         xsi:schemaLocation="http://maven.apache.org/POM/4.0.0 https://maven.apache.org/xsd/maven-4.0.0.xsd">
    <modelVersion>4.0.0</modelVersion>

    <parent>
        <groupId>org.springframework.boot</groupId>
        <artifactId>spring-boot-starter-parent</artifactId>
        <version>2.2.6.RELEASE</version>
        <relativePath />
    </parent>

    <groupId>cn.edu.sgu.www</groupId>
    <artifactId>springboot-gateway</artifactId>
    <version>0.0.1-SNAPSHOT</version>
    <name>springboot-gateway</name>
    <description>Spring Boot整合Spring Cloud Gateway案例项目</description>

    <properties>
        <java.version>1.8</java.version>
    </properties>

    <dependencies>
        <dependency>
            <groupId>org.springframework.cloud</groupId>
            <artifactId>spring-cloud-starter-gateway</artifactId>
            <version>2.2.6.RELEASE</version>
        </dependency>

        <dependency>
            <groupId>org.springframework.cloud</groupId>
            <artifactId>spring-cloud-starter-loadbalancer</artifactId>
            <version>2.2.6.RELEASE</version>
        </dependency>

        <dependency>
            <groupId>com.alibaba.cloud</groupId>
            <artifactId>spring-cloud-starter-alibaba-nacos-discovery</artifactId>
            <version>2.2.6.RELEASE</version>
        </dependency>
    </dependencies>

    <build>
        <plugins>
            <plugin>
                <groupId>org.springframework.boot</groupId>
                <artifactId>spring-boot-maven-plugin</artifactId>
            </plugin>
        </plugins>
    </build>
</project>
2、修改配置
如果像上面一样,每个应用都要写ip:端口号,也太麻烦了。gateway支持动态路由,通过配置动态路由,可以实现负载均衡的功能,只需要把上面的配置稍微修改一下。
server:
  port: 9091

spring:
  application:
    name: gateway
  cloud:
    nacos:
      discovery:
        register-enabled: true
        server-addr: ${nacos.server}
        namespace: ${nacos.namespace}
    gateway:
      enabled: true
      # 开启自动路由
      discovery:
        locator:
          enabled: true
      routes:
        - id: provider
          uri: lb://provider
          predicates:
            - Path=/api/provider/**
          filters:
            - StripPrefix=2

nacos:
  server: localhost:8848
  namespace: 21baf036-a74d-4c13-9209-dc69e7c1c1ad

logging:
  file:
    name: D:/log/gateway.log # 保存日志文件到D盘
  level:
    springfox: error
    cn.edu.sgu.www.gateway: debug
上面的配置文件对比前面的配置文件,其实就多了一个开启动态路由的配置以及注册到nacos注册中心的配置。
spring:
cloud:
nacos:
discovery:
register-enabled: true
server-addr: ${nacos.server}
namespace: ${nacos.namespace}
gateway:
discovery:
locator:
enabled: true
nacos:
server: localhost:8848
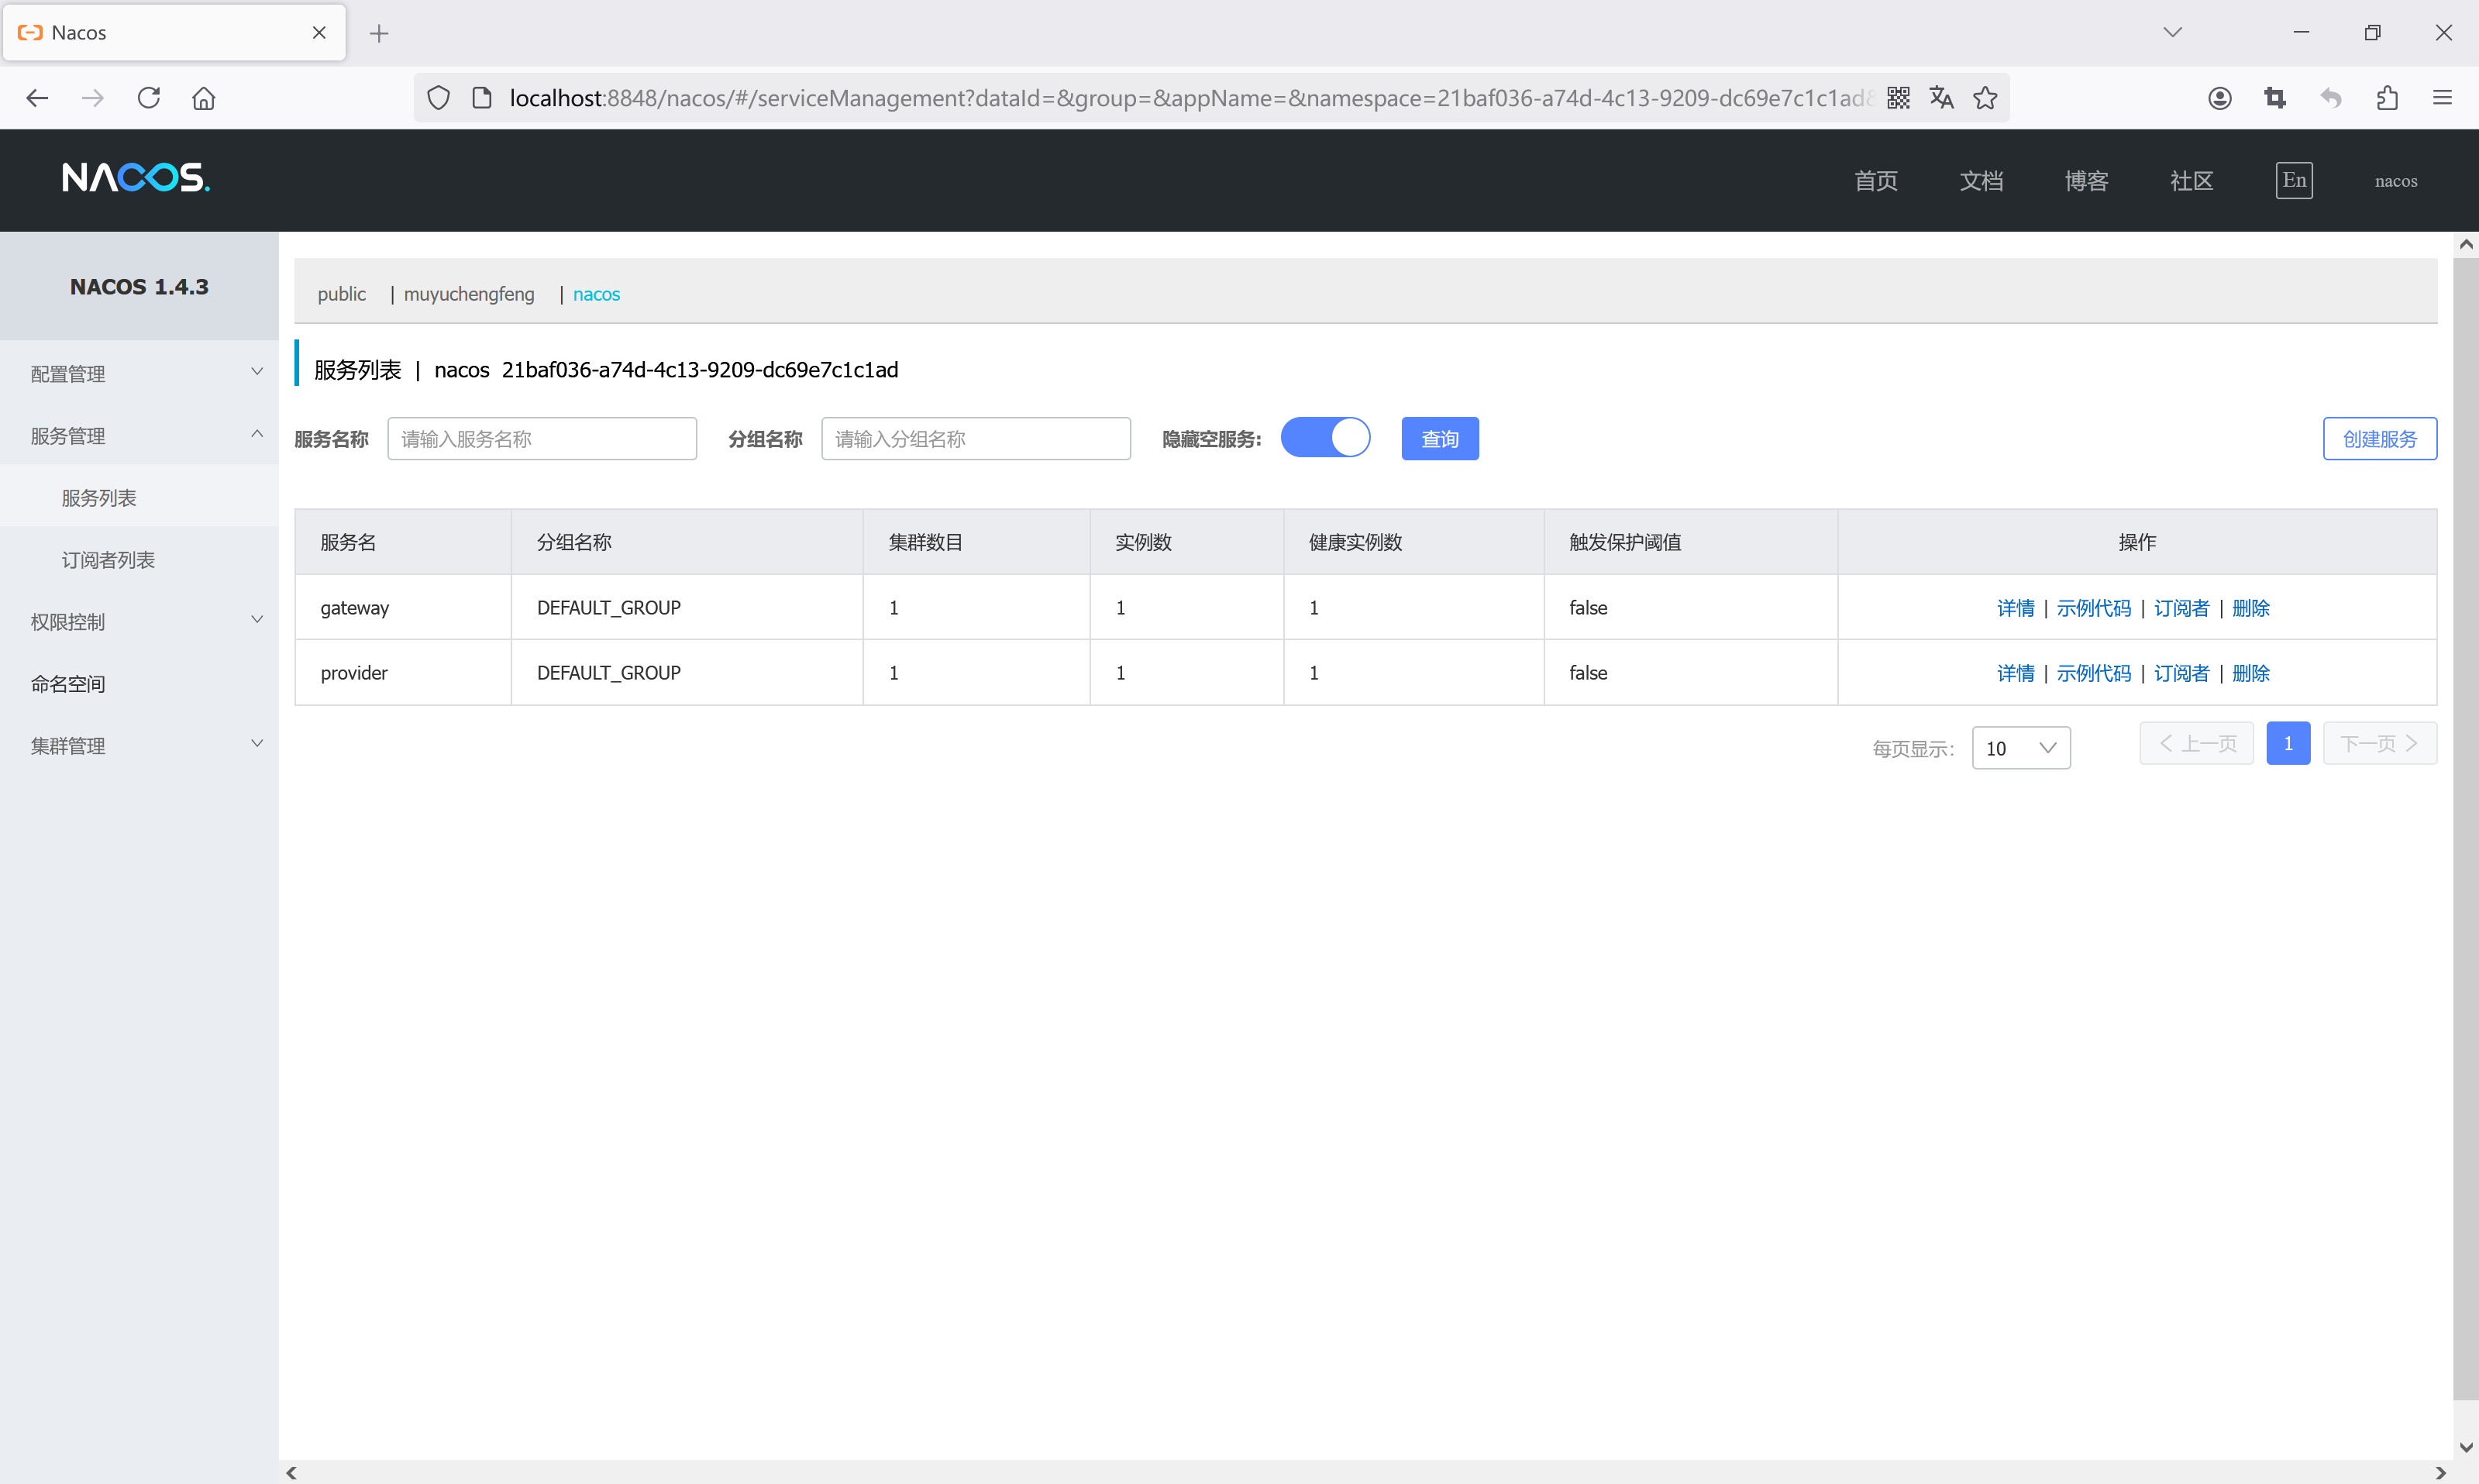
namespace: 21baf036-a74d-4c13-9209-dc69e7c1c1ad并且断言改成了以下格式,其中lb表示load balance(负载均衡),后面加上我们注册到注册中心的服务名,也就是服务提供者的的spring.application.name配置的值。
lb://服务名称
需要确保gateway和provider都注册到了nacos
好了,文章就分享到这里了,看完不要忘了点赞+收藏哦~
文章的代码已经上传到Gitee,可按需获取~
Spring Boot整合Spring Cloud Gateway案例项目![]() https://gitee.com/muyu-chengfeng/springboot-gateway.git
https://gitee.com/muyu-chengfeng/springboot-gateway.git
如果想要更深入学习gateway,可以访问Spring官网Spring Cloud Gateway


 2352
2352

 被折叠的 条评论
为什么被折叠?
被折叠的 条评论
为什么被折叠?
 到【灌水乐园】发言


