


转载请标明出处:http://blog.csdn.net/hioor/article/details/50907396
一、概述
自定义属性(attribute)是自定义View中不可或缺的一部分,在xml中输入的数据直接成为控件(View)的一部分,确实可以大大简化布局时对自定义控件的控制。
二、从xml开始讲View和ViewGroup的属性
1、从自定义属性开始了解 attr.xml 属性定义
在xml中,不论是View和ViewGroup都有很多属性,如layout_width,layout_heighth之类的,当然,这些都是系统自带的,而且,有一些属性,如android:gravity 是有固定的一些值的,如“center”、“end”等等。当然,归根结底,这些选项的实现方式,都是通过java代码实现的!但是,这个数值是怎么走过去的呢? 这里靠的是一个Values中的一个指定的xml文件 ——attr.xml ,也就是属性(attribute)文件的意思。
如系统中自带的一个属性:background
            <declare-styleable name = "名称">
                   <attr name = "background" format = "reference" />
            </declare-styleable>
其中
“名称”指的是控件(View)的名称
“background” 也就是控件中的属性的名字
“reference”指的是这个“background”属性的格式
这里可以用代码中的逻辑方式这么理解
| 项目 | 代码中的形式 | attr中的形式 |
|---|---|---|
| 属性类型 | int | reference |
| 属性名称 | number | background |
| 属性值 | 10 | @drawable/icon |
和java中的有限的几个属性类型一样,attr中的属性类型也是有限的,如下
| 编号 | 属性名称 | 属性值举例 | 名称例子 |
|---|---|---|---|
| 1 | reference:引用资源ID | @mipmap/ic_launcher…… | background |
| 2 | color:颜色值 | 112233、@color/primary_color | textcolor(TextView) |
| 3 | dimension:尺寸值 | 10dp、10px…… | layout_width |
| 4 | boolean:布尔值 | true、false | layout_centerInParent(RelativeLayout) |
| 5 | float:浮点值 | 10.0 | fromAlpha(anim.xml) |
| 6 | integer:整型值 | 1 | max(ProgressBar) |
| 7 | string:字符串 | “helloworld” | text(TextView) |
| 8 | fraction:百分数 | “helloworld” | text(TextView) |
| 9 | flag:位或运算 | center、end、right | gravity(FrameLayout) |
| 10 | enum:枚举值。 | vertical | orientation |
ps1:enum属性表示为在enum中的数个值选择一个,表示“非1即2”;flag属性表示为在flag中的数值则
是可以多个并列的,表示“1”、“2”、或者“1 | 2”
ps2:多个属性是可以一起用的,譬如:background
            <declare-styleable name = "名称">
                   <attr name = "background" format = "reference|color" />
            </declare-styleable>
2、自定义属性在xml中的使用
首先先创建一个attr.xml文件,如果有的话就不用创建了。然后在文件中加入如下代码:
<?xml version="1.0" encoding="utf-8"?>
<resources>
    <declare-styleable name="DiyView">
        <attr name="diycolor" format="color"/>
    </declare-styleable>
</resources>
于是,这个时候,就可以在xml中使用DiyView的自定义控件的 diycolor属性了?no!
因为我们还有个准备活动没有做,就是生成一个DiyView的java代码,才能表示“我们确实有了一个叫做DiyView的控件”,然后才能在xml中使用这么一个自定义的View
那么,首先,在src文件中创建一个DiyView.java,并继承View
public class DiyView extends View {
    public DiyView(Context context) {
        super(context);
    }

    public DiyView(Context context, AttributeSet attrs) {
        super(context, attrs);
    }

    public DiyView(Context context, AttributeSet attrs, int defStyleAttr) {
        super(context, attrs, defStyleAttr);
    }
}
其中有三个必须要实现的构造函数,我们暂时先不管java部分的代码,因为这是个极大的坑,需要我们整整花好久去分析,所以,只能先去xml中感受一下自定义属性要怎么玩~
以下是我的activity_main.xml中的代码
<?xml version="1.0" encoding="utf-8"?>
<RelativeLayout xmlns:android="http://schemas.android.com/apk/res/android"
    xmlns:tools="http://schemas.android.com/tools"
    android:layout_width="match_parent"
    android:layout_height="match_parent"
    tools:context="resarch.com.datatimeselector.MainActivity">
    <resarch.com.datatimeselector.DiyView
        android:layout_width="match_parent"
        android:layout_height="match_parent" />


</RelativeLayout>
然而,此时出现了这么一个问题:

Rendering Problems
The DiyView custom view has been edited more recently than the last build: Build the project.
这个时候,点击build就好了,这意味着你重新建立了xml对DiyView.java代码的联系,从现在的角度讲,xml就能够使用你的自定义View了。
然后在DiyView中加入自定义属性“diycolor”,然后随便选一种颜色就好了,代码如下
<?xml version="1.0" encoding="utf-8"?>
<RelativeLayout xmlns:android="http://schemas.android.com/apk/res/android"
    xmlns:tools="http://schemas.android.com/tools"
    android:layout_width="match_parent"
    android:layout_height="match_parent"
    xmlns:app="http://schemas.android.com/apk/res-auto"
    tools:context="resarch.com.datatimeselector.MainActivity">
    <resarch.com.datatimeselector.DiyView
        android:layout_width="200dp"
        android:layout_height="200dp"
        app:diycolor="#f90"/>
</RelativeLayout>
ps1:diycolor的前面的代码不是android,而是app
ps2:在RelativLayout里面多了一行xmlns:app=”http://schemas.android.com/apk/res-auto”表示这个app系列的属性都引用自自定义的文件attr.xml中,虽然看起来是res-auto。
当然,如果把xmlns:app……中的app改成test,那么,只要把后面的app:diycolor……里的app也改成test就好了
我相信,这个时候你看到的画面和我看到的画面一样,什么变化都没发生……还不如原来自动生成的“hello world”,比如我这边的图就是这样的:
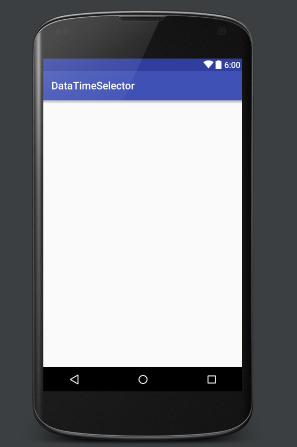
其实嘛,是这样的,这个属性值是传到java代码里了,但是,我们在java代码里什么事儿都没做呢……空空如也,所以,不管在什么类型的自定义的属性,里面放了什么数据,其实都没什么效果。这个时候我们需要返回java代码中,把它实现掉
三、java代码中的自定义属性
我们终于走到了这一步,而我们需要做的,就是先把这个自定义属性从xml中拿过来,但是三个构造函数,哪个才是有用的?无需多言,直接使用杀手锏:三合一,代码如下:
public class DiyView extends View {
    public DiyView(Context context) {
        this(context,null);
    }

    public DiyView(Context context, AttributeSet attrs) {
        this(context, attrs,0);
    }

    public DiyView(Context context, AttributeSet attrs, int defStyleAttr) {
        super(context, attrs, defStyleAttr);
    }
}
ps:就是把前两个构造函数的最终都引到第三个构造函数中,就是super改成this,然后再加上需要的参数向下一个构造函数走(如果你问我这种编码方式是哪里来的?我只能说:看android系统定义的某些View的源码)
然后,使用一个叫做TypeArray的类来接收这个自定义属性的数
    public DiyView(Context context, AttributeSet attrs, int defStyleAttr) {
        super(context, attrs, defStyleAttr);
        TypedArray a = context.obtainStyledAttributes(attrs,R.styleable.DiyView);
        int color = a.getColor(R.styleable.DiyView_diycolor,Color.RED);
        a.recycle();
    }
TypeArray接收了attr里定义在 name=DiyView中的所有的自定义属性,当然,这么多的数据不可能用一个指针来搞定,我们只能从这个集合中取出一部分来使用
所以,按照这种尿性,这个 对象 a 中,可以get到我们之前讲过的10种属性的数据,当然
a.getColor(R.sytleable.DiyView_diycolor,Color.RED),为了以防报错(也就是属性没给值的情况),这个地方需要弄一个默认值 ,如这里的参数“Color.RED”。
a.recycle(),“让TypeArray回到循环里,等待下一次的调用”是源码中的解释,“但是用过这个方法的方法不能再次使用它了”,这说明还有其他的方法会用到这个TypeArray,但是,AttributeSet的值不是我们自己创建(new)出来的,也就说,这个数值会交给下一个View去使用
接下来,看看我们这个定义的属性是否真的传入了java文件中,我们可以直接加入如下一行代码:
setBackgroundColor(color);现在我们回到刚才的xml中去看看是否有效果:
(这时候会出现一段熟悉的字样,没错,我们这个时候需要点击蓝色字:build)
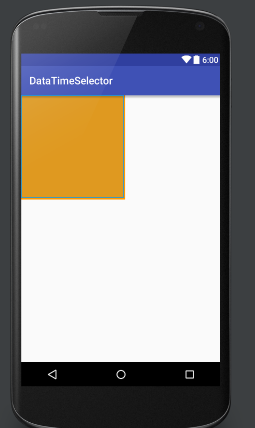
ps1:这里,f90本来就是屎黄色……
ps2:代码里的setBackgroundColor()方法就是设置这个view的背景颜色
四、小结
自定义属性的步骤:
1.创建attrs.xml文件
2.在xml文件中使用
3.在java文件中获取并使用当然,讲到目前为止,也只是讲到关于View的知识的一个小点。当然,按照这个attrs.xml的推论往回走,我们可以知道,其实在android,这些控件的xml属性都是在某个系统的attrs.xml中定义过的,然后再在对应的View中进行接收,然后进行处理!下一节会开始讲View在java文件中的处理!


 565
565

 被折叠的 条评论
为什么被折叠?
被折叠的 条评论
为什么被折叠?
 到【灌水乐园】发言


