


AndroidL(Lollipop)给我们带来了两个Widget的第二个——CardView。
CardView作为一个layout诞生,它其实一直存在着。先来看看官网的效果图:
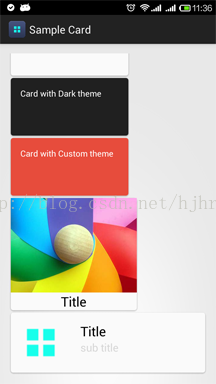
是不是感觉很熟悉?是的,一个layout,设置background,background使用shape来设置圆角、边框等,然后layout里放上我们的view。
这个是我们以前实现卡片视图的常用方式,因为我们使用比较频繁,这次谷歌把它封装成一个layout直接供我们使用。
CardView除了能设置圆角外,它还能设置背景颜色和阴影。
下面我讲解怎么使用CardView:
想要使用CardView,不能和RecyclerView、Palette以及其他开源框架一样直接使用jar包,而需要把谷歌提供的cardView兼容工程放到到你的工程同目录下导入Eclipse:
在你的SDK目录下sdk—>extras—>android—>m2repository—>com—>android—>support—>cardview-v7—>21.0.0文件夹里找到如图3的文件,把后缀.aar改成.zip格式解压出来,解压出来的文件就是我们需要用到的library工程了。
图1
图2 图3
把提取出来的工程拷贝到你的工程同目录下,再导入Eclipse中,
设定为为library:
之后你就可以设定你自己工程,引用刚才library:
之后我们就可以正常使用CardView了:
使用的时候需要注意,必须要使用xmlns:card_view="http://schemas.android.com/apk/res-auto"这个命名空间,不然我们没法使用它属性来设定圆角、阴影等
<?xml version="1.0" encoding="utf-8"?>
<RelativeLayout xmlns:android="http://schemas.android.com/apk/res/android"
    android:layout_width="match_parent"
    android:layout_height="match_parent" >

    <android.support.v7.widget.CardView
        xmlns:card_view="http://schemas.android.com/apk/res-auto"
        android:layout_width="match_parent"
        android:layout_height="match_parent"
        android:layout_margin="8dp"
        android:orientation="horizontal"
        card_view:cardCornerRadius="5dp" >

        <RelativeLayout
            android:layout_width="match_parent"
            android:layout_height="60dip" >

            <TextView
                android:id="@+id/text"
                android:layout_width="wrap_content"
                android:layout_height="wrap_content"
                android:layout_centerInParent="true"
                android:text="test" />
        </RelativeLayout>
    </android.support.v7.widget.CardView>

</RelativeLayout>
好了,要说的基本讲完了,效果图我就不上了,具体可以看看我上传的demo:
如有转载,请注明出处:http://blog.csdn.net/hjhrq1991


 1090
1090

 被折叠的 条评论
为什么被折叠?
被折叠的 条评论
为什么被折叠?
 到【灌水乐园】发言


