


TabLayout结合ViewPager和Fragment实现多页面滑动
一、官方简介:(原文翻译,有待改善)
TabLayout提供了一个水平布局来显示tab(标签)。tab的显示是通过调用TabLayout的实例来实现的。该实例调用newTab()方法来新建一个tab,该tab分别调用setText(int) 和 setIcon(int) 方法来改变其标题和图标。TabLayout实例调用addTab(Tab)方法将tab添加到TabLayout布局后,才能显示出被添加的tab。例如:
 TabLayout tabLayout = ...;
 tabLayout.addTab(tabLayout.newTab().setText("Tab 1"));
 tabLayout.addTab(tabLayout.newTab().setText("Tab 2"));
 tabLayout.addTab(tabLayout.newTab().setText("Tab 3"));
你应该通过setOnTabSelectedListener(OnTabSelectedListener)方法来设置一个监听器来监听所有tab的选定状态变化。如果你结合ViewPager使用,可以用setupWithViewPager(ViewPager)方法来关联TabLayout和ViewPager。连同此布局,可以使用setupWithViewPager(翻页效果)两个链接在一起。TabLayout布局将被PagerAdapter的页面标题自动填充。
你也可以通过在TabLayout布局内部添加TabItem插件来新建tab。例子如下:
<android.support.design.widget.TabLayout
         android:layout_height="wrap_content"
         android:layout_width="match_parent">

     <android.support.design.widget.TabItem
             android:text="@string/tab_text"/>

     <android.support.design.widget.TabItem
             android:icon="@drawable/ic_android"/>

 </android.support.design.widget.TabLayout>
二、使用例子(demo)
学习该例子前,你应掌握的知识点:1.Fragment,2.ViewPager, 3.ButterKnife (View注入框架)的使用。
demo的Github开源地址:https://github.com/RimonHwang/TabLayout
1.三个页面的Fragment布局文件:
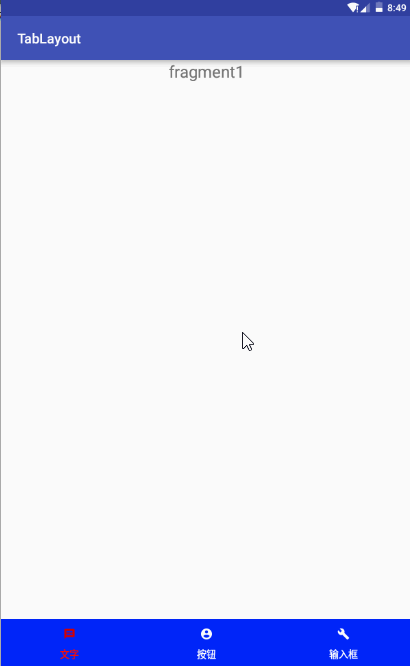
fragment1.xml
<?xml version="1.0" encoding="utf-8"?>
<LinearLayout xmlns:android="http://schemas.android.com/apk/res/android"
              android:layout_width="match_parent"
              android:layout_height="match_parent"
              android:orientation="vertical">

    <TextView
        android:id="@+id/textView"
        android:layout_width="wrap_content"
        android:layout_height="wrap_content"
        android:layout_gravity="center_horizontal"
        android:text="fragment1"
        android:textSize="24sp"/>
</LinearLayout>
fragment2.xml
<?xml version="1.0" encoding="utf-8"?>
<LinearLayout xmlns:android="http://schemas.android.com/apk/res/android"
              android:orientation="vertical"
              android:layout_width="match_parent"
              android:layout_height="match_parent">

    <Button
        android:layout_width="wrap_content"
        android:layout_height="wrap_content"
        android:text="fragment2"
        android:id="@+id/button"
        android:layout_gravity="center_horizontal"/>
</LinearLayout>
fragment3.xml
<?xml version="1.0" encoding="utf-8"?>
<LinearLayout xmlns:android="http://schemas.android.com/apk/res/android"
              android:layout_width="match_parent"
              android:layout_height="match_parent"
              android:orientation="vertical"
    >

    <EditText
        android:id="@+id/editText"
        android:layout_width="match_parent"
        android:layout_height="wrap_content"
        android:layout_gravity="center_horizontal"
        android:hint="输入用户名"/>

    <EditText
        android:id="@+id/editText2"
        android:layout_width="match_parent"
        android:layout_height="wrap_content"
        android:layout_gravity="center_horizontal"
        android:ems="10"
        android:hint="输入密码"
        android:inputType="textPassword"/>

    <Button
        android:layout_width="wrap_content"
        android:layout_height="wrap_content"
        android:text="登陆"
        android:id="@+id/button2"
        android:layout_gravity="center_horizontal"/>

    <TextView
        android:id="@+id/textView2"
        android:layout_width="match_parent"
        android:layout_height="wrap_content"
        android:layout_gravity="center_horizontal"
        android:text="@string/inputusername"
        android:textAppearance="?android:attr/textAppearanceLarge"
        />

    <TextView
        android:layout_width="wrap_content"
        android:layout_height="wrap_content"
        android:textAppearance="?android:attr/textAppearanceLarge"
        android:id="@+id/textView3"
        android:layout_gravity="center_horizontal"
        android:textColor="#ff0000"/>

</LinearLayout>
2.三个布局对应的Fragment类
Fragment1.java
package com.example.tablayout;

import android.os.Bundle;
import android.support.annotation.Nullable;
import android.support.v4.app.Fragment;
import android.view.LayoutInflater;
import android.view.View;
import android.view.ViewGroup;

/**
 * Created by Rimon on 2016/5/24.
 */
public class Fragment1 extends Fragment{
    @Nullable
    @Override
    public View onCreateView(LayoutInflater inflater, @Nullable ViewGroup container, @Nullable Bundle savedInstanceState) {
        return inflater.inflate(R.layout.fragment_1,container,false);
    }
}
Fragment2.java
package com.example.tablayout;

import android.os.Bundle;
import android.support.annotation.Nullable;
import android.support.v4.app.Fragment;
import android.view.LayoutInflater;
import android.view.View;
import android.view.ViewGroup;
import android.widget.Button;
import android.widget.Toast;

import butterknife.BindView;
import butterknife.ButterKnife;

/**
 * Created by Rimon on 2016/5/24.
 */
public class Fragment2 extends Fragment {
    @BindView(R.id.button)
    Button button;

    @Nullable
    @Override
    public View onCreateView(LayoutInflater inflater, @Nullable ViewGroup container, @Nullable
    Bundle savedInstanceState) {
        View view = inflater.inflate(R.layout.fragment_2, container, false);
        ButterKnife.bind(this, view);
        button.setOnClickListener(new View.OnClickListener() {
            @Override
            public void onClick(View v) {
                Toast.makeText(getContext(),"你点击了第2个Fragment中的按钮",Toast.LENGTH_SHORT).show();
            }
        });
        return view;
    }
}
Fragment3.java
package com.example.tablayout;

import android.os.Bundle;
import android.support.annotation.Nullable;
import android.support.v4.app.Fragment;
import android.view.LayoutInflater;
import android.view.View;
import android.view.ViewGroup;
import android.widget.Button;
import android.widget.EditText;
import android.widget.TextView;

import butterknife.BindView;
import butterknife.ButterKnife;

/**
 * Created by Rimon on 2016/5/24.
 */
public class Fragment3 extends Fragment {
    @BindView(R.id.editText)
    EditText editText;
    @BindView(R.id.button2)
    Button button2;
    @BindView(R.id.textView3)
    TextView textView3;

    @Nullable
    @Override
    public View onCreateView(LayoutInflater inflater, @Nullable ViewGroup container, @Nullable
    Bundle savedInstanceState) {
        View view = inflater.inflate(R.layout.fragment_3, container, false);
        ButterKnife.bind(this, view);
        button2.setOnClickListener(new View.OnClickListener() {
            @Override
            public void onClick(View v) {
                textView3.setText(editText.getText());
            }
        });

        return view;
    }
}
3.主界面布局activity_main.xml
<?xml version="1.0" encoding="utf-8"?>
<LinearLayout
    xmlns:android="http://schemas.android.com/apk/res/android"
    xmlns:app="http://schemas.android.com/apk/res-auto"
    xmlns:tools="http://schemas.android.com/tools"
    android:layout_width="match_parent"
    android:layout_height="match_parent"
    android:orientation="vertical"
    tools:context="com.example.tablayout.MainActivity">

    <android.support.v4.view.ViewPager
        android:id="@+id/viewPager"
        android:layout_width="match_parent"
        android:layout_height="0dp"
        android:layout_weight="1"/>
    <android.support.design.widget.TabLayout
        android:layout_width="match_parent"
        android:layout_height="wrap_content"
        android:background="@color/titleBlue"
        app:tabIndicatorColor="@color/red"
        app:tabSelectedTextColor="@color/red"
        app:tabTextColor="@color/white"
        android:id="@+id/tabLayout"/>


</LinearLayout>
4.MainActivity.java
package com.example.tablayout;

import android.os.Bundle;
import android.support.design.widget.TabLayout;
import android.support.design.widget.TabLayout.Tab;
import android.support.v4.app.Fragment;
import android.support.v4.app.FragmentManager;
import android.support.v4.app.FragmentStatePagerAdapter;
import android.support.v4.view.ViewPager;
import android.support.v7.app.AppCompatActivity;

import butterknife.BindView;
import butterknife.ButterKnife;

public class MainActivity extends AppCompatActivity {

    PageAdapter adapter;
    @BindView(R.id.tabLayout)
    TabLayout tabLayout;
    @BindView(R.id.viewPager)
    ViewPager viewPager;

    @Override
    protected void onCreate(Bundle savedInstanceState) {
        super.onCreate(savedInstanceState);
        setContentView(R.layout.activity_main);
        ButterKnife.bind(this);

        initTabs();//初始化Tabs指示器
        adapter = new PageAdapter(getSupportFragmentManager(), tabLayout.getTabCount());
        //创建页面适配器PageAdpter
        viewPager.setAdapter(adapter);
        //TabLayoutOnPageChangeListener 实现了
        //ViewPager.OnPageChangeListener接口,可作为addOnPageChangeListener()的参数,关联Tabs和Viewpager的位置变化;
        viewPager.addOnPageChangeListener(new TabLayout.TabLayoutOnPageChangeListener(tabLayout));
        tabLayout.setOnTabSelectedListener(new TabLayout.OnTabSelectedListener() {
            @Override
            public void onTabSelected(Tab tab) {
                viewPager.setCurrentItem(tab.getPosition());
                switch (tab.getPosition()) {
                    case 0:
                        tab.setIcon(R.drawable.ic_message_red_a700_18dp);
                        break;
                    case 1:
                        tab.setIcon(R.drawable.ic_account_circle_red_a700_18dp);
                        break;
                    case 2:
                        tab.setIcon(R.drawable.ic_build_red_a700_18dp);

                    default:
                        break;
                }
            }

            @Override
            public void onTabUnselected(Tab tab) {
                switch (tab.getPosition()) {
                    case 0:
                        tab.setIcon(R.drawable.ic_message_white_18dp);
                        break;
                    case 1:
                        tab.setIcon(R.drawable.ic_account_circle_white_18dp);
                        break;
                    case 2:
                        tab.setIcon(R.drawable.ic_build_white_18dp);
                        break;
                    default:
                        break;
                }

            }

            @Override
            public void onTabReselected(Tab tab) {

            }
        });


    }

    private void initTabs() {
        tabLayout.addTab(tabLayout.newTab().setText("文字").setIcon(R.drawable
                .ic_message_red_a700_18dp));
        tabLayout.addTab(tabLayout.newTab().setText("按钮").setIcon(R.drawable
                .ic_account_circle_white_18dp));
        tabLayout.addTab(tabLayout.newTab().setText("输入框").setIcon(R.drawable.ic_build_white_18dp));
        tabLayout.setTabGravity(TabLayout.GRAVITY_FILL);//使得三个Tab适配屏幕宽度
    }

    //新建PageAdapter类继承FragmentStatePagerAdapter,构造方法中传入代表Tab个数的参数numOfTabs;
    public class PageAdapter extends FragmentStatePagerAdapter {
        int numOfTabs;

        public PageAdapter(FragmentManager fm, int numOfTabs) {
            super(fm);
            this.numOfTabs = numOfTabs;
        }

        @Override
        public Fragment getItem(int position) {
            switch (position) {
                case 0:
                    Fragment1 fragment1 = new Fragment1();
                    return fragment1;
                case 1:
                    Fragment2 fragment2 = new Fragment2();
                    return fragment2;
                case 2:
                    Fragment3 fragment3 = new Fragment3();
                    return fragment3;
            }
            return null;
        }

        @Override
        public int getCount() {
            return numOfTabs;
        }
    }
}


 1344
1344

 被折叠的 条评论
为什么被折叠?
被折叠的 条评论
为什么被折叠?
 到【灌水乐园】发言


