


1.Navigation主要作用
方便管理Fragment
(1)方便我们管理Fragment页面的切换
(2)可视化的页面导航图,便于理清页面间的关系。
(3)通过destination和action完成页面间的导航
(4)类型安全的参数传递
(5)通过NavigationUI类,对底部导航,抽屉菜单,ActionBar的菜单导航进行统一的管理。
(6)支持深层链接Deeplink。
2.使用Navigation切换Fragment
2.1三个主要元素
三个主要元素
Navigation Graph
NavHostFragment
NavController
当要切换Fragment时,使用NavController对象, 控制跳转到Navigation Graph中的指定Fragment,并展示到容器NavHostFragment里。
2.2步骤
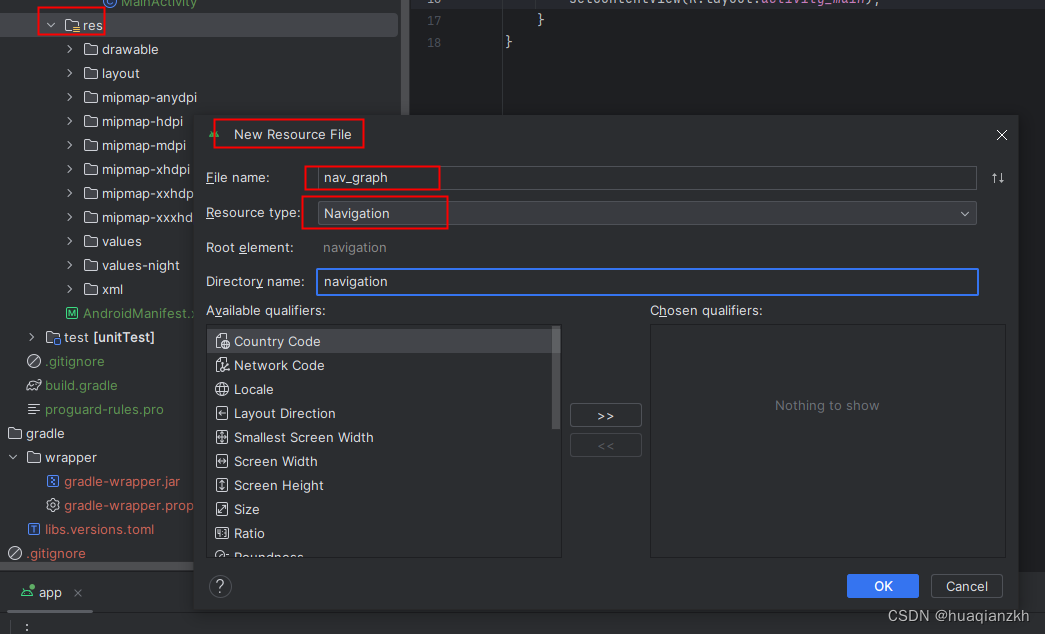
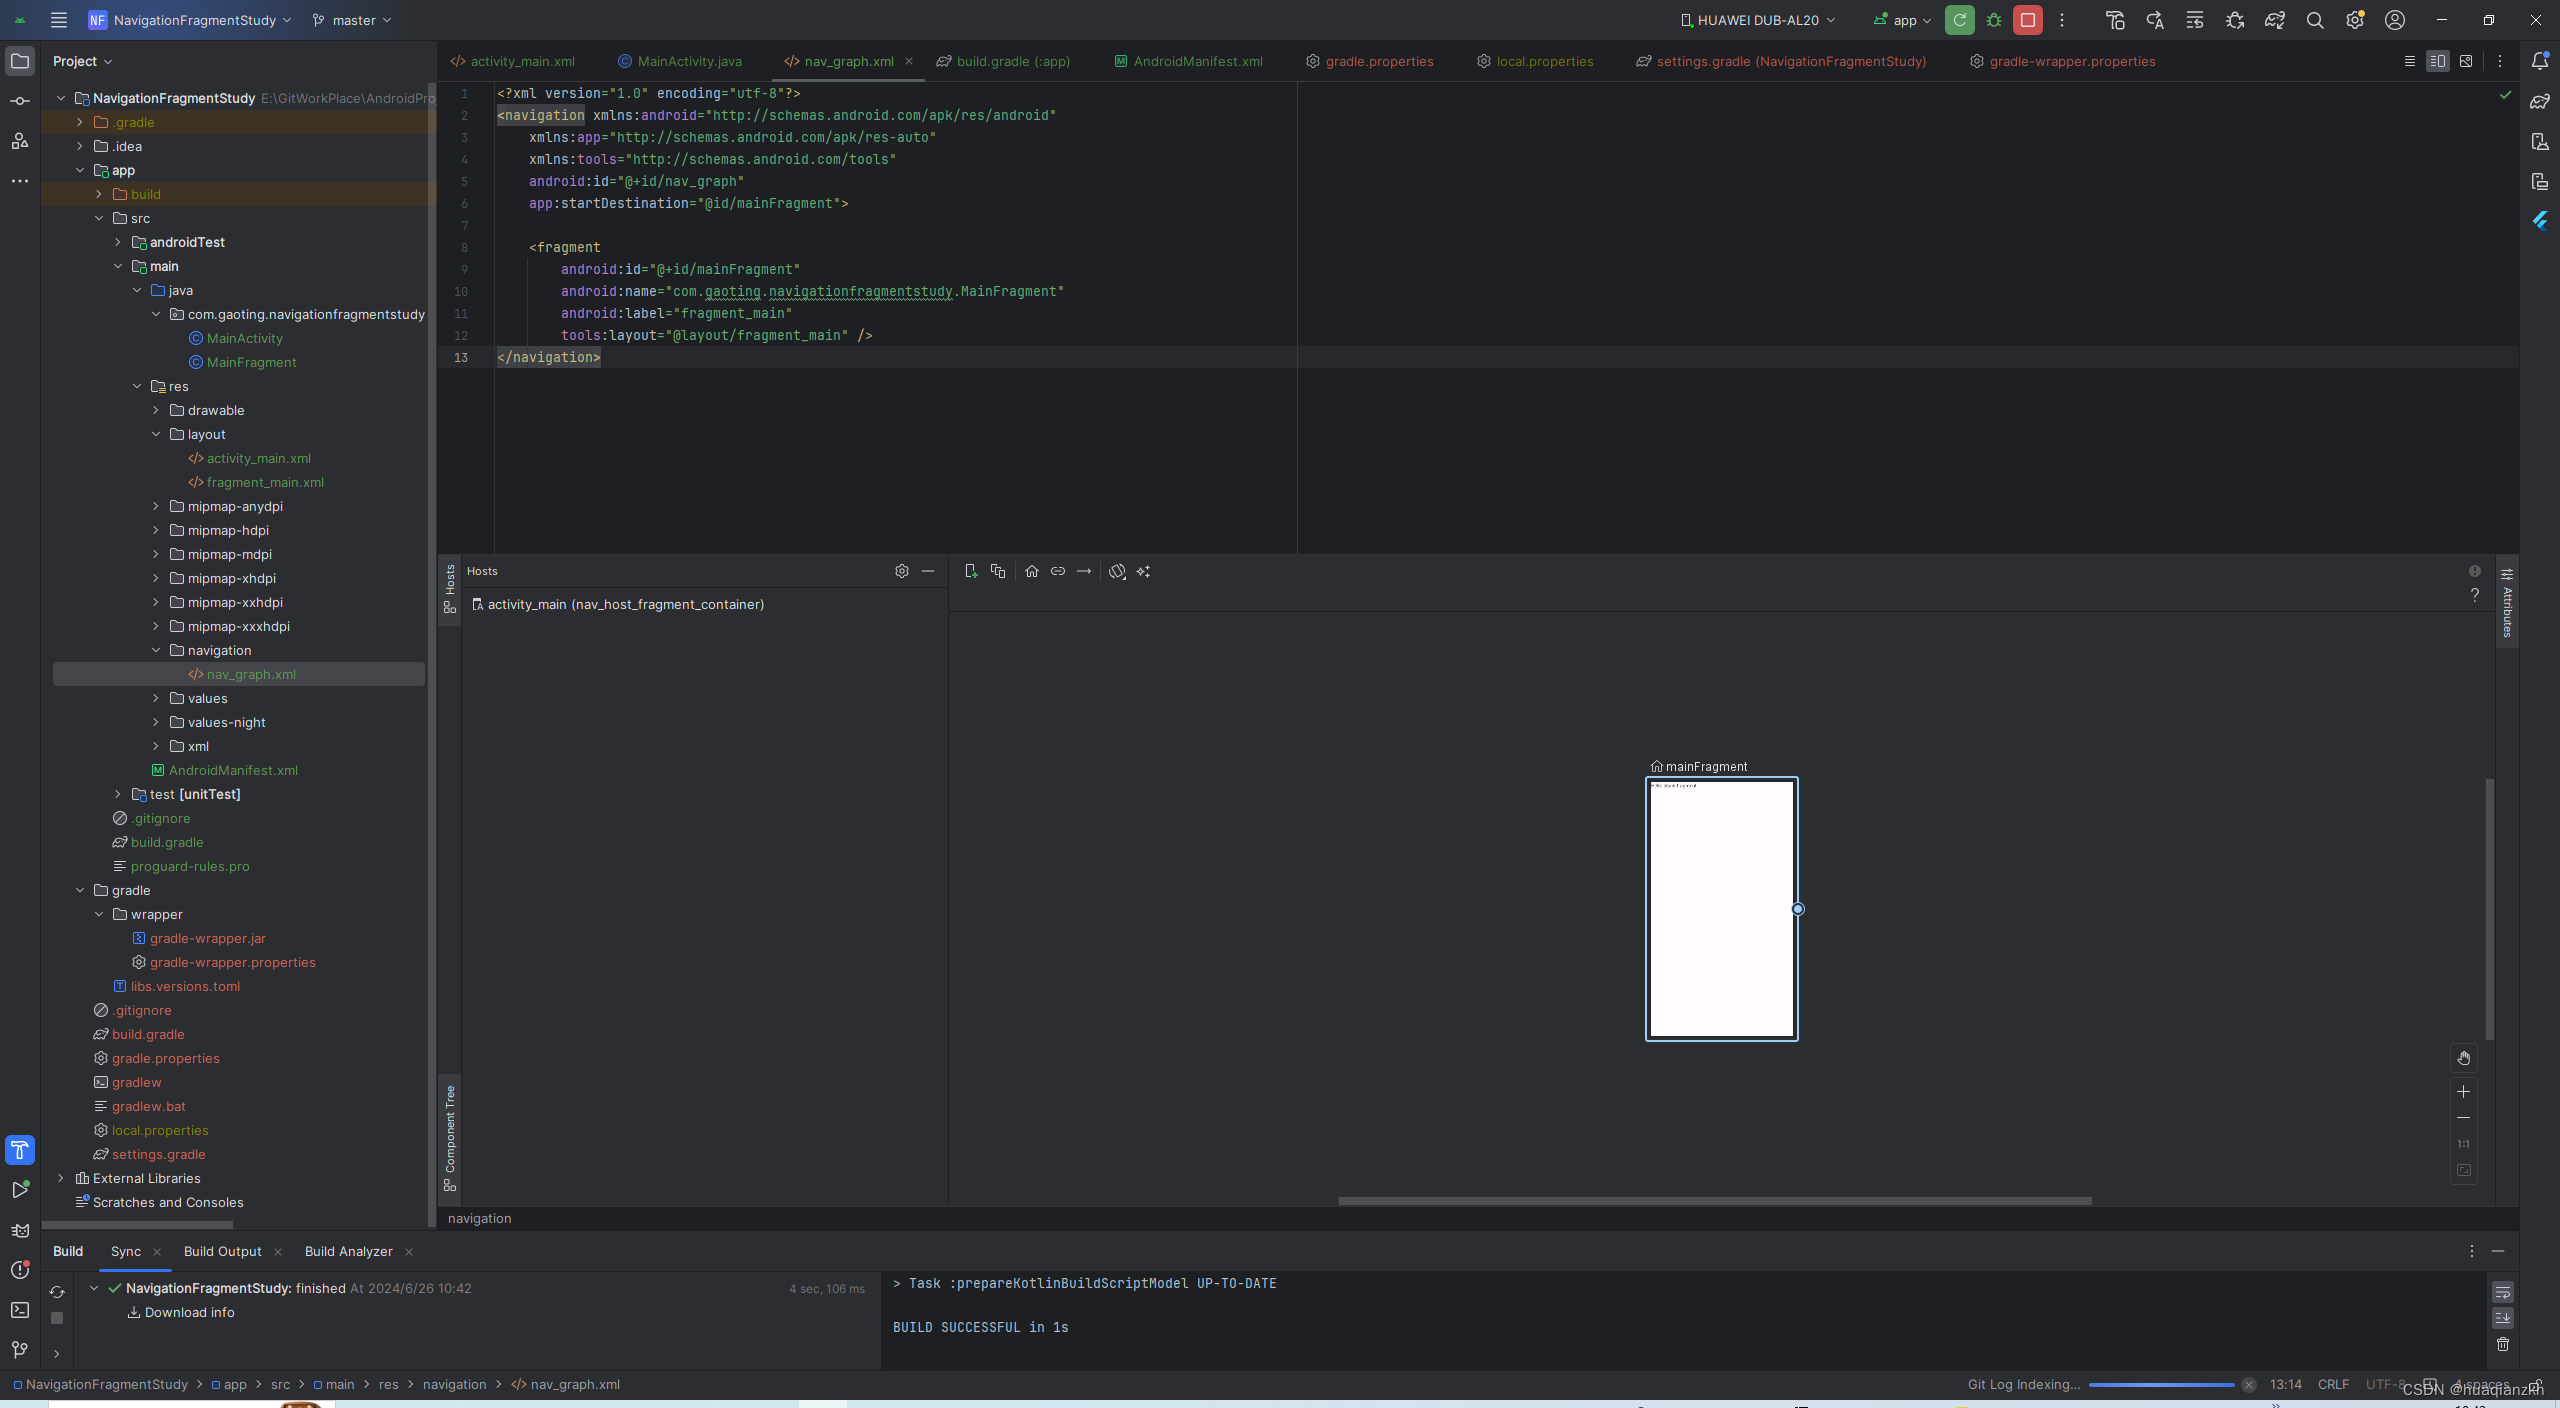
1)新建nav_graph
res右键>点击New >Android Resource File。

按提示安装依赖,最后可以看到如下图效果。
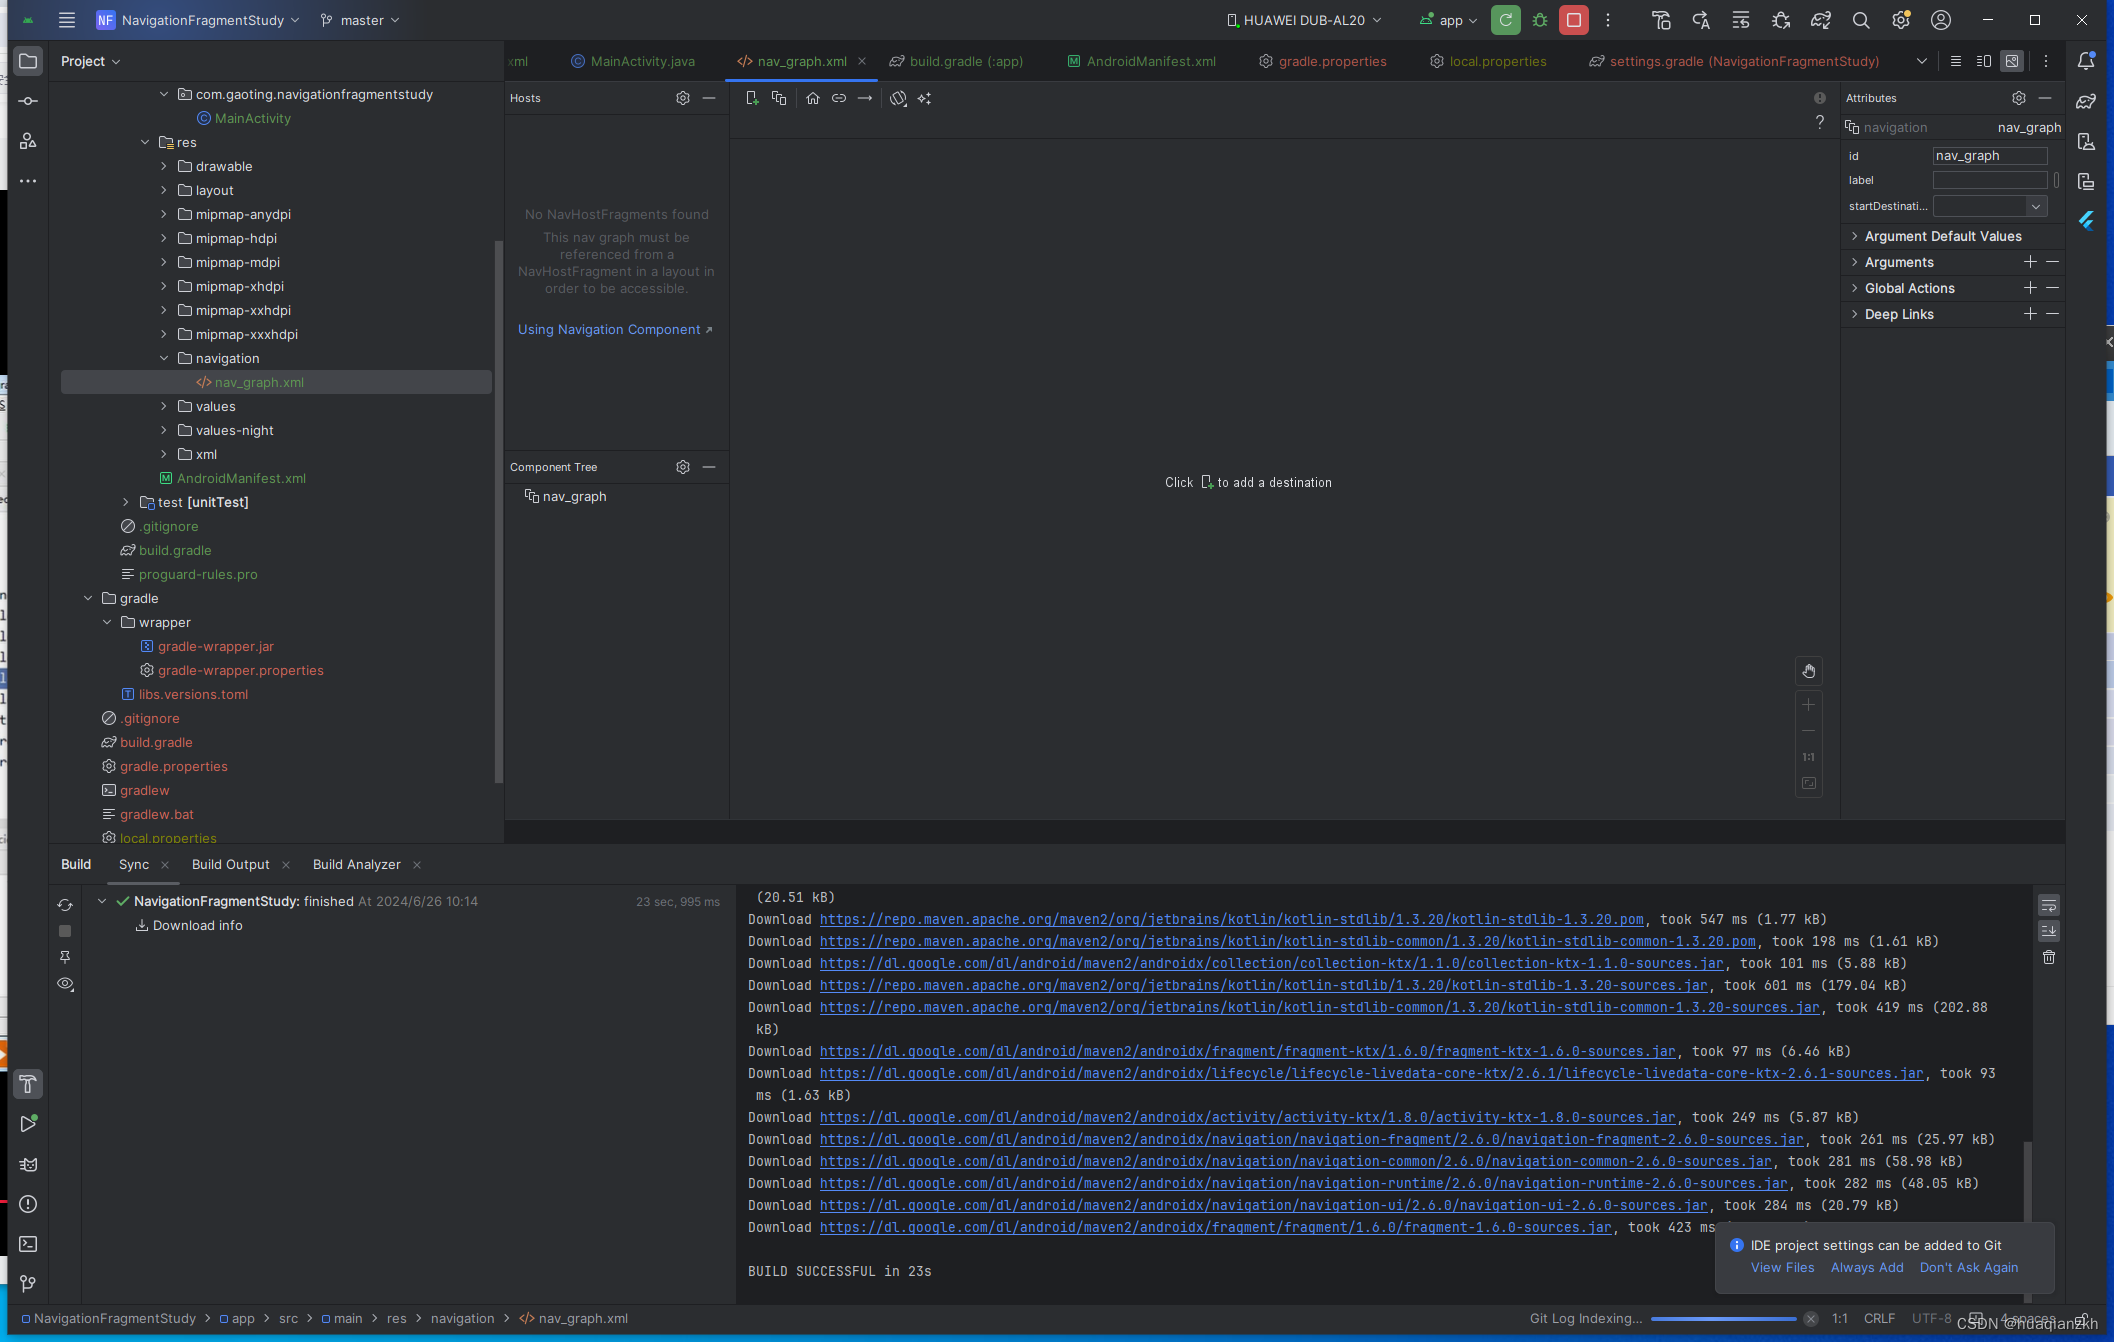
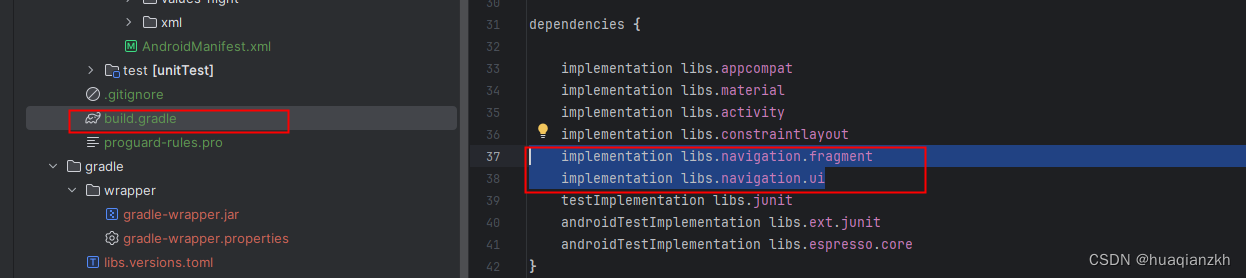
可以在项目app下面的build.gradle文件看到增加的库。
2)在Activity的layout布局里声明HostFragment。
<?xml version="1.0" encoding="utf-8"?>
<androidx.constraintlayout.widget.ConstraintLayout xmlns:android="http://schemas.android.com/apk/res/android"
    xmlns:app="http://schemas.android.com/apk/res-auto"
    xmlns:tools="http://schemas.android.com/tools"
    android:id="@+id/main"
    android:layout_width="match_parent"
    android:layout_height="match_parent"
    tools:context=".MainActivity">

<fragment
    android:id="@+id/nav_host_fragment_container"
    android:name="androidx.navigation.fragment.NavHostFragment"
    app:navGraph = "@navigation/nav_graph"
    android:layout_width="match_parent"
    android:layout_height="match_parent"/>

</androidx.constraintlayout.widget.ConstraintLayout>
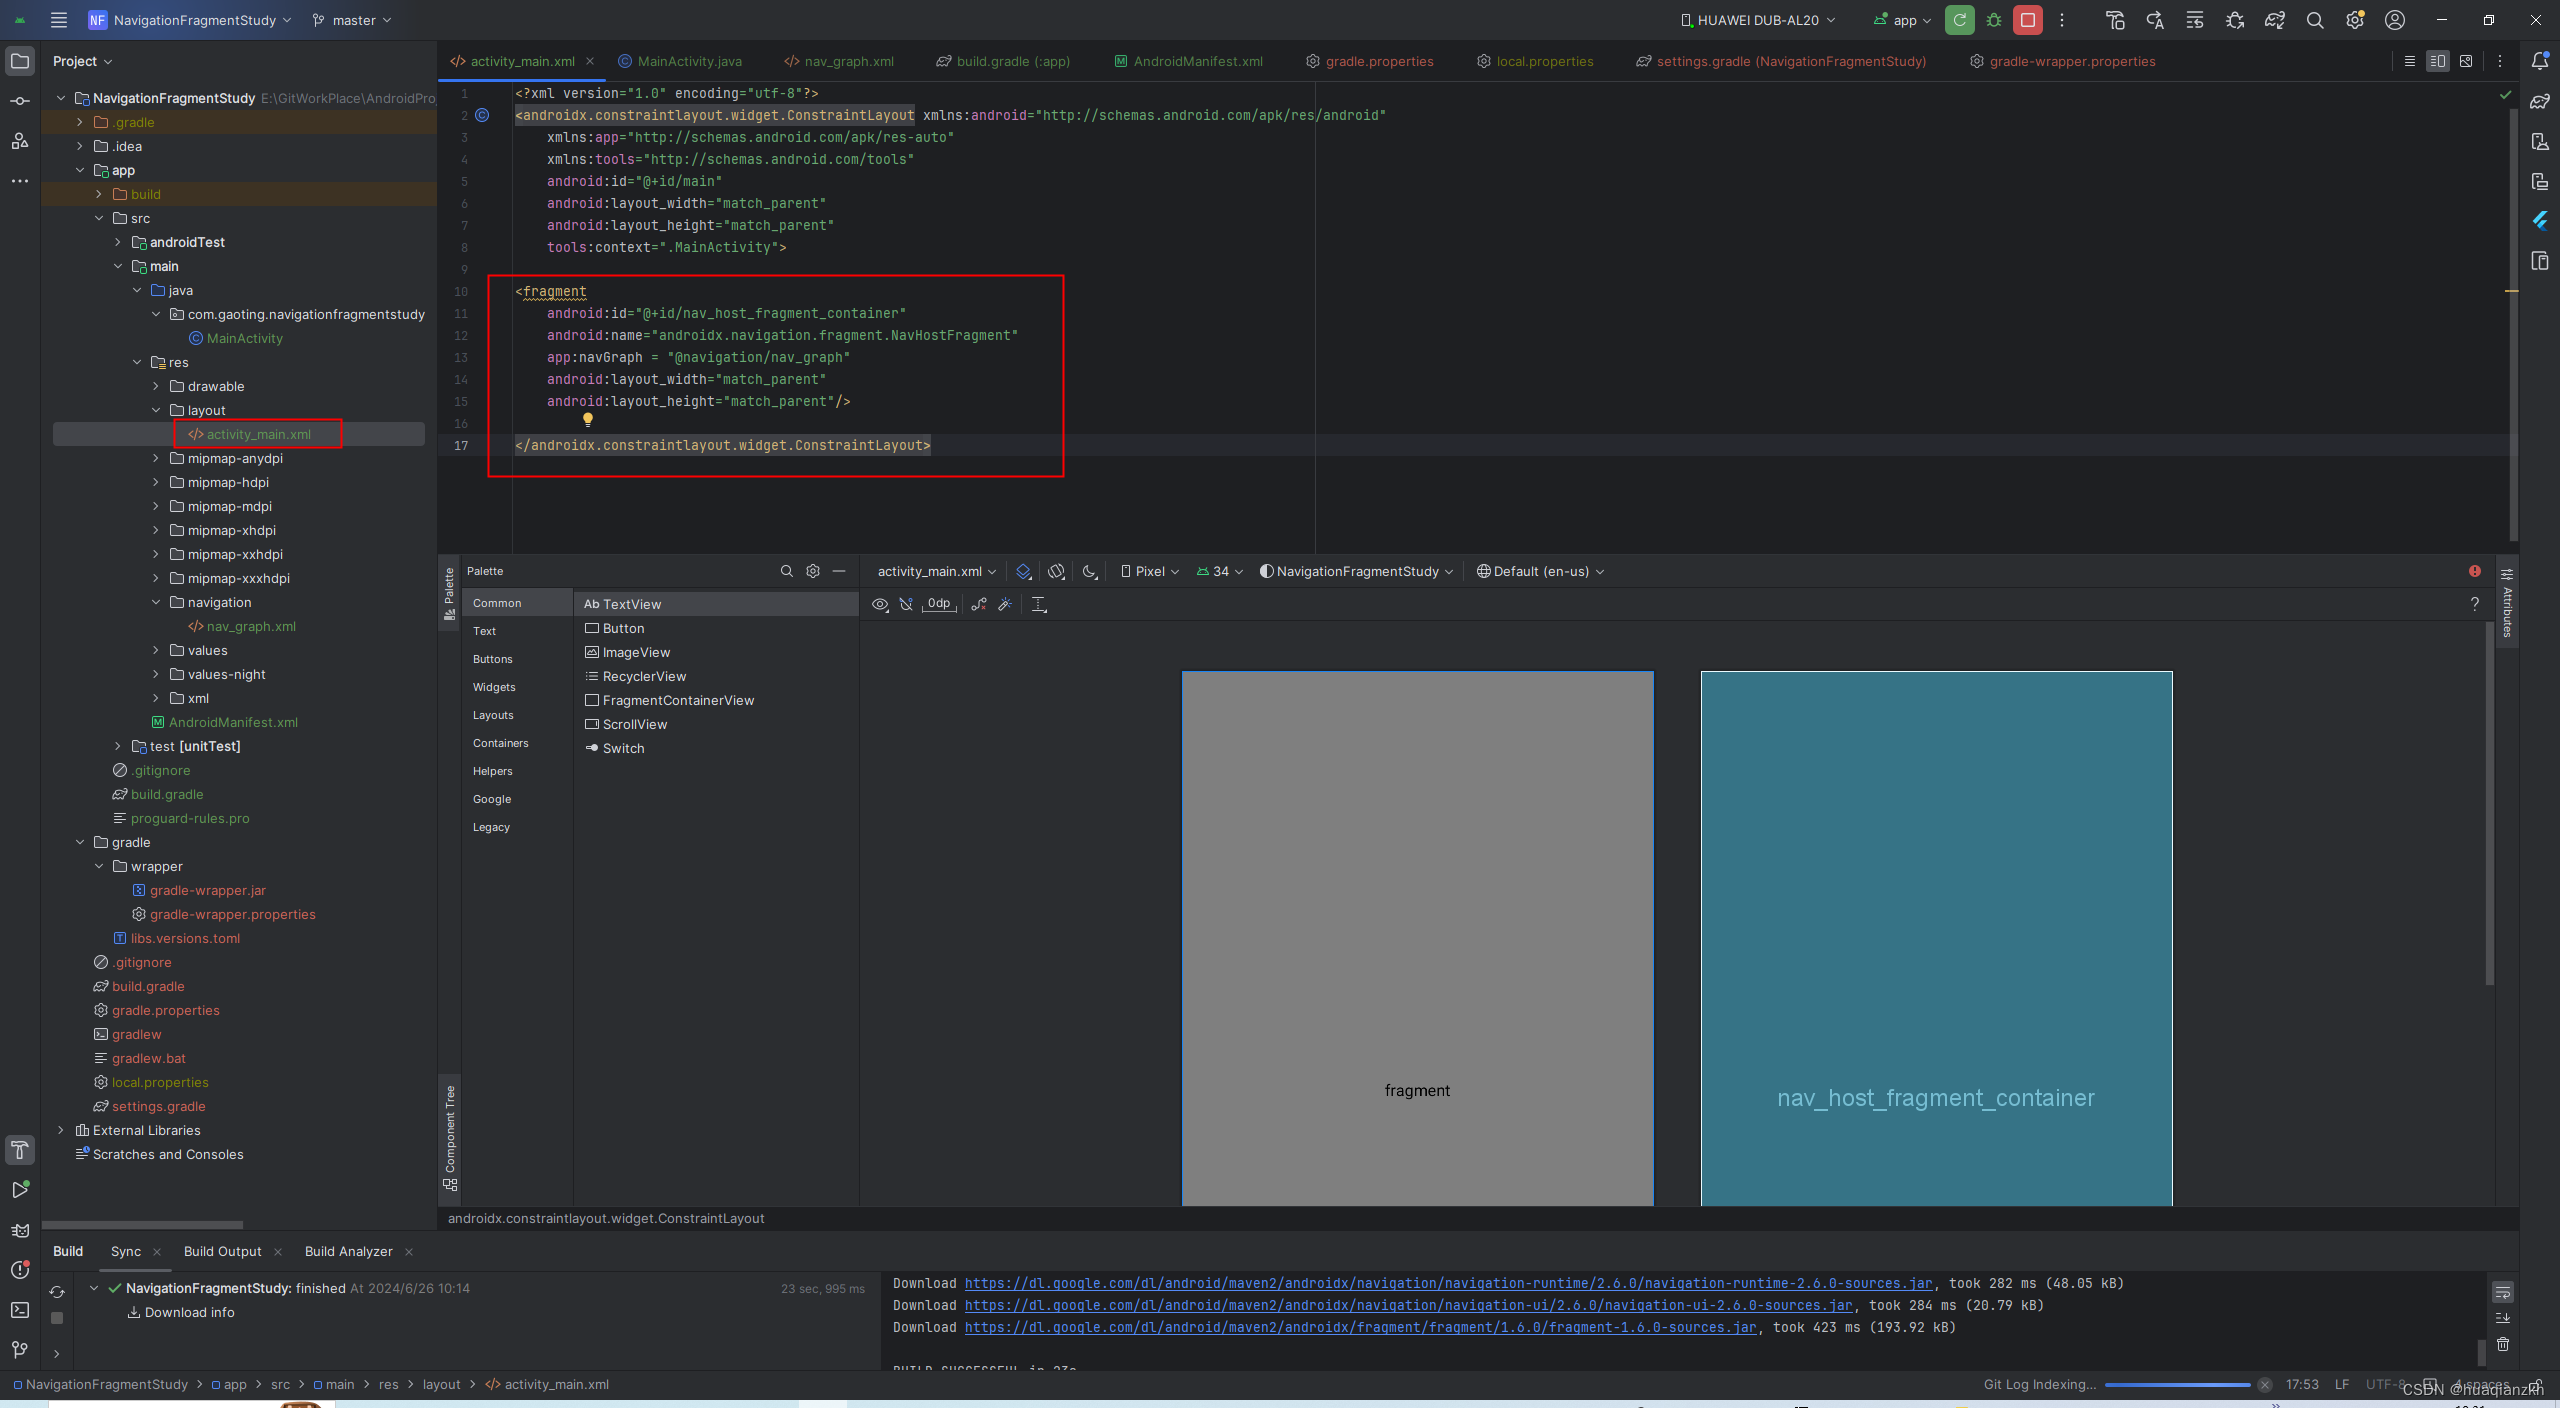
hosts看到宿主容器已经有了。

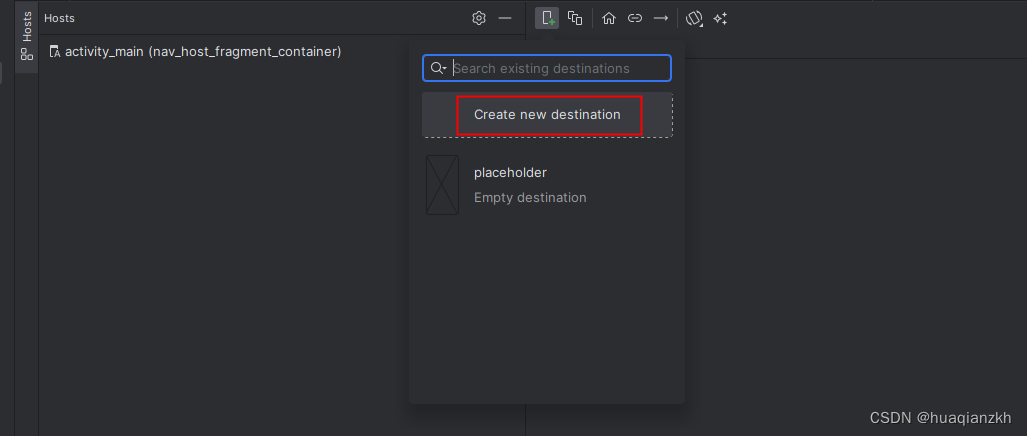
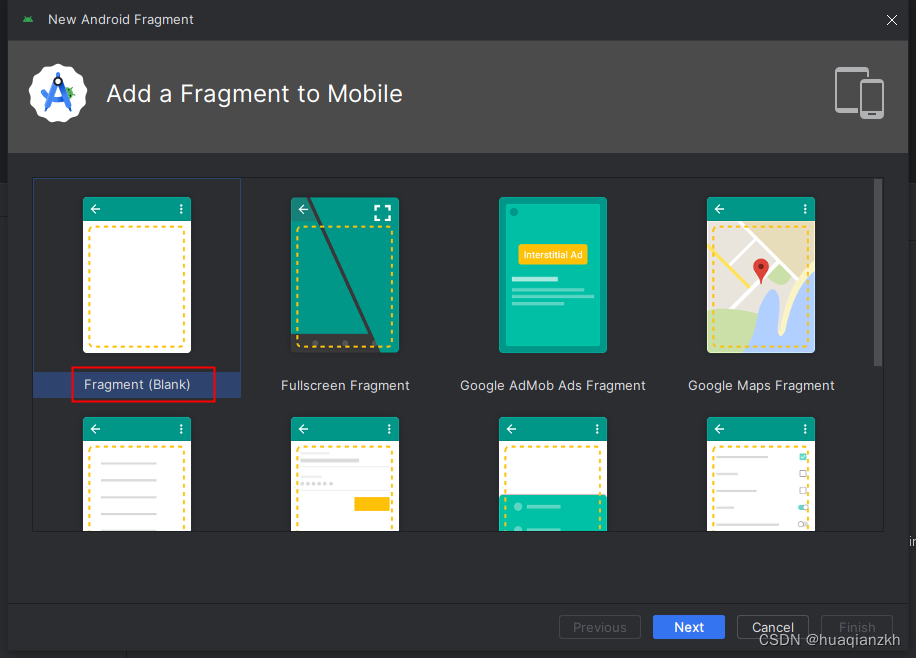
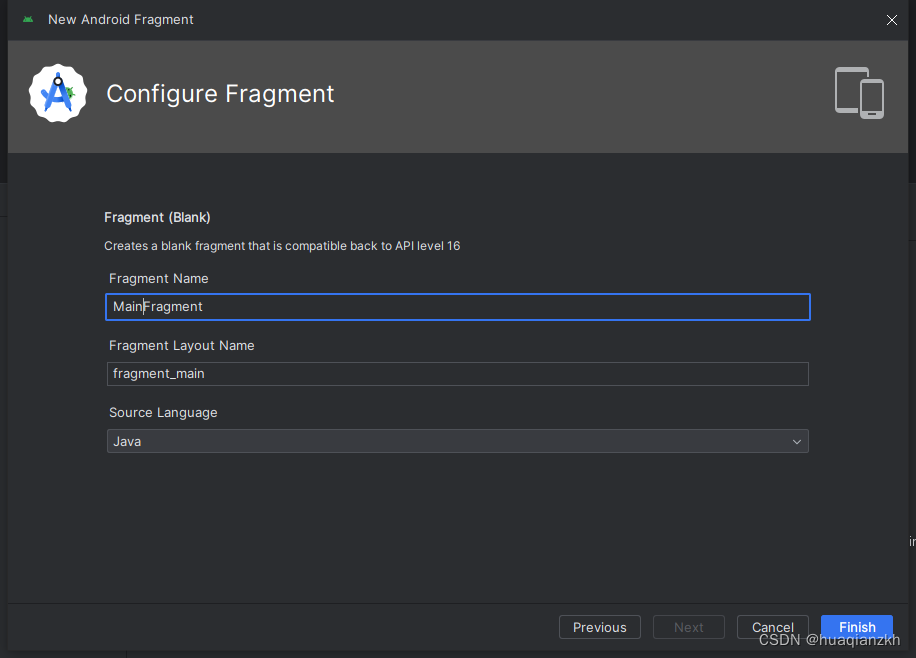
3)创建Fragment页面
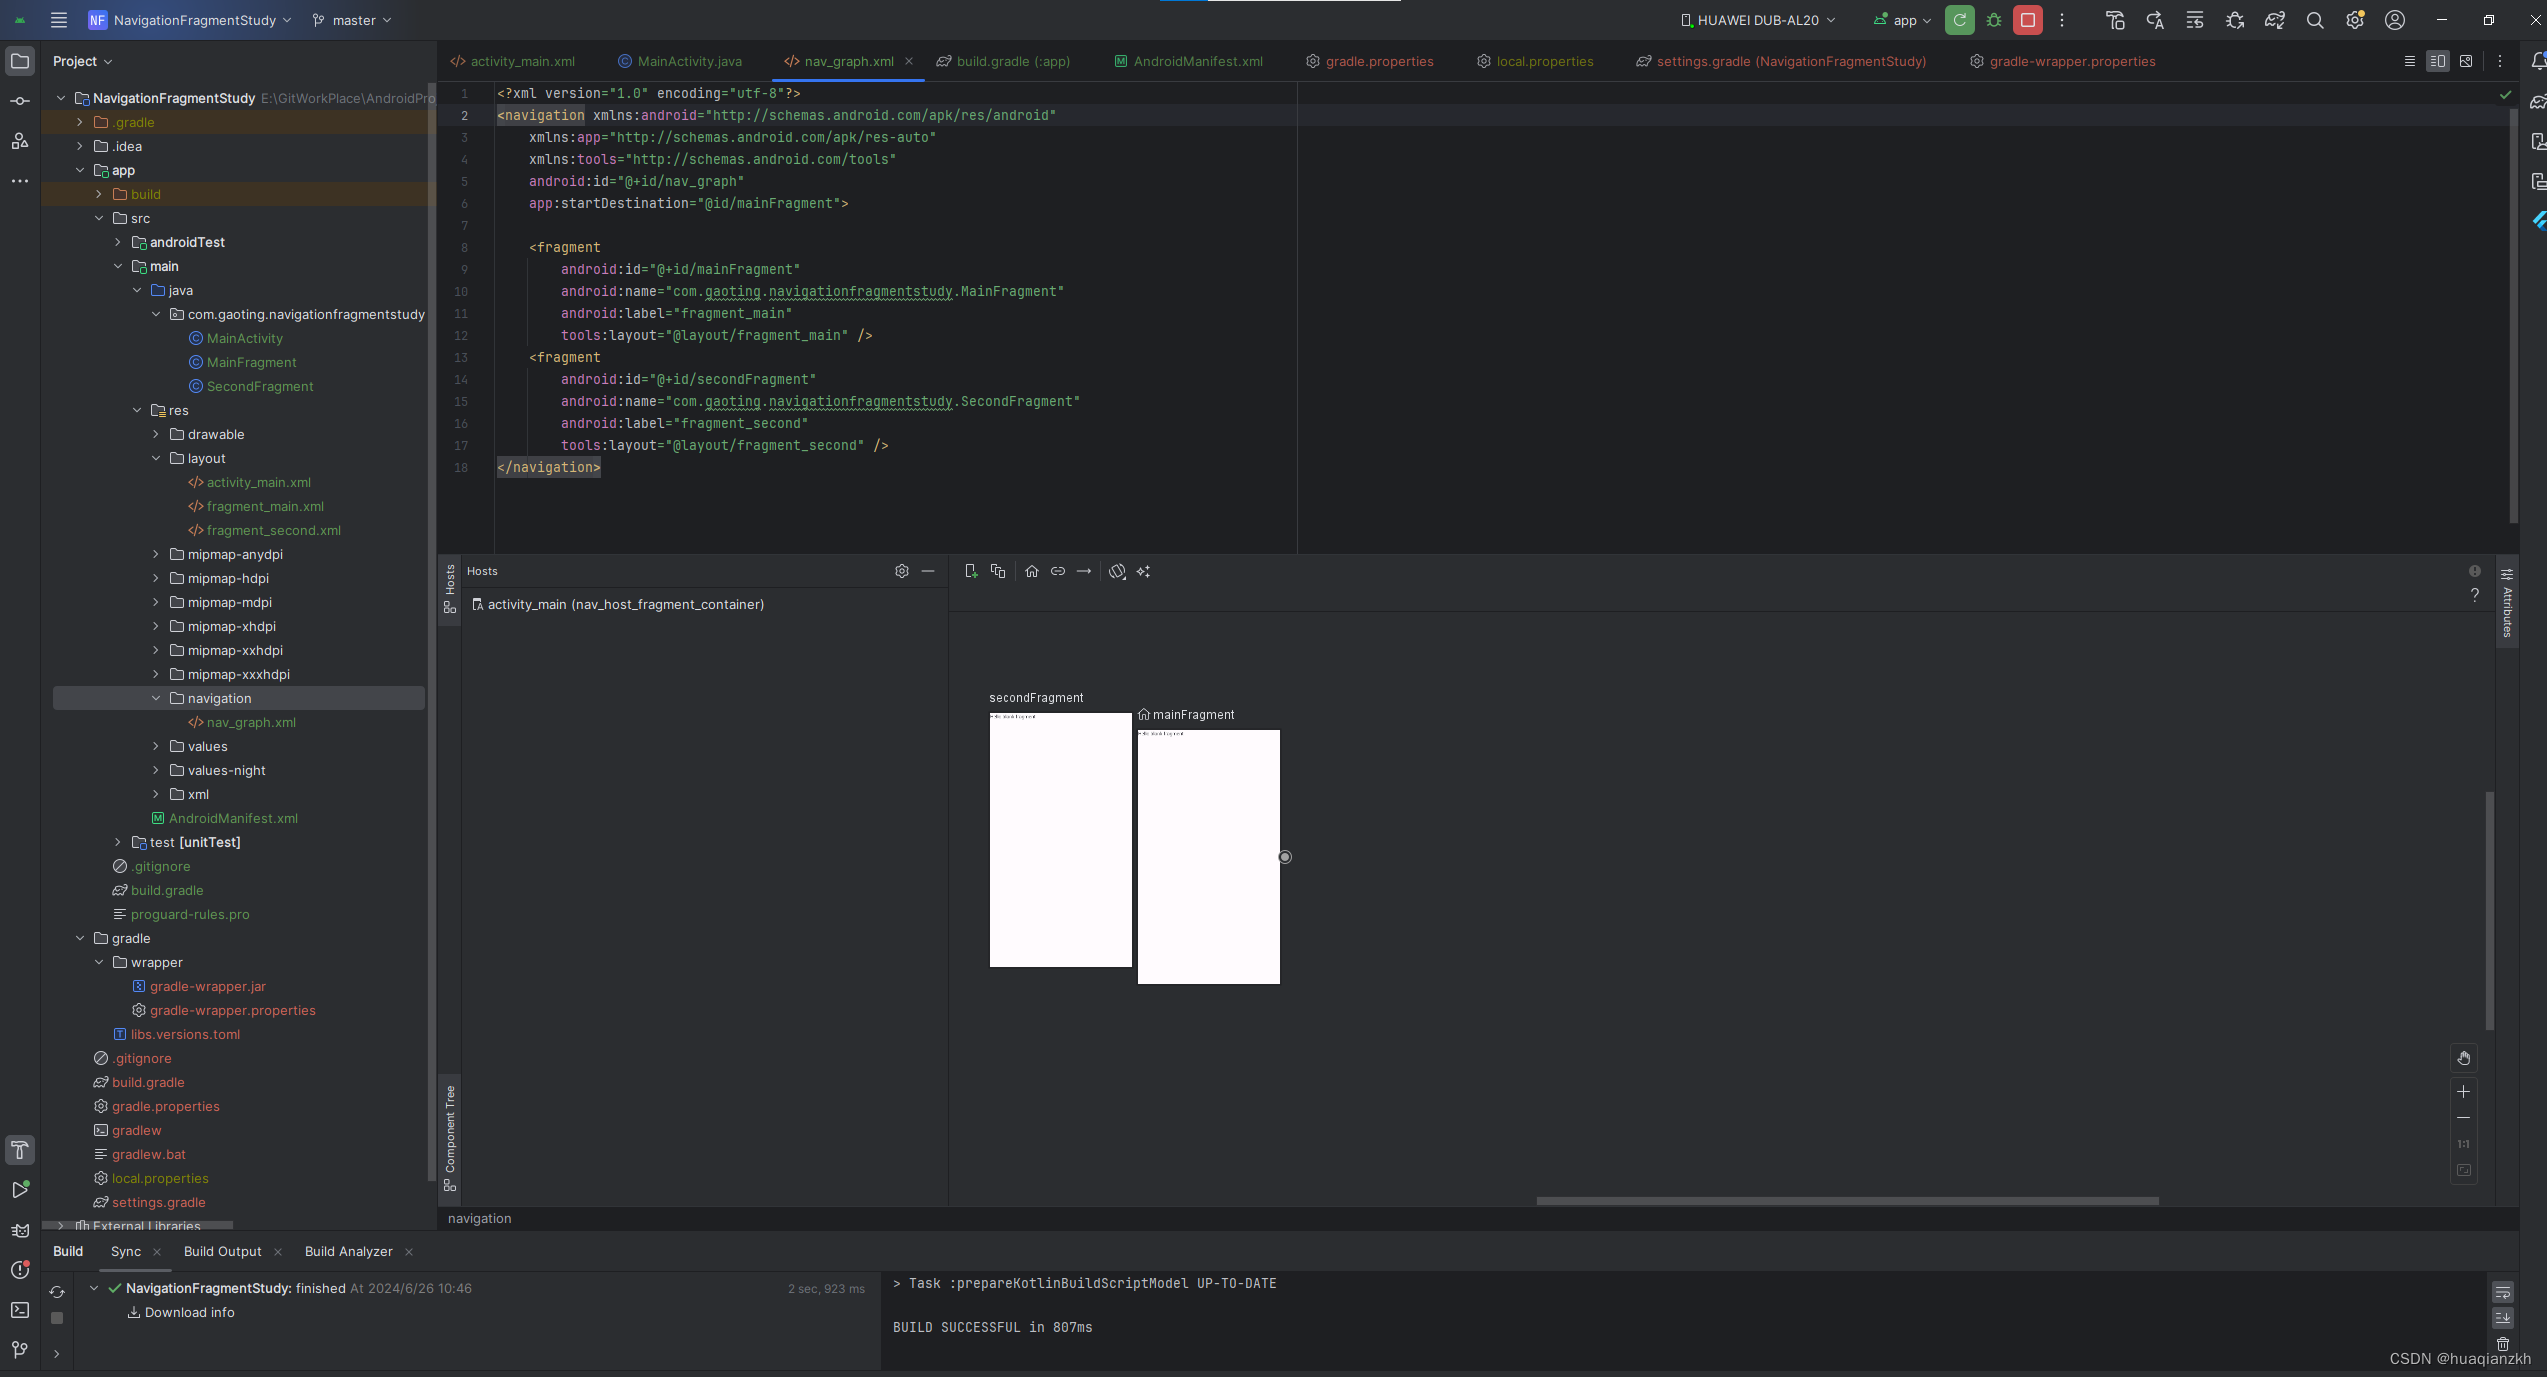
创建步骤:点击New Destination>create new destination>Fragment(Blank)。要创建一个mainFragment和一个secondFragment。

创建了两个Fragment,如下图所示。
拖动圆点可以增加方向箭头,如下所示。
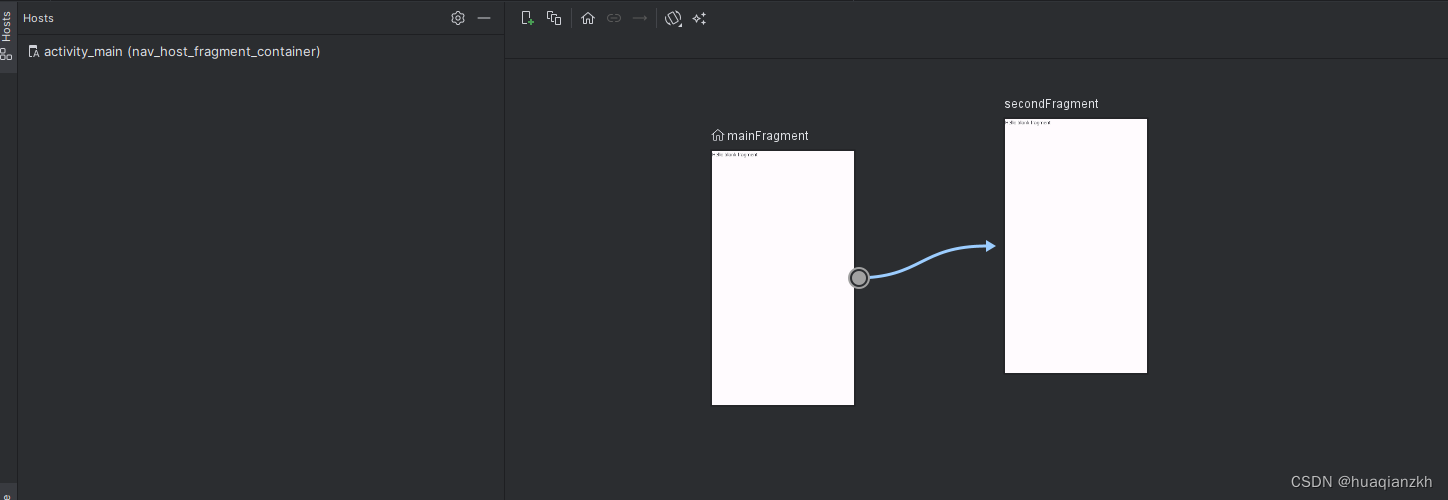
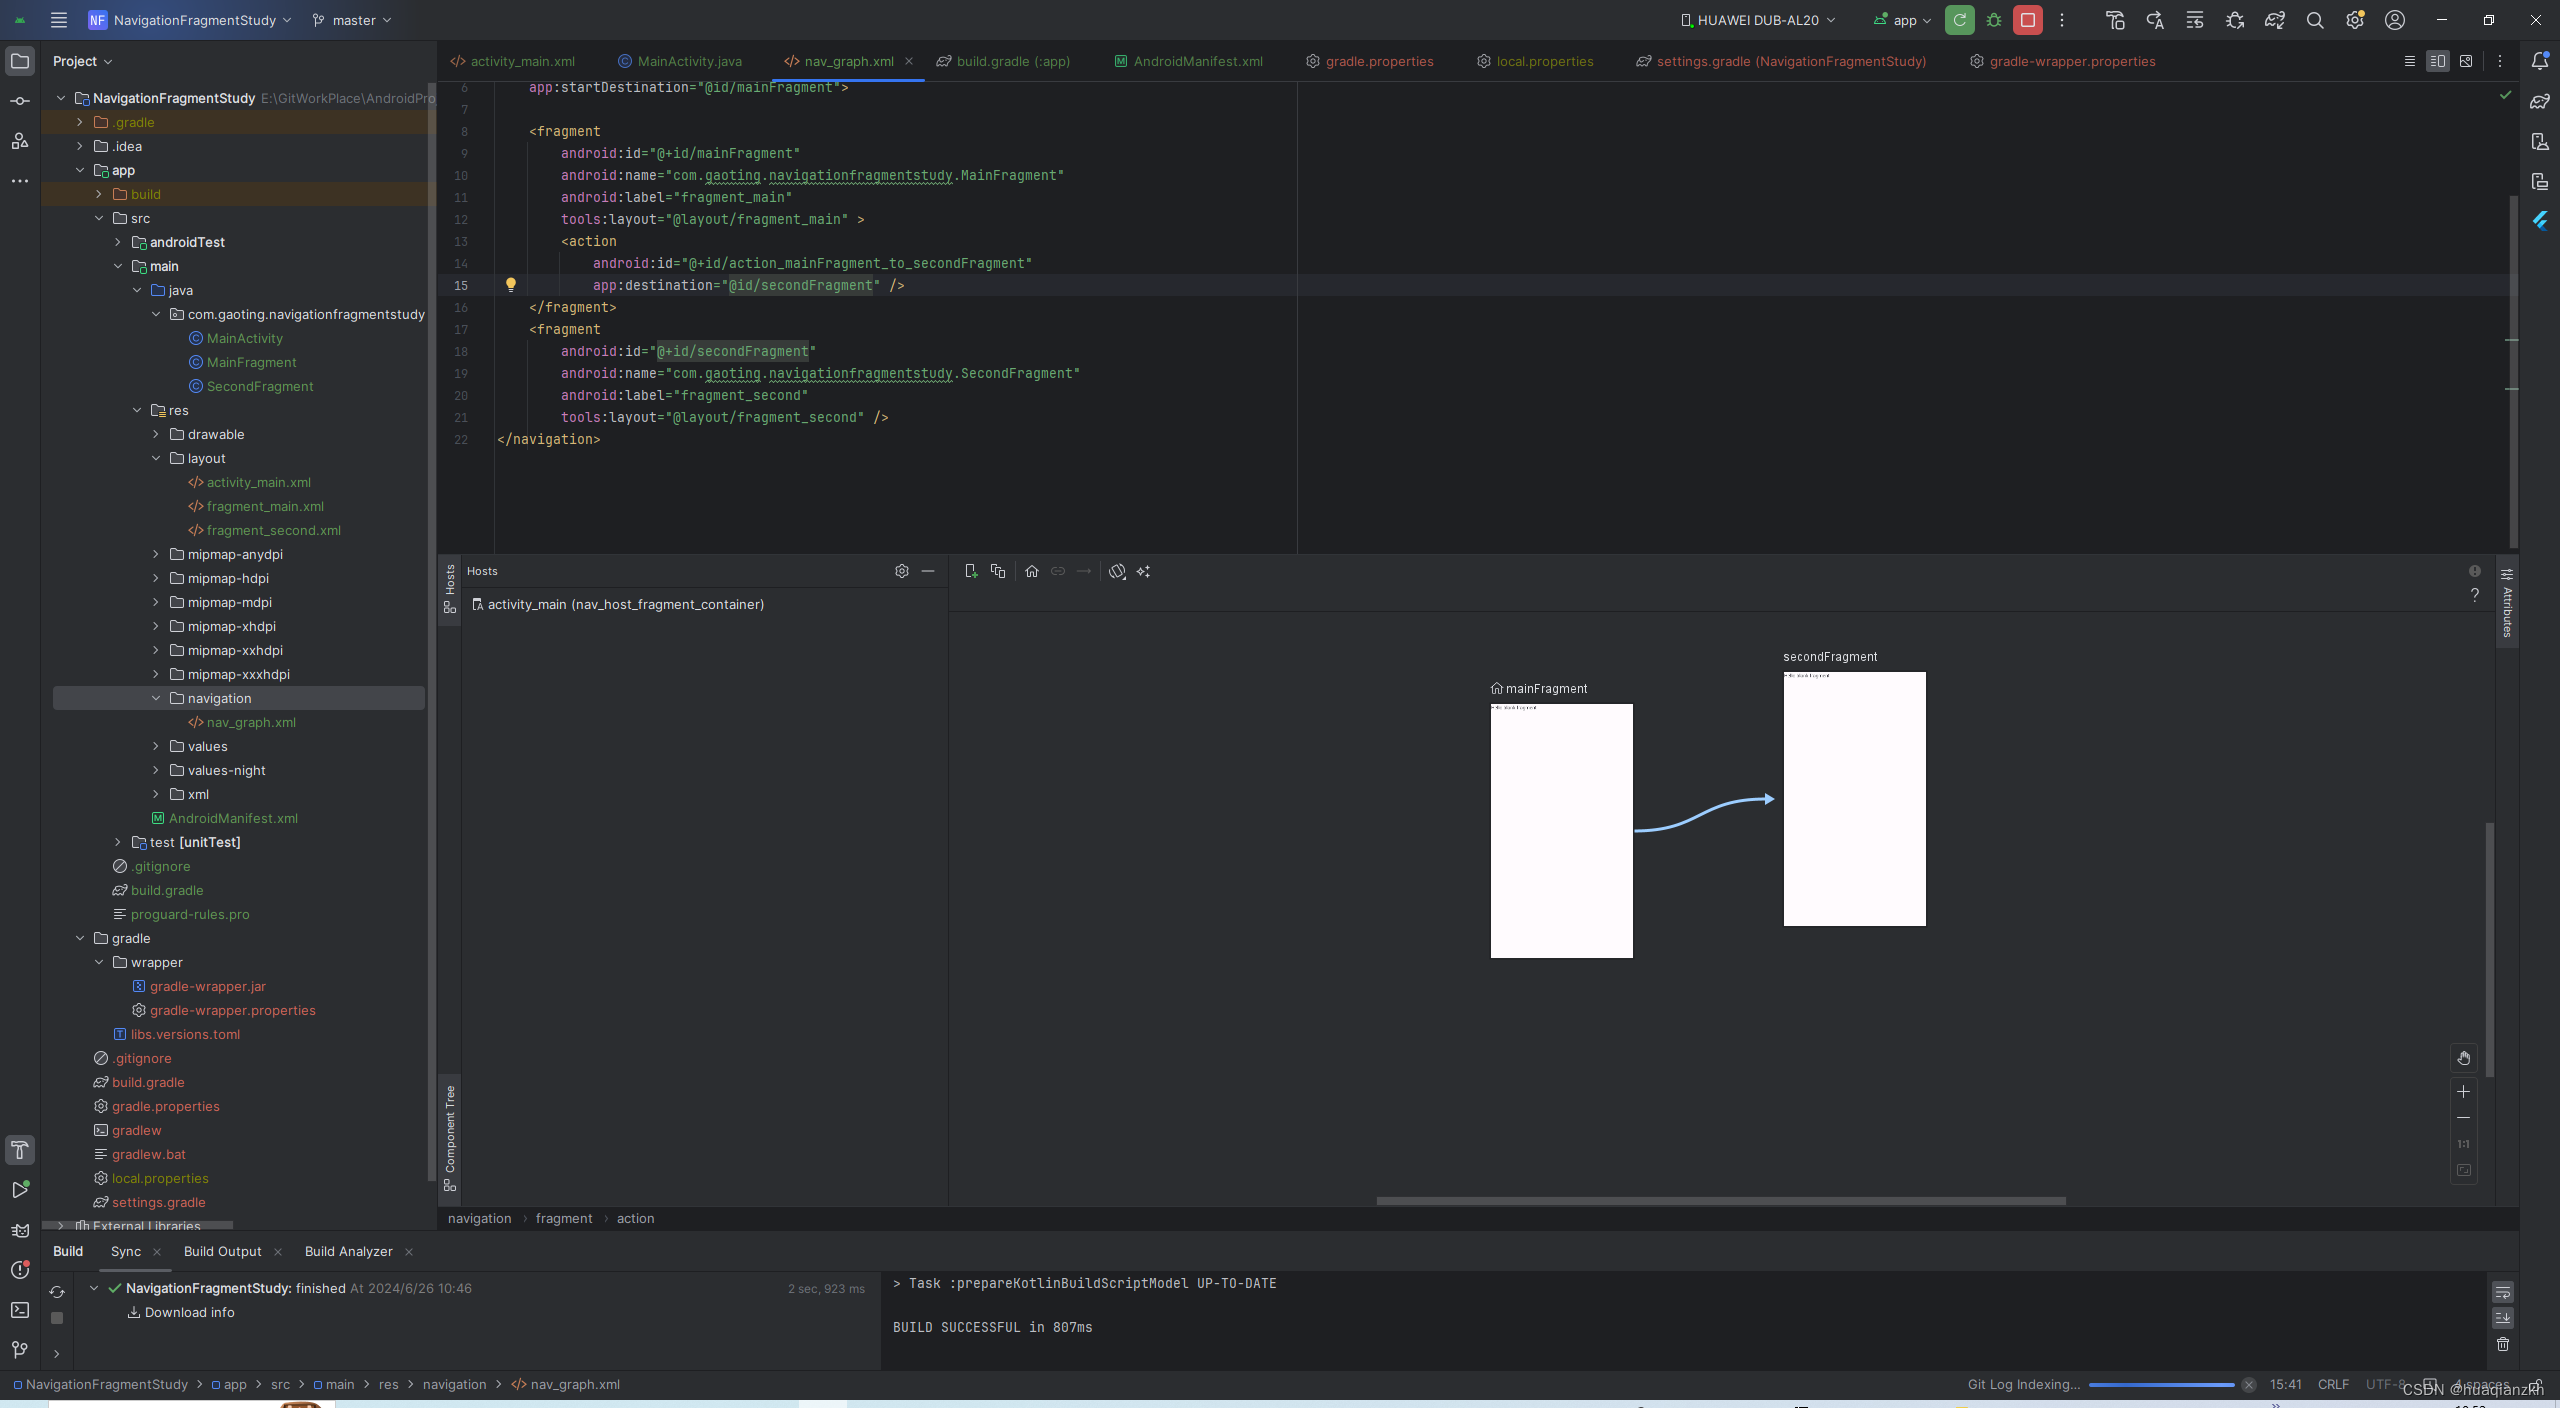
可以看到代码中自动增加了一个action动作。
<?xml version="1.0" encoding="utf-8"?>
<navigation xmlns:android="http://schemas.android.com/apk/res/android"
xmlns:app="http://schemas.android.com/apk/res-auto"
xmlns:tools="http://schemas.android.com/tools"
android:id="@+id/nav_graph"
app:startDestination="@id/mainFragment">
<fragment
android:id="@+id/mainFragment"
android:name="com.gaoting.navigationfragmentstudy.MainFragment"
android:label="fragment_main"
tools:layout="@layout/fragment_main" >
<action
android:id="@+id/action_mainFragment_to_secondFragment"
app:destination="@id/secondFragment" />
</fragment>
<fragment
android:id="@+id/secondFragment"
android:name="com.gaoting.navigationfragmentstudy.SecondFragment"
android:label="fragment_second"
tools:layout="@layout/fragment_second" />
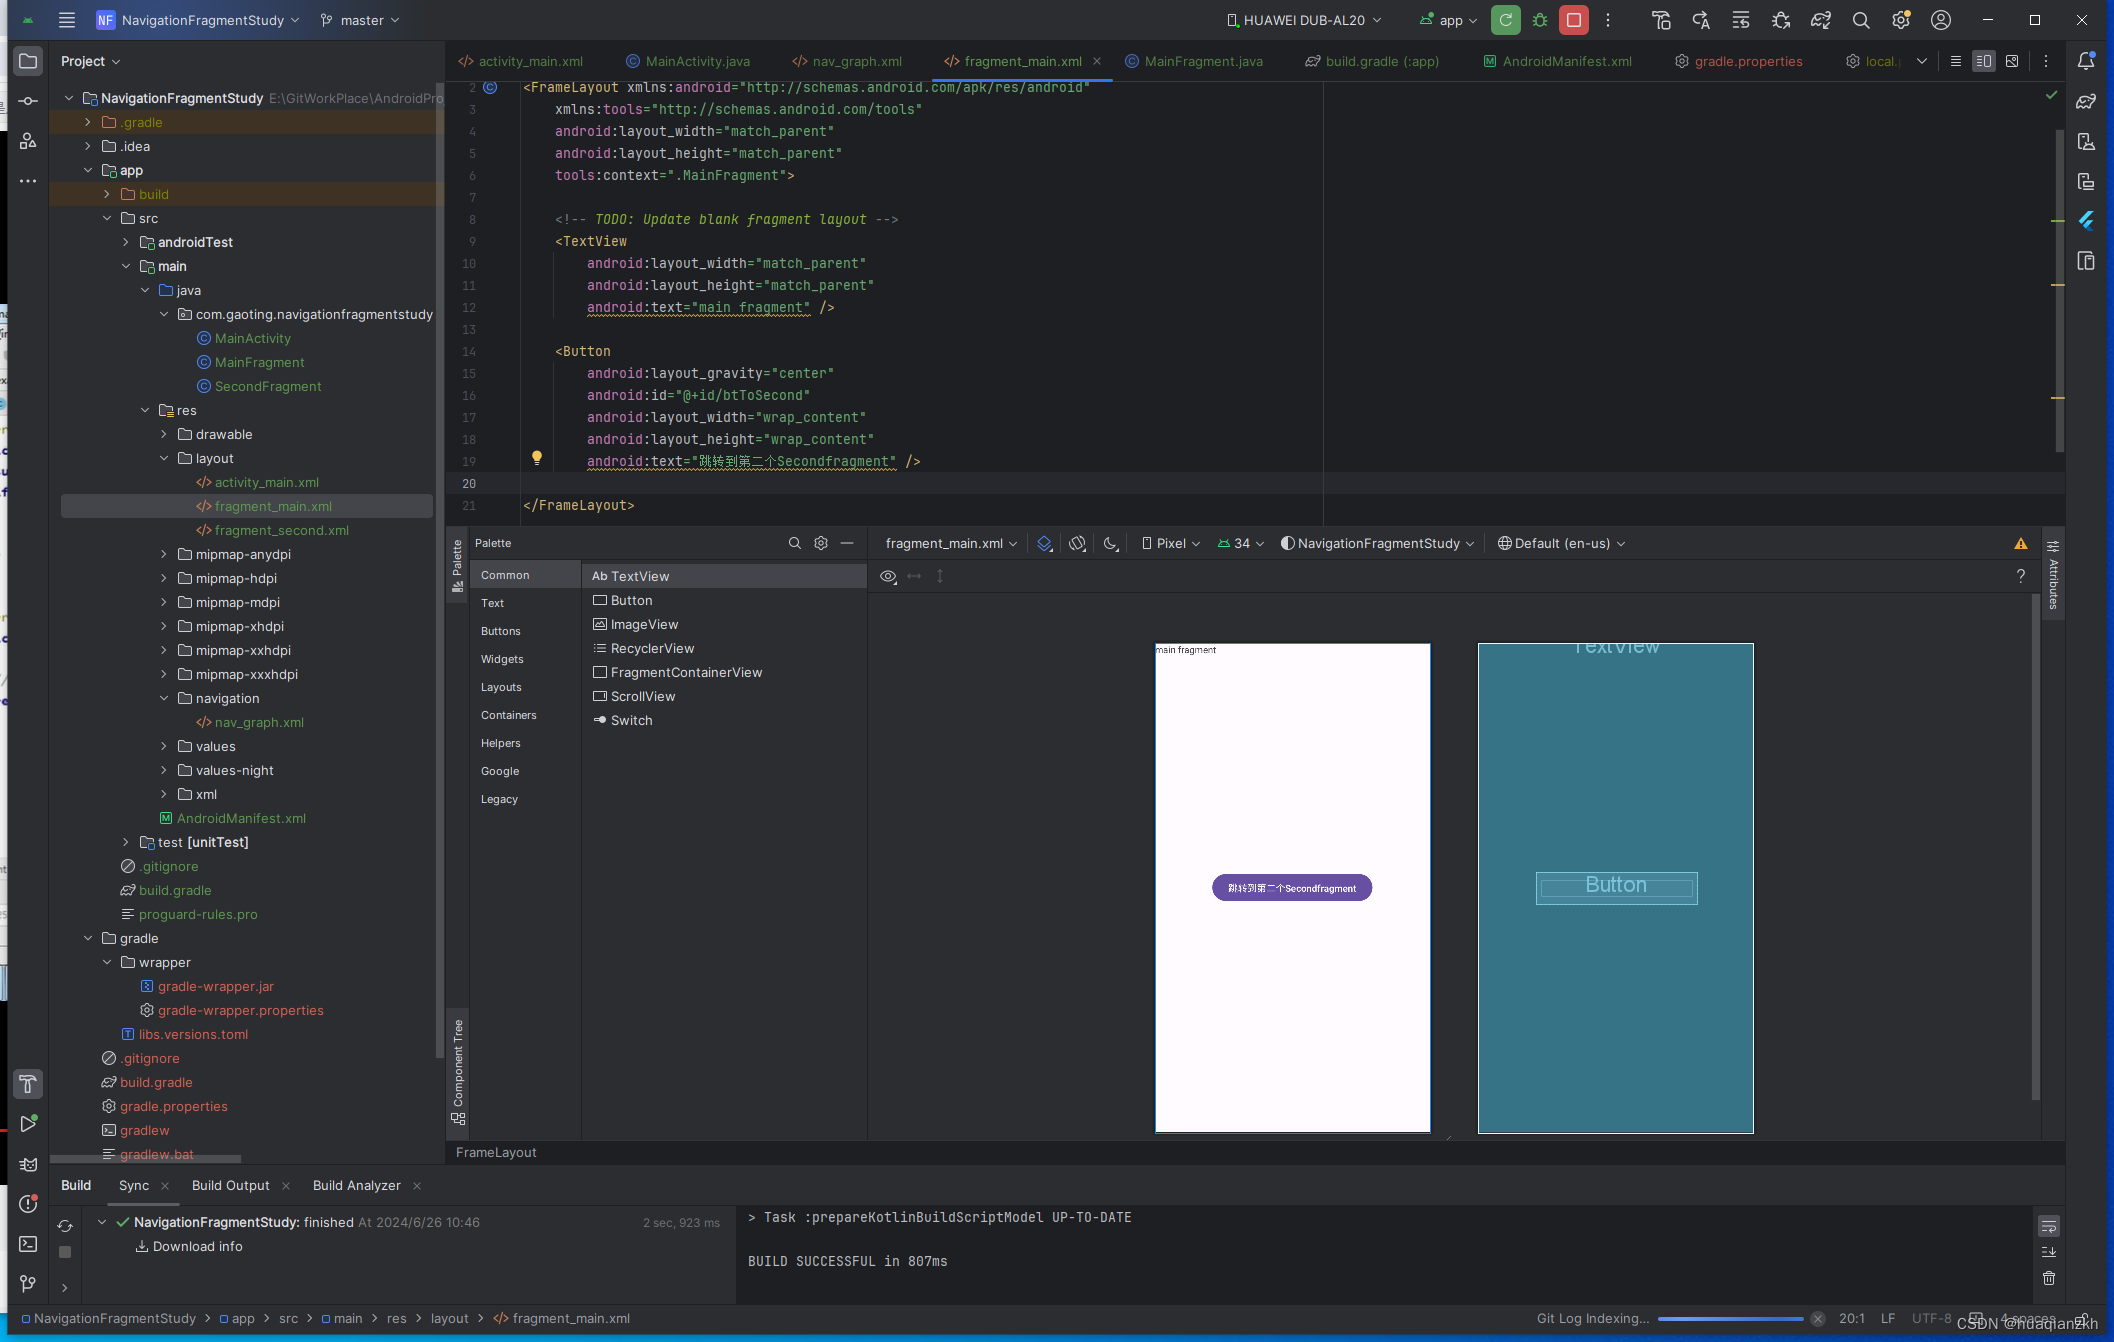
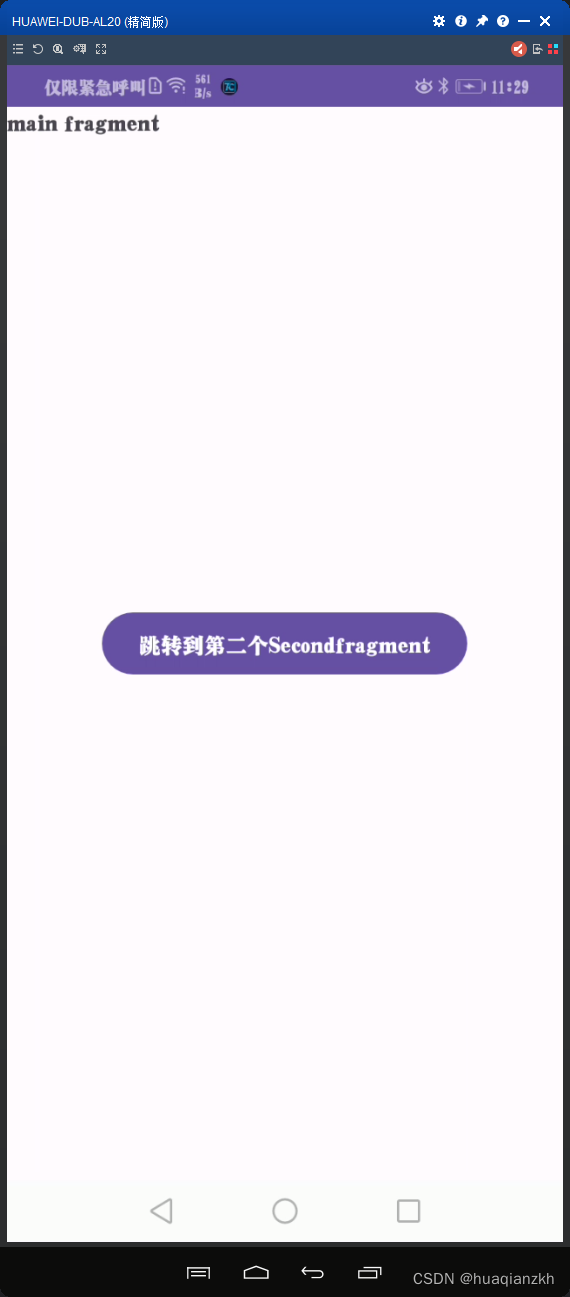
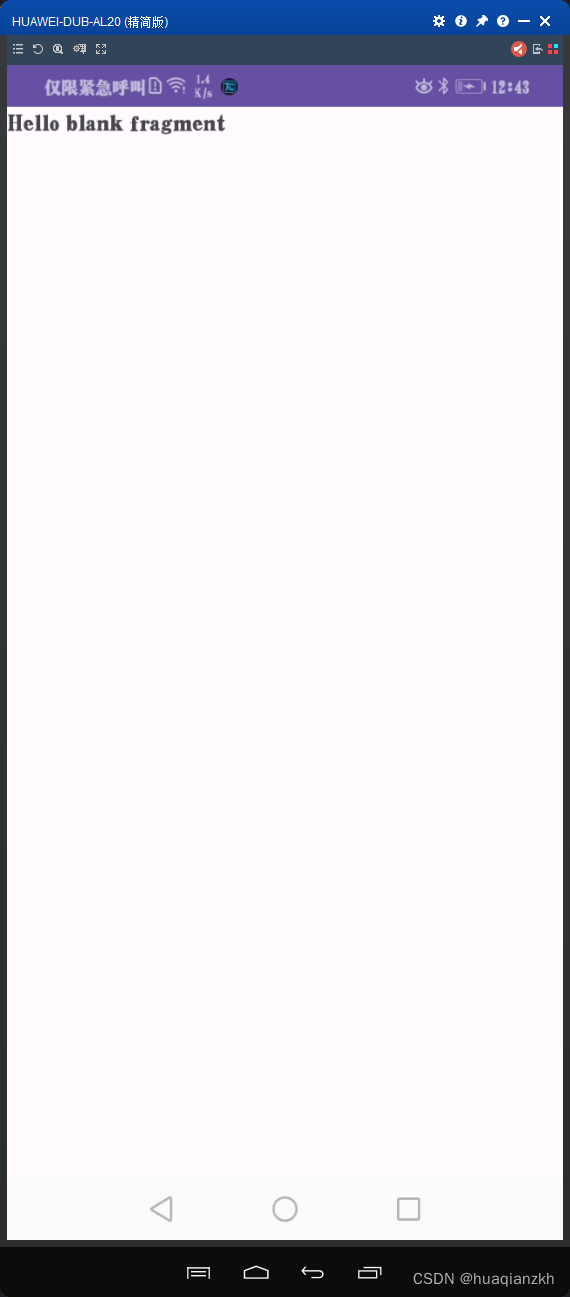
</navigation>4)修改fragment_main.xml布局文件,增加一个button,用来触发跳转。
5)修改MainFragment代码。用来给btnSecond增加click事件。
    @Override
    public View onCreateView(LayoutInflater inflater, ViewGroup container,
                             Bundle savedInstanceState) {
        // Inflate the layout for this fragment

        View rootView = inflater.inflate(R.layout.fragment_main, container, false);
        Button btToSecond = rootView.findViewById(R.id.btToSecond);
        btToSecond.setOnClickListener(new View.OnClickListener() {
            @Override
            public void onClick(View view) {
                NavController navController = Navigation.findNavController(view);
                navController.navigate((R.id.action_mainFragment_to_secondFragment));
            }
        });
        return rootView;
    }
}
6)运行效果


 480
480


 被折叠的 条评论
为什么被折叠?
被折叠的 条评论
为什么被折叠?
 到【灌水乐园】发言


