


SkyWalking介绍
关于skywalking介绍,网上文章比较多,可以参考 https://www.jianshu.com/p/ffa7ddcda4ab
SkyWalking安装
ES安装
因为我打算使用ES作为skywalking的存储媒介,所以在安装之前需要先安装配置好ES
安装完成后使用http://localhost:9100/即可查看ES文档信息
如果出现配置上的问题参考:ElasticSearch报错记录
SW安装
选择最新的版本下载
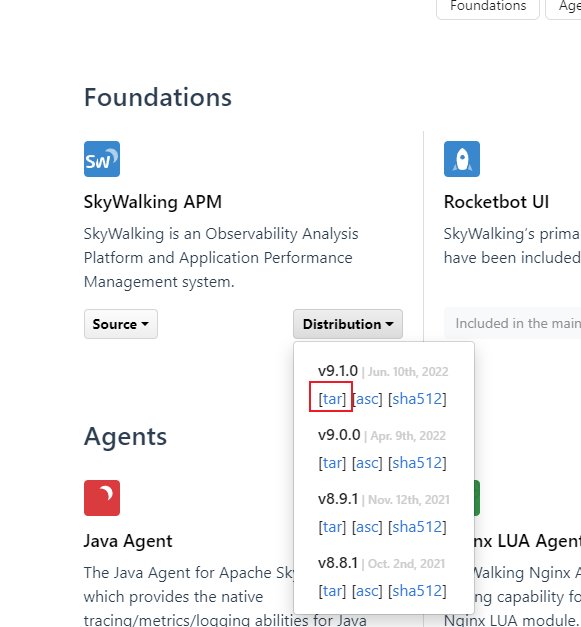
下载完成后修改配置,因为我使用的是ES,所以要修改ES的配置,配置完成后进入安装目录bin目录执行命令启动服务
![]()
startup.bat启动后使用http://localhost:8080/ 查看UI界面
- 修改storage.selector为:${SW_STORAGE:elasticsearch}
- 修改storage.elasticsearch.clusterNodes为ES配置的network.host
storage:
  selector: ${SW_STORAGE:elasticsearch}
  elasticsearch:
    namespace: ${SW_NAMESPACE:""}
    clusterNodes: ${SW_STORAGE_ES_CLUSTER_NODES:172.16.XX.XX:9200}
    protocol: ${SW_STORAGE_ES_HTTP_PROTOCOL:"http"}
    connectTimeout: ${SW_STORAGE_ES_CONNECT_TIMEOUT:3000}
    socketTimeout: ${SW_STORAGE_ES_SOCKET_TIMEOUT:30000}
    responseTimeout: ${SW_STORAGE_ES_RESPONSE_TIMEOUT:15000}
    numHttpClientThread: ${SW_STORAGE_ES_NUM_HTTP_CLIENT_THREAD:0}
    user: ${SW_ES_USER:""}
    password: ${SW_ES_PASSWORD:""}
    trustStorePath: ${SW_STORAGE_ES_SSL_JKS_PATH:""}
    trustStorePass: ${SW_STORAGE_ES_SSL_JKS_PASS:""}
    secretsManagementFile: ${SW_ES_SECRETS_MANAGEMENT_FILE:""} # Secrets management file in the properties format includes the username, password, which are managed by 3rd party tool.
    dayStep: ${SW_STORAGE_DAY_STEP:1} # Represent the number of days in the one minute/hour/day index.
    indexShardsNumber: ${SW_STORAGE_ES_INDEX_SHARDS_NUMBER:1} # Shard number of new indexes
    indexReplicasNumber: ${SW_STORAGE_ES_INDEX_REPLICAS_NUMBER:1} # Replicas number of new indexes
    # Super data set has been defined in the codes, such as trace segments.The following 3 config would be improve es performance when storage super size data in es.
    superDatasetDayStep: ${SW_SUPERDATASET_STORAGE_DAY_STEP:-1} # Represent the number of days in the super size dataset record index, the default value is the same as dayStep when the value is less than 0
    superDatasetIndexShardsFactor: ${SW_STORAGE_ES_SUPER_DATASET_INDEX_SHARDS_FACTOR:5} #  This factor provides more shards for the super data set, shards number = indexShardsNumber * superDatasetIndexShardsFactor. Also, this factor effects Zipkin and Jaeger traces.
    superDatasetIndexReplicasNumber: ${SW_STORAGE_ES_SUPER_DATASET_INDEX_REPLICAS_NUMBER:0} # Represent the replicas number in the super size dataset record index, the default value is 0.
    indexTemplateOrder: ${SW_STORAGE_ES_INDEX_TEMPLATE_ORDER:0} # the order of index template
    bulkActions: ${SW_STORAGE_ES_BULK_ACTIONS:5000} # Execute the async bulk record data every ${SW_STORAGE_ES_BULK_ACTIONS} requests
    # flush the bulk every 10 seconds whatever the number of requests
    # INT(flushInterval * 2/3) would be used for index refresh period.
    flushInterval: ${SW_STORAGE_ES_FLUSH_INTERVAL:15}
    concurrentRequests: ${SW_STORAGE_ES_CONCURRENT_REQUESTS:2} # the number of concurrent requests
    resultWindowMaxSize: ${SW_STORAGE_ES_QUERY_MAX_WINDOW_SIZE:10000}
    metadataQueryMaxSize: ${SW_STORAGE_ES_QUERY_MAX_SIZE:10000}
    scrollingBatchSize: ${SW_STORAGE_ES_SCROLLING_BATCH_SIZE:5000}
    segmentQueryMaxSize: ${SW_STORAGE_ES_QUERY_SEGMENT_SIZE:200}
    profileTaskQueryMaxSize: ${SW_STORAGE_ES_QUERY_PROFILE_TASK_SIZE:200}
    profileDataQueryBatchSize: ${SW_STORAGE_ES_QUERY_PROFILE_DATA_BATCH_SIZE:100}
    oapAnalyzer: ${SW_STORAGE_ES_OAP_ANALYZER:"{\"analyzer\":{\"oap_analyzer\":{\"type\":\"stop\"}}}"} # the oap analyzer.
    oapLogAnalyzer: ${SW_STORAGE_ES_OAP_LOG_ANALYZER:"{\"analyzer\":{\"oap_log_analyzer\":{\"type\":\"standard\"}}}"} # the oap log analyzer. It could be customized by the ES analyzer configuration to support more language log formats, such as Chinese log, Japanese log and etc.
    advanced: ${SW_STORAGE_ES_ADVANCED:""}
项目集成
- 新建.NET6 API项目,使用NUGET安装SkyAPM.Agent.AspNetCore包
- 在项目中添加skyapm.json配置文件
{
  "SkyWalking": {
    "ServiceName": "MassTransitTest",
    "Namespace": "",
    "HeaderVersions": [
      "sw8"
    ],
    "Sampling": {
      "SamplePer3Secs": -1,
      "Percentage": -1.0
    },
    "Logging": {
      "Level": "Information",
      "FilePath": "logs/skyapm-{Date}.log"
    },
    "Transport": {
      "Interval": 3000,
      "ProtocolVersion": "v8",
      "QueueSize": 30000,
      "BatchSize": 3000,
      "gRPC": {
        "Servers": "localhost:11800",
        "Timeout": 10000,
        "ConnectTimeout": 10000,
        "ReportTimeout": 600000
      }
    }
  }
}- 修改Properties文件夹下的launchSettings.json文件,新增ASPNETCORE_HOSTINGSTARTUPASSEMBLIES和SKYWALKING__SERVICENAME节点配置
{
  "$schema": "https://json.schemastore.org/launchsettings.json",
  "iisSettings": {
    "windowsAuthentication": false,
    "anonymousAuthentication": true,
    "iisExpress": {
      "applicationUrl": "http://localhost:65317",
      "sslPort": 44398
    }
  },
  "profiles": {
    "MassTransitTest": {
      "commandName": "Project",
      "dotnetRunMessages": true,
      "launchBrowser": true,
      "launchUrl": "weatherforecast",
      "applicationUrl": "http://192.168.137.1:5298",
      "environmentVariables": {
        "ASPNETCORE_ENVIRONMENT": "Development",
        "ASPNETCORE_HOSTINGSTARTUPASSEMBLIES": "SkyAPM.Agent.AspNetCore",
        "SKYWALKING__SERVICENAME": "MassTransitTest"
      }
    },
    "IIS Express": {
      "commandName": "IISExpress",
      "launchBrowser": true,
      "launchUrl": "swagger",
      "environmentVariables": {
        "ASPNETCORE_ENVIRONMENT": "Development",
        "ASPNETCORE_HOSTINGSTARTUPASSEMBLIES": "SkyAPM.Agent.AspNetCore",
        "SKYWALKING__SERVICENAME": "MassTransitTest"
      }
    }
  }
}
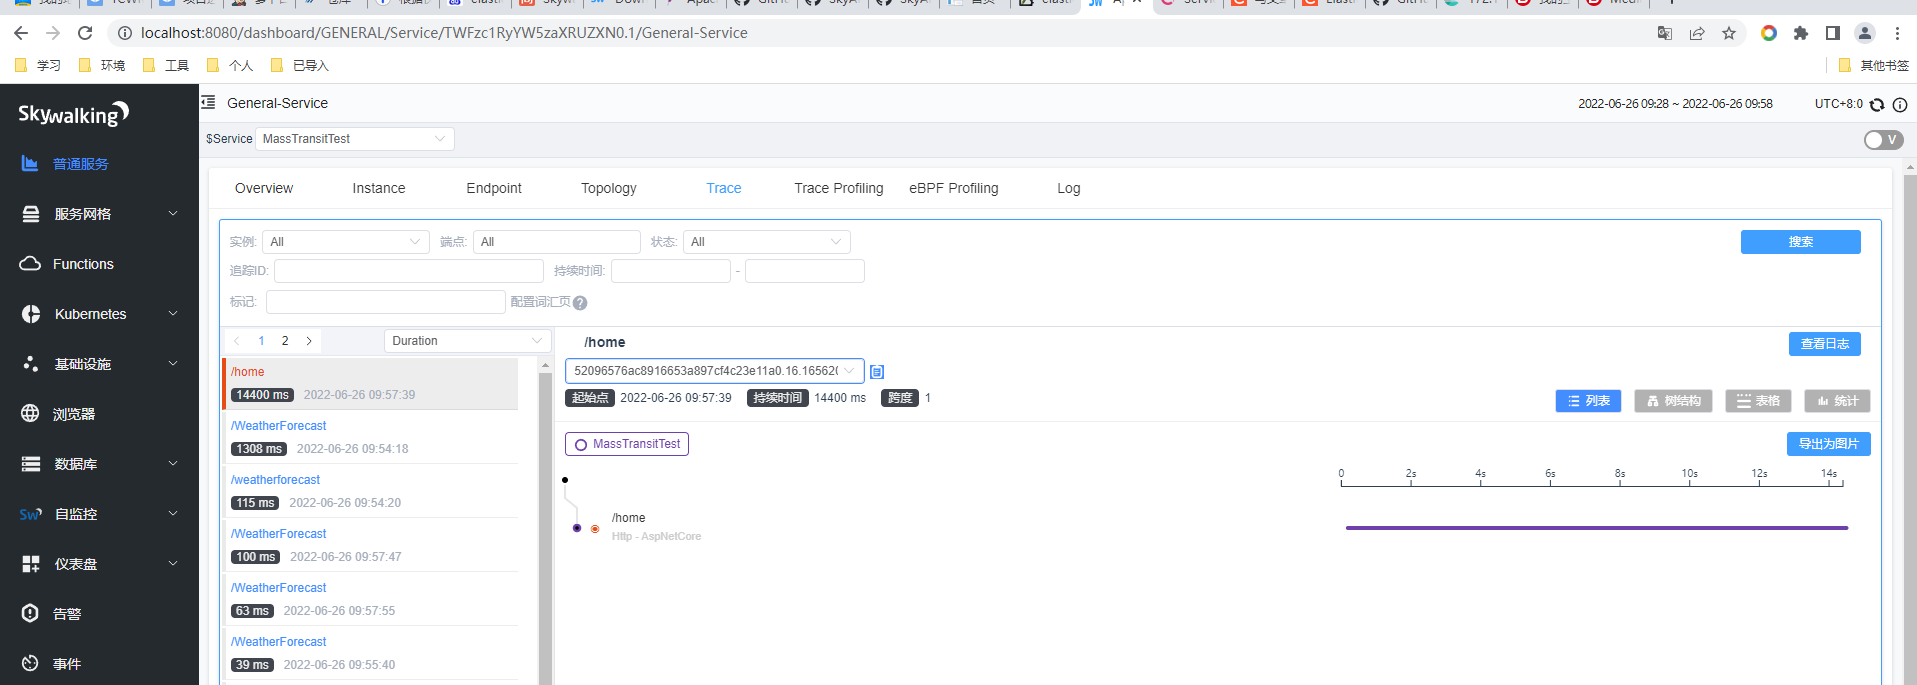
码云完整代码 戳这里
使用postman测试接口请求后,就可以在skywalking里查看到接口数据了


 179
179


 被折叠的 条评论
为什么被折叠?
被折叠的 条评论
为什么被折叠?
 到【灌水乐园】发言


