


一、显卡
-
「必须」更新软件列表和安装必要软件、依赖
sudo apt-get update #更新软件列表 sudo apt-get install g++ sudo apt-get install gcc sudo apt-get install make -
禁用 nouveau 驱动
ouveau是Ubuntu自带的显卡驱动,但他是核显,我这里想安装独显,就得把他禁掉
-
命令(cmd)
sudo gedit /etc/modprobe.d/blacklist.conf(输入密码)
-
(自动打开的)文本,在末尾
# added
blacklist nouveau
blacklist lbm-nouveau
options nouveau modeset=0
alias nouveau off
alias lbm-nouveau off
ctrl+s 保存
-
更新重启
sudo update-initramfs –u
sudo reboot # 重启电脑
lsmod | grep nouveau # 输出内容为空,则表示成功禁用
-
-
安装驱动
- 选择合适版本:官网查询,记住版本号xxx.yy
- 卸载之前的
sudo apt-get remove nvidia-*  # 卸载之前的

add-apt-repository ppa:graphics-drivers/ppa  # 更新显卡驱动的源

apt-get install nvidia-driver-xxx  # xxx是显卡版本,需要修改
-
检查
nvidia-smi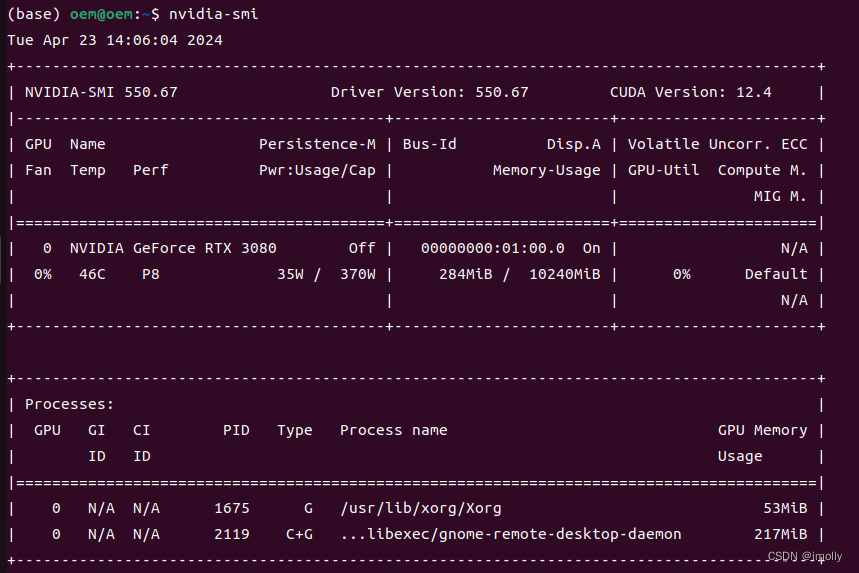
-
安装成功。
CUDA version :12.4 ——最大CUDA版本
二、CUDA
-
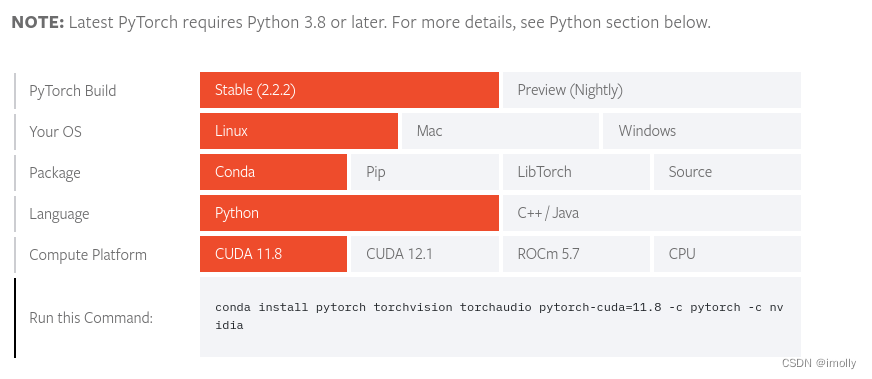
pytorch 官网:CUDA11.8 12.1
-
安装依赖
sudo apt-get install freeglut3-dev build-essential libx11-dev libxmu-dev libxi-dev libgl1-mesa-glx libglu1-mesa libglu1-mesa-dev -
安装CUDA
- CUDA 11.8
- CUDA 12.1
- 一路选择下来,我最后选了runfile(local),因为命令行少
第一行加sudo,能防止权限不够
# 11.8
sudo wget https://developer.download.nvidia.com/compute/cuda/11.8.0/local_installers/cuda_11.8.0_520.61.05_linux.run
sudo sh cuda_11.8.0_520.61.05_linux.run
# 12.1 sudo wget https://developer.download.nvidia.com/compute/cuda/12.1.0/local_installers/cuda_12.1.0_530.30.02_linux.run sudo sh cuda_12.1.0_530.30.02_linux.run
-
安装时的选择
- continue
- 写 accept
- 不要driver:在driver处按enter
- install
- (如果有多个CUDA,会问你symlink改不改): Yes
-
检查
nvcc -V
成功!
安装CUDA失败,重装该版本(希望用不上)
环境配置之cuda的卸载(ubuntu)_ubuntu卸载cuda-CSDN博客
切换CUDA(选读)
- 切换脚本
-
sudo vim switch-cuda.sh -
#!/usr/bin/env bash # Copyright (c) 2018 Patrick Hohenecker # # Permission is hereby granted, free of charge, to any person obtaining a copy # of this software and associated documentation files (the "Software"), to deal # in the Software without restriction, including without limitation the rights # to use, copy, modify, merge, publish, distribute, sublicense, and/or sell # copies of the Software, and to permit persons to whom the Software is # furnished to do so, subject to the following conditions: # # The above copyright notice and this permission notice shall be included in all # copies or substantial portions of the Software. # # THE SOFTWARE IS PROVIDED "AS IS", WITHOUT WARRANTY OF ANY KIND, EXPRESS OR # IMPLIED, INCLUDING BUT NOT LIMITED TO THE WARRANTIES OF MERCHANTABILITY, # FITNESS FOR A PARTICULAR PURPOSE AND NONINFRINGEMENT. IN NO EVENT SHALL THE # AUTHORS OR COPYRIGHT HOLDERS BE LIABLE FOR ANY CLAIM, DAMAGES OR OTHER # LIABILITY, WHETHER IN AN ACTION OF CONTRACT, TORT OR OTHERWISE, ARISING FROM, # OUT OF OR IN CONNECTION WITH THE SOFTWARE OR THE USE OR OTHER DEALINGS IN THE # SOFTWARE. # author: Patrick Hohenecker <mail@paho.at> # version: 2018.1 # date: May 15, 2018 set -e # ensure that the script has been sourced rather than just executed if [[ "${BASH_SOURCE[0]}" = "${0}" ]]; then echo "Please use 'source' to execute switch-cuda.sh!" exit 1 fi INSTALL_FOLDER="/usr/local" # the location to look for CUDA installations at TARGET_VERSION=${1} # the target CUDA version to switch to (if provided) # if no version to switch to has been provided, then just print all available CUDA installations if [[ -z ${TARGET_VERSION} ]]; then echo "The following CUDA installations have been found (in '${INSTALL_FOLDER}'):" ls -l "${INSTALL_FOLDER}" | egrep -o "cuda-[0-9]+\\.[0-9]+$" | while read -r line; do echo "* ${line}" done set +e return # otherwise, check whether there is an installation of the requested CUDA version elif [[ ! -d "${INSTALL_FOLDER}/cuda-${TARGET_VERSION}" ]]; then echo "No installation of CUDA ${TARGET_VERSION} has been found!" set +e return fi # the path of the installation to use cuda_path="${INSTALL_FOLDER}/cuda-${TARGET_VERSION}" # filter out those CUDA entries from the PATH that are not needed anymore path_elements=(${PATH//:/ }) new_path="${cuda_path}/bin" for p in "${path_elements[@]}"; do if [[ ! ${p} =~ ^${INSTALL_FOLDER}/cuda ]]; then new_path="${new_path}:${p}" fi done # filter out those CUDA entries from the LD_LIBRARY_PATH that are not needed anymore ld_path_elements=(${LD_LIBRARY_PATH//:/ }) new_ld_path="${cuda_path}/lib64:${cuda_path}/extras/CUPTI/lib64" for p in "${ld_path_elements[@]}"; do if [[ ! ${p} =~ ^${INSTALL_FOLDER}/cuda ]]; then new_ld_path="${new_ld_path}:${p}" fi done # update environment variables export CUDA_HOME="${cuda_path}" export CUDA_ROOT="${cuda_path}" export LD_LIBRARY_PATH="${new_ld_path}" export PATH="${new_path}" echo "Switched to CUDA ${TARGET_VERSION}." set +e return -
# 保存,优先选1
:w !sudo tee %

:wq!
-
-
source switch-cuda.sh  # 查看拥有的CUDA版本

source switch-cuda.sh XX.X  # XX.X为版本号
三、CUDNN
-
选择合适版本:官网,下载tar(或者三个包)
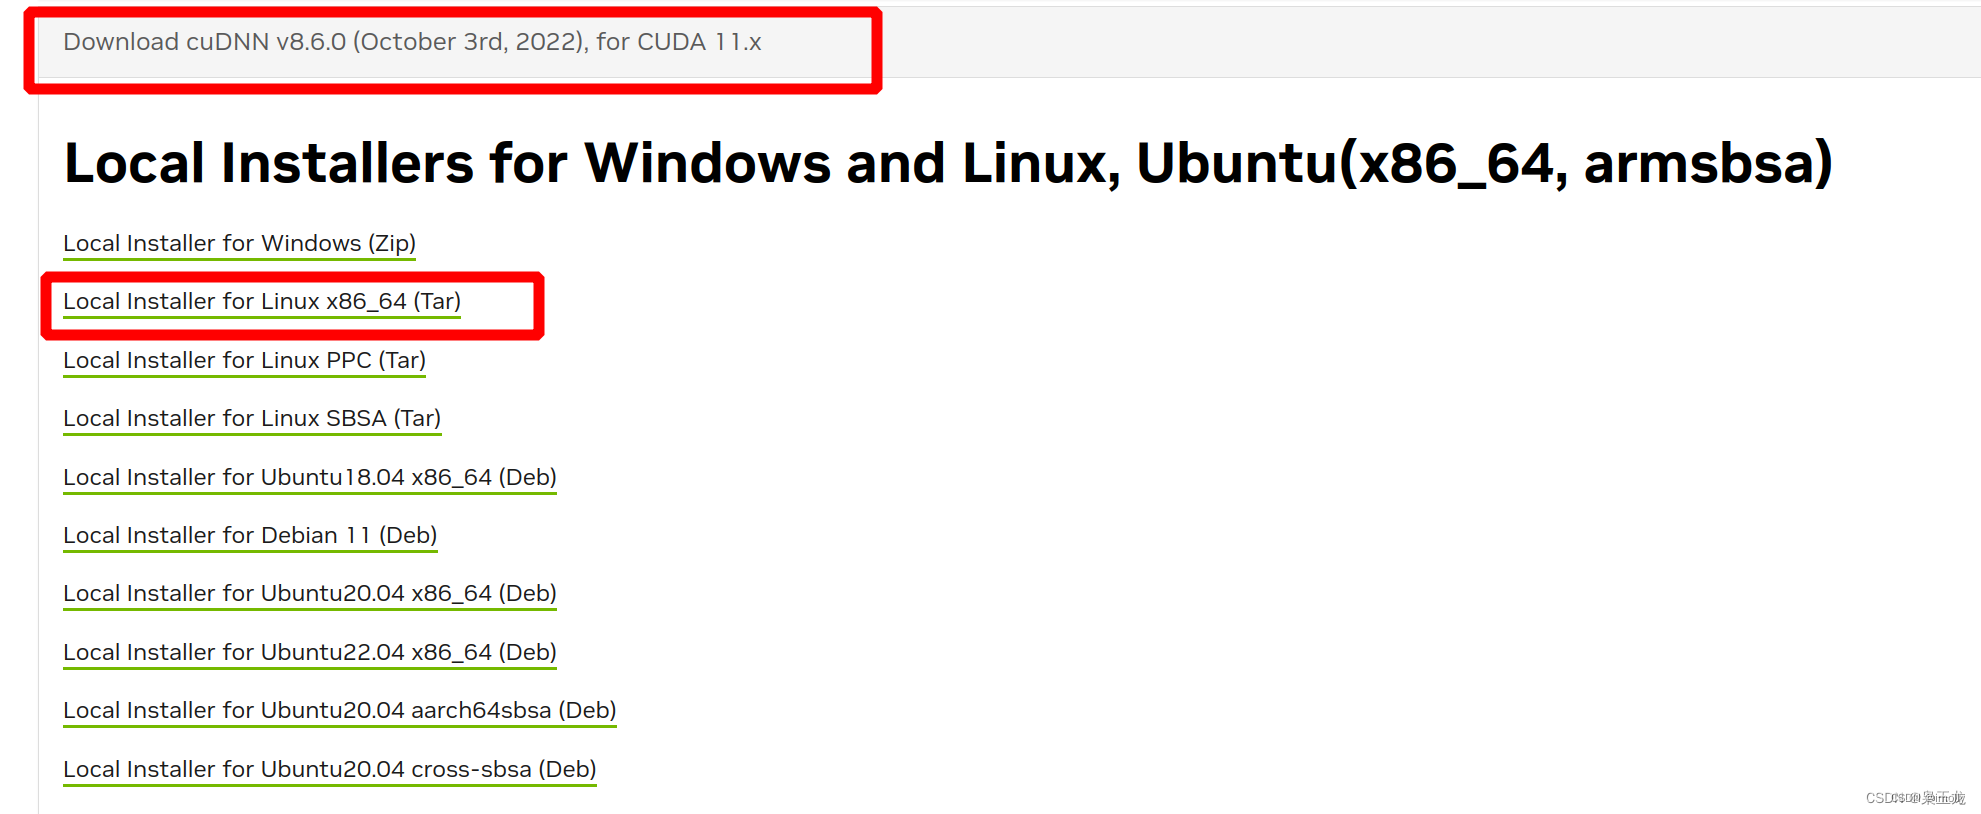
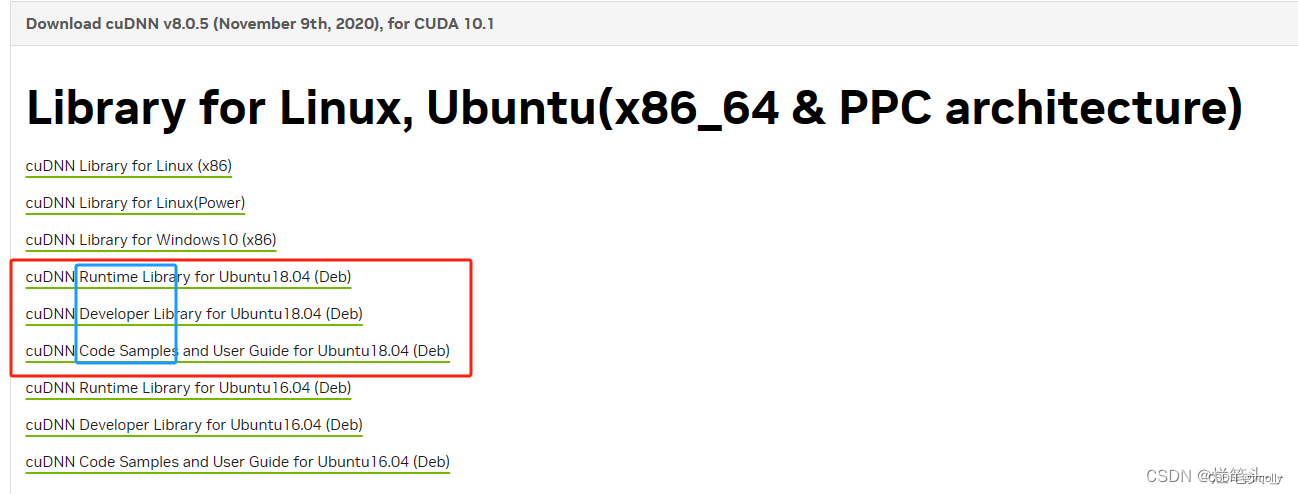
-
单个包跳到3,
三个包点链接:ubuntu下的cudnn安装_cudnn安装 ubuntu-CSDN博客 -
解压
tar -xvf cudnn-linux-x86_64-8.9.6.50_cuda11-archive.tar.xz # 改文件名称 # 或者可以删掉文件名,然后把想解压的文件拖到命令窗口里,自动获取文件路径。都可以 -
进入文件夹,复制
cd cudnn-linux-x86_64-8.9.6.50_cuda11-archive/ sudo cp -d -r ./lib/* /usr/local/cuda-11.8/lib64/ sudo cp -r ./include/* /usr/local/cuda-11.8/include/ -
测试
sudo chmod a+r /usr/local/cuda-11.8/include/cudnn.h /usr/local/cuda-11.8/lib64/libcudnn*

cat /usr/local/cuda-11.8/include/cudnn_version.h | grep CUDNN_MAJOR -A 2
出现的三个数字==版本号
四、pytorch
-
官网命令
pip3 install torch torchvision torchaudio --index-url https://download.pytorch.org/whl/cu118我用的conda xxx,没有conda用pip3 也行,据说pip3快
-
检查(依然在CMD)
python  # 如果报错,试python3
import torch
from torch.backends import  cudnn
print(cudnn.is_available())
print(torch.backends.cudnn.version())
print(torch.cuda.is_available())  # True,则gpu版本的pytorch安装成功
print(torch.zeros(1).cuda())
如果有python编译器,如pycharm、vscode,在那里面import print 更简单,直接复制。这里是照顾没装这些编译器的人
可能报错
#error -- unsupported GNU version! gcc versions later than 8 are not supported!-CSDN博客
Gcc多版本安装和切换_安装gcc新版本,并能切换-CSDN博客
「解决」ubuntu CUDA版本什么都对,但torch.cuda.is_available()是false-CSDN博客
参考
ubuntu下,安装配置CUDA_cuda安装教程 ubuntu-CSDN博客


 2775
2775

 被折叠的 条评论
为什么被折叠?
被折叠的 条评论
为什么被折叠?
 到【灌水乐园】发言


