


WPF 精确计算三维元素的投影范围
在 WPF 程序中,二维元素可以使用 VisualTreeHelper.GetDescendantBounds(Visual reference) 来获取其内容的范围,三维元素可以使用 GetContentBounds(Visual3D reference) 来获取其在二维平面的投影范围。然而,当三维元素中的模型非正向(存在旋转或偏移)时,上面方法获取的范围并不准确,本文将介绍一种准确计算 WPF 三维投影范围的方法。
GetContentBounds
首先,我们来看看如何通过 GetContentBounds() 方法获取投影范围。如下所示,使用 XAML 标记语言在界面上生成一个立方体和一个矩形,我们将用矩形来标记计算得到的立方体投影范围。先来看看模型未旋转情况下的结果:
Code-xaml:
<Grid Background="LightGray">
    <Viewport3D x:Name="MyViewport">
        <Viewport3D.Camera>
            <OrthographicCamera Position="3 3 5" LookDirection="-3 -3 -5" Width="3"/>
        </Viewport3D.Camera>
        <Viewport3D.Children>
            <ModelVisual3D>
                <ModelVisual3D.Content>
                    <DirectionalLight Color="White" Direction="-1 -1 -1"/>
                </ModelVisual3D.Content>
            </ModelVisual3D>
            <ModelVisual3D x:Name="MyVisual">
                <ModelVisual3D.Content>
                    <GeometryModel3D>
                        <GeometryModel3D.Geometry>
                            <MeshGeometry3D Positions="0,0,0 1,0,0 0,1,0 1,1,0 0,0,1 1,0,1 0,1,1 1,1,1"
                                            TriangleIndices="0,2,1 1,2,3 0,4,2 2,4,6 0,1,4 1,5,4 1,7,5 1,3,7 4,5,6 7,6,5 2,6,3 3,6,7"/>
                        </GeometryModel3D.Geometry>
                        <GeometryModel3D.Material>
                            <DiffuseMaterial Brush="Red"/>
                        </GeometryModel3D.Material>
                        <!--<GeometryModel3D.Transform>
                            <RotateTransform3D>
                                <RotateTransform3D.Rotation>
                                    <AxisAngleRotation3D Axis="1 1 0" Angle="5"/>
                                </RotateTransform3D.Rotation>
                            </RotateTransform3D>
                        </GeometryModel3D.Transform>-->
                    </GeometryModel3D>
                </ModelVisual3D.Content>
            </ModelVisual3D>
        </Viewport3D.Children>
    </Viewport3D>
    <Rectangle x:Name="MyRegion" Stroke="Blue" StrokeThickness="1" VerticalAlignment="Top" HorizontalAlignment="Left"/>
</Grid>
Code-behing:
var bounds = VisualTreeHelper.GetDescendantBounds(MyViewport);

MyRegion.Width = bounds.Width;
MyRegion.Height = bounds.Height;

// 使用计算得到的投影范围来设定长方形的位置和大小
MyRegion.Margin = new Thickness(bounds.Left, bounds.Top, 0, 0);
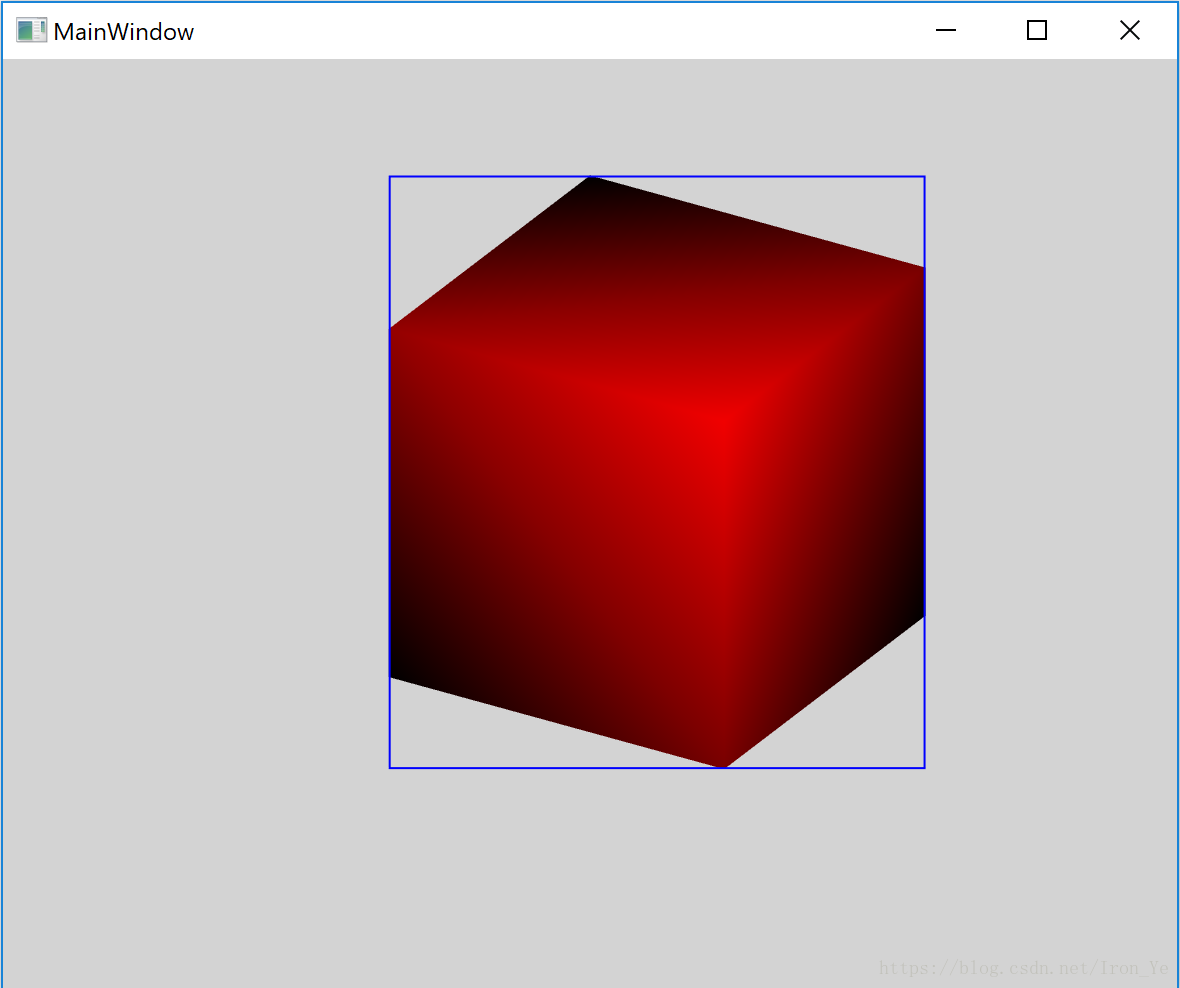
如上图所示,在模型未旋转的情况下,范围计算准确,矩形与三维模型的边界完全重合。我们取消 XAML 中注释掉的代码,即给模型加上旋转,再看看效果:
<GeometryModel3D.Transform>
    <RotateTransform3D>
        <RotateTransform3D.Rotation>
            <AxisAngleRotation3D Axis="1 1 0" Angle="5"/>
        </RotateTransform3D.Rotation>
    </RotateTransform3D>
</GeometryModel3D.Transform>
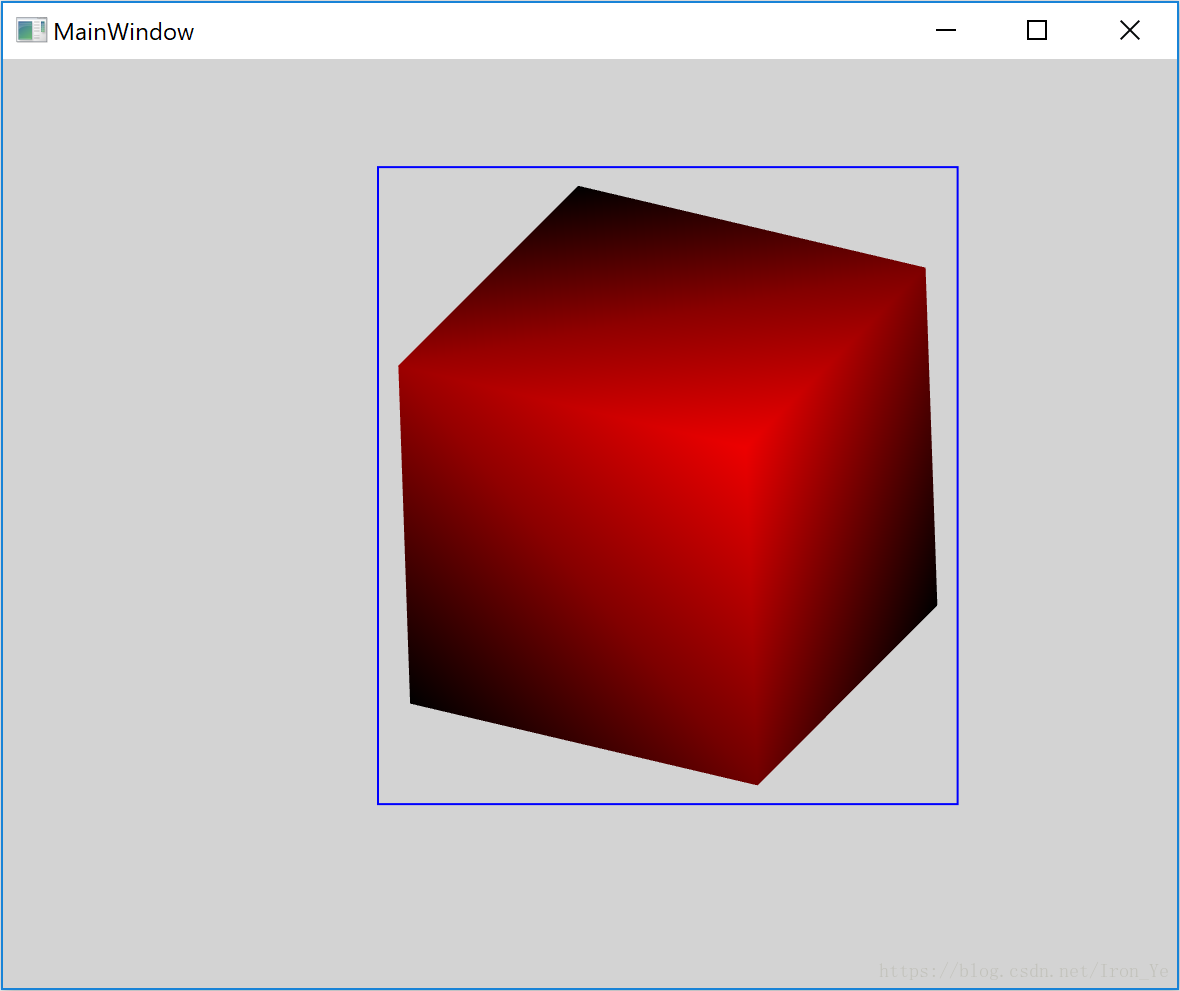
如上图所示,当模型带了 Transform 后,GetContentBounds() 方法得到的范围会比立方体的实际投影范围大一些,这个较大的范围应该是旋转后的三维范围直接乘以投影矩阵的结果。
逐点计算投影范围
为了解决 后,GetContentBounds() 计算不准确的问题,我们可以首先精确地计算出各个顶点的投影坐标,然后取坐标合集,即可得到整个三维的投影区域。
对于一个三维元素(Visual3D),我们需要先找到其二维投影平面(Viewport3DVisual),然后求得三维到二维投影平面之间的投影矩阵(GeneralTransform3DTo2D),最后计算三维元素中各个三维顶点经过投影矩阵变换后的二维坐标,将所有的二维坐标求合集变得到整个三维的投影范围。需要注意的是,Visual3D 有多种类型,需要分类处理;并且三维模型存在嵌套、本身还可能存在变换(Transform3D),这些都需要叠加到整体的投影变换中。
/// <summary>
/// 计算三维的投影区域。
/// </summary>
/// <param name="visual"></param>
/// <returns></returns>
public static Rect CalculateBounds(Visual3D visual)
{
    // 三维到二维的投影矩阵
    var transform = visual.TransformToAncestor(GetViewport3DVisual(visual));
    if (transform == null)
    {
        return Rect.Empty;
    }

    var bounds = Rect.Empty;

    // 计算各个子模型的投影区域,然后取合集
    var modelVisual3D = visual as ModelVisual3D;
    if (modelVisual3D != null)
    {
        bounds.Union(CalculateBounds(transform, modelVisual3D.Content, Matrix3D.Identity));

        // Union the bounds of Children
        foreach (var child in modelVisual3D.Children)
        {
            bounds.Union(CalculateBounds(child));
        }
    }
    else
    {
        // UIElement3D or Viewport2DVisual3D
        bounds.Union(transform.TransformBounds(VisualTreeHelper.GetDescendantBounds(visual)));
    }

    return bounds;
}

/// <summary>
/// 计算指定 <see cref="Model3D"/> 中各个顶点的投影坐标集合。
/// </summary>
public static Rect CalculateBounds(GeneralTransform3DTo2D transform, Model3D model, Matrix3D rootMatrix)
{
    var region = Rect.Empty;
    var matrix = Matrix3D.Identity;

    matrix.Prepend(rootMatrix);
    if (model.Transform != null)
    {
        matrix.Prepend(model.Transform.Value);
    }

    var geometryModel3D = model as GeometryModel3D;
    if (geometryModel3D != null)
    {
        var meshGeometry3D = geometryModel3D.Geometry as MeshGeometry3D;
        if (meshGeometry3D != null)
        {
            var innerTransform = new MatrixTransform3D(matrix);
            foreach (var position in meshGeometry3D.Positions)
            {
                region.Union(transform.Transform(innerTransform.Transform(position)));
            }
        }
    }
    else
    {
        var model3DGroup = model as Model3DGroup;
        if (model3DGroup != null)
        {
            foreach (var child in model3DGroup.Children)
            {
                region.Union(CalculateBounds(transform, child, matrix));
            }
        }
    }

    return region;
}

/// <summary>
/// 获取三维的投影平面。
/// </summary>
public static Viewport3DVisual GetViewport3DVisual(Visual3D visual3D)
{
    DependencyObject obj = visual3D;

    while (obj != null)
    {
        var visual = obj as Viewport3DVisual;
        if (visual != null)
        {
            return visual;
        }

        obj = VisualTreeHelper.GetParent(obj);
    }

    return null;
}
private void Usage()
{
    var bounds = CalculateBounds(MyVisual);
}


 1863
1863


 被折叠的 条评论
为什么被折叠?
被折叠的 条评论
为什么被折叠?
 到【灌水乐园】发言


