


前言
MYSQL数据同步到ElasticSearch目前有很多种方案可以供我们选择,下面列出几种可用的方案:
1.基于logstash-input-jdbc插件同步数据
-
基于elasticsearch-jdbc插件同步数据
-
基于go-mysql-elasticsearch同步数据
-
修改项目的业务逻辑,在mysql入库成功后也同步写到elasticsearch中,实际也有不少公司直接用这种方式,不用安装数据同步的组件,也不会有数据延迟的问题
经过反复比较,我还是选择了第三种方案,用go-mysql-elasticsearch同步mysql数据到elasticsearch,一方面go-mysql-elasticsearch确实安装起来方便,快捷,同步支持全量和增量同步,增量同步时基本上没有延迟,相当于准实时的,另一方面go-mysql-elasticsearch是用golang开发的一个不错的开源项目,在这个项目基础上二开和调试,优化排错也很方便。下面我们一起来看一下如何在生产环境上安装go-mysql-elasticsearch,实现mysql数据自动同步到elasticsearch
一、go-mysql-elasticsearch的项目地址
go-mysql-elasticsearch是github上的一个开源的项目,虽然源作者已没太多时间去维护这个项目,但这个项目目前还能正常用于mysql和elasticsearch的各个版本
github项目地址:https://github.com/go-mysql-org/go-mysql-elasticsearch
在这个项目基础上做了一些改动的地址:
https://github.com/airzhe/go-mysql-elasticsearch.git go-mysql-elasticsearch注释版
https://github.com/shenping1916/go-mysql-elasticsearch go-mysql-elasticsearch二次开发
本次安装我是go-mysql-elasticsearch注释版为基础安装

二、安装步骤
1.安装golang项目的编译、运行、开发环境
安装过程也不复杂,如果是Centos环境,可以直接查看我原来的文章:
centos7.9快速安装golang运行和开发环境图文教程
2.从github上clone项目
我的go-mysql-elasticsearch目录是/data/go/src/go-mysql-elasticsearch
cd /data/go/src  #进入golang的项目目录
git clone https://github.com/airzhe/go-mysql-elasticsearch.git  #从github上拉取项目
cd /data/go/src/go-mysql-elasticsearch   #进入拉取的项目目录
go mod tidy  #安装项目依赖包
make #编译项目
如果没有问题,会在/data/go/src/go-mysql-elasticsearch目录里生成一个bin目录,打包编译好项目启动文件就在里面
在这里需要特殊説明的是,如果你的elasticsearch是8.X版本,源代码包里有一处需要改一下:
vim /data/go/src/go-mysql-elasticsearch/elastic/client.go
func (r *BulkRequest) bulk(buf *bytes.Buffer) error {
	meta := make(map[string]map[string]string)
	metaData := make(map[string]string)
	if len(r.Index) > 0 {
		metaData["_index"] = r.Index
	}
	if len(r.Type) > 0 {
		metaData["_type"] = r.Type
	}

	if len(r.ID) > 0 {
		metaData["_id"] = r.ID
	}
	if len(r.Parent) > 0 {
		metaData["_parent"] = r.Parent
	}
	if len(r.Pipeline) > 0 {
		metaData["pipeline"] = r.Pipeline
	}

	meta[r.Action] = metaData

	data, err := json.Marshal(meta)
	if err != nil {
		return errors.Trace(err)
	}

	buf.Write(data)
	buf.WriteByte('\n')

	switch r.Action {
	case ActionDelete:
		//nothing to do
	case ActionUpdate:
		doc := map[string]interface{}{
			"doc": r.Data,
		}
		data, err = json.Marshal(doc)
		if err != nil {
			return errors.Trace(err)
		}

		buf.Write(data)
		buf.WriteByte('\n')
	default:
		//for create and index
		data, err = json.Marshal(r.Data)
		if err != nil {
			return errors.Trace(err)
		}

		buf.Write(data)
		buf.WriteByte('\n')
	}

	return nil
}
把 bulk方法中的,这三行代码直接删除:
if len(r.Type) > 0 {
		metaData["_type"] = r.Type
	}
后再编译,不然同步时会有问题
如果elastic是老版本的应该不用删除
3.修改配置文件
vim /data/go/src/go-mysql-elasticsearch/etc/river.toml
# MySQL address, user and password
# user must have replication privilege in MySQL.
my_addr = "127.0.0.1:3306"
my_user = "root"
my_pass = ""
my_charset = "utf8"

# Set true when elasticsearch use https
#es_https = false
# Elasticsearch address
es_addr = "127.0.0.1:9200"
# Elasticsearch user and password, maybe set by shield, nginx, or x-pack
es_user = ""
es_pass = ""

# Path to store data, like master.info, if not set or empty,
# we must use this to support breakpoint resume syncing.
# TODO: support other storage, like etcd.
data_dir = "./var"

# Inner Http status address
stat_addr = "127.0.0.1:12800"
stat_path = "/metrics"

# pseudo server id like a slave
server_id = 1001

# mysql or mariadb
flavor = "mysql"

# mysqldump execution path
# if not set or empty, ignore mysqldump.
mysqldump = "mysqldump"

# if we have no privilege to use mysqldump with --master-data,
# we must skip it.
#skip_master_data = false

# minimal items to be inserted in one bulk
bulk_size = 128

# force flush the pending requests if we don't have enough items >= bulk_size
flush_bulk_time = "200ms"

# Ignore table without primary key
skip_no_pk_table = false

# MySQL data source
[[source]]
schema = "test"

# Only below tables will be synced into Elasticsearch.
# "t_[0-9]{4}" is a wildcard table format, you can use it if you have many sub tables, like table_0000 - table_1023
# I don't think it is necessary to sync all tables in a database.
tables = ["t", "t_[0-9]{4}", "tfield", "tfilter"]

# Below is for special rule mapping

# Very simple example
#
# desc t;
# +-------+--------------+------+-----+---------+-------+
# | Field | Type         | Null | Key | Default | Extra |
# +-------+--------------+------+-----+---------+-------+
# | id    | int(11)      | NO   | PRI | NULL    |       |
# | name  | varchar(256) | YES  |     | NULL    |       |
# +-------+--------------+------+-----+---------+-------+
#
# The table `t` will be synced to ES index `test` and type `t`.
[[rule]]
schema = "test"
table = "t"
index = "test"
type = "t"

# Wildcard table rule, the wildcard table must be in source tables
# All tables which match the wildcard format will be synced to ES index `test` and type `t`.
# In this example, all tables must have same schema with above table `t`;
[[rule]]
schema = "test"
table = "t_[0-9]{4}"
index = "test"
type = "t"

# Simple field rule
#
# desc tfield;
# +----------+--------------+------+-----+---------+-------+
# | Field    | Type         | Null | Key | Default | Extra |
# +----------+--------------+------+-----+---------+-------+
# | id       | int(11)      | NO   | PRI | NULL    |       |
# | tags     | varchar(256) | YES  |     | NULL    |       |
# | keywords | varchar(256) | YES  |     | NULL    |       |
# +----------+--------------+------+-----+---------+-------+
#
[[rule]]
schema = "test"
table = "tfield"
index = "test"
type = "tfield"

[rule.field]
# Map column `id` to ES field `es_id`
id="es_id"
# Map column `tags` to ES field `es_tags` with array type
tags="es_tags,list"
# Map column `keywords` to ES with array type
keywords=",list"

# Filter rule
#
# desc tfilter;
# +-------+--------------+------+-----+---------+-------+
# | Field | Type         | Null | Key | Default | Extra |
# +-------+--------------+------+-----+---------+-------+
# | id    | int(11)      | NO   | PRI | NULL    |       |
# | c1    | int(11)      | YES  |     | 0       |       |
# | c2    | int(11)      | YES  |     | 0       |       |
# | name  | varchar(256) | YES  |     | NULL    |       |
# +-------+--------------+------+-----+---------+-------+
#
[[rule]]
schema = "test"
table = "tfilter"
index = "test"
type = "tfilter"

# Only sync following columns
filter = ["id", "name"]

# id rule
#
# desc tid_[0-9]{4};
# +----------+--------------+------+-----+---------+-------+
# | Field    | Type         | Null | Key | Default | Extra |
# +----------+--------------+------+-----+---------+-------+
# | id       | int(11)      | NO   | PRI | NULL    |       |
# | tag      | varchar(256) | YES  |     | NULL    |       |
# | desc     | varchar(256) | YES  |     | NULL    |       |
# +----------+--------------+------+-----+---------+-------+
#
[[rule]]
schema = "test"
table = "tid_[0-9]{4}"
index = "test"
type = "t"
# The es doc's id will be `id`:`tag`
# It is useful for merge muliple table into one type while theses tables have same PK
id = ["id", "tag"]
配置文件根据实际的环境修改就可以,如有问题可以留言沟通
4. 运行go-mysql-elasticsearch
cd /data/go/src/go-mysql-elasticsearch/bin
./go-mysql-elasticsearch  -config=../etc/river.toml
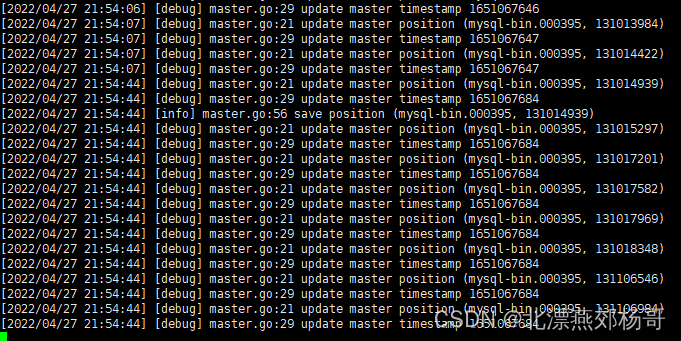
如果正常的话go-mysql-elasticsearch会用mysql-dump先同步历史数据,同步完成后会根据mysql的二进制日志实时同步新的数据,需要説明的是同步前需要开启mysql的ROW模式的binlog,我相信一般生产环境的mysql服务一般都开启了mysql的binlog
正常同步,我们可以看一下同步的控制台日志:
5. 最后用supervisor来管理go-mysql-elasticsearch
当go-mysql-elasticsearch意外退出或服务器重启时supervisor可以自动的启动go-mysql-elasticsearch来同步数据
如果对supervisor服务不是很了解,可以查看我的文章:
CENTOS7.9安装并配置supervisor服务
这里我只是简单的贴出supervisor里配置go-mysql-elasticsearch启动的配置文件
vim vi /etc/supervisord.d/gomysqlelasticsearch.ini
[program:gomysqlelasticsearch]
directory=/data/go/src/go-mysql-elasticsearch/bin
command=/data/go/src/go-mysql-elasticsearch/bin/go-mysql-elasticsearch -config=../etc/river.toml &
numprocs=1
redirect_stderr=true
autostart=true
autorestart=true
user=root
stdout_logfile=/data/logs/gomysqlelasticsearch/gomysqlelasicsearch.log
:wq保存配置文件后,重载supervisorctl的配置文件
#进入控制台
# supervisorctl
#重新读取配置
reread
#更新配置
update
#开始所有配置
start gomysqlelasticsearch
status
gomysqlelasticsearch             RUNNING   pid 28718, uptime 1 day, 2:47:40
看到最后的运行状态后,就説明supervisor已经把go-mysql-elasticserch的运行状态管理起来
总结
以上就是今天给大学介绍go-mysql-elasticsearch的安装过程。
如有问题,欢迎大家留言沟通,点赞支持!!!


 3959
3959


 被折叠的 条评论
为什么被折叠?
被折叠的 条评论
为什么被折叠?
 到【灌水乐园】发言


