1.Android Studio 安装ButterKnife插件
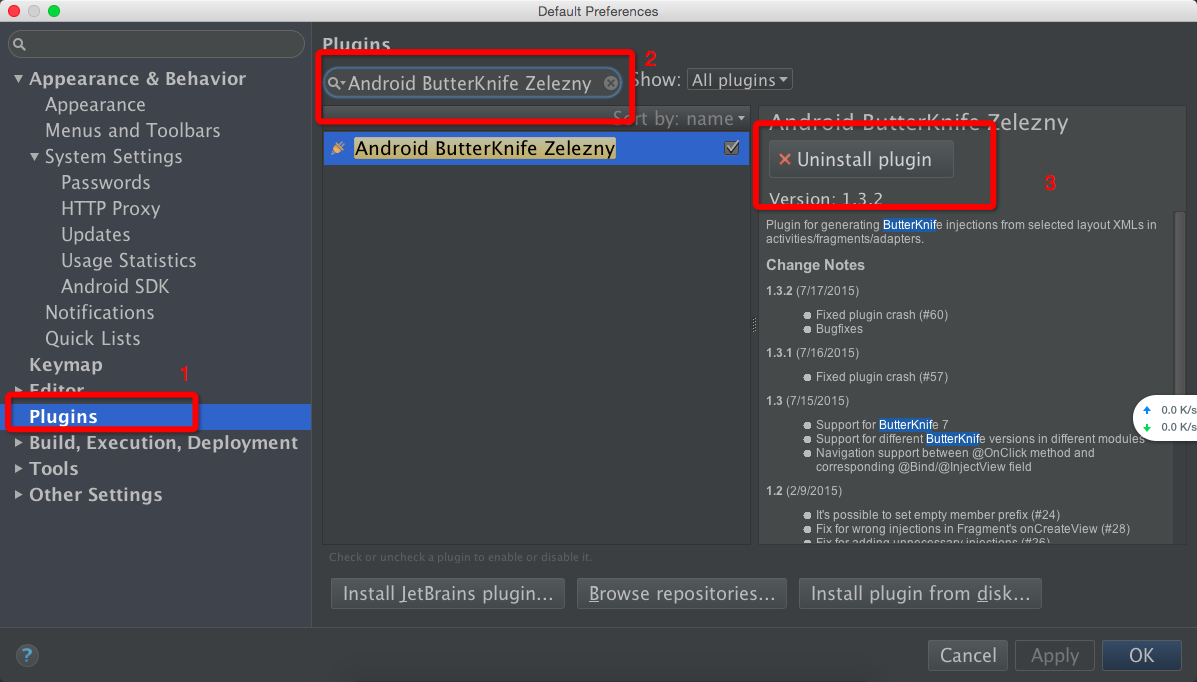
同安装其他插件类似,如下:
1.1 打开Plugins界面
按照上图中1,2,3指示操作(注意:这里我的Android Studio中已经安装了该插件,所以显示的内容不太一样)。然后重启Android Studio。
2.在项目上使用该开源项目(以Android Studio 为例)
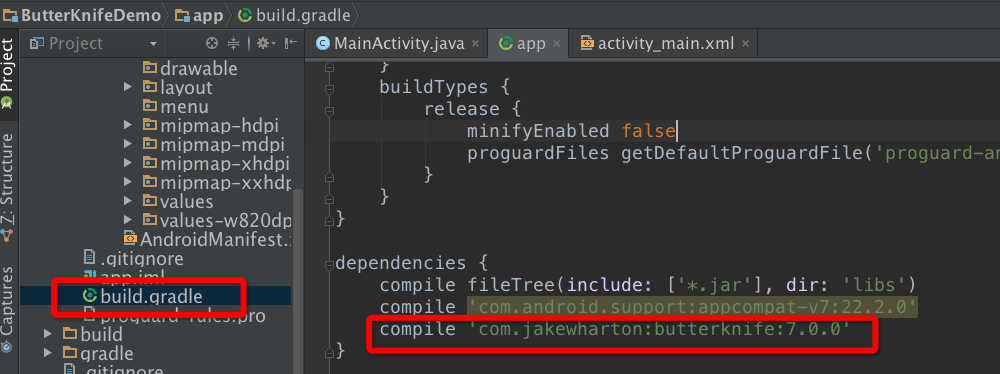
2.1 在bulid.gradle中添加依赖
重新编译一下该项目,通过后继续操作。
2.2 在代码中就可以使用注解的方式了
2.2.1 示例布局文件如下:
< LinearLayout xmlns:android = "http://schemas.android.com/apk/res/android" xmlns:tools = "http://schemas.android.com/tools" android:layout_width = "match_parent" android:layout_height = "match_parent" android:orientation = "vertical" android:paddingBottom = "@dimen/activity_vertical_margin" android:paddingLeft = "@dimen/activity_horizontal_margin" android:paddingRight = "@dimen/activity_horizontal_margin" android:paddingTop = "@dimen/activity_vertical_margin" tools:context = ".MainActivity" > < TextView android:id = "@+id/text_veiw_tv1" android:layout_width = "match_parent" android:layout_height = "wrap_content" android:text = "TextView 1" /> < Button android:id = "@+id/button_bt1" android:layout_width = "match_parent" android:layout_height = "wrap_content" android:text = "Button1" /> < TextView android:id = "@+id/text_veiw_tv2" android:layout_width = "match_parent" android:layout_height = "wrap_content" android:text = "TextView 2" /> < Button android:id = "@+id/button_bt2" android:layout_width = "match_parent" android:layout_height = "wrap_content" android:text = "Button2" /> </ LinearLayout >
2.2.2 在代码中使用注解
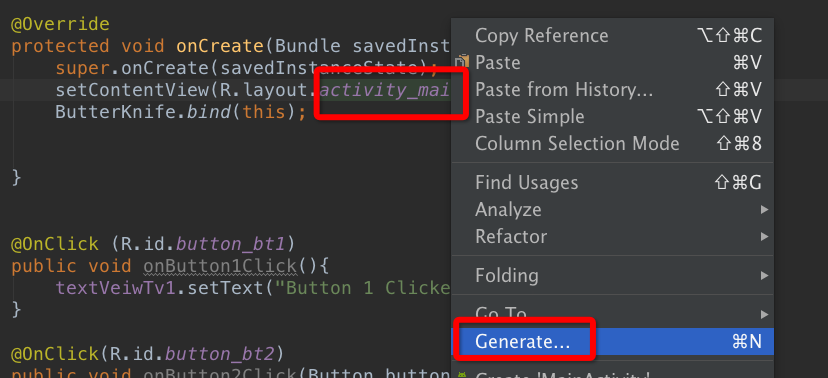
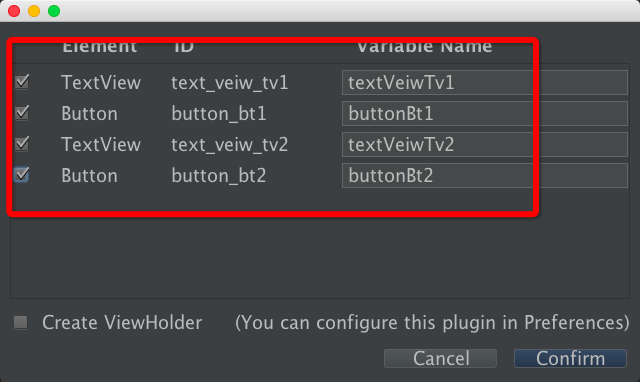
选择上述布局文件名,右键
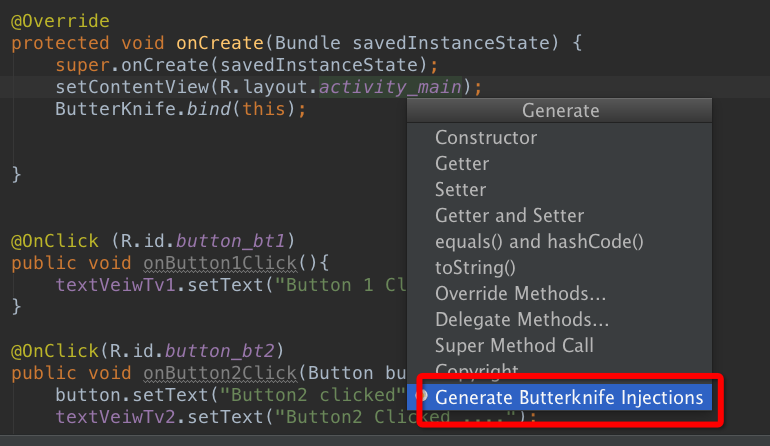
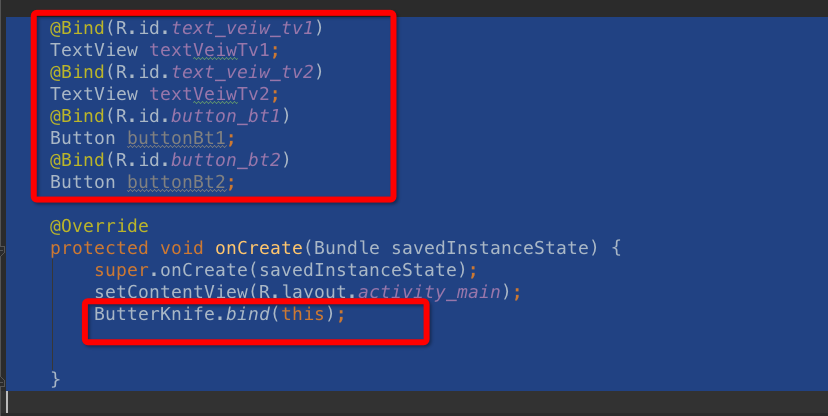
选择“Confirm”后,就会自动生成各个在布局文件中带有id 属性的view的注解形式
如下所示:
@Bind(R.id.text_veiw_tv1) TextView textVeiwTv1; @Bind(R.id.text_veiw_tv2) TextView textVeiwTv2; @Bind(R.id.button_bt1) Button buttonBt1; @Bind(R.id.button_bt2) Button buttonBt2; @Override protected void onCreate(Bundle savedInstanceState) { super.onCreate(savedInstanceState); setContentView(R.layout.activity_main); ButterKnife.bind(this); }
标注如下:
3 在代码中就可以点击事件
3.1 在代码里加入@OnClick(控件Id)
    @OnClick(R.id.button_bt1)
    public void test1(){
        Log.e(TAG, "onTest");
    }
3.2 gradle里添加“annotationProcessor 'com.jakewharton:butterknife-compiler:8.4.0' ”
dependencies {
    compile 'com.jakewharton:butterknife:8.4.0'
    annotationProcessor 'com.jakewharton:butterknife-compiler:8.4.0'
}
当前gradle版本是2.2.0
buildscript {
    repositories {
        jcenter()
    }
    dependencies {
        classpath 'com.android.tools.build:gradle:2.2.0'

        // NOTE: Do not place your application dependencies here; they belong
        // in the individual module build.gradle files
        classpath 'com.neenbedankt.gradle.plugins:android-apt:1.8'
    }
}




 6233
6233

 被折叠的 条评论
为什么被折叠?


