


目录
自动化需要准备的环境
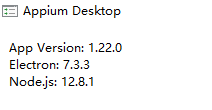
- Appium 桌面版
- Android sdk
- Java 环境jdk
- 逍遥模拟器
- Inspector
appium启动后点击这个图标会跳转到下载页面

打开逍遥模拟器,安装测试apk
查看模拟器的设备名字
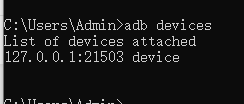
device_name 是127.0.0.1:21503
启动appium server端
打开appium桌面版,点击【Edit Configurations】,设置sdk环境

点击【Start Server V1.22.0】启动服务,看到下面的文字就是成功了

启动Inspector
Inspector 可以用来查看app上的元素,在脚本中用来定位元素

deviceName | 设备名字,前面adb devices查出 |
appPackage | adb shell dumpsys window w |findstr \/ |findstr name= mSurface=Surface(name=com.xx/com.xx.WebviewExActivity) / 斜杠左侧是appPackage,右侧是appActivity |
appActivity |
点击【Start Sessions】,会在模拟器上打开app
开始写脚本
新建一个maven项目
pom.xml
<?xml version="1.0" encoding="UTF-8"?>
<project xmlns="http://maven.apache.org/POM/4.0.0"
         xmlns:xsi="http://www.w3.org/2001/XMLSchema-instance"
         xsi:schemaLocation="http://maven.apache.org/POM/4.0.0 http://maven.apache.org/xsd/maven-4.0.0.xsd">
    <modelVersion>4.0.0</modelVersion>

    <groupId>org.example</groupId>
    <artifactId>app_uiautomitor</artifactId>
    <version>1.0-SNAPSHOT</version>

    <properties>
        <project.build.sourceEncoding>UTF-8</project.build.sourceEncoding>
        <maven.compiler.target>1.8</maven.compiler.target>
        <maven.compiler.source>1.8</maven.compiler.source>
    </properties>
    <dependencies>
        <!-- https://mvnrepository.com/artifact/io.appium/java-client -->
        <dependency>
            <groupId>io.appium</groupId>
            <artifactId>java-client</artifactId>
            <version>7.6.0</version>
        </dependency>


        <!-- https://mvnrepository.com/artifact/org.seleniumhq.selenium/selenium-java -->
        <dependency>
            <groupId>org.seleniumhq.selenium</groupId>
            <artifactId>selenium-java</artifactId>
            <version>3.141.59</version>
        </dependency>


        <!-- https://mvnrepository.com/artifact/org.testng/testng -->
        <dependency>
            <groupId>org.testng</groupId>
            <artifactId>testng</artifactId>
            <version>7.4.0</version>
        </dependency>


    </dependencies>


    <build>
        <plugins>
            <plugin>
                <groupId>org.apache.maven.plugins</groupId>
                <artifactId>maven-surefire-plugin</artifactId>
                <version>3.0.0-M5</version>
                <configuration>
                    <useSystemClassLoader>false</useSystemClassLoader>
                </configuration>
            </plugin>
        </plugins>
    </build>
</project>
初始化

测试结束后关闭driver

常见的定位方法
- 如果有id,尽量使用driver.findElementById();

- resource-id,也可以用 driver.findElementById();

- 相对位置

想要定位图中的元素,可以先定位到有 resource-id的元素,然后找它的子元素。
driver.findElementById("com.xx")
.findElements(By.className("android.widget.LinearLayout"))
.get(0)- xpath定位
driver.findElementByXPath("//android.view.View[@resource-id='app']/android.view.View[6]/android.view.View[3]").click();
xpath的元素从1开始,所以[3]表示第三个 android.view.View
- 长按
场景:需要长按某个元素,然后弹出一个窗口,再点击窗口里的元素
1,找到需要长按的元素
WebElement element = driver.findElementById("xxx");
2,执行长按操作
TouchAction touchAction = new TouchAction(driver);
        touchAction.longPress(LongPressOptions.longPressOptions().withElement(ElementOption.element(element)).withDuration(Duration.ofSeconds(1))).perform();
3,点击页面的元素
driver.findElementById("xxx").click();
- 滑动页面
从(x1,y1) 滑动到(x2,y2)
 TouchAction touchAction = new TouchAction(driver);
touchAction.press(PointOption.point(x1, y1)).moveTo(PointOption.point(x2, y2)).release().perform();- 点击坐标
定位的终极大法:点坐标
new TouchAction<>(driver).press(PointOption.point(x,y)).release().perform();


 1141
1141


 被折叠的 条评论
为什么被折叠?
被折叠的 条评论
为什么被折叠?
 到【灌水乐园】发言


