


 这篇文章介绍了BeeWare的Toga开发工具,它允许Python开发者构建美观且功能强大的跨平台应用,涵盖iOS、Android等多平台,通过示例展示了Toga组件的使用方法,强调了其易用性、开源性和对未来应用的广阔前景。
传奇开心果博文系列
- 系列博文目录
- beeware的toga开发移动应用示例系列
- 博文目录
- 一、beeware和toga介绍
- 二、Toga常用组件使用方法示例
- 三、归纳总结
系列博文目录
beeware的toga开发移动应用示例系列
博文目录
一、beeware和toga介绍
1.BeeWare介绍
BeeWare是一个可以让Python开发者构建跨平台应用的开发工具套件包。Beeware所奉行的开发理念是:写一次到处部署。用Python编写应用程序,并使用丰富的本机用户界面在iOS、Android、Windows、MacOS、Linux、Web和tvOS上发布它们。多个应用程序,一个代码库,在每个平台上都有完整的本机用户体验。beeware最突出最亮眼的之处就是:它不但使Python有了较好的移动开发的能力,而且自带打包工具,打包成安卓手机应用和苹果手机应用很容易。这就让开发者趋之如骛。
开发者能用 Python 编写的应用程序,在包括 iOS、Android、Windows、macOSiconicon、Linuxicon、浏览器和 tvOSicon 都能很好地运行。
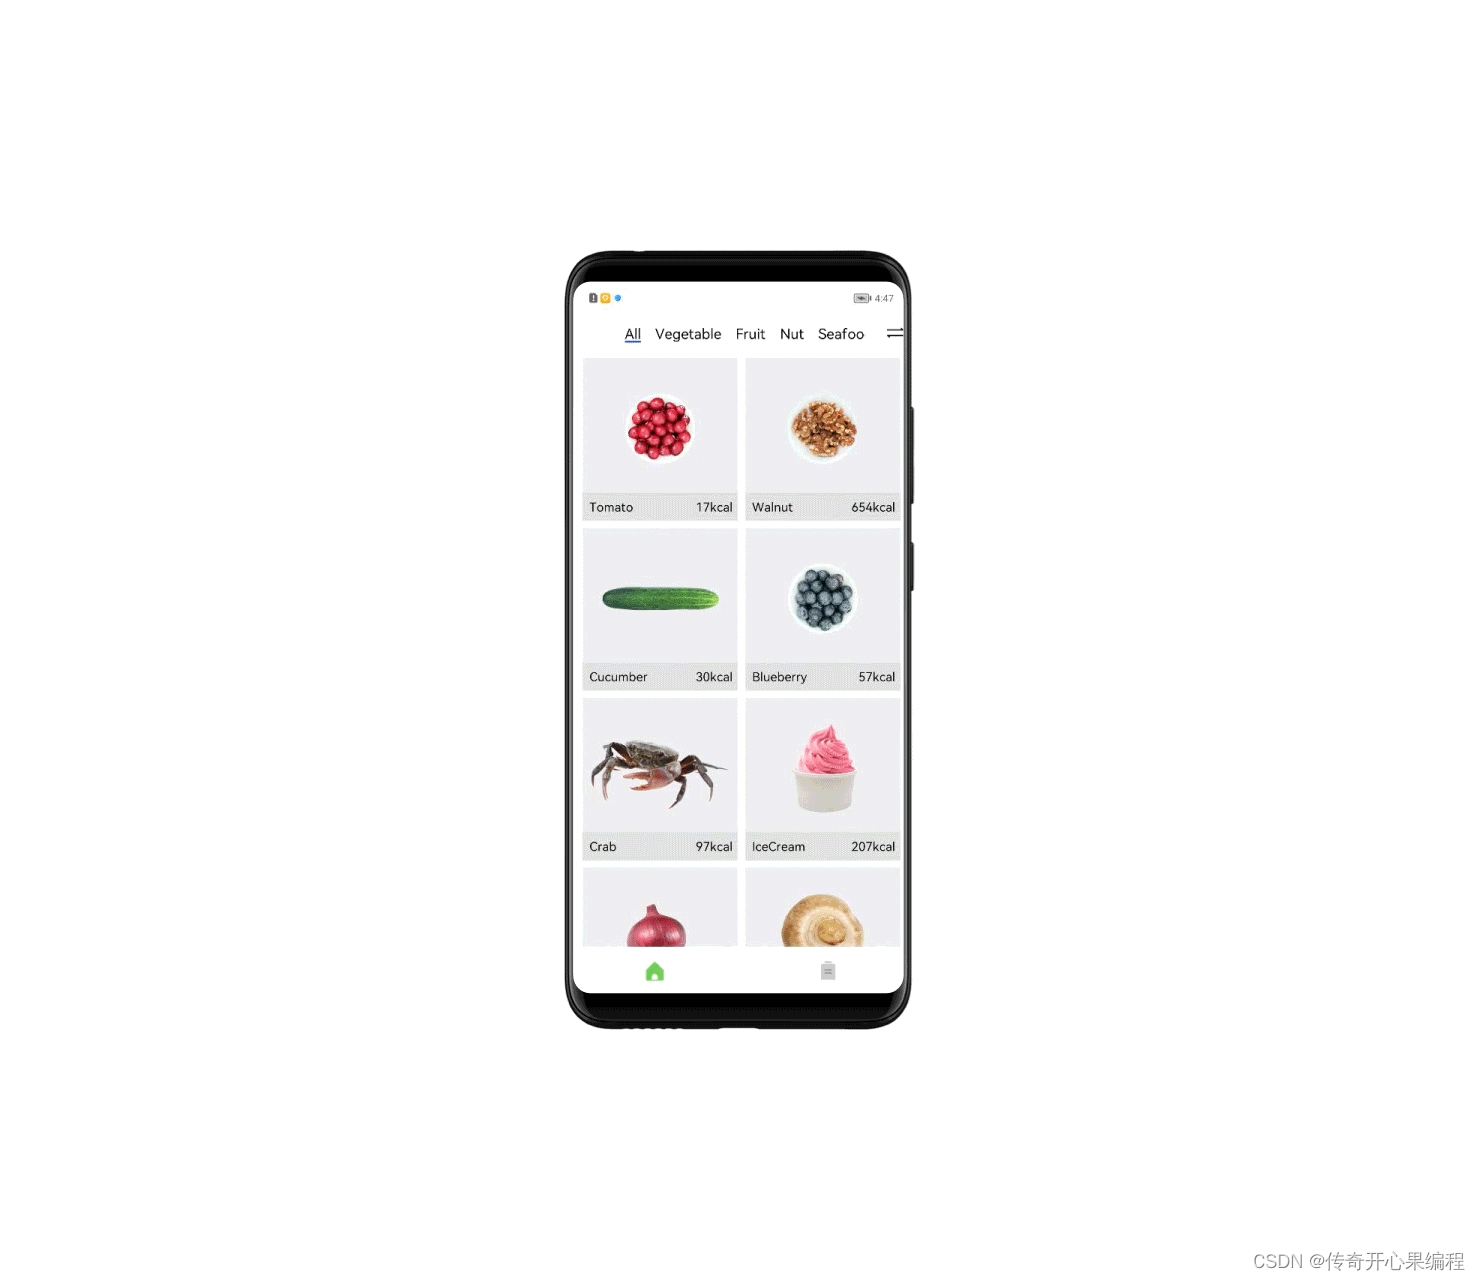
BeeWare项目是原生Python移动应用,可以构建外观和感觉上对于每个特定移动(和桌面)平台都是100%本机的应用程序。
Beeware写一次到处部署。用Python编写应用程序,并使用丰富的本机用户界面在iOS、Android、Windowsicon、MacOS、Linux、Web和tvOS上发布它们。多个应用程序,一个代码库,在每个平台上都有完整的本机用户体验。
BeeWare 是一套工具和库,每个工具和库协同工作,帮助您编写跨平台的原生 GUI Python 应用程序。它包括:
Toga,一个跨平台的小部件工具包;
Briefcase,一种将 Python 项目打包为可分发给最终用户的工具;
Rubicon ObjC,一个用于在 Python 代码中使用 iOSicon 和 macOS 上的 Objective C 库的库;
Rubicon Java,一个用于在 Python 代码中使用 Java 库的库。

2.Toga介绍
Toga是该开发工具中一个跨平台GUI工具包,组件很丰富,提供一百多个图形化界面组件。这就为开发者高效规范写代码开发提供了保障。再加上Python语言代码短小精悍,像英语文章一样容易理解,对初学者很友好。因此,beeware开发工具随着它逐步成熟和开发社区的活跃,会逐渐火起来的。未来可期!

3.项目发起人和更新者拉塞尔·基思-马吉介绍
拉塞尔·基思-马吉(Russell Keith-Magee)是澳大利亚的软件开发者和开源社区活动家。他是Beeware项目的创始人和主要贡献者。Beeware项目是一个旨在通过提供一套用于构建跨平台应用程序的开发工具和框架来推动Python在移动和桌面应用开发领域的发展的项目。拉塞尔·基思-马吉对于推动Python在移动应用开发方面的发展做出了重要贡献,并致力于促进开源社区的发展和合作。
Russell Keith-Magee :也就是拉塞尔·基思-马吉发起了 BeeWare 项目,该项目旨在将CPython 移植到 Android和iOS上,即用 Python 编写的应用可以在 Android 和iOS上本地运行。
4.BeeWare发展历程
BeeWare 项目成立的目标是让开发者能用 Python 编写应用程序,而在2020年 2 月,这一目标初步实现了第一个里程碑:一个纯 Python 应用程序在可以在 Android 设备上运行!
Python 软件基金会2020年向 BeeWare 项目给予了 50000 美元的资助,以使其对外开放 Android 的支持水平有所提高,而CPython Android 端口必须支持运行 4.4 更高版本的大多数现代 Android 设备。2023年也还有机构大力资助。
BeeWare 截止现在还在更新,近期的一次时间是2024年1月14日。未来可期,让我们静静地期待!
二、Toga常用组件使用方法示例
 1.创建应用程序
使用Toga创建应用程序时需要创建一个Application对象,该对象包含应用程序的名称和图标等信息。以下是创建Application对象的代码:
import toga

app = toga.App('xx应用', icon=None)
2.创建窗口
可以使用Window对象创建一个窗口。以下是创建一个窗口的代码:
import toga

class MyWindow(toga.App):

def startup(self):

self.main_window=toga.MainWindow(title='xx窗口')

self.main_window.show()

if __name__ == '__main__':

app = MyWindow('xx应用:', 'hello 传奇开心果')

app.main_loop()
3.创建按钮(Button)
import toga

def button_handler(widget):
    print("Button clicked!")

button = toga.Button('Click me!', on_press=button_handler)
box = toga.Box(children=[button])

app = toga.App('My App', 'com.example.myapp', main_window=toga.MainWindow(title='My App', content=box))
app.main_loop()
4.创建文本输入框(TextInput)
import toga

def textinput_handler(widget):
    print("Entered text:", widget.value)

textinput = toga.TextInput(placeholder='Enter text', on_change=textinput_handler)
box = toga.Box(children=[textinput])

app = toga.App('My App', 'com.example.myapp', main_window=toga.MainWindow(title='My App', content=box))
app.main_loop()
5.创建标签(Label)组件:
import toga

label = toga.Label('Hello, Toga!')

app = toga.App('My App', 'com.example.myapp', main_window=toga.MainWindow(title='My App', content=label))
app.main_loop()
6.创建下拉列表(Selection)
import toga

def selection_handler(widget):
    print("Selected item:", widget.value)

selection = toga.Selection(items=['Item 1', 'Item 2', 'Item 3'], on_select=selection_handler)
box = toga.Box(children=[selection])

app = toga.App('My App', 'com.example.myapp', main_window=toga.MainWindow(title='My App', content=box))
app.main_loop()
7.创建滑块(Slider)
import toga

def slider_handler(widget):
    print("Slider value:", widget.value)

slider = toga.Slider(min_value=0, max_value=100, on_change=slider_handler)
box = toga.Box(children=[slider])

app = toga.App('My App', 'com.example.myapp', main_window=toga.MainWindow(title='My App', content=box))
app.main_loop()
8.创建复选框(Check Box)
import toga

def checkbox_handler(widget):
    print("Checkbox state:", widget.is_on)

checkbox = toga.Checkbox(label='Check me', on_toggle=checkbox_handler)
box = toga.Box(children=[checkbox])

app = toga.App('My App', 'com.example.myapp', main_window=toga.MainWindow(title='My App', content=box))
app.main_loop()
9.创建单选按钮(Radio Button)组件:
import toga

def radiobutton_handler(widget):
    print("Selected option:", widget.label)

radio1 = toga.RadioButton('Option 1', on_select=radiobutton_handler)
radio2 = toga.RadioButton('Option 2', on_select=radiobutton_handler)
box = toga.Box(children=[radio1, radio2])

app = toga.App('My App', 'com.example.myapp', main_window=toga.MainWindow(title='My App', content=box))
app.main_loop()
10.创建图像视图(Image View)组件:
import toga

image = toga.Image('path/to/image.png')
imageview = toga.ImageView(image=image)

app = toga.App('My App', 'com.example.myapp', main_window=toga.MainWindow(title='My App', content=imageview))
app.main_loop()
11.创建滚动视图(Scroll View)组件:
import toga

label = toga.Label('Long text goes here...')
scrollview = toga.ScrollContainer(content=label)

app = toga.App('My App', 'com.example.myapp', main_window=toga.MainWindow(title='My App', content=scrollview))
app.main_loop()
12.创建列表视图(List View)
import toga

def listview_handler(widget, item):
    print("Selected item:", item)

listview = toga.ListView(data=['Item 1', 'Item 2', 'Item 3'], on_select=listview_handler)

app = toga.App('My App', 'com.example.myapp', main_window=toga.MainWindow(title='My App', content=listview))
app.main_loop()
13.创建进度条(Progress Bar)
import toga

progress = toga.ProgressBar(max=100, value=50)

app = toga.App('My App', 'com.example.myapp', main_window=toga.MainWindow(title='My App', content=progress))
app.main_loop()
14.创建日期选择器(Date Picker)组件:
import toga
from datetime import date

def datepicker_handler(widget):
    selected_date = widget.value
    print("Selected date:", selected_date)

datepicker = toga.DatePicker(min_date=date(2022, 1, 1), max_date=date(2022, 12, 31), on_select=datepicker_handler)

app = toga.App('My App', 'com.example.myapp', main_window=toga.MainWindow(title='My App', content=datepicker))
app.main_loop()
15.创建文件选择器(File Dialog)
import toga

def filedialog_handler(widget):
    selected_file = widget.selection
    print("Selected file:", selected_file)

button = toga.Button('Open File', on_press=filedialog_handler)
box = toga.Box(children=[button])

app = toga.App('My App', 'com.example.myapp', main_window=toga.MainWindow(title='My App', content=box))
app.main_loop()
16.创建网格布局(Grid Layout)
import toga

grid = toga.Grid()

label1 = toga.Label('Label 1')
label2 = toga.Label('Label 2')
button = toga.Button('Button')

grid.add(label1, row=0, column=0)
grid.add(label2, row=0, column=1)
grid.add(button, row=1, column=0, column_span=2)

app = toga.App('My App', 'com.example.myapp', main_window=toga.MainWindow(title='My App', content=grid))
app.main_loop()
17.创建选项卡(Tab)
import toga

def tab_handler(widget):
    print("Selected tab:", widget.current_tab.label)

tab1 = toga.Tab(label='Tab 1', on_select=tab_handler)
tab2 = toga.Tab(label='Tab 2', on_select=tab_handler)

box1 = toga.Box()
box1.add(toga.Label('Content for Tab 1'))

box2 = toga.Box()
box2.add(toga.Label('Content for Tab 2'))

tab1.content = box1
tab2.content = box2

tabs = toga.TabGroup(tabs=[tab1, tab2])

app = toga.App('My App', 'com.example.myapp', main_window=toga.MainWindow(title='My App', content=tabs))
app.main_loop()
18.创建文件选择器(File Dialog)
import toga

def filedialog_handler(widget):
    selected_files = widget.selection
    print("Selected files:", selected_files)

button = toga.Button('Open Files', on_press=filedialog_handler)
box = toga.Box(children=[button])

app = toga.App('My App', 'com.example.myapp', main_window=toga.MainWindow(title='My App', content=box))
app.main_loop()
以上示例演示了Toga常见组件的使用方法。根据需要,可以在应用程序中添加其他组件、布局和事件处理程序等来构建更复杂的界面。请注意,在运行这些示例代码之前,需要先安装并配置好Toga开发环境。
三、归纳总结
 beeware的toga界面gui工具集成包、组件集成库,组件丰富,组件用法简单,功能强大。组件外观漂亮美观,很有魅力。是一套优质的UI框架。免费开源,是开发者跨平台开发强大的生产力工具。因为是跨平台工具,一直在不断的更新,未来应用前景广阔。它是Python跨平台开发的践行者,也是Python实现全能编程语言梦想,补齐最后一块短板的拓荒者、改造者和践行者。


 2232
2232


 被折叠的 条评论
为什么被折叠?
被折叠的 条评论
为什么被折叠?
 到【灌水乐园】发言


