


步骤
- 修改实体
- 增加dao(jpa),service层
- 增加controller层
- 测试
修改Demo实体
package com.springboot.study.bean;

import javax.persistence.Entity;
import javax.persistence.GeneratedValue;
import javax.persistence.Id;

/**
 * Demo 模型
 * @author like
 *
 */
@Entity
public class Demo {
     @Id
     @GeneratedValue
    private long id;


    private String name;
    private String demo;
    public long getId() {
        return id;
    }
    public void setId(long id) {
        this.id = id;
    }
    public String getName() {
        return name;
    }
    public void setName(String name) {
        this.name = name;
    }
    public String getDemo() {
        return demo;
    }
    public void setDemo(String demo) {
        this.demo = demo;
    }

}
增加dao层(JPA)
package com.springboot.study.dao.jpa;

import org.springframework.data.repository.CrudRepository;

import com.springboot.study.bean.Demo;

/**
 * 这就完成一个Dao层的开发,不需要其他注解和配置,JPA自动配置
 * @author like
 *
 */
public interface DemoDao extends CrudRepository<Demo, Long>{

}
增加service层
package com.springboot.study.service;

import org.springframework.beans.factory.annotation.Autowired;
import org.springframework.stereotype.Service;

import com.springboot.study.bean.Demo;
import com.springboot.study.dao.jpa.DemoDao;

@Service
public class DemoService {
    @Autowired
    private DemoDao demoDao;

    public void save(Demo demo){
        demoDao.save(demo);
    }

}
controller层
package com.springboot.study.controller;
import org.springframework.beans.factory.annotation.Autowired;
import org.springframework.web.bind.annotation.RequestMapping;
import org.springframework.web.bind.annotation.RestController;
import com.springboot.study.bean.Demo;
import com.springboot.study.service.DemoService;
/**
* Demo 控制类
* @author like
*
*/
@RestController
@RequestMapping("/demo")
public class DemoController2 {
@Autowired
private DemoService demoService;
@RequestMapping("/saveDemo")
public String getDemo(){
Demo demo = new Demo();
demo.setId(1);
demo.setDemo("demo");
demo.setName("testDemo");
demoService.save(demo);
return "demo save success";
}
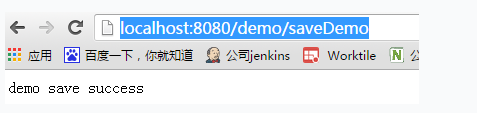
}测试
http://localhost:8080/demo/saveDemo
jdbcTemplate应用
- 新增jdbcdao
- 修改Service
- 修改controller
- 测试
新增jdbcdao
package com.springboot.study.dao.jdbcTemplate;

import javax.annotation.Resource;

import org.springframework.jdbc.core.BeanPropertyRowMapper;
import org.springframework.jdbc.core.JdbcTemplate;
import org.springframework.jdbc.core.RowMapper;
import org.springframework.stereotype.Repository;

import com.springboot.study.bean.Demo;

@Repository
public class DemoJdbcDao {

    @Resource
    private JdbcTemplate jdbcTemplate;

    public Demo getById(long id){
        String sql = "select * from Demo where id=?";
        RowMapper<Demo> rowMapper = new BeanPropertyRowMapper<Demo>(Demo.class);
        return jdbcTemplate.queryForObject(sql, rowMapper,id);
    }
}
修改Service
package com.springboot.study.service;

import org.springframework.beans.factory.annotation.Autowired;
import org.springframework.stereotype.Service;

import com.springboot.study.bean.Demo;
import com.springboot.study.dao.jdbcTemplate.DemoJdbcDao;
import com.springboot.study.dao.jpa.DemoDao;

@Service
public class DemoService {
    @Autowired
    private DemoDao demoDao;

    @Autowired
    private DemoJdbcDao demoJdbcDao;

    public void save(Demo demo){
        demoDao.save(demo);
    }

    public Demo getById(long id){
        return demoJdbcDao.getById(id);
    }

}
修改controller
package com.springboot.study.controller;

import org.springframework.beans.factory.annotation.Autowired;
import org.springframework.web.bind.annotation.RequestMapping;
import org.springframework.web.bind.annotation.RestController;

import com.springboot.study.bean.Demo;
import com.springboot.study.service.DemoService;

/**
 * Demo 控制类
 * @author like
 *
 */
@RestController
@RequestMapping("/demo")
public class DemoController2 {
    @Autowired
    private DemoService demoService;

    @RequestMapping("/saveDemo")
    public String getDemo(){
        Demo demo = new Demo();
        demo.setId(1);
        demo.setDemo("demo");
        demo.setName("testDemo");
        demoService.save(demo);

        return "demo save success";

    }

    @RequestMapping("/getById")
    public Demo getDemo(long id ){
        return demoService.getById(id);

    }
}
测试
访问 http://localhost:8080/demo/getById?id=1
结果:
成功


 113
113

 被折叠的 条评论
为什么被折叠?
被折叠的 条评论
为什么被折叠?
 到【灌水乐园】发言


